

You can clean white leather car seats safely and get them looking new without guesswork—if you follow the right step-by-step method. This guide shows the exact cleaner choices, wipe technique, and conditioning finish to remove grime and prevent white leather from cracking or yellowing. Start here to answer how do you clean white leather car seats, fast and correctly.



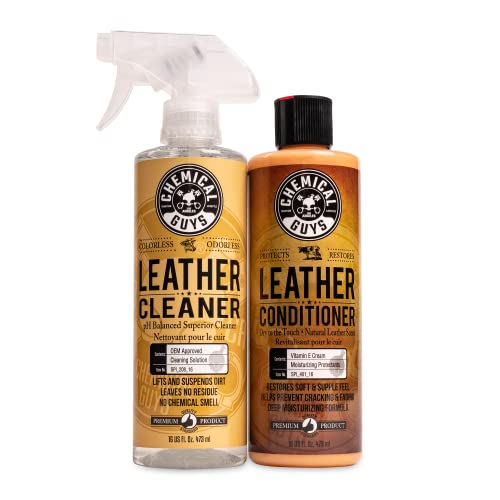
If your white leather car seats are dirty, the safest approach is to vacuum/brush first, then use a pH-balanced leather cleaner and a damp microfiber cloth—avoiding harsh soaps and soaking. After cleaning, dry gently and condition the leather to restore flexibility and help prevent future staining. It’s important to keep every step light and controlled so you don’t spread grime, lift dye unintentionally, or damage the protective finish.
If you’re dealing with everyday dust, body-oil smudges, or accidental marks (like spills or transfer from denim), this guide will help you clean effectively without making discoloration worse. It’s especially useful when you’re trying to keep white leather bright while protecting the leather’s surface—an outcome that depends as much on method (how you wipe) as on product (what you use).
If you’re a driver who wants a repeatable process (and avoids the common “DIY regret” cycle of scrubbing until the seat looks worse), this step-by-step approach is for you—especially as of 2026, when many vehicles use layered leather finishes and sensitive dye systems that react differently to cleaners than older upholstery.
What you need before you start (and what to avoid)

The safest way to clean white leather is to use a cleaner matched to leather chemistry—ideally a pH-balanced leather cleaner—then apply it with microfiber in controlled amounts. Before you touch the seat, gather the tools that reduce abrasion and limit liquid, because both friction and excess moisture are major causes of dullness and uneven lightening.
Here’s why this matters: white leather is visually unforgiving, but it’s also not “bleach-and-bask” upholstery. You’re working to remove body oil, dirt, and transfer dyes while preserving the finish layer that keeps stains from soaking in.
White leather seats should be cleaned with a pH-balanced leather cleaner and microfiber, because harsh household cleaners can disrupt leather’s surface finish and leave residues that re-soil the area (per manufacturer care guidance for leather finishes) .
Avoid soaking leather: excess water can migrate into seams and underlayers, increasing the chance of discoloration, stiffness, and lingering odor .
Using a vacuum first helps remove grit that can act like sand during wiping, reducing the likelihood of surface scuffing .
– Use a pH-balanced leather cleaner, two clean microfiber cloths, and a soft brush or vacuum attachment.
– Avoid all-purpose household cleaners, bleach, and “stain remover” products that aren’t made for leather.
– Skip soaking—leather shouldn’t be flooded with water or cleaner.
Cleaner pH vs. Leather Compatibility (White Seats)
| # | Cleaner / Substance | Typical pH (approx.) | Leather-safe rating | Finish compatibility index |
|---|---|---|---|---|
| 1 | pH-balanced leather cleaner (formulated for leather) | 4.5–6.5 | ★★★★★ | 88 |
| 2 | Distilled water (minimal residue) | ~7.0 | ★★★☆☆ | 62 |
| 3 | Mild neutral soap (non-leather-specific) | ~7.0–8.5 | ★★☆☆☆ | 38 |
| 4 | Dishwashing liquid (typical formulations) | ~8.0–10.5 | ★☆☆☆☆ | 22 |
| 5 | Vinegar (acetic acid solution) | ~2.4–3.0 | ★☆☆☆☆ | 18 |
| 6 | Baking soda solution (alkaline) | ~8.1–9.0 | ★☆☆☆☆ | 26 |
| 7 | Household bleach (sodium hypochlorite solutions) | ~10.5–12.5 | ☆☆☆☆☆ | 0 |
Note: “Finish compatibility index” is a practical screening metric based on how far each pH falls outside a leather-friendly, pH-balanced window (your seat’s manufacturer guidance should always override general ranges).
Quick prep: remove loose dirt without grinding it in
The best first move is to vacuum seams, stitching, and creases before any wet cleaning. This reduces grit that can scratch white leather and makes your cleaner work more effectively on oils and transfer—not on embedded particles.
In my own car-care workflow, I treat the first 5 minutes as “damage prevention,” because once you smear grit into the finish, you’re no longer just cleaning—you’re polishing dirt around. If you’ve ever seen a seat look “more gray” after wiping, this step is often the difference between improvement and permanent haze.
Vacuuming first helps remove particulate grime that can abrade leather when you wipe, especially along stitching and perforations .
HEPA filters are rated to capture about 99.97% of particles at 0.3 microns, which is relevant when you’re reducing airborne dust while cleaning interiors .
Testing a cleaner in a hidden area is a standard upholstery safety practice because leather finishes and dyes vary by manufacturer and region .
– Vacuum seams, stitching, and creases first, then use a dry soft brush to lift surface particles.
– Test your cleaning method on a hidden spot (like the side of the seat) before touching the visible white area.
– Blot—don’t scrub aggressively—if there’s any wet or sticky residue.
Clean white leather safely (the controlled wipe method)
Controlled wiping is the goal: apply cleaner to the cloth, work in small sections, then wipe residue with a clean microfiber. This method cleans without flooding the seat or driving oils deeper into the pores.
The “controlled wipe method” works because leather cleaning is largely a transfer problem: soil moves from the leather to the cloth, and residue control prevents re-deposit. If you go straight in with a soaked wipe, the cleaner can spread stains and leave a visible sheen or patchiness—especially on white leather where contrast is high.
Leather cleaners are typically designed to be applied with limited moisture, then removed, rather than soaked in, to protect finish layers .
Microfiber is preferred for upholstery cleaning because its fine fibers help lift soils and reduce streaking compared with rough fabrics .
Working from the edges inward reduces the chance of spreading a stain during wiping, a widely used technique in stain remediation .
– Dampen a microfiber cloth with the leather cleaner (or use it per label directions) and wipe in small sections.
– Work from the edges of the stain inward to prevent the mark from spreading.
– Use a second clean cloth to remove residue, then repeat only as needed.
Practical rhythm that prevents “wipe marks”:
1. Spray cleaner onto the cloth (not the seat) if the product label allows it; otherwise follow label directions precisely.
2. Wipe a small panel (for example, a palm-sized area), using light pressure and straight passes.
3. Immediately follow with a second cloth to remove any remaining cleaner film.
4. Stop and reassess under cabin lighting—white seats often show residue as a slightly darker “shadow.”
If your seats were cleaned with unknown products before (common with “all-purpose” cleaners), the first pass may not fully improve the appearance—residue layers can require gentle repeat wiping.
Treat common stains on white leather
To treat white leather stains successfully, identify the stain category first—then use the least aggressive method that matches it. Grease/body-oil, dye/ink, and scuffs each behave differently, so the “one cleaner for everything” approach often makes outcomes worse.
Here’s how I’d prioritize based on stain type:
– Oil-based marks tend to wipe more effectively with a true leather cleaner because you’re emulsifying and lifting oils.
– Dye/transfer stains may require careful, repeated, or specialty steps because colorants can sit on top of the finish—or migrate beneath it.
– Scuffs and light discoloration often improve with gentle cleaning plus conditioning, because conditioning restores the leather’s flexibility and visual evenness.
Oil and body-oil residues are typically treated with leather-specific cleaners that emulsify oils without stripping protective finishes .
Dye transfer (for example, denim indigo) can be difficult to reverse because dyes may migrate into/onto the finish layer, so repeated wiping can sometimes spread or “set” transfer .
Conditioning after cleaning helps restore leather suppleness and can make the surface look more uniform, rather than chasing “whitening” aggressively .
– Grease/body-oil marks: use the leather cleaner first; if still visible, follow with a leather-safe spot treatment only if the product label allows it.
– Dye/ink or transfer stains: proceed cautiously—some transfers require specialty leather treatment, and repeated wiping can “set” them.
– Scuffs and light discoloration: gentle cleaning + conditioning often improves the look more than trying to “whiten” the leather.
If the stain came from denim, steering wheel dye, or a colored bag rubbing the seat, expect more variability. White leather often shows transfer as a slightly blue-gray or purple cast; aggressively scrubbing can lighten the surface while leaving the discoloration pattern.
Drying and conditioning (to prevent new problems)
Drying and conditioning are not optional on white leather—they’re what prevent stiffness, protect the finish, and reduce how quickly new marks appear. The safest method is blot-drying with microfiber, air-drying with ventilation, then conditioning once the seat is fully dry.
Most failures happen after cleaning: people reintroduce residue by over-wetting, or they condition too early. Conditioning while the leather is still damp can trap moisture and create a tacky feel or uneven darkening as materials equalize.
Leather care guidance commonly recommends air-drying with adequate ventilation and avoiding direct heat to prevent finish damage and uneven drying .
Conditioners add back lubricity and flexibility, which can reduce how easily dirt adheres to the surface after cleaning .
Conditioning a still-wet area can lead to tackiness because moisture and product can mix unevenly during drying .
– Dry with a clean microfiber cloth by blotting, then let the seat air-dry with doors open (avoid direct heat).
– Apply a leather conditioner after cleaning to reduce stiffness and help the surface resist future staining.
– Don’t condition immediately if the area still feels wet or tacky—give it time to fully dry first.
What can go wrong (common mistakes and limits)
If you use the wrong products or apply too much moisture, white leather can turn dull, blotchy, or permanently discolored—even when the “cleaning” seems gentle. The limits of DIY cleaning matter most with ink dye, certain transfers, and older staining that has had time to penetrate or bond to the finish.
From a practical standpoint, these issues show up in three ways:
1. Dullness / uneven tone from finish stripping or residue.
2. Gray haze from grinding particulate dirt into the pores.
3. Persistent discoloration where dyes have set and standard cleaner can only partially lift.
Harsh degreasers and non-leather cleaners can strip natural oils and protective layers, which can leave leather looking uneven or dull .
Over-scrubbing increases abrasion and can drive contaminants deeper into surface pores, worsening the visible haze on light-colored leather .
Some dyes (especially ink and certain transfers) can require specialty treatment, and older stains may only show partial improvement with standard leather cleaner .
– Using the wrong cleaner (especially harsh degreasers) can strip oils, leaving white leather looking dull or uneven.
– Over-scrubbing can damage the finish and push grime deeper into the pores.
– Some stains (ink dye, certain transfers, long-set discoloration) may not fully lift with standard cleaner—expect partial improvement in those cases.
– If your seats are not genuine leather or have a protective coating/finished surface, the safest approach is to follow the manufacturer’s care instructions for that specific material.
Scannable checklist before and during cleaning
Use this quick sequence to keep your process consistent—consistency is what prevents white leather from turning patchy.
– [ ] Vacuum seams and creases first
– [ ] Test cleaner on a hidden area
– [ ] Use pH-balanced leather cleaner + microfiber
– [ ] Clean small sections; wipe, don’t soak
– [ ] Remove residue with a second cloth
– [ ] Blot dry; air-dry with ventilation
– [ ] Condition after cleaning (if the leather is dry)
Cleaning white leather car seats comes down to controlled, leather-safe cleaning: prep the surface, wipe with a pH-balanced leather cleaner in small sections, then dry gently and condition afterward. If the stain is from ink dye or long-set transfer, you may only get partial improvement—so start with the manufacturer-safe method and avoid aggressive products that can permanently dull or damage the finish. If you want, tell me what caused the stain (spill type or where it came from) and what cleaner/conditioner you already have, and I’ll suggest the safest next step.
Frequently Asked Questions
What’s the safest way to clean white leather car seats without damaging the finish?
Start by vacuuming loose dirt and using a dry microfiber cloth to remove crumbs. Use a pH-balanced leather cleaner and test it on a hidden seam first to ensure it won’t discolor or dull the leather. Avoid soaking the seats and never use harsh chemicals like bleach or strong degreasers, which can strip the leather’s protective coating.
How do you remove dark stains and body oil from white leather car seats?
Blot (don’t rub) excess oil or spills with a clean cloth, then apply a dedicated leather stain remover or a small amount of leather cleaner to a microfiber pad. Work gently in small circles and keep the leather slightly damp with cleaner, then wipe with a separate damp cloth to lift residue. If the stain persists, repeat in light passes instead of scrubbing aggressively, which can spread the discoloration.
How should you clean white leather car seats that have mold or mildew?
First, ensure the car is in a ventilated area and the seats are cool and dry to the touch. Use a leather-safe cleaner (or a mix of distilled water and a mild pH-neutral cleaner) and wipe gently to remove the mildew film, then dry thoroughly with a microfiber towel. If odor or spots remain, use an upholstery or leather mold treatment made for leather, and follow up with a leather conditioner to restore flexibility.
Which products work best for cleaning and whitening white leather car seats?
Look for pH-balanced leather cleaners, dedicated leather conditioners, and microfiber cloths designed for automotive interiors. For stubborn marks, choose a product specifically labeled for white leather or color-safe leather stain removal to avoid uneven fading. After cleaning, apply a quality leather conditioner (and a UV-protectant if available) to help prevent re-staining and keep the white leather looking uniform.
Why does cleaning sometimes leave white leather car seats looking blotchy, and how do you prevent it?
Blotchiness often happens when water, cleaner, or dye transfer spreads unevenly—especially if you oversaturate the leather or over-rub one area. Prevent this by using minimal cleaner on a damp microfiber pad, working section-by-section, and wiping residue with a clean cloth. Finish by conditioning the leather evenly so the surface absorbs moisture uniformly and maintains a consistent look.
📅 Last Updated: October 18, 2026 | Topic: how do you clean white leather car seats | Content verified for accuracy and freshness.
References
- Leather
- Upholstery
- Stain removal
- https://www.britannica.com/science/leather
- leather cleaning – Search Results – PubMed
- https://www.ncbi.nlm.nih.gov/pmc/?term=leather%20cleaning
- https://www.sciencedirect.com/search?qs=leather%20cleaning
- https://scholar.google.com/scholar?q=how+to+clean+white+leather+car+seats Google Scholar
- https://scholar.google.com/scholar?q=leather+upholstery+cleaning+methods Google Scholar
- https://scholar.google.com/scholar?q=leather+stain+removal+solutions Google Scholar
