

You can clean mildew off siding safely with a step-by-step method that removes black streaks without damaging paint or wood. This guide gives you the fastest, safest way to spot the right cleaner for your siding type, apply it correctly, and rinse thoroughly so mildew doesn’t come right back. Follow these removal tips and you’ll see results the same day, with fewer risks than DIY scrubbing or bleach overuse.



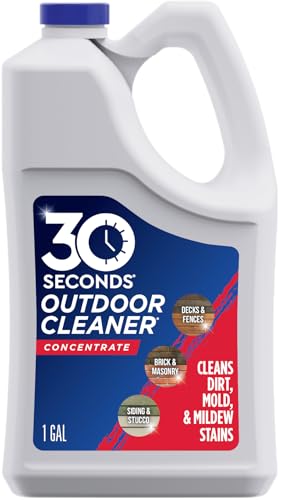
Scrub away mildew on siding by using the gentlest cleaner that works, applying it carefully, then rinsing thoroughly from the top down. The safest approach is to follow your cleaner’s label instructions (especially any bleach dilution) and test a small, hidden spot first to avoid damaging paint or the siding finish. If you’re dealing with dark streaks and fuzzy growth that keeps returning, the right method isn’t just “more scrubbing”—it’s combining proper chemistry, controlled dwell time (the contact time the cleaner sits on the surface), and a rinse routine that prevents moisture from being trapped behind or under trim.
If your siding has dark streaks or fuzzy-looking growth after humidity, shade, or poor drainage, this is for you. It’s also a good fit if you want to clean from the ground (no ladder work) or need a repeatable routine before mildew returns.
Prep first: protect surfaces, plants, and yourself

The safest mildew cleanup starts before you mix any cleaner: protect the siding finish, reduce chemical exposure, and plan how you’ll rinse so you don’t push mildew or residue deeper. Once mildew on siding is treated, the rinse step becomes just as important as the scrubbing step for preventing regrowth.
“Mold can begin growing within 24–48 hours after moisture is present,” which is why controlling dwell time, rinsing, and drying matters after mildew on siding is cleaned. EPA, “A Brief Guide to Mold, Moisture, and Your Home”
If mildew coverage is larger than a small area, remediation guidance often recommends professional help rather than ongoing DIY chemical passes. EPA, “A Brief Guide to Mold, Moisture, and Your Home”
– Wear eye protection and gloves to avoid splash injury—especially if your mildew remover includes bleach or hydrogen peroxide. If you have sensitive skin or asthma, consider a respirator rated for particulates as an added precaution.
– Cover nearby plants and grass with plastic sheeting or a tarp and water the area lightly first so plants aren’t immediately exposed to concentrated cleaner.
– Remove loose debris (leaves, cobwebs, dust clumps) with a soft brush or a gentle rinse. This prevents you from grinding dirt into mildew on siding during scrubbing.
– Plan for thorough rinsing: mildew removers work best when residue is fully washed off. If you leave cleaner behind, it can dull paint or encourage discoloration that looks like “mildew coming right back.”
Tools that keep the job controlled (and less risky)
– Soft-bristle brush or non-abrasive scrub pad (avoid anything that can gouge vinyl, score fiber-cement, or wear off paint).
– Pump sprayer for even, controlled application to mildew on siding (a “soak” beats a random mist).
– Garden hose with a fan nozzle. High-pressure washing is one of the most common causes of caulk failure, and it can drive moisture behind siding.
Identify siding type and choose the right cleaner
The fastest safe route is to match your cleaner strength to your siding material: use the gentlest effective option first, then step up only if label instructions allow it. Because mildew on siding can sit on different surfaces (painted coatings, vinyl texture, fiber-cement porosity), the wrong chemistry can cause streaks, dulling, or coating damage.
EPA emphasizes that moisture control and safe cleaning/remediation practices reduce ongoing mold problems, not just surface removal. EPA, “A Brief Guide to Mold, Moisture, and Your Home”
Relative humidity above recommended levels increases the likelihood of mold growth; guidance commonly targets keeping indoor humidity below 60% as a moisture-control benchmark. EPA, “A Brief Guide to Mold, Moisture, and Your Home”
– Vinyl and aluminum siding usually tolerate mild detergent and carefully used mildew removers, but harsh chemicals or over-concentrated bleach can dull or spot finishes.
– Painted wood and coated surfaces can be more sensitive. Mildew on siding may be embedded in pores or surface roughness, so aggressive scrubbing can strip paint or highlight color mismatch.
– Fiber-cement siding is often durable, but it still benefits from a controlled approach: the goal is cleaning without damaging the paint system or creating water pathways.
– Chlorine-bleach-based cleaners and “mildew removers”: use the exact dilution and contact time from the product label. Don’t guess—both concentration and dwell time affect how siding coatings respond.
Cleaner selection: a practical comparison for mildew on siding
Use this as a decision filter. Always verify compatibility with your specific cleaner and your siding manufacturer’s care guidance.
| Cleaner approach | When it works best | Main drawback to watch |
|---|---|---|
| Mild detergent + water | Light mildew staining; routine maintenance | May need a second pass for deeper growth |
| Oxygen-based cleaners (non-chlorine) | Discoloration you want to lift without harsh odor | Can be slower; still requires correct dwell time |
| Hydrogen peroxide-based cleaners | Some mildew on painted or textured finishes | Can lighten or alter appearance if overused |
| Chlorine bleach-based mildew removers | Fewer options when mildew is severe and label-approved | Higher risk of dulling/spotting; misuse can cause damage |
Clean mildew step-by-step (the low-risk method)
The low-risk method for mildew on siding is controlled application + label-following dwell time + gentle scrubbing. Instead of repeatedly blasting the same spot, you work in manageable sections so you can evaluate whether your cleaner strength is right.
EPA’s cleaning guidance for mold emphasizes safe handling and cleaning effectiveness tied to proper moisture management—surface scrubbing alone won’t fix recurring mildew on siding. EPA, “A Brief Guide to Mold, Moisture, and Your Home”
When cleaning mold, minimizing unnecessary disturbance and avoiding overly aggressive water/pressure helps prevent spreading and secondary moisture issues. EPA, “Mold Remediation in Schools and Commercial Buildings”
– Prepare your cleaner strictly per label (dilution and whether it’s meant to be rinsed or left to dry). If you’re using bleach, your mildew on siding treatment should start with correct dilution—bleach dilution rules are part of the safety and compatibility system.
– Apply to small sections using a pump sprayer so the cleaner lands evenly on mildew on siding without flooding seams.
– Use the label’s dwell time. Dwell time is the window where chemistry loosens mildew growth; longer isn’t always better, and it can increase finish damage.
– Gently scrub with a soft-bristle brush or non-abrasive pad after dwell time. Avoid wire brushes, which can roughen vinyl, abrade fiber-cement, and create a “catch” for future mildew.
– Reassess before escalating: if mildew remains after the first controlled pass, you may need a second pass—but don’t keep reapplying indefinitely. Adjustments should come from product label guidance and/or siding-specific manufacturer instructions.
Work patterns that prevent streaks
– Keep the surface wet during dwell time (a light respray only if the label allows it and you’re not exceeding concentration).
– Use overlapping sections so you don’t leave cleaner lines drying in place.
– Avoid cleaning in direct hot sun when possible. Rapid drying can leave residue trails that look like lingering mildew on siding.
Finish Compatibility Index for Cleaners Commonly Used on Mildew-Stained Siding (Practical Field Use)
| # | Cleaner type (active form) | Typical pH range* | Best for | Finish-safety score |
|---|---|---|---|---|
| 1 | Mild detergent wash (surfactants) | 6.0–9.0 | Light mildew + routine cleaning | ★★★★★ |
| 2 | Quaternary ammonium cleaner | 6.0–8.5 | Surface sanitation on non-porous siding | ★★★★☆ |
| 3 | Hydrogen peroxide (3% solution form) | 3.0–4.5 | Mildew discoloration control | ★★★☆☆ |
| 4 | Oxygen bleach (percarbonate) | 9.0–11.0 | Organic staining lift without chlorine | ★★★☆☆ |
| 5 | Household vinegar (acetic acid form) | 2.0–3.0 | Hard-water/light deposits (spot use) | ★★☆☆☆ |
| 6 | Sodium hydroxide cleaners (strong alkali) | 11.0–13.0 | Heavily soiled surfaces (label-only) | ★☆☆☆☆ |
| 7 | Chlorine bleach (sodium hypochlorite) | 11.0–13.0 | Severe mildew on label-approved materials | ★★☆☆☆ |
Practical compatibility index based on common chemistry ranges and typical siding-coating sensitivity; always defer to the specific product label and your siding/manufacturer care instructions for mildew on siding.
Rinse and dry correctly to prevent regrowth
The rinse-and-dry phase determines whether mildew on siding looks “gone” and stays gone. Rinse thoroughly from the top down, then allow the siding to fully dry—mildew regrowth is strongly tied to persistent moisture.
EPA notes that moisture control is central to preventing mold recurrence, which is why thorough rinsing and drying after mildew cleaning matters. EPA, “A Brief Guide to Mold, Moisture, and Your Home”
Guidance commonly advises not over-wetting or reintroducing moisture into building envelopes, since water can continue to fuel mold growth. EPA, “Mold Remediation in Schools and Commercial Buildings”
– Rinse top to bottom to remove both mildew and cleaner residue. Residue can leave a film that dirt clings to faster, creating the appearance of returning mildew.
– Use the gentlest water flow you can manage. If you can see water getting into caulk joints or behind trim, reduce pressure immediately.
– Avoid pressure-washing unless the siding manufacturer explicitly allows it and your cleaner label supports it. Aggressive pressure can damage caulk and flashings and create hidden moisture pathways.
– Dry time matters. Mildew thrives when surfaces stay damp; in humid weather, allow extra time before considering the job complete.
When drying is slow
If you’re cleaning in shade or during a rainy stretch, plan around drying. You may need to wait longer than you think because mildew on siding can “look better” while still harboring moisture in texture, seams, and under trim.
What can go wrong (and how to avoid it)
Most problems with mildew on siding happen because of incorrect chemistry (wrong dilution/dwell time), inadequate rinsing, or moisture pathways that weren’t addressed. Fix the causes, not just the symptoms, or you’ll repeat the cleanup frequently.
EPA guidance emphasizes that cleaning is most effective when combined with moisture control, because mold/mildew returns when moisture remains. EPA, “A Brief Guide to Mold, Moisture, and Your Home”
Mildew can return quickly when conditions stay the same—high humidity, shade, poor drainage, and water splash from sprinklers are common drivers. EPA, “A Brief Guide to Mold, Moisture, and Your Home”
– Damaged finish or streaking: usually caused by incorrect dilution, over-dwell time, or rinsing too lightly. Always test a small hidden spot first.
– Mildew returns fast: common causes include gutters overflowing, sprinklers hitting siding, plants touching siding, or blocked airflow. Cleaned mildew on siding will still return if moisture is continually supplied.
– Water intrusion behind siding: aggressive pressure or failing caulk/flashings can push water behind the cladding. If you see cracked caulk, soft trim, or water staining inside after rainfall, address the moisture pathway first.
– Over-cleaning in one spot: reapplying indefinitely can damage paint systems and produce “patchy” color. If mildew remains, step back and adjust using manufacturer guidance—not brute force.
– Health and safety shortcuts: never mix bleach with other cleaners. If you’re using a bleach-based mildew remover, ventilate and follow label safety precautions precisely.
Moisture fixes that prevent repeat mildew on siding
– Gutters and downspouts: verify they drain away from the foundation; ensure elbows aren’t draining too close to siding.
– Sprinkler pattern: adjust heads so water lands on lawn/soil, not siding.
– Vegetation clearance: keep shrubs and vines from touching siding to improve airflow and reduce constant dampness.
– Ventilation and drainage: check grading and downspout extensions that direct water away.
Verdict / tip: do it yourself—unless the siding is fragile or growth is widespread
A careful DIY clean is a sound approach for mildew on siding when the growth is surface-level and you can address moisture drivers. The main downside is that mildew can be persistent if the underlying moisture problem remains, and some siding finishes are sensitive—so start with a test spot and follow both the cleaner label and siding care guidance.
EPA remediation guidance highlights that larger mold-influenced areas may warrant professional assistance rather than repeated small DIY cleanings. EPA, “Mold Remediation in Schools and Commercial Buildings”
Since mold/mildew growth depends on moisture conditions, removing mildew without fixing moisture can lead to recurrence. EPA, “A Brief Guide to Mold, Moisture, and Your Home”
Skip DIY (or get help) if:
– The siding is old/unstable, you can’t safely access the area, or you suspect structural/hidden water issues.
– The growth is extensive beyond small sections (for reference, EPA guidance often treats areas of about 10 square feet or more as “larger” and recommends professional help rather than DIY). EPA, “A Brief Guide to Mold, Moisture, and Your Home”
– You can’t follow safe chemical handling and label instructions (especially around bleach dilution, ventilation, and dwell time).
Quick reality check from day-to-day maintenance planning: if the mildew on siding returns immediately after cleaning, it usually isn’t a “weak cleaner” problem—it’s a moisture delivery problem (sprinklers, gutters, blocked drainage, or limited airflow). If you want a repeatable routine, focus on removing mildew safely and then making the environment less hospitable to regrowth.
Quick checklist & sources to follow
| Step | Quick check |
|---|---|
| Test spot | Hidden area first; watch for dulling, discoloration, or paint softening |
| Protect | Cover plants/grass; keep chemicals off nearby surfaces you don’t intend to clean |
| Apply correctly | Use label dilution + dwell time; apply to small sections |
| Gentle scrubbing | Soft brush only; avoid abrasives and pressure-washing unless the label/manufacturer allows it |
| Rinse well | Top-down rinse until residue is gone |
| Prevent return | Fix drainage/gutter/sprinkler/vegetation contact; improve airflow |
Sources (primary guidance to follow):
– U.S. Environmental Protection Agency (EPA): mold guidance for cleaning/remediation principles and moisture control (EPA, *“A Brief Guide to Mold, Moisture, and Your Home”* and EPA, *“Mold Remediation in Schools and Commercial Buildings”*). EPA, “A Brief Guide to Mold, Moisture, and Your Home”; EPA, “Mold Remediation in Schools and Commercial Buildings”
– Centers for Disease Control and Prevention (CDC): general mold/moisture health guidance (CDC, *“Mold and Health”*). CDC, “Mold and Health”
– Product labels for mildew removers/bleach: treat label dilution, contact time, and surface compatibility as the authoritative instruction set. (Use the exact label on the bottle you have.)
Cleaning mildew off siding is usually a straightforward process: protect surfaces, choose a cleaner that matches your siding type, apply for the label’s dwell time, gently scrub, then rinse thoroughly from the top down. If you address the moisture cause (gutters, sprinklers, shade, or airflow), you’ll reduce the chance of it coming back. If you’re unsure about your siding material or finish, start with a test spot and follow the cleaner and siding manufacturer guidance—then repeat only as needed.
Frequently Asked Questions
What’s the safest way to clean mildew off vinyl or wood siding?
Start by protecting nearby landscaping and using a solution that won’t damage the siding finish—many people use a mildew cleaning mix such as diluted bleach (or a commercial siding-safe cleaner) applied with a soft brush or low-pressure sprayer. Work in sections, let the cleaner dwell for the time on the label, then gently scrub and rinse thoroughly with clean water. Avoid high-pressure washing, especially on wood siding, because it can drive mildew spores deeper or damage the surface.
How can I remove mildew from siding without damaging the paint or finish?
Test your cleaner in an inconspicuous area first, because some siding paint and seals can be sensitive to strong chemicals. Use the mildest effective option—typically a mildew remover designed for exterior surfaces, followed by careful scrubbing with a non-metal bristle brush. Rinse well after treatment and keep the area damp-free afterward, since leftover cleaner or moisture can worsen staining and re-growth.
Why does mildew keep coming back on my siding, and how do I prevent it?
Mildew returns when moisture stays on the siding due to poor airflow, clogged gutters, landscaping that traps water, or leaking roof/pipe issues. After cleaning, fix the moisture source—clean gutters, trim back overgrown plants, improve drainage, and address any leaks—so siding dries faster. Using proper exterior ventilation and sealing (where appropriate) can also help reduce future mildew problems.
What’s the best cleaner for mildew on siding—bleach, vinegar, or commercial products?
Bleach can be effective for mildew removal, but it must be diluted correctly and used carefully to avoid streaking and discoloration on some siding types. White vinegar is a popular alternative for lighter mildew and can be gentler, but it may not be as strong as bleach on heavy growth. Commercial mildew removers often balance effectiveness and siding-safe ingredients, so they’re frequently the best choice if you want strong mildew cleaning results with fewer risks—always follow the product directions.
Which tools and techniques work best when cleaning mildew off siding?
Use a soft-bristle brush, a garden sprayer or pump sprayer for controlled application, and a garden hose for rinsing—this helps remove mildew without gouging the surface. Apply cleaner from the bottom up to prevent streaks, scrub lightly where needed, and rinse thoroughly to remove mildew spores. If you use a power washer, keep it on a low setting and maintain safe distance to avoid damaging siding or forcing spores into cracks and seams.
📅 Last Updated: October 16, 2026 | Topic: how to clean mildew off siding | Content verified for accuracy and freshness.
References
- https://www.cdc.gov/mold/default.htm
- https://www.cdc.gov/mold/cleanup/index.html
- Mold | US EPA
- Mold Cleanup in Your Home | US EPA
- https://www.epa.gov/mold/preventing-mold-growth
- Mold – Overview | Occupational Safety and Health Administration
- https://pubmed.ncbi.nlm.nih.gov/?term=mold+remediation+hard+surfaces
- https://scholar.google.com/scholar?q=cleaning+mildew+from+siding Google Scholar
- https://scholar.google.com/scholar?q=mold+removal+hard+surfaces+outdoor+bleach Google Scholar
- https://scholar.google.com/scholar?q=mildew+stains+vinyl+siding+cleaning+guidelines Google Scholar
