

Clean a vintage teak sideboard without leaving sticky residue by using a gentle, oil-safe method that lifts grime while preserving the wood’s finish. If your sideboard is tacky from past cleaners or spills, the right approach is to strip residue first and then clean with a barely-damp cloth to prevent buildup. Follow these steps and you’ll remove stickiness fast—without dulling the teak or creating new tackiness.

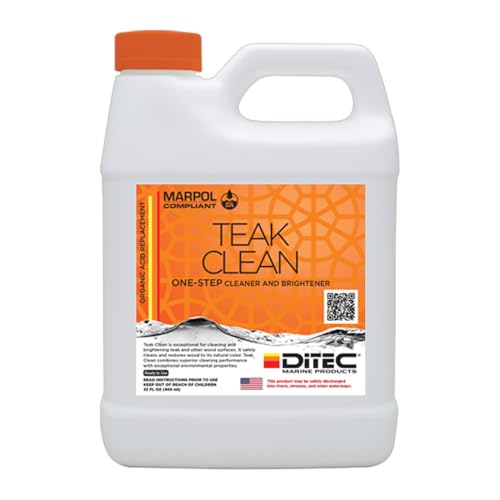


To clean a vintage teak sideboard without sticky residue, use the gentlest cleaner that lifts grime, then remove it completely with clean-water wipes and thorough drying. Skip “one-step” polishes and conditioning products until you’ve confirmed they won’t react with the sideboard’s older finish—because that reaction is what often turns a once-smooth surface tacky.
If your sideboard has an aged varnish, shellac, or an older wax layer, the wrong cleaner can make it tacky again. This is for anyone restoring everyday wear without stripping too aggressively or turning the surface into a dust magnet.
Who this is for / when it applies

This guide is for owners of vintage teak sideboards—especially pieces with unknown or aged finishes—who want a clean look without adding any new film that can attract dirt. As of 2026, “easy” furniture wipes can be convenient, but many contain oils, conditioning agents, or polymer resins that can accumulate on older teak.
Assess the Finish First (So You Don’t Create Stickiness)
The fastest way to avoid sticky residue is to identify whether you’re dealing with a wax film, a hard varnish/shellac layer, or an already-degraded surface. The better the finish diagnosis, the safer your cleaning method—because the wrong product won’t just clean; it can re-soften what’s already there.
Older furniture finishes can feel tacky again when cleaning products partially re-activate wax or soft topcoats, especially if detergent residue remains.
Shellac finishes can be sensitive to alcohol-based cleaners because shellac is soluble in alcohol.
Many “furniture polish/conditioner” products are designed to leave an intentional film for gloss, which can build up over repeated use.
Look for clues on the teak sideboard’s surface
Before you touch the whole vintage teak sideboard, inspect it in bright light:
– Look for signs of an old wax film: a cloudy sheen, uneven dullness, or a surface that feels slightly smudgy when you rub with a clean finger.
– Look for signs of a glossy varnish: a harder, uniform shine that doesn’t smear easily when handled.
– Check for “gummy” spots: if the teak feels soft, smeary, or tacky even before cleaning, you may be dealing with finish breakdown (not just dirt).
Do a controlled spot test (this prevents whole-piece tack)
Test cleaning on a hidden area—ideally the underside or the back panel—using the exact steps you’ll use for the vintage teak sideboard:
1. Wipe with your chosen cleaner (see the next section).
2. Follow immediately with a clean-water wipe.
3. Dry fully.
Then wait a few minutes and lightly touch the area with a clean, dry microfiber corner. If it feels tacky, pause. For a vintage teak sideboard, this is the moment to change course—because once you spread a reactive cleaner across the whole surface, the tack can appear everywhere.
Stop early if the finish is already failing
If the vintage teak sideboard surface feels gummy during the first test, don’t keep adding cleaners or polish. Degraded finishes can lift or smear under gentle agitation, and adding more liquid can accelerate haze. At that point, your best next move is a finish-specific plan (often including careful stripping)—but that’s beyond “residue-free everyday cleaning.”
Use the Right Teak Cleaner (Residue-Free by Design)
To prevent sticky residue, choose a cleaner that lifts grime but doesn’t leave behind oils, waxes, or polymer films. For most vintage teak sideboards with unknown finishes, mild, water-based cleaning wins because you can fully remove it with clean-water wipes.
Surfactants in mild dish soap are intended to lift oils and grime, and thorough rinsing helps remove any remaining detergent film.
Microfiber cloths are commonly recommended for wipe-down cleaning because their fibers trap particles, and they can be used with minimal liquid to reduce oversaturation.
Avoiding “conditioning” or “one-step” polishes reduces the likelihood of accumulating glossy films that can become tacky on older finishes.
Start simple: mild dish soap in warm water
The safest default cleaner for a vintage teak sideboard is:
– Mild dish soap in warm water, using only a few drops in a small bowl.
– Use a damp microfiber cloth rather than a wet-on-wet application—teak and older finishes can trap moisture underneath a surface layer.
Why this matters: when detergent isn’t rinsed away, it can leave a thin residue film. On a vintage teak sideboard, that film is exactly what can feel “sticky” once it interacts with existing wax or finish components.
Skip the “polish shortcut” (until you verify compatibility)
It’s tempting to use a quick teak polish for shine, but many “one-step” products are designed to leave a protective film. Until you know how your specific vintage teak sideboard finish reacts, skip:
– furniture polishes marketed as “conditioners”
– oils meant to soak in (especially on older, film-forming finishes)
– products that promise both cleaning and gloss in one step
Data snapshot: cleaners and residue risk on vintage teak finishes
Residue Risk by Cleaner Type (Vintage Teak Sideboard, 2026)
| # | Cleaner type | Residue risk* | Rinse/wipe needed? | Best fit on vintage teak |
|---|---|---|---|---|
| 1 | Clean-water wipe (no additives) | Very Low | No | Daily dust & light grime |
| 2 | Mild dish soap solution | Low | Yes (clean-water wipe) | Everyday cleaning without film |
| 3 | pH-neutral wood cleaner (water-based) | Low–Medium | Usually yes | Softer spot cleaning when finish is stable |
| 4 | Mineral spirits (odor-minimized) | Medium | Often follow with wipe/rinse step | Removing stubborn oily grime (only if finish tolerates) |
| 5 | Denatured alcohol (spot use) | Medium–High | Yes, if you use it | Avoid on shellac-heavy or waxed layers |
| 6 | Vinegar-water solution | Medium | Yes | Use only after finish testing |
| 7 | Oil-based teak “conditioners” / penetrating oils | High | Not always (often no rinse) | Skip unless finish is known and intended |
Residue risk reflects the likelihood of leaving behind an additional film or of re-softening older coatings on a vintage teak sideboard if you don’t follow with clean-water wiping and full drying.
Clean Step-by-Step: Lift Grime, Then Remove Any Film
You avoid sticky residue by cleaning and then immediately removing any detergent film with clean-water wipes, followed by full drying. On a vintage teak sideboard, this “wash → rinse-wipe → dry” loop is the difference between a clean surface and a tacky one later.
Detergent residues can create a residue film on wood surfaces if not removed with clean-water wiping.
Allowing wood finishes to remain damp during drying can contribute to haze or dull patches on older topcoats.
Using minimal liquid helps prevent over-wetting, which is a common cause of uneven appearance on older finishes.
Step 1: Wipe with soapy solution (light pressure only)
– Wipe the vintage teak sideboard with the soapy solution using light pressure.
– Work with the grain to avoid spreading grime into pores.
– Use a cloth that stays damp, not dripping. Over-wetting is how water and cleaners get trapped under existing film layers.
Step 2: Immediately wipe with clean water (no detergent film)
– Follow right away with a clean-water wipe using a second microfiber cloth.
– This is where sticky residue is prevented: you’re physically removing the cleaning chemistry rather than letting it evaporate on the surface.
Step 3: Dry completely
– Dry fully with a dry microfiber cloth.
– On vintage teak sideboard finishes that are shellac-like or waxed, leaving moisture can produce a hazy or slightly tacky feel once the surface settles.
Handle Stubborn Areas Without Damaging Vintage Coatings
For stuck-on grime or localized tack, repeat gentle cleaning cycles instead of escalating to harsh chemicals. This approach protects the original vintage teak sideboard coating while still removing the residue that causes stickiness.
Using stronger chemicals on unknown finishes increases the chance of softening, smearing, or reactivating existing wax layers.
Repeated gentle wipes can reduce residue while keeping mechanical stress low compared with abrasive scrubbing.
Abrasives can grind softened residue into pores and micro-scratches, making tackier areas spread after drying.
Sticky spots: switch from “more product” to “more cycles”
For a vintage teak sideboard sticky area:
– Use repeated gentle wipes: soapy water → clean-water wipe → dry.
– If tack remains, reassess whether you’re dealing with wax buildup (film) versus adhesive-like grime (spot contamination).
Avoid abrasives unless finish tolerance is known
– Avoid scrubbing or abrasive pads on vintage teak sideboard surfaces with aged varnish/shellac/wax.
– “Scrubbing” often redistributes the sticky residue across a larger area, which is the opposite of what you want.
Comparison (what usually works vs. what often backfires)
| Method on a vintage teak sideboard | Pros | Cons / risk |
|---|---|---|
| Mild soap + clean-water wipe + full dry (repeat as needed) | Low film risk; preserves finish | Might take 2–3 cycles for heavy wax buildup |
| Strong solvents (mineral spirits/alcohol) without confirmation | Can dissolve oily grime quickly | Can soften shellac/wax or lift fragile varnish; may increase tack if residue isn’t fully removed |
| Wax/polish “topcoat” after cleaning | Quick gloss | Can trap leftover residue and turn tacky over time |
What Can Go Wrong (And How to Fix It)
Most sticky problems come from leftover cleaner/polish film or re-softening an existing wax layer. The fix is usually to wipe again with clean water and dry completely—then stop adding products until the surface stabilizes.
Tackiness after cleaning is commonly associated with leftover cleaning film or reactivated wax components.
Cloudy patches frequently result from too much water, insufficient drying, or finish reactivity.
Many furniture polishes are formulated to leave a film by design, which can accumulate on older finishes.
Tackiness after cleaning
Usually it’s one of these:
– detergent film left behind (not fully removed by clean-water wiping)
– reactivated wax layer underneath the dirt
Fix: Do another round on the vintage teak sideboard:
1. wipe lightly with damp water only (or minimal soap if needed)
2. do a clean-water wipe
3. dry fully with fresh microfiber
Cloudy patches
This is often tied to over-wetting or a finish that’s reacting to the cleaner.
– Fix: stop, rinse-wipe, dry completely, then re-evaluate what finish type you actually have.
Over-polishing
If you keep applying polishes on a vintage teak sideboard, the film can build faster than you can remove it, increasing the chance of tackiness and dirt attraction.
Verdict: Best Practice for a Vintage Teak Sideboard (With Limits)
If you want “no sticky residue,” the best practice is a simple routine: mild soap for grime, immediate clean-water wipes, and full drying—then stop. This minimizes the chance of reactivating older coatings on a vintage teak sideboard, especially when the finish type is uncertain.
The downside is that this approach may not fully remove heavy wax buildup in one pass. Also, some vintage teak sideboards react unpredictably if the finish is actively degraded, contaminated, or flaking—so in 2026 and beyond, the safe path still starts with spot testing and restrained chemistry.
Skip this routine (and consider a finish-specific restoration approach) if your vintage teak sideboard has:
– flaking finish or active smearing when you wipe
– unknown chemical contamination (e.g., prior aggressive coatings)
– persistent gumminess that appears even with water-only wiping
Quick Checklist: Residue-Free Teak Cleaning
– [ ] Check finish (wax-like smears vs. hard varnish shine)
– [ ] Spot-test cleaner in a hidden area
– [ ] Use mild dish soap in warm water (light pressure)
– [ ] Wipe with clean water immediately
– [ ] Dry completely with a fresh microfiber cloth
– [ ] Repeat gently if needed—don’t jump to strong polishes/solvents
Sources
If you follow one principle for your vintage teak sideboard—clean gently, remove everything with clean-water wipes, and dry completely—you can keep the wood looking refreshed without introducing the films that cause sticky residue. Start with finish assessment and spot testing, then repeat only gentle cycles; when tack persists, it’s a signal to reassess the finish rather than escalate the chemistry.
Frequently Asked Questions
What cleaning products can I use to clean a vintage teak sideboard without leaving sticky residue?
Use a mild, pH-balanced cleaner or a solution of warm water with a small amount of gentle dish soap, then rinse with a lightly damp cloth. Avoid heavy-duty degreasers, ammonia, and alcohol-based wipes, which can interact with older teak finishes and leave tacky buildup. For sticky spots, try a small amount of mineral spirits on an inconspicuous area first, then follow with a wipe using a damp cloth and dry thoroughly.
How do I remove sticky residue from a vintage teak sideboard safely?
Start by wiping the area with a clean microfiber cloth lightly dampened with warm water to lift surface grime. If it’s still tacky, apply a tiny amount of mineral spirits to a cloth (not directly onto the wood), then wipe with the grain and immediately follow with a damp cloth to remove loosened residue. Finish by drying completely and letting the wood rest so you can assess whether the stickiness has fully cleared.
How should I clean and dry teak to prevent tackiness from soaking into the finish?
Use minimal moisture—clean with a damp (not wet) cloth and always remove excess liquid right away. After cleaning, dry the sideboard thoroughly with a soft towel and let it air-dry in a well-ventilated area. If the teak has an existing varnish or lacquer, excessive water can seep into micro-cracks and create a gummy feel when it dries.
Why does my teak sideboard feel sticky after cleaning, and how can I stop it?
Sticky teak usually comes from detergent or cleaner left behind, incompatibility between cleaners and the original finish, or oil-based products that haven’t cured fully. Rinse-wipe after any soap solution with a cloth dampened in clean water, then dry immediately to avoid residue buildup. If you’ve already applied a product and it turned tacky, remove it with mineral spirits or a finish-safe cleaner and then reassess before applying anything new.
Which method is best for maintaining a vintage teak sideboard while keeping it residue-free?
The best approach is gentle cleaning plus careful finishing maintenance: dust regularly, spot-clean with mild soap and water, and avoid “quick fix” sprays that can leave film. If the sideboard looks dry, use a teak-specific cleaner and then a finish like teak oil sparingly—thin coats allow proper absorption without gummy buildup. Always test any product in a hidden area first, because older teak sideboards may have different finishes than modern teak furniture.
📅 Last Updated: October 20, 2026 | Topic: How to Clean a Vintage Teak Sideboard Without Leaving a Sticky Residue | Content verified for accuracy and freshness.
References
- Teak
- Wood finishing
- Wood finishing
- Varnish
- Shellac
- https://pubmed.ncbi.nlm.nih.gov/?term=wood+surface+cleaning
- https://www.britannica.com/plant/teak
- https://scholar.google.com/scholar?q=cleaning+teak+wood+without+residue Google Scholar
- https://scholar.google.com/scholar?q=remove+sticky+residue+from+wood+finish Google Scholar
- https://scholar.google.com/scholar?q=wood+surface+cleaning+methods+varnish+wax+oil+residue Google Scholar
