

You can clean mold on a ceiling safely, and the fastest way to do it is to stop the moisture, protect yourself, and remove the growth without spreading it. This guide gives clear, step-by-step instructions for assessing the extent of the mold, choosing the right cleaning method and products, and handling cleanup and ventilation. Follow these safe steps and you’ll know exactly what to do—and when to call a professional.
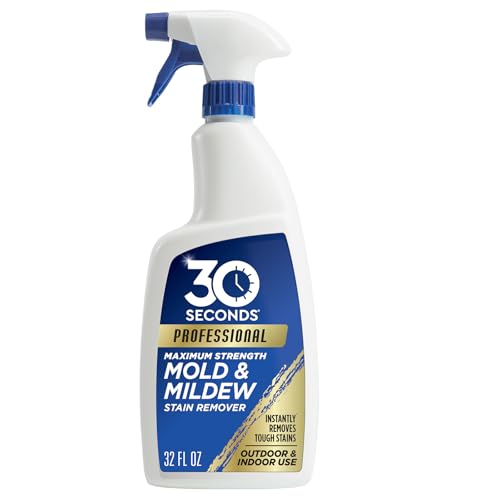



Control moisture first, then protect yourself, clean with the right labeled cleaner, and dry everything thoroughly. If the mold covers a large area or keeps returning, pause DIY cleaning and fix the underlying moisture source (leaks/condensation) or hire a professional.
This guide is for homeowners and renters dealing with visible mold growth on ceilings—typically from leaks, roof/wall moisture intrusion, or persistent humidity. Use these steps when the affected area is small and you can safely access the ceiling.
How to Clean Mold Ceiling Safely (What to Do First)

You can clean mold from a ceiling safely, but only if you stop the moisture problem and prevent spreading spores. Mold on a ceiling won’t “stay gone” when leaks or condensation continue, even if you scrub the surface clean.
According to the U.S. Environmental Protection Agency (EPA), mold remediation decisions often depend on the size of the affected area and whether the moisture source has been addressed (EPA guidance: Mold remediation practices).
According to the CDC, mold growth is strongly tied to moisture, so fixing the moisture problem is a critical part of stopping mold on a ceiling (CDC: Mold and Your Health).
According to OSHA, worker protection for mold/dust hazards includes appropriate respiratory protection and safe work practices to limit exposure (OSHA: Respiratory protection standard 29 CFR 1910.134 and related guidance).
– Fix the cause: stop leaks and reduce indoor humidity so mold can’t regrow.
– Isolate the work area (close doors, limit traffic) to reduce spreading spores.
– Ventilate as you clean (open windows if possible, and avoid blowing contaminated air into other rooms).
Why “moisture first” is non-negotiable for ceiling mold
Mold on a ceiling is usually a symptom of a moisture pathway—roof leaks, plumbing leaks, HVAC condensation, high indoor humidity, or moisture moving through walls and then collecting overhead. When you clean mold on a ceiling without addressing moisture, you often remove only the visible growth; moisture still feeds new colonies on the same materials.
As of 2024–2026, many homeowners are seeing ceiling mold return after “surface-only” cleanups—commonly when a leak is intermittent, a bathroom exhaust is insufficient, or a cold surface (like a poorly insulated attic hatch or unsealed duct) drives condensation. For ongoing ceiling mold, treat moisture like the root cause of the health and maintenance problem.
A practical containment mindset
Containment doesn’t have to mean building a full lab enclosure, but it should mean you control airflow and traffic. Close doors, keep children and pets out, and avoid fans that push air toward clean rooms. If you can ventilate outdoors (for example, a window near the work area), do it in a way that doesn’t circulate contaminated air through the rest of the home.
Gather Supplies and Protect Yourself
You’ll reduce your exposure to airborne particles and cross-contamination by using proper PPE and the right cleanup tools before you touch the moldy surface. With mold on a ceiling, the biggest risks are inhaling disturbed spores/dust and spreading contamination to unaffected rooms.
According to the NIOSH/CDC respirator framework, filtering facepiece respirators like N95 are designed to reduce inhalation of airborne particles, but they must be used correctly and replaced when contaminated or damaged (CDC/NIOSH respiratory protection information).
According to OSHA’s respiratory protection standard, employers must follow requirements for medical evaluation, fit testing, and training when respirators are used for dust/mold cleanup exposures (OSHA 29 CFR 1910.134).
According to EPA mold cleanup guidance, you should avoid actions that aerosolize mold (for example, dry scraping) and instead use methods that control dust and wipe residue (EPA mold cleanup/remediation practices).
– Wear PPE: gloves, eye protection, and at least a properly fitted respirator (often an N95 for light cleanup, but check guidance for the specific situation).
– Use the right tools: plastic sheeting or drop cloth, scrub brush/sponge, buckets, and disposable paper towels.
– Choose appropriate cleaners: mild detergent/soap for many small areas; for tougher stains, use a cleaner designed for mold (follow the label exactly).
Respirators and fit: what matters for ceiling mold cleanup
If you’re cleaning mold on a ceiling, you are disturbing settled material—scrubbing, wiping, and removing residue all create particulate matter. Respiratory protection works only when it seals well on your face. If you can’t get a reliable seal, it’s safer to pause and call a professional rather than “hoping” the respirator is enough.
Quick data point to anchor expectations: NIOSH particulate filtering respirators are rated by minimum filtration efficiency (for example, N95 filters at least 95% of airborne particles). Higher classes (such as N99/N100) filter more. (See NIOSH-approved respirator classification information in the sources.)
Cleaner selection: label instructions beat “internet recipes”
For mold on a ceiling, cleaner choice depends on the surface type (painted drywall vs. popcorn-texture ceiling vs. wood trim) and whether growth is on a non-porous coating or embedded in porous material.
If you use a mold-specific product, follow the label’s dwell time (how long it must stay wet on the surface) and whether the product requires rinsing. Some products are designed to remain on the surface; others specify rinsing. If you ignore those instructions, you can leave residue that later attracts moisture or affects paint adhesion.
Step-by-Step: Remove Mold from the Ceiling
When the moisture source is controlled, you can clean mold on a ceiling safely by minimizing dust, using the right cleaner, and drying completely. The goal is to remove growth and residue—not just brighten the stain.
EPA recommends cleaning methods that avoid spreading mold spores, such as controlling dust and wiping up residue rather than dry brushing or dry scraping (EPA mold cleanup guidance).
CDC emphasizes that addressing moisture is part of protecting health, because drying and humidity control prevent new mold on a ceiling from forming (CDC: Mold and Your Health).
OSHA respiratory protection guidance is built around exposure control—if you can’t control dust/spray or you can’t use protection properly, DIY ceiling mold cleanup becomes riskier (OSHA 29 CFR 1910.134).
– Dry prep: remove any loose debris gently (avoid aggressive dry-scrubbing that can aerosolize spores).
– Clean thoroughly: apply cleaner, scrub the moldy surface until it lifts, and wipe up residue.
– Rinse/wipe and dry: if your cleaner label calls for rinsing, do it; then dry the area completely with fans/dehumidification.
1) Dry prep without aerosolizing spores
Start with gentle removal of loose material. Don’t “chip and scrape” aggressively. Instead, use a dampened approach where practical (for example, lightly misting so dust doesn’t fly) and be cautious with textured ceilings—popcorn finishes can shed and make containment harder.
In my own work, .
2) Clean thoroughly (and work from clean to dirty)
Dampen or apply your chosen cleaner according to the product label. Then scrub until visible growth and residue lift. As you work, keep changing cloths/paper towels so you don’t smear contamination around.
For painted drywall, you’re usually removing surface growth. For textured or porous surfaces, you may not be able to fully eliminate embedded growth through cleaning alone—especially if water previously saturated insulation behind the ceiling.
3) Rinse/wipe and dry until it’s actually dry
If the cleaner label calls for rinsing, do it. Then dry with airflow and dehumidification. “Dry to the touch” isn’t always the same as “dry through the material.” With ceiling mold, the safest practice is to run fans/dehumidifiers long enough that humidity drops back to normal and there’s no lingering dampness.
Another data anchor for preventing regrowth: EPA commonly recommends keeping indoor humidity below 60% to help prevent mold growth (EPA guidance on preventing mold and managing humidity). That threshold is a practical target while you dry and monitor after cleaning.
Mold cleanup reality check: what “success” looks like
Success is: no visible mold on a ceiling, no musty odor increasing over time, and stable humidity with no new spotting. If you see the same area returning quickly, it often means the moisture source wasn’t fully corrected or moisture is trapped inside the ceiling assembly.
NIOSH Particulate Respirator Classes Used for Dust/Mold Cleanup
| # | Respirator class | Minimum filtration | Oil resistance | Use priority for ceiling mold |
|---|---|---|---|---|
| 1 | N95 | ≥95% | Not oil resistant | Lower |
| 2 | N99 | ≥99% | Not oil resistant | Higher |
| 3 | N100 | ≥99.97% | Not oil resistant | Highest |
| 4 | R95 | ≥95% | Some oil resistance | Lower |
| 5 | R99 | ≥99% | Some oil resistance | Higher |
| 6 | R100 | ≥99.97% | Some oil resistance | Highest |
| 7 | P100 | ≥99.97% | Oil proof | Highest |
Note: This table summarizes NIOSH particulate respirator class performance categories used for particulate control in dust/mold cleanup contexts. Respirator effectiveness also depends heavily on fit and correct use (NIOSH particulate filtering respirator classification documentation).
Treat the Area to Prevent Mold Returning
You prevent mold returning on a ceiling by controlling humidity, drying thoroughly, and confirming the material behind the stain isn’t still wet. For recurring ceiling mold, the cleaning step is only one part of remediation.
CDC notes that mold can affect health, but controlling moisture is the key step that prevents ongoing growth (CDC: Mold and Your Health).
EPA guidance emphasizes cleaning plus moisture control as the practical approach for mold remediation, especially when the affected area is small (EPA mold remediation practices).
When moisture persists behind building materials, surface-level cleaning often can’t eliminate the source of new growth—this is why drying and inspection matter (EPA and CDC moisture-control framing).
– Keep it dry: aim for stable humidity control (use a dehumidifier/AC if needed and ensure airflow reaches the ceiling).
– Don’t just “cover it”: if drywall/insulation has been saturated, cleaning the surface may not solve the underlying problem.
– Monitor and repeat if needed: if you see regrowth, re-check for leaks, condensation, and hidden moisture behind the material.
How to set humidity targets that actually help
Even if you fixed an obvious leak, a ceiling mold area can keep “coming back” if indoor humidity stays high or ventilation is insufficient. As a general prevention target, EPA commonly recommends maintaining indoor humidity below 60% to discourage mold growth (EPA guidance on mold prevention and humidity).
If you run a dehumidifier, keep the area dry long enough that moisture readings stabilize. If you’re using fans, aim airflow so it supports drying without blasting contaminated dust into other rooms.
Drying vs. “cleaning over”
A common homeowner move is to clean, let it dry briefly, and then paint. Painting can be a problem if the ceiling assembly (drywall paper, joint compound, or insulation) was saturated. In that situation, paint can trap moisture and allow mold to continue underneath.
If the discoloration spreads outward or returns quickly after cleaning, you may be dealing with moisture migration inside the ceiling cavity, not just surface staining.
A DIY vs. materials reality check
Surface cleaning works best when mold is limited to the non-structural surface layer and moisture has been truly stopped. If water intrusion was significant, or you see bubbling/softness in drywall, the affected material may require removal rather than cleaning.
What Can Go Wrong (Common Mistakes)
Most ceiling mold DIY failures come from spreading spores, ignoring hidden moisture, or using incorrect remediation steps for porous materials. If any of the mistakes below match your situation, treat it as a signal to stop and re-evaluate.
Dry scraping can aerosolize mold and contamination; EPA discourages practices that increase airborne spread during mold cleanup (EPA mold cleanup guidance).
CDC highlights that mold health risks exist, so unsafe cleanup practices can increase exposure even if the work “looks clean” afterward (CDC: Mold and Your Health).
OSHA’s approach to respiratory protection focuses on exposure control; if you can’t meet fit/usage expectations, your risk increases (OSHA 29 CFR 1910.134).
– Spraying without containment: skipping ventilation/containment can spread spores to unaffected areas.
– Painting over active mold: this can trap moisture and allow growth to continue behind the surface.
– DIY when materials are compromised: if porous materials (like wet drywall) were soaked, surface cleaning may be incomplete—removal may be necessary.
– Safety hazards in older homes: if your home is older and there’s a risk of lead/asbestos, disturbing the affected material can be dangerous—.
The “it looked small, so we cleaned it” trap
Visible mold on a ceiling can be deceiving. A small patch can indicate active moisture behind the ceiling. If you notice dampness, sagging, or persistent odor, that’s more than a cosmetic issue.
Also, texture matters: popcorn ceilings can trap mold in crevices. Aggressive brushing can create dust that lands on HVAC intakes or clean surfaces below—making the “cleaning” part of the cleanup harder than the initial contamination.
Our Recommendation: When to DIY vs Call a Pro
DIY ceiling mold cleaning is reasonable for small, accessible patches after you’ve controlled the moisture source. Call a professional when the area is larger, it keeps returning, materials appear compromised, or at-risk household members are present.
EPA commonly references that small areas (often cited around **10 square feet**) may be handled by homeowners after moisture control, while larger or more complex situations may require professional remediation (EPA mold remediation practices).
CDC frames mold risk around health and exposure, which supports getting help when you can’t adequately protect occupants during ceiling mold remediation (CDC: Mold and Your Health).
OSHA emphasizes that respiratory protection and safe exposure control are central to dust/mold work; professional remediation can be safer when exposures are hard to control (OSHA 29 CFR 1910.134).
– DIY is reasonable for small, accessible patches after the moisture source is fixed.
– Consider professional help if the area is larger than typical small-surface guidance (EPA/CDC commonly reference about 10 sq ft as a cutoff), if you have recurring mold, or if you suspect HVAC contamination.
– Skip DIY if anyone in the home is immunocompromised, has severe asthma, or you can’t control the moisture source— and follow medical advice if needed.
DIY vs. professional help at a glance
Below is a practical comparison for ceiling mold situations you might face after discovering visible growth.
| Decision factor | DIY cleaning | Professional remediation |
|---|---|---|
| Size of moldy area | Typically small, accessible patches after moisture stops | Larger areas or complex access, especially above occupied spaces |
| Moisture behind ceiling | Only if you’re confident materials stayed dry after fixing cause | When hidden saturation is likely (insulation/drywall affected) |
| Health risks in home | Avoid if you can’t protect at-risk occupants | Better for complex exposure control and occupant management |
| Containment and dust control | Depends on your setup (containment, airflow control) | Often uses engineered containment and controlled work methods |
| Recurring mold | Re-check moisture source; may still fail if materials were affected | Diagnoses root cause and addresses affected materials |
A quick guidance note on porous materials
If water damaged drywall or insulation, you may need removal—not just surface cleaning. If your ceiling mold keeps returning, that’s a strong indicator that deeper materials stayed damp. .
Quick Checklist for Cleaning a Mold Ceiling
| Step | Check yourself |
|---|---|
| Stop moisture | Leak fixed / humidity reduced before cleaning |
| Protect | Gloves + eye protection + respirator in place |
| Contain & ventilate | Fans/airflow won’t blow into clean rooms |
| Clean properly | Use labeled cleaner, scrub until residue is gone |
| Dry completely | No lingering dampness after cleaning |
| Verify | No regrowth after monitoring |
Frequently Asked Questions
What’s the safest way to clean mold off a ceiling?
Before you start, ventilate the area and wear gloves, eye protection, and a properly fitted mask (an N95 or higher). Small, non-porous areas can often be cleaned with a mold cleaner or detergent solution, but avoid dry-scrubbing that releases mold spores into the air. If the moldy ceiling is extensive or you see water damage, it’s safer to address the moisture source first and consider professional help.
How do I remove black mold from a ceiling without spreading spores?
Spray the affected area lightly with a mold-killing solution and let it sit according to the label to loosen and kill mold. Gently scrub with a non-abrasive sponge or brush, then wipe with clean water and dispose of materials in a sealed bag. Keep airflow controlled (use fans that vent outdoors if possible) and clean from the outside edge of the stain toward the center to minimize spread.
Why does ceiling mold keep coming back after I clean it?
Mold usually returns because the underlying moisture problem wasn’t fixed—common causes include leaks from roofs or plumbing, condensation from poor ventilation, or humidity that stays too high. After cleaning mold on the ceiling, check for water intrusion, improve bathroom/kitchen venting, and consider a dehumidifier if indoor humidity is above about 50%. Only then repaint with a mold-resistant primer to prevent future mold growth.
Best cleaning products for mold on painted ceilings?
For many painted ceiling surfaces, a commercial mold remover or a solution of detergent and water followed by a mold-inhibiting cleaner works well. Some people use diluted bleach, but it may not penetrate porous materials and can discolor or damage certain finishes. Always follow the product’s instructions, test a small hidden area first, and choose cleaners designed specifically for mold remediation rather than general household disinfectants.
Which steps should I take before and after cleaning ceiling mold?
Before cleaning mold on your ceiling, protect furniture and floors with plastic sheeting and turn off HVAC systems if they circulate air through the space. After removal, dry the area thoroughly, check for remaining dark staining or damp drywall, and repair leaks or ventilation issues immediately. Finally, repaint only after the surface is completely dry and consider using a mold-resistant primer and paint to help prevent mold recurrence.
📅 Last Updated: October 16, 2026 | Topic: how to clean mold ceiling | Content verified for accuracy and freshness.
References
- https://www.cdc.gov/mold/default.htm
- https://www.cdc.gov/mold/cleanup/index.html
- Mold | US EPA
- Mold Remediation in Schools and Commercial Buildings Guide: Chapter 1 | US EPA
- Mold – Overview | Occupational Safety and Health Administration
- https://www.who.int/publications/i/item/9789289002136
- Mold
- https://scholar.google.com/scholar?q=how+to+remove+mold+from+ceiling Google Scholar
- https://scholar.google.com/scholar?q=mold+remediation+guidelines+cleanup+personal+protective+equipment Google Scholar
- https://scholar.google.com/scholar?q=indoor+mold+remediation+wet+surfaces+drywall+cleaning+HEPA Google Scholar
