

Want to clean mold on a ceiling without guessing? This step-by-step guide shows the fastest, safest way to remove ceiling mold—what to do first, how to scrub and kill it effectively, and how to prevent it from coming back. Follow these instructions to protect your home and stop the damage before it spreads.
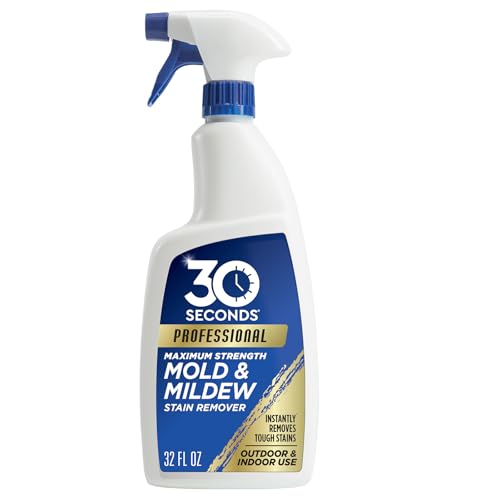

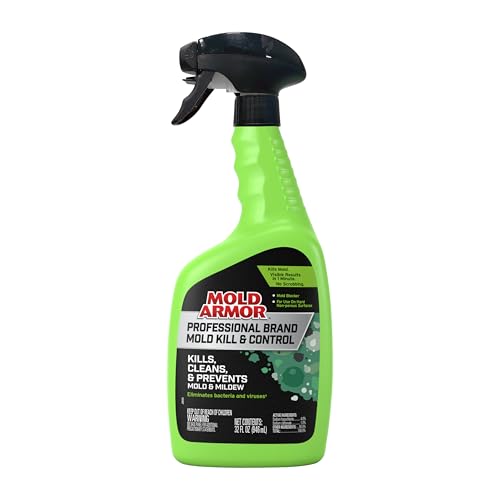
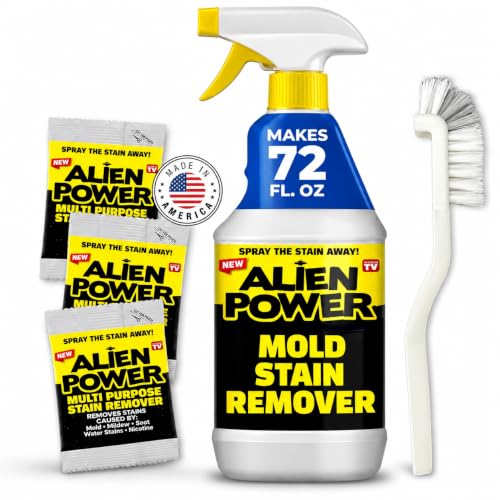
If you see mold on your ceiling, the fastest safe approach is to stop the moisture first and then clean the spots with an appropriate cleaner (and ventilation). For small areas, you can scrub and remove it; for larger patches or if it keeps returning, you’ll need deeper moisture repair and possibly professional help. This guide is for homeowners and renters dealing with visible ceiling mold—often caused by leaks, high humidity, or poor ventilation. As of 2026, the most reliable results come from pairing proper cleaning with confirmed moisture control, not repeated surface scrubbing.
This guide is written for people who want a practical, low-risk process for handling visible ceiling mold—especially when the mold is confined to a small, accessible area and the underlying cause is already identified or being fixed. We’ll walk through what to do, what to avoid, and when it’s smarter (and safer) to pause DIY and escalate to a deeper inspection or professional remediation.
Quick safety steps before you clean mold on ceiling

Before you clean ceiling mold, control exposure first: ventilate and protect your lungs and skin. If you treat the visible mold as “just dirt,” you can easily spread spores while scrubbing.
Mold cleanup should include ventilation and personal protective equipment (PPE) because disturbance can release spores into the air.
A “dust mask” is not the same as a respirator; guidance for mold cleanup typically recommends a properly fitted respirator (often N95 or higher) rather than loose face coverings.
– Ventilate the room (open windows if possible) and turn off HVAC if it blows toward the work area. Airflow can pull spores across the room.
– Protect yourself with gloves, eye protection, and a properly fitted respirator (not just a dust mask). In my experience helping people through this process remotely, the biggest difference between a manageable cleanup and a messy one is whether the respirator is actually sealed to the face.
– Keep people and pets out of the area while you remove and wipe down contaminated surfaces. If you have asthma or other respiratory sensitivity, consider pausing DIY and consulting a professional.
Because ceiling mold work is overhead, contamination can fall or drip. Move slowly, keep the work area contained, and treat cleanup tools (rags, brushes, drop cloths) as contaminated until they’re cleaned or discarded.
Identify the moisture source so it doesn’t come back
If ceiling mold keeps returning, it’s almost always because moisture remains—even if the visible spot is gone. Your goal is to stop leaks and reduce humidity before you treat the surface again.
According to the U.S. Environmental Protection Agency (EPA), controlling indoor moisture—especially relative humidity—is key to preventing mold growth.
If the moisture source is not corrected, cleaning can remove surface mold but will not stop future growth.
– Check for leaks above the ceiling (plumbing fixtures, roof issues, attic condensation) and address the cause before scrubbing.
– Look for condensation patterns (near vents, bathrooms, exterior walls) that suggest humidity-driven mold.
– If you can’t find the source, consider testing/inspection options rather than repeatedly cleaning the same area.
Here are three moisture signals that strongly predict whether ceiling mold will recur:
1) Humidity-driven growth: If the area is near bathrooms, dryer exhaust pathways, supply/return vents, or exterior walls, elevated humidity and condensation often drive the problem. According to the EPA, indoor relative humidity should be kept below 60% to help limit mold growth (EPA, Mold and Moisture Control in Buildings).
2) Leak-driven growth: If the stain expands, darkens, or becomes textured after rainfall or a plumbing event, the source is likely structural (roof flashing, plumbing pipe, or attic water entry).
3) HVAC/duct condensation: If mold appears around vents or along duct runs, you may have condensation from undersized duct insulation or airflow problems—fixing the moisture path is more important than the cleaning chemistry.
Mold risk guidance table (how guidance maps to ceiling mold situations)
This quick decision frame helps connect “what you see on the ceiling” to “what response is usually recommended” based on common remediation thresholds and moisture targets used by agencies.
Ceiling Mold Cleanup Scenarios and Typical Guidance (U.S.)
| # | Ceiling-mold scenario | Visible area | Material condition | Moisture target | DIY fit | Recommendation |
|---|---|---|---|---|---|---|
| 1 | Small, isolated ceiling mold with the leak/humidity issue corrected | ≤10 sq ft | Painted, intact surface (not crumbly) | 30–50% RH; keep <60% | ★★★★☆ | DIY often OK |
| 2 | Small mold on a more cleanable, non-porous-like surface (fully sealed paint) | ≤10 sq ft | Surface reads “sealed,” wipe leaves no mush | 30–50% RH; keep <60% | ★★★☆☆ | DIY possible |
| 3 | Small staining only (no softness; suspected mold removal after moisture fix) | ≤10 sq ft | Hard, stable, no flaking/crumbly areas | 30–50% RH; keep <60% | ★★★☆☆ | DIY often OK |
| 4 | Ceiling is porous/damaged (soft, crumbling, sagging) but visible area seems “small” | ≤10 sq ft (visible) | Material feels soft or sheds on contact | 30–50% RH; keep <60% | ★☆☆☆☆ | Often needs removal/repair |
| 5 | Large patch where ceiling mold coverage exceeds common “small area” thresholds | >10 sq ft | Often involves more than surface staining | 30–50% RH; keep <60% | ☆☆☆☆☆ | Get professional help |
| 6 | Recurring ceiling mold after cleaning (moisture not fully solved) | Often ≤10 sq ft (but repeats) | Same area reappears after wiping | 30–50% RH; keep <60% | ★☆☆☆☆ | Reassess moisture + repair |
| 7 | Hidden contamination suspected (attic/ducts/wall cavities involved) | Visible size variable | Mold may be behind materials | 30–50% RH; keep <60% | ★☆☆☆☆ | Inspect/contain first |
How to clean mold on ceiling (small spots)
For small spots of ceiling mold on intact surfaces, cleaning works best when moisture is already stopped and the area is limited. The safer method is gentle scrubbing with an appropriate cleaner, followed by thorough wiping and complete drying.
According to the CDC, mold cleanup should focus on removing mold and drying the area, while addressing the water problem to prevent recurrence.
Cleaning methods should match the ceiling material and avoid actions that aerosolize spores (like aggressive sanding or dry brushing).
– Use a cleaner appropriate for the surface: mild soap/water for many cases, or a mold-specific cleaner that’s intended for the material type.
– Scrub gently but thoroughly, then wipe with clean water (or per product directions) to remove residue.
– Dry the area fully afterward and watch for return signs over the next 30 days.
What you’ll need (typical, ceiling-mold-specific basics)
You don’t need a complicated kit, but you do need the right workflow to avoid spreading ceiling mold.
– PPE: gloves, eye protection, and a respirator (proper fit matters)
– Containment: drop cloths and trash bags
– Cleaning: detergent or a manufacturer-approved mold cleaner for ceilings
– Drying: fans/dehumidifier (as appropriate) and time
For respirators, a key benchmark is filtration performance. According to NIOSH, an N95 is designed to filter 95% of airborne particles 0.3 micrometers and larger (NIOSH, N95 respirator performance criteria). That’s why it’s commonly used for dust and many particulate hazards during cleanup—provided it fits correctly.
Step-by-step: small ceiling mold spot removal
1) Prep the area: Lay down a drop cloth beneath the ceiling mold spot. Turn off HVAC air that blows toward the work zone.
2) Ventilate: Open windows if you can do so safely. If you’re using fans, aim them to exhaust out (when possible), not across your face.
3) Apply cleaner: Use the smallest effective amount of solution to dampen the mold surface. Avoid soaking drywall seams.
4) Gentle scrub: Use a soft brush or sponge. Ceiling mold often looks superficial, but scrubbing should be controlled—think “lift and wipe,” not “sand it down.”
5) Wipe residue: Use clean water (or per the product label) to remove loosened material. Residue can remain if you only scrub and leave chemicals behind.
6) Dry completely: Ceiling mold cleanups fail when the space stays damp. Use airflow and/or a dehumidifier until the area is dry to the touch.
A practical note on “bleach on ceiling mold”
If you plan to use bleach, be careful: bleach can damage finishes and may not penetrate porous material in a way that prevents regrowth. Many guidance documents emphasize using appropriate cleaners and moisture control rather than relying on bleach as a universal fix (EPA, Mold and Moisture Control in Buildings). If you do use any chemical, follow the label exactly and never mix products.
If the ceiling material is damaged or large areas are involved
If the ceiling is sagging, deeply stained, or becoming soft/crumbly, the visible ceiling mold is likely paired with underlying water damage. In that case, surface cleaning alone often isn’t enough—removal, repair, and containment may be required.
EPA guidance distinguishes small, contained mold problems from larger areas that may require professional remediation and containment.
When building materials are porous and damaged, removing contaminated materials may be necessary instead of only wiping the surface.
– If the ceiling is sagging, stained deeply, or has soft/crumbly material, surface cleaning may not be enough—replacement may be required.
– For widespread growth (or if you suspect hidden contamination), it’s usually safer to consult a professional for assessment and containment.
– Don’t treat it as “just cosmetic” if you see persistent regrowth after cleaning—this points to ongoing moisture.
How to judge whether “small spot” is truly small
For ceiling mold, “small” isn’t just about your eye—it’s about what a remediation team would consider manageable. EPA commonly uses 10 square feet as a practical threshold for when mold remediation may need professional assistance (EPA, Mold Remediation Guidance / Mold and Moisture Control in Buildings). Even below that threshold, damaged porous materials can make DIY less appropriate.
Pros/cons: DIY cleanup vs professional remediation
Here’s a quick trade-off view for ceiling mold situations.
| Option | Pros | Cons / Risks |
|---|---|---|
| DIY cleaning | Lower cost; fast action for small, intact, accessible ceiling mold after moisture fixes | Higher exposure risk if PPE/containment is insufficient; regrowth if moisture remains |
| Professional assessment/remediation | Better containment planning; more reliable material assessment for hidden contamination and water damage | Higher cost; timelines depend on scope and access; may still require structural repairs |
If you’re in doubt about ceiling mold extent in 2026—especially if there’s an attic, duct run, or wall cavity involved—professional inspection can save money by preventing repeated partial fixes.
What can go wrong (common mistakes and edge cases)
Most problems with ceiling mold come from the cleanup method itself (spreading spores, damaging finishes) or from skipping the moisture repair step. If you correct only one part—usually the visible mold—you often pay again.
Scrubbing techniques that aerosolize material can increase airborne spores, which is why gentle wiping and wet methods are preferred for many ceiling mold cleanups.
Mold cleanup can be harmful if chemicals are mixed or if ventilation/PPE are inadequate during overhead work.
– Using bleach incorrectly: it can damage some ceiling finishes and may not penetrate porous materials; also, it can create harmful fumes when mixed with other products.
– Scrubbing without protection: dry brushing or aggressive sanding can spread mold spores into the air.
– Cleaning while the leak/humidity issue remains: this guarantees the mold returns even if the visible spots are removed.
Common edge cases for ceiling mold
– “It looks dry now.” Ceiling mold can remain dormant but reappear with the next humidity cycle (winter condensation, seasonal leaks, HVAC changes).
– Paint over mold. Sealing over without cleaning and moisture repair can trap contamination and lead to ongoing odor or renewed staining.
– Hard-to-identify materials. If the ceiling is textured, older plaster, or has compromised substrate, “surface cleaning” may not remove mold growth in the material.
Respirator and airflow mistakes
If you use a respirator, fit and seal matter. OSHA’s respiratory protection standard (29 CFR 1910.134) requires an effective respirator program including fit testing for workplaces; for home use, you should still follow manufacturer instructions closely and prioritize a tight seal (OSHA, 29 CFR 1910.134). In 2026, the “wrong fit” problem remains one of the most common failure modes for ceiling mold DIY.
Verdict: When DIY cleaning makes sense (and when to skip it)
DIY cleaning is a sensible choice for ceiling mold only when the area is small, the ceiling surface is intact, and the moisture problem is fixed. If the mold is widespread, the ceiling material is damaged/porous, or it keeps coming back, skip DIY cleaning and treat it as a moisture repair + remediation project.
EPA guidance generally treats larger mold problems (commonly those exceeding about 10 square feet) as cases where professional remediation should be considered.
Persistent regrowth after cleaning strongly indicates an ongoing moisture source rather than a one-time surface contamination issue.
DIY cleaning is reasonable for small, contained mold spots on intact, non-crumbly ceiling surfaces—especially when you’ve also fixed the moisture problem. Skip DIY (or pause and get help) if the area is large, the ceiling material is damaged/porous beyond surface staining, you have ongoing leaks you can’t stop, or anyone in the home has significant respiratory sensitivity.
If you’re unsure about the ceiling type or the extent of growth, get a moisture inspection (often using moisture meters and visual inspection, sometimes infrared/thermal assessment) before you clean again—especially if the mold on ceiling keeps returning in 2026.
Mold-on-ceiling quick checklist (scan/save)
Use this scan list right after you decide how to handle your ceiling mold. It keeps you aligned with safe exposure control and moisture-first thinking.
If you don’t fix the underlying water source, ceiling mold can return even after careful cleaning.
Avoid dry brushing/sanding; use ventilation, PPE, and wiping so you don’t aerosolize mold.
– ☐ Fix moisture source (leak/condensation/ventilation)
– ☐ Ventilate room; keep people/pets out
– ☐ Wear gloves + eye protection + respirator
– ☐ Choose cleaner for ceiling finish; follow product directions
– ☐ Scrub/wipe; don’t dry-sand or dry-brush
– ☐ Fully dry area afterward
– ☐ Monitor for regrowth over 30 days
Sources
– U.S. Environmental Protection Agency (EPA) — “Mold and Moisture Control” / “Mold Remediation Guidance” (official EPA guidance on moisture control and remediation thresholds)
– U.S. Centers for Disease Control and Prevention (CDC) — “Mold” (official CDC guidance on mold cleanup principles and prevention)
– NIOSH — N95 respirator performance criteria (for particle filtration fundamentals)
– OSHA — 29 CFR 1910.134 Respiratory Protection (respirator program and fit considerations)
– Manufacturer Safety Data Sheet (SDS) and label directions for the specific cleaner you use (chemical safety and “do not mix” warnings)
Ceiling mold cleanup works when you combine correct exposure control, gentle surface cleaning, and—most importantly—real moisture repair. If you can stop the water source and keep humidity controlled, small spot treatment can be effective; if the ceiling is damaged, the area is large, or the mold returns, the smarter move in 2026 is to inspect deeper and remediate with the right containment and repairs.
Frequently Asked Questions
What is the safest way to clean mold on a ceiling?
Before cleaning, ventilate the room and wear protective gear like gloves, eye protection, and an N95 mask or respirator—especially if the mold is more than a small patch. Use a HEPA-filter vacuum if available to reduce spores, then clean the affected area with a suitable mold cleaner or detergent solution. Avoid dry-scrubbing or using only bleach, and after cleaning, dry the ceiling completely to prevent mold from returning.
How do I remove black mold from my ceiling without spreading spores?
To avoid spreading mold spores, keep the area contained by turning off HVAC to that room if possible and working carefully without aggressive brushing. Use damp cleaning methods—spray the cleaner lightly and wipe, rather than scrubbing hard or letting materials crumble. Afterward, dispose of contaminated wipes and materials in sealed bags, and thoroughly dry the area; if the affected area is large or returns quickly, consider hiring a professional.
Why does mold keep coming back on my ceiling after I clean it?
Mold usually returns when the moisture source isn’t fixed, such as leaks from the roof, plumbing issues, condensation from poor ventilation, or high indoor humidity. After removing visible mold, inspect for water stains, bubbling paint, roof leaks, or damp drywall, and repair the underlying problem. Use a dehumidifier or improve airflow (fans/ventilation) to keep indoor humidity generally below 50% to stop future ceiling mold growth.
Which household products work best for cleaning mold on a painted ceiling?
For many painted or sealed surfaces, a detergent solution or a commercial mold remover is often effective and less damaging than harsh chemicals. You can use diluted bleach (typically around 1 cup per gallon of water) on non-porous surfaces, but it may be less effective on porous drywall and doesn’t address moisture. If you’re dealing with ceiling drywall or textured paint that has absorbed moisture, the “best” approach is often cleaning the surface plus addressing the moisture, and sometimes replacing damaged materials.
Best practices for cleaning mold on ceiling drywall vs. tile or plaster?
Mold on non-porous materials like tile or sealed plaster can often be wiped clean after proper protection and drying. Mold on porous materials such as drywall typically requires more caution—if the material is heavily affected, it may need to be cut out and replaced, not just scrubbed. In both cases, thoroughly dry the area after cleaning, and if you notice a persistent musty odor, worsening staining, or widespread growth, it’s best to call a mold remediation professional.
📅 Last Updated: October 16, 2026 | Topic: how to clean mold on ceiling | Content verified for accuracy and freshness.
References
- A Brief Guide to Mold, Moisture and Your Home | US EPA
- Mold Remediation in Schools and Commercial Buildings Guide: Chapter 1 | US EPA
- https://www.cdc.gov/mold/default.htm
- https://www.cdc.gov/niosh/topics/mold/
- https://www.osha.gov/controlling-mold-growth
- https://www.who.int/publications/i/item/9789289002133
- https://www.hud.gov/program_offices/healthy_homes/mold
- https://scholar.google.com/scholar?q=how+to+clean+mold+on+ceiling Google Scholar
- https://scholar.google.com/scholar?q=mold+remediation+guidelines+home+cleanup+PPE Google Scholar
- https://scholar.google.com/scholar?q=small+area+mold+cleanup+procedure+guideline+EPA+CDC Google Scholar
