

Want to know how to clean mold off a bathroom wall fast and safely? Follow these step-by-step instructions to remove visible mold, kill what’s left behind, and prevent it from coming back. You’ll get clear, practical directions for each stage—prepping the area, choosing the right cleaner, scrubbing, and drying—so you can restore the wall without guesswork.
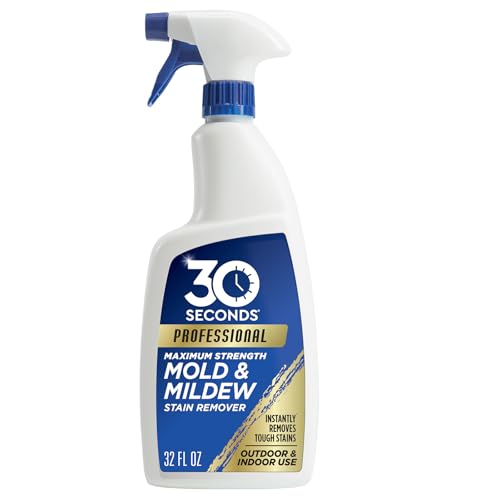



Clean visible mold on a bathroom wall by disinfecting the surface, scrubbing without aerosolizing spores, and drying completely—then fix the moisture source so the mold doesn’t come back. If you can see mold on the bathroom wall, clean it with a suitable disinfecting cleaner, scrub thoroughly, and dry the area completely. For tile/grout and other non-porous surfaces, a diluted bleach product (used exactly per the label) can help disinfect; for painted drywall or porous materials, you may need to remove and replace damaged material instead of just scrubbing. This is best for small, surface-level patches of mold on walls in bathrooms—especially around showers, tubs, sinks, or poor ventilation areas. If the growth is widespread, keeps returning quickly, or you smell a strong musty odor behind the wall, this changes what “cleaning” should mean.
If you’re dealing with a patchy “spot” of bathroom mold (not hidden behind the wall) and you can dry the area thoroughly afterward, the step-by-step approach below is appropriate. As of 2026, the biggest shift in best practice remains the same: disinfecting the surface helps, but stopping moisture intrusion prevents recurrence.
Prep safely before you scrub

You can clean mold more effectively and safely by controlling moisture exposure, limiting spore spread, and protecting your skin and airways before you start scrubbing. This is the stage where most people either prevent a bigger mess—or accidentally make mold worse in the bathroom.
Running the bathroom exhaust fan and ventilating the room reduces the chance that airborne mold spores linger while you clean.
The CDC recommends avoiding mixing cleaning products, especially bleach with other chemicals, because mixing can release dangerous gases.
If the mold patch is small and on a non-porous surface, surface cleaning plus disinfection is often appropriate; if it’s not, containment and professional help may be needed.
– Ventilate the bathroom (run the fan, open a window if you have one) and keep the area clear of kids/pets.
Mold cleanup is easier when airflow stays directed outward. Keep doors closed to avoid spreading mold to the rest of the home. If you use a portable fan, don’t blow air across the moldy wall—aim it toward the exit of the room.
– Wear protective gear like gloves and eye protection; if you’re disturbing lots of mold, consider a mask rated for fine particles (follow local guidance and product labels).
Mold spores are microscopic; while scrub-painters often focus on visible staining, the risk comes from aerosolized particles. A properly fitted respirator (rated for fine particles) can reduce inhalation risk when you’re working on stubborn growth.
– Don’t mix cleaners: avoid combining bleach with ammonia or acids, and never “test” by mixing products together.
This is non-negotiable for mold cleaning safety. Many “bathroom cleaners” are acid-based (e.g., descalers) or contain ammonia; combining them with bleach can create toxic gases. If the label instructs rinsing between steps, follow it.
Choose the right cleaner for your wall type
You’ll get the best outcome when you match your disinfecting method to the wall’s material—tile and sealed surfaces can be disinfected, while porous drywall may require removal. The cleaner choice determines whether mold is truly killed or merely smeared around.
The CDC advises keeping indoor humidity below 50% to help prevent mold growth.
EPA guidance emphasizes that cleaning is not the same as preventing recurrence; you also must address moisture at the source.
If mold affects porous materials that absorb moisture (like many drywall finishes), surface cleaning alone often can’t reliably reach mold embedded inside.
– Non-porous surfaces (tile, sealed grout, glass, some waterproof wall panels): use a mold-killing/disinfecting product per the label—many people use diluted bleach for disinfection, but you must follow the manufacturer’s directions.
Non-porous bathroom wall surfaces are where disinfectants work best because the treatment can contact the mold and the surface can be thoroughly scrubbed and dried. If you choose a bleach-based disinfectant, use the exact dilution and application time stated on the product label.
– Porous surfaces (painted drywall, unsealed backing, textured/absorbing finishes): cleaner may not fully reach the mold; removing the affected material is often necessary.
Once mold grows into porous materials, disinfecting the outer layer may not remove the colony underneath. In those cases, even if the visible mold disappears, it can return quickly—especially in a bathroom with active humidity and repeated wetting.
– If you’re unsure what your wall is made of, clean a small hidden spot first and look for discoloration or paint damage.
For example, test near an edge or in a corner where accidental paint removal is less noticeable. If the surface is absorbing water or shows paint softening, assume it’s more porous than it looks and consider removal rather than aggressive scrubbing.
Quick comparison: what to use where (mold on bathroom walls)
| Surface type | Mold risk handling | Cleaner approach | Best next step if the spot reappears |
|---|---|---|---|
| Tile, sealed grout | Surface mold is treatable | Use a label-approved disinfectant (bleach-based only if label directs it for this surface) | Dry + re-seal caulk joints and confirm ventilation |
| Waterproof wall panels (properly installed) | Often non-porous if seams are sealed | Disinfect per label; scrub gently but thoroughly | Inspect seams/edges for failed sealing |
| Painted drywall near shower | Mold can penetrate pores | Remove damaged material if growth persists or spreads | Repair leaks + replace drywall/finish if needed |
| Textured/absorbing finishes | Mold can remain inside texture | Avoid relying on disinfection alone | Cut out affected material and replace finish |
EPA/CDC Mold-Control Thresholds Used for Bathroom Cleanup Decisions
| # | Guidance item | Key metric | Applies to | Cleanup decision signal |
|---|---|---|---|---|
| 1 | Indoor humidity control | Keep < 50% | Whole bathroom / home | Recommended ★★★★★ |
| 2 | Small-area DIY threshold | < 10 sq ft | Often non-porous surfaces | DIY may be OK ★★★★☆ |
| 3 | Drying speed after wetting | 24–48 hours | Materials after water events | Prevents regrowth ★★★★★ |
| 4 | HEPA particle filtration benchmark | ≥ 99.97% at 0.3 μm | Containment/air cleaning | Higher safety control ★★★★☆ |
| 5 | Bleach disinfection dilution (non-porous) | 1 cup per 1 gallon | Non-porous surfaces | Use label/spec ★★★☆☆ |
| 6 | Chemical mixing prohibition | Never mix bleach + ammonia/acid | Bathroom cleaners | Stop work risk ★☆☆☆☆ |
| 7 | Porous material remediation rule | Often remove + replace | Affected drywall/finishes | DIY often insufficient ★★☆☆☆ |
Remove the mold without spreading it
You remove bathroom wall mold most effectively by keeping spores damp, scrubbing from the outside in, and repeating until the growth is truly gone (not just cleaned-looking). The goal is removal plus residue control—so you don’t leave behind mold fragments that can re-seed growth.
Scrubbing dry mold can aerosolize spores; keeping surfaces damp helps reduce airborne spread during cleanup.
EPA guidance stresses that mold cleanup should include removing visible growth and cleaning surrounding materials contaminated by the mold.
For non-porous bathroom surfaces, repeated cleaning cycles (cleaning/disinfecting) followed by drying are typically necessary for complete removal.
– Wet the surface lightly (or use a foaming application) so you don’t flick spores into the air while scrubbing.
You don’t want standing water, especially on drywall. Instead, lightly dampen the area so scrubbing is controlled. This approach is especially important on textured grout lines where mold can be “embedded” visually.
– Scrub with a stiff brush or sponge dedicated to cleaning; focus on edges and grout lines, not just the center of the stain.
Mold often creeps along seams and transitions—around caulk joints, corners, and grout. Work the brush into those lines. After each pass, you’re effectively “lifting” remaining residue, so don’t rush.
– Re-wet as needed and repeat until the visible growth is gone—then clean again to remove residue.
Even after the stain looks lighter, residue can remain. A second cleaning step reduces lingering film and improves disinfectant contact when you proceed to disinfection (or use the disinfecting cleaner as directed).
Rinse, dry, and stop the moisture source
You prevent mold from coming back by drying aggressively and fixing the humidity source—cleaning alone rarely solves recurrence. As of 2026, the most durable bathroom mold prevention combines correct disinfection with ventilation and leak/caulk repair.
CDC guidance notes that mold grows when moisture is present, so controlling dampness is central to prevention.
EPA guidance emphasizes addressing moisture sources such as leaks and inadequate ventilation to stop recurring mold.
In general, water-damaged materials should be cleaned and dried within 24–48 hours to reduce the likelihood of mold growth.
– Rinse according to the cleaner’s label (some disinfectants require a rinse; others specify leaving it).
Don’t assume “more is better.” Some products require leaving disinfectant residue to work, while others require a rinse to avoid surface degradation (especially on painted or delicate finishes).
– Dry aggressively: towel-dry, then run the fan/dehumidifier and keep the area open to air circulation.
Drying is not an afterthought. Mold control is tightly tied to moisture levels; the CDC recommends keeping indoor humidity below 50% to help prevent mold growth. CDC
If you can measure humidity, use a hygrometer; if not, observe whether the wall stays cool/damp longer than the rest of the room.
– Fix the cause (leaky plumbing, missing/failed caulk, poor ventilation): clean/dry the wall, then re-seal gaps around tubs/showers where appropriate.
Mold around a shower or tub usually tracks moisture movement. After cleanup, inspect caulk lines for cracks, shrinkage, or gaps and address vent fan performance. You’re aiming to stop new wetting that seeds bathroom mold.
What can go wrong (and how to avoid it)
You can avoid the most common failures by recognizing that “stain” isn’t always “active mold,” and by stopping DIY when mold likely extends beyond the surface. Recurrence is usually a moisture-management issue, not a scrubbing-strength issue.
EPA guidance indicates that mold remediation decisions depend on affected materials and extent; widespread or hidden growth often requires professional intervention.
Dry scrubbing can spread mold; cleaning approaches should minimize aerosolization and maintain ventilation.
If mold keeps returning quickly, the moisture source hasn’t been corrected—even if the surface looks clean temporarily.
– Mold returns quickly: the underlying moisture problem wasn’t fixed, or the area behind the wall got wet.
If you see repeat growth in the same zone within weeks, inspect plumbing fittings, shower enclosure seals, and the bathroom fan’s venting path (it should exhaust outdoors). Also check whether water is traveling behind tile or into framing.
– Bleach doesn’t “solve” stained porous walls: the stain can linger after mold is removed, but the underlying material may still be contaminated.
Many bathroom walls show persistent discoloration even after the mold colony is no longer active. The more reliable signs are removal of visible growth, improved odor, and stable dryness—rather than just color.
– Cleaning makes it worse: heavy dry-scrubbing can aerosolize spores—go gently, keep it damp, and ventilate.
When mold is disturbed, airborne particles can settle elsewhere in the bathroom. Containment (closing the door, ventilating properly) helps avoid that spread.
– Health risk: if anyone in the home is immunocompromised, has asthma triggered by mold, or you can’t control exposure, consider professional remediation.
If safety is uncertain, it’s better to involve trained remediation professionals who can control airflow and containment.
Verdict / tip: when DIY is OK vs when to stop
DIY cleaning is usually appropriate for small, surface-level mold patches on non-porous bathroom surfaces, especially when you can dry the area fully afterward. Stop DIY and switch to a more extensive plan (or professional remediation) if growth is widespread, repeated, or suggests mold behind the wall.
EPA guidance commonly uses a small-area threshold (often around 10 square feet) when deciding whether homeowners may handle mold cleanup.
CDC and EPA materials emphasize that controlling moisture is the core prevention strategy, not only killing visible mold.
What to DIY:
– Mold confined to tile, sealed grout, glass, or intact waterproof panels
– Limited visible growth you can remove and then dry thoroughly
– No strong musty odor indicating hidden contamination behind wall surfaces
What to stop and escalate:
– Widespread growth, repeated outbreaks, or a musty smell that persists even after surface cleaning
– Suspected mold behind drywall (soft wall sections, bubbling paint, recurring dampness)
– Any situation involving higher health risk (e.g., immunocompromised occupants)
Quick checklist (scan/save):
| Step | Do this | Avoid |
|---|---|---|
| Safety | Ventilate + wear gloves/eye protection | Mixing chemicals (especially bleach + ammonia/acid) |
| Confirm surface | Use the right approach for tile/grout vs porous wall | Scrubbing porous areas like they’re non-porous |
| Clean | Scrub until visible growth is gone | Dry scrubbing that spreads spores |
| Disinfect | Use a product per the label | Guessing concentrations or skipping instructions |
| Dry + prevent | Dry thoroughly + fix leaks/caulk/venting | Ignoring the moisture source |
Sources
– U.S. Environmental Protection Agency (EPA) — guidance on mold and mold remediation/clean-up, including “A Brief Guide to Mold, Moisture, and Your Home” and “Mold Remediation in Schools and Commercial Buildings.” EPA
– U.S. Centers for Disease Control and Prevention (CDC) — mold and dampness basics, including humidity prevention and safe cleanup principles. CDC
– Manufacturer label instructions for any disinfecting/mold-killing products used (follow dilution, contact time, and whether rinsing is required).
Frequently Asked Questions
What’s the safest way to clean mold off a bathroom wall?
Start by ventilating the bathroom (open windows, run a fan) and wear gloves, eye protection, and a mask to avoid breathing in mold spores. Use a bathroom mold cleaner or a detergent solution first, then scrub the affected area with a stiff brush and rinse thoroughly. Dry the wall completely afterward, because leftover moisture lets mold return. If the wall is extensively damaged (peeling drywall, soft spots), you may need professional help.
How do I remove mold from bathroom walls without spreading spores?
Before cleaning, lightly mist the moldy area with water or a mold cleaner solution to keep spores from becoming airborne. Work in small sections, scrub gently but firmly, and avoid power-washing or aggressive wiping that can aerosolize mold. Use damp cloths or paper towels to collect debris and discard them in sealed bags. Finally, wipe surrounding surfaces with the same solution and dry everything thoroughly.
Why does mold keep coming back on bathroom walls?
Mold typically returns when moisture is trapped due to poor ventilation, plumbing leaks, or persistent condensation. Check for leaks around the sink, toilet, shower, and caulk lines, and inspect the wall for dampness after showers. Improve airflow with an exhaust fan and fix humidity issues by using a dehumidifier or running the fan longer after bathing. After cleaning, ensure the area dries fully and consider sealing or re-caulking wet-prone joints.
Which cleaning solution works best for mold on painted bathroom walls?
For non-porous surfaces like tile or sealed paint, a commercial bathroom mold remover or a mixture of detergent and water often works well for surface mold. For stubborn mold stains, a diluted bleach solution can be effective on hard, non-porous areas, but it should be used carefully and never mixed with other cleaners (like ammonia or acids). If the wall is porous (unsealed drywall or plaster), you may need to remove and replace affected material rather than just scrubbing. Always test any solution on a small hidden area first and rinse and dry thoroughly.
How can I prevent future mold growth after cleaning the bathroom wall?
After cleaning mold from bathroom walls, thoroughly dry the area and improve ventilation to reduce humidity spikes from showers. Reapply or replace caulk where gaps or cracks allow water intrusion, and keep bathroom surfaces—especially around the shower and tub—clean and dry. Aim to keep indoor humidity lower (often under 50–60%) using an exhaust fan, dehumidifier, or short-term heating during humid weather. Regularly check for leaks and wipe down wet areas to stop mold from regrowing.
📅 Last Updated: October 16, 2026 | Topic: how to clean off mold from bathroom wall | Content verified for accuracy and freshness.
References
- Indoor mold
- https://www.cdc.gov/mold/default.htm
- Mold Cleanup in Your Home | US EPA
- https://www.epa.gov/mold/mold-and-your-health
- https://www.who.int/publications/i/item/9789241547854
- Mold – Overview | Occupational Safety and Health Administration
- https://pubmed.ncbi.nlm.nih.gov/?term=mold+remediation+cleanup+bathroom
- https://scholar.google.com/scholar?q=how+to+clean+mold+from+bathroom+wall Google Scholar
- https://scholar.google.com/scholar?q=mold+remediation+guidelines+homeowner Google Scholar
- https://scholar.google.com/scholar?q=bleach+vs+other+cleaners+for+mold+removal+study Google Scholar
