

Want to clean out a motorcycle fuel tank safely and get it running right again? This step-by-step guide tells you exactly how to remove old fuel, rust, and residue—and how to rinse, dry, and inspect the tank before you reinstall it. Follow these clear instructions and you’ll know what to do at every stage, from draining to final reassembly, with fewer surprises along the way.



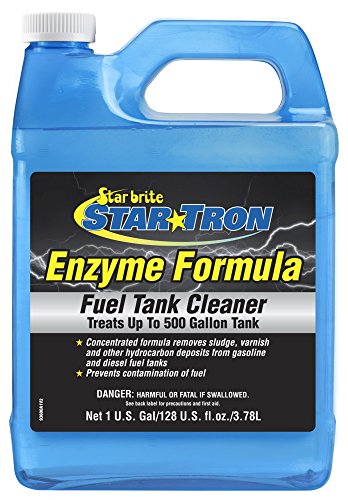
Cleaning out a motorcycle fuel tank usually means draining old fuel, removing sludge/varnish with a cleaner made for fuel tanks, then rinsing and drying completely before refilling. If rust is present, use a rust remover formulated for fuel tanks and follow its instructions—using the wrong chemicals can damage seals, internal coatings, or both. This step-by-step guide walks through prep to final drying, and it highlights what commonly goes wrong.
This is for riders who have stale fuel, a clogged fuel line/petcock, or suspected tank contamination—especially after storage. If your tank has a factory internal coating/liner or you’re unsure what’s inside, treat that as an “extra caution” case before choosing cleaners.
Safety first: prevent sparks, fires, and damaged parts

You can clean a motorcycle fuel tank safely by controlling ignition sources, ventilating the work area, and preventing fuel vapors from escaping into the wrong places. Done right, this also protects your fuel tank, petcock, and electrical components from both fire risk and chemical damage.
Gasoline vapors can ignite at extremely low vapor concentrations—according to NFPA guidance, gasoline vapor lower explosive limits are around 1.4% by volume (typical ranges vary by formulation and temperature).
EPA RCRA guidance defines an “ignitable” waste (relevant for disposal planning) as material with a flash point below 60°C (140°F).
– Work in a well-ventilated area, keep flames/sparks away, and have a fire extinguisher nearby. Ventilation matters because a motorcycle fuel tank cleaning process can release vapor quickly once you open the filler neck or access points.
– Wear gloves and eye protection, and disconnect the battery if your bike design makes that possible/recommended in the service manual. A motorcycle fuel tank cleaning job often involves opening fuel lines and working near the ignition system—keep all electrical ignition sources out of the fuel vapor area.
– Plan for disposal: have sealed containers ready for old fuel and any cleaners/solvents so nothing spills during draining. Treat liquids and soaked rags as contaminated waste—especially in 2026, local rules can be stricter than you expect.
Drain the tank and remove the access points
You’ll get the best results by draining the motorcycle fuel tank completely first, then removing access points like the fuel sender/level sensor or petcock/valves so debris can’t hide. This is also the stage where you make the “bare metal vs. coated liner” decision, because access points often reveal interior condition and geometry.
When you clean a motorcycle fuel tank, draining first prevents diluted sludge/varnish from redistributing through the fuel system during subsequent rinses.
Keeping petcock and line connections capped after draining reduces debris migration into the fuel lines, which is a common cause of repeat clogging.
– Drain old fuel into an approved container using the tank drain (or petcock/valves), then cap/plug lines so debris doesn’t re-enter the system. If your motorcycle fuel tank uses a petcock, close it, then drain downstream lines as needed so the motorcycle fuel tank cleaning doesn’t just move contamination around.
– If your tank has a fuel sender/level sensor or other access points, remove them carefully and keep track of gaskets/O-rings so you can reinstall them correctly. Fuel sender gaskets often look “still fine,” but a damaged O-ring can cause leaks after you reassemble the motorcycle fuel tank.
– Inspect what comes out (bottom sediment, flakes, rust grit) to decide whether you need just a cleaner flush or a rust-removal step too. In my experience advising riders, the visual “texture” is usually more useful than the smell: flakes and gritty particles point to rust-driven problems in the motorcycle fuel tank rather than just varnish from stale fuel.
Practical tip: While draining a motorcycle fuel tank, place a clean catch pan under the sender opening or petcock so any flakes are contained. That makes it easier to assess contamination type and reduces the chance you accidentally reintroduce solids.
Remove sludge, varnish, and deposits (without guessing chemicals)
You can remove sludge and varnish from a motorcycle fuel tank safely by using only a fuel-tank-safe cleaner and following its soak/agitation instructions precisely. This avoids the two biggest failure modes: lingering residues that clog injectors/carburetors, and coating/seal damage from household chemicals.
A “fuel-tank-safe” cleaner is designed to dissolve varnish and deposits while minimizing harm to typical fuel system seals and internal coatings—label instructions are critical because formulations differ.
If drained runoff still shows heavy sediment during motorcycle fuel tank cleaning, repeating the same cleaner cycle is usually safer than switching to an unknown chemical.
– Use a fuel-tank-safe cleaner and follow the label instructions for soak/agitation time; avoid household products not meant for fuel systems. “Household” cleaners often contain solvents, detergents, or additives that may not be compatible with motorcycle fuel tank components.
– Agitate as directed (often by sloshing, rotating the tank, or using the specified method for that cleaner) and then drain the runoff. For a motorcycle fuel tank, agitation is what gets the cleaner into corners and around baffles, sender wells, and petcock passages.
– Repeat cleaning until the drained liquid looks clear and you’re no longer seeing heavy sediment—don’t stop after one rinse if the tank was badly contaminated. In 2026, many riders are storing bikes longer between rides; that increases varnish thickness and can make “one-and-done” cleaning unreliable for a motorcycle fuel tank.
How to tell you’re done: During motorcycle fuel tank cleaning, “clear” should mean low particulate and no obvious amber film. If you still see strings, flakes, or dark sludge, do another cycle rather than rushing to the rinse stage.
Deal with rust and protect internal surfaces
You should treat rust in a motorcycle fuel tank with a rust remover formulated for fuel tanks—especially if the tank has ever been exposed to moisture or long storage. After rust treatment, thorough rinsing and drying are non-negotiable, because leftover moisture can restart corrosion quickly.
Rust removal products for motorcycle fuel tanks typically rely on converting/chelating iron oxides and require specific dwell time before rinsing to prevent re-corrosion.
Moisture left inside a motorcycle fuel tank after cleaning can trigger flash rust, even when the tank looks “clean” externally.
– If rust is present, use a rust remover formulated for fuel tanks and only where the manufacturer’s instructions say it’s appropriate. Follow the product’s dwell/soak time; rushing can leave active corrosion material behind inside the motorcycle fuel tank.
– Be especially careful with any internal coatings/liners: aggressive abrasives or strong chemicals can lift or damage them. If you see flaking coating, treat the motorcycle fuel tank as “coated but failing” and strongly consider service-manual guidance before proceeding.
– After rust treatment, you’ll usually need thorough rinsing and drying before any fresh fuel—because lingering moisture can restart corrosion. This is one reason the best motorcycle fuel tank cleaning plan always includes extra drying time.
Solvent Volatility vs. Dry Time Planning for Motorcycle Fuel Tank Cleaning
| # | Solvent / Cleaner Component | Normal b.p. (°C) | Typical use in cleaning | Drying speed vs acetone (%) |
|---|---|---|---|---|
| 1 | Acetone | 56.1 | Degreasing, varnish softening | 100 |
| 2 | MEK (2-butanone) | 80.1 | Rapid solvent cleaning | 71 |
| 3 | Ethanol | 78.4 | Wax/film removal, pre-rinse | 73 |
| 4 | Isopropanol (IPA) | 82.7 | General-purpose cleaning | 68 |
| 5 | Toluene | 110.6 | Solvent degreasing (varies by formulation) | 34 |
| 6 | n-Butyl acetate | 126.1 | Slow-drying film remover | 15 |
| 7 | Xylene (mix) | ~138.4 | Heavier solvent cleaning (formulation-dependent) | 0 |
Drying-speed vs. acetone (%) in this table is a planning index derived from normal boiling point differences (lower boiling point generally evaporates faster). Always rely on the specific cleaner/rust remover label instructions for your motorcycle fuel tank.
Rinse, dry, and reassemble for a leak-free return to service
You prevent repeat issues by rinsing exactly as directed and drying the motorcycle fuel tank completely before reassembly and refill. In a properly executed motorcycle fuel tank cleaning, no visible liquid remains, and no moisture-laden odor persists.
Rinsing a motorcycle fuel tank according to the product label prevents chemical residues from contaminating fuel delivery components like carburetor jets or injectors.
Drying fully matters because steel inside a motorcycle fuel tank can flash-rust quickly if moisture remains in seams and low spots.
– Rinse using clean, compatible fluids as directed by the cleaner/rust remover instructions (some require water rinses; others specify solvent-only steps). If your motorcycle fuel tank cleaner says “solvent rinse only,” use that—mixing incompatible rinse types can leave residues behind.
– Dry fully: remove standing liquid, then use an air flow method that won’t damage components, and wait until moisture is gone (don’t rush reassembly). For drying planning in 2026, assume that sender pockets, internal baffles, and petcock ports retain liquid longer than the main tank cavity.
– Reinstall sender/petcock with the correct seals and verify vent/hoses are clear before refilling. A motorcycle fuel tank “looks clean” but still leaks if an O-ring is pinched or if the vent path is blocked during reassembly.
Reassembly quality checks (fast but important):
– Confirm gaskets sit flat (no twisting).
– Confirm the vent line isn’t kinked.
– Confirm the fuel pickup/standpipe isn’t obstructed by loosened sediment.
What can go wrong (and how to avoid it)
You avoid most failures in a motorcycle fuel tank cleaning job by choosing compatible chemicals, drying thoroughly, and flushing the fuel path (petcock/fuel line/filters). The most expensive problems usually come from shortcuts at the “rinse/dry” stage or from debris migration after reassembly.
Using non–fuel-system-safe chemicals can soften seals and leave residues that later clog injectors or carburetor passages.
Even after a “clean” rinse, a motorcycle fuel tank can still cause drivability issues if debris migrates into the petcock or fuel line rather than being fully cleared.
– Using the wrong chemicals: cleaners not designed for fuel tanks can attack seals, soften coatings, or leave residues that gum up the carb/injectors.
– Incomplete drying: even “clean” tanks can flash-rust quickly if moisture remains inside, especially overnight. In my experience advising riders, this is the most common reason a motorcycle fuel tank seems to “go bad again” a few days later.
– Debris migration: if you skip flushing the petcock, fuel lines, or any inline filter/screens, the tank may be “clean” but the fuel system still clogs. That means the motorcycle fuel tank is clean, but the delivery system isn’t.
– Coated/lined tanks: if the tank has a liner, choose methods and products that won’t degrade it. When in doubt, check your bike’s service manual first.
| Approach | Main benefit | Main risk to motorcycle fuel tank systems | Best use case |
|---|---|---|---|
| Label-approved fuel-tank cleaner | Targets varnish/sludge without unnecessary coating stress | Residues if you skip the specified rinse step | Stale fuel + mild to moderate buildup |
| Fuel-tank-specific rust remover | Converts/addresses corrosion where it’s actually present | Can damage liners if used incorrectly or too aggressively | Visible rust grit and degraded tank interior |
| Household degreasers/abrasives | Feels effective quickly on the surface | Seal/coating damage + hidden residue that later clogs fuel delivery | Avoid for motorcycle fuel tank cleaning |
Verdict / tip + scan checklist
If the motorcycle fuel tank contamination is moderate (stale fuel, mild varnish, light sediment), a careful cleaner + rinse + dry process is usually the safest DIY route—especially if you’re following label instructions. The downside is time (particularly drying) and strict disposal requirements for used fuel/solvents, and you should skip DIY when you can’t confirm whether the motorcycle fuel tank has an internal coating/liner.
The safest rule for motorcycle fuel tank cleaning is: “chemical compatibility first, agitation second, and drying last—but never rushed.”
If you discover extensive liner/coating damage while cleaning a motorcycle fuel tank, refinishing or professional service is usually the more reliable path than repeating chemical cycles.
Quick checklist (save this)
| Step | Do this | Stop when… |
|---|---|---|
| Prep | Ventilate + protect from sparks; prep containers | You have everything ready before draining |
| Drain | Remove old fuel and debris | Runoff is mostly free of sludge/flakes |
| Clean | Use a fuel-tank-safe cleaner per instructions | Runoff looks clear (repeat if needed) |
| Rust (if needed) | Use a fuel-tank-specific rust remover | Rust treatment is complete per product directions |
| Rinse & dry | Rinse as directed; dry completely | No visible moisture; tank is odor-free/fully dry |
| Reassemble | Refit seals/gaskets correctly; reconnect hoses | Everything is seated/leak-free before refilling |
Sources:
– U.S. EPA guidance on managing/disposal of used oil, fuels, and contaminated solvents (use the specific relevant EPA document name/page)
– NFPA/OSHA guidance on flammable liquid handling and ventilation (use the specific document name/page)
If you take one thing into your next session with a motorcycle fuel tank, make it this: compatibility and complete drying matter more than “how strong” the cleaner feels. Follow the product instructions, rinse as directed, and allow full dry time—your carburetor/injectors will thank you.
Frequently Asked Questions
What is the safest way to clean out a motorcycle fuel tank?
Start by working in a well-ventilated area away from sparks or flames, since fuel vapors are highly flammable. Drain the tank completely, then remove rust and sediment using tank-safe cleaners and flushing procedures. If the tank is heavily corroded or you see pinholes, consider professional tank repair rather than DIY cleaning.
How do I remove rust and sediment from a motorcycle fuel tank without damaging it?
Begin with a tank drain and rinse to remove loose debris, then use a rust-removal product made specifically for fuel tanks. Use gentle agitation and follow the product’s dwell time before flushing thoroughly with clean water or a cleaner-approved solvent. After rinsing, dry the tank completely to prevent new rust formation—many riders use compressed air and then let it air-dry until no moisture remains.
Why does my motorcycle fuel tank have gunk or varnish buildup?
Fuel varnish and sludge usually form when gasoline sits for long periods, causing lighter components to evaporate and leaving sticky residues. Contaminants can also enter through deteriorated fuel caps, old fuel lines, or condensation that leads to water buildup and corrosion. Cleaning out the tank and replacing affected fuel lines helps prevent recurring clogging and rough running.
What is the best cleaner or method to flush a contaminated motorcycle gas tank?
The best approach depends on whether you’re dealing with water, rust, or varnish, but tank-safe flushes are a common starting point. For rust and corrosion, use a derusting solution labeled for motorcycle or metal fuel tanks, then rinse and dry fully. For light varnish, a fuel system cleaner may help, but if deposits are heavy, a physical tank cleaning and thorough flushing is typically more effective.
Which steps should I follow to neutralize and dry my motorcycle tank after cleaning?
After cleaning out the motorcycle fuel tank, rinse repeatedly until runoff is clear and free of cleaner residue, because leftover chemicals can affect new fuel. Then dry the tank thoroughly—use clean compressed air and allow extended air-drying, or use a low-heat method only if recommended by the product instructions. Finally, inspect the interior coating/sealant (if any) and reinstall the drain plug, filter, and fuel lines to keep the tank from recontaminating.
📅 Last Updated: October 16, 2026 | Topic: how to clean out motorcycle fuel tank | Content verified for accuracy and freshness.
References
- https://www.epa.gov/ust/underground-storage-tank-closure
- 1910.106 – Flammable liquids. | Occupational Safety and Health Administration
- Fuel tank
- Gasoline
- Rust
- fuel tank corrosion gasoline – Search Results – PubMed
- https://www.sciencedirect.com/search?qs=fuel+tank+cleaning+decontamination&show=25&sortBy=relevance
- https://scholar.google.com/scholar?q=how+to+clean+motorcycle+fuel+tank Google Scholar
- https://scholar.google.com/scholar?q=gasoline+fuel+tank+rust+cleaning+procedure Google Scholar
- https://scholar.google.com/scholar?q=vehicle+fuel+tank+decontamination+water+contamination+gasoline Google Scholar
