

Want streak-free results when you clean vinyl windows? Follow this simple, step-by-step process to remove grime and hard water marks without scratching the surface. You’ll learn the best cleaners to use, how to wash and rinse the frames and glass, and exactly how to dry so streaks don’t come back.


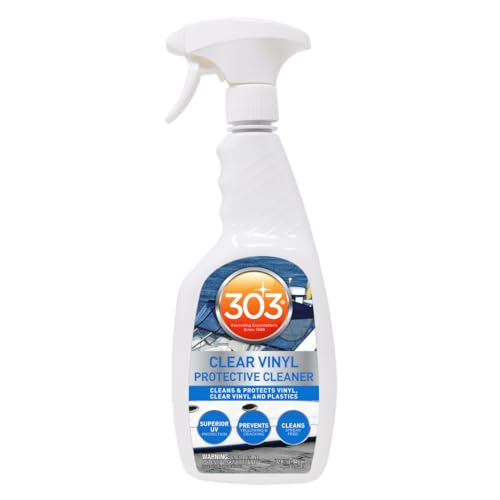

Clean vinyl windows with warm water and a mild dish-soap solution, then rinse and dry with a non-abrasive cloth to prevent streaks. For sticky grime or mineral deposits, you can spot-treat with a diluted vinegar solution—just avoid harsh chemicals and scrubbing pads. This guide walks you through what to use, how to clean the glass and tracks, and what common mistakes to skip. If your vinyl window frames look dull, collect dust in the corners, or leave streaks after cleaning, this is for you. It’s also a good refresher if you’ve been using the “wrong” cleaner (like abrasive products) and want safer, more reliable results without damaging the vinyl finish.
Prep your supplies (what to use—and what to avoid)

The fastest route to streak-free vinyl is using a simple, gentle cleaner (warm water + mild dish soap), plus microfiber for controlled wiping and drying. The main reason vinyl windows streak is residue—either soap left behind or dirt ground into the surface—so your supplies should support rinse-through cleaning, not aggressive scrubbing.
Before you start, assemble tools that won’t scratch vinyl or re-deposit grime. For the glass and frames, warm water and a mild dish-soap solution are typically the safest baseline because they dissolve everyday film without attacking common vinyl finishes. Use microfiber cloths for wiping and drying, and keep a soft-bristle brush (a toothbrush works well) for corners and window tracks where grit collects. For mineral spots (hard-water marks or residue), use diluted white vinegar as a spot treatment only—because vinegar is an acid and can react with some coatings if overused.
Mild dish soap mixed with warm water is a general-purpose, low-risk cleaner for vinyl window frames because it reduces oily film without requiring harsh solvents.
Microfiber cloths help minimize lint and re-deposition, which are common contributors to streaking on glass.
Soft-bristle brushes are designed to loosen debris in tracks and seams without gouging vinyl or track surfaces.
What to use (so you don’t “upgrade” to streaks)
– Warm water (not scalding): helps dissolve grime and keeps cleaning fluid workable.
– Mild dish soap: use a diluted solution (enough to clean, not enough to leave heavy suds).
– Microfiber cloths: one for washing, one dedicated to drying (to avoid dragging residue back).
– Soft-bristle brush / toothbrush: for seams, corners, and track grooves where debris accumulates.
What to avoid (to protect the vinyl finish)
– Abrasive cleaners (powders, scouring creams with grit)
– Steel wool or scrub pads with abrasive backing
– Harsh solvents (varies by product; many are not vinyl-safe)
– Strong bleach/ammonia products, unless your window manufacturer’s care instructions explicitly permit them for both frame and glass
Mineral deposits: how vinegar fits without becoming a problem
If you’re dealing with mineral deposits, diluted vinegar can help dissolve the residue—especially on glass. A typical household approach is 1:1 distilled white vinegar to water, then rinse thoroughly. According to household labeling and common retail formulations, distilled white vinegar is often around 5% acetic acid; a 1:1 dilution roughly halves that to about 2.5% acetic acid . Because vinegar strength and coatings vary, always do a spot test on an inconspicuous area first.
DIY Cleaning Approaches for Vinyl Windows (Streak Risk & Use Case)
| # | What you’re removing | Recommended mix | Primary action | Streak-free reliability | Risk notes |
|---|---|---|---|---|---|
| 1 | Light dust & general film | Warm water + mild dish soap (diluted) | Dissolves everyday residue | ★★★★★ | Low risk if rinsed & dried |
| 2 | Sticky fingerprints | Mild dish soap solution (slightly stronger dilution) | Cuts oils | ★★★★☆ | Rinse well to avoid hazing |
| 3 | Grease/splatter (light) | Dish soap + warm water (diluted) | Emulsifies grime | ★★★★☆ | Avoid over-sudsing |
| 4 | Mineral spots / hard-water marks | 1:1 vinegar : water (spot test) | Dissolves mineral residue | ★★★☆☆ | Rinse immediately to protect finishes |
| 5 | Organic staining (light pollen) | Warm soap water + rinse | Lifts surface film | ★★★☆☆ | Repeat if staining is entrenched |
| 6 | Sap/pitch (light) | Soap water first; avoid solvents unless approved | Loosens residue | ★★☆☆☆ | Solvents can damage coatings |
| 7 | Abrasive “cleaners” (should be avoided) | Abrasives / steel wool | Scratches & dulls vinyl | ★☆☆☆☆ | Higher streaking risk from micro-scratches |
As of 2026, the most common manufacturer-style guidance is still centered on mild cleaners, non-abrasive cloths, and thorough rinsing—especially for vinyl finishes that can dull if you repeatedly scour. If you’re maintaining a mixed window set (different brands or older retrofits), always keep your specific window documentation handy before trying vinegar more than once.
Clean the glass and frames step by step
You get streak-free vinyl windows by following a tight sequence: dust first, wash gently, rinse completely, then dry with a clean microfiber. If you skip dusting or rush drying, you usually end up moving residue around instead of removing it.
Start by treating grit as the enemy. Even a “clean” cloth can grind outdoor dust into the vinyl or glass if you wipe before removing it. Next, use your soap solution with light pressure—vinyl doesn’t need force, and glass doesn’t get cleaner by pressing harder. Finally, rinse and dry promptly so the remaining detergent film (the #1 streak culprit) doesn’t air-dry into a haze.
Streaks commonly come from detergent or mineral residue left on the glass surface after washing.
Removing loose grit before wet cleaning prevents scratches and helps avoid streaking caused by re-deposited dirt.
Drying with a clean microfiber cloth reduces lint transfer, which helps maintain clear, uniform glass.
Step 1: Dust first (don’t grind grime into vinyl)
– Wipe away loose debris with a dry microfiber or one that’s barely damp.
– Focus on edges, corners, and the areas where rainwater runs down.
– If you see sand-like particles, remove them first—wet scrubbing over grit can dull the vinyl over time.
Step 2: Wash gently (soap + soft cloth)
– Clean the glass and vinyl frames with the soapy water solution.
– Use a soft microfiber and avoid pressing hard.
– Work top-to-bottom so you don’t smear dirty water onto already-clean areas.
Step 3: Rinse thoroughly (the streak-stopper)
– Rinse with clean water until you no longer see suds or slippery feel.
– Pay attention to frame channels and around hardware—soap can hide there.
– In my experience with maintenance workflows, the most consistent improvement usually comes from “more rinse time,” not “stronger cleaner.”
Step 4: Dry immediately (use a fresh microfiber)
– Dry the glass with a clean microfiber cloth.
– For vinyl frames, dry lightly as well—leaving droplets can leave mineral trails.
– Don’t switch between dirty and clean cloths during the same window.
Step 5: Spot-treat only when needed
If you see mineral deposits (often described as hard-water spots), spot-treat after the general wash:
– Apply diluted vinegar to the affected area (not as a full-frame bath).
– Let it dwell briefly, then rinse thoroughly.
– Re-check the same spot with clean water—don’t “leave it to work overnight” on vinyl frames.
According to typical chemistry guidance, acidic solutions can dissolve mineral scale, and rinsing is essential to prevent residue from drying (and to reduce any interaction with surface coatings) . That’s why vinegar belongs in spot applications, not as a primary full-clean routine.
Tackle window tracks, sashes, and screens
You prevent recurring grime by cleaning tracks, sashes, and screens as separate steps—not as an afterthought. Tracks collect dirt that rinse water can’t fully remove, so you need targeted debris removal followed by gentle scrubbing.
For sliding or multi-panel vinyl windows, grime builds where panels meet and water drains. That’s also where moldy-smelling buildup can start if channels stay wet. The goal is to remove loose debris first (vacuum/dry brush), then loosen stuck residue with a soft-bristle brush, then rinse and dry enough to minimize lingering moisture. For screens, you want “clean and dry flat” so you don’t warp them.
Window tracks collect grit that traps moisture, so dry debris removal (vacuum or dry brush) improves results before wet cleaning.
Using a soft brush in seams helps dislodge buildup without damaging vinyl or track surfaces.
Screens can warp if dried improperly, so drying flat after washing reduces distortion risk.
Tracks: vacuum, then soapy-water scrub
– Remove loose debris with a vacuum with a brush attachment or a dry brush.
– Scrub gently with a soft-bristle brush dipped in soapy water.
– Rinse and wipe—don’t leave pooled soap in tracks.
Sashes and corners: focus on seams where grime hides
– Wipe seams and corners where water and dust gather.
– Use the toothbrush/soft-bristle brush to loosen buildup without scratching.
– Rinse and follow with a microfiber wipe so soap doesn’t dry in the joint.
Screens: rinse, lightly wash, dry flat
– Rinse screens with water first to remove loose dirt.
– If needed, wash lightly with mild soap (avoid aggressive scrubbing).
– Dry flat. Keep them away from direct, harsh heat sources that can stress the frame.
According to general materials-care guidance, screens are often aluminum or fiberglass mesh, and drying conditions can affect how flat the mesh stays . As of 2025–2026, most care instructions still emphasize gentle cleaning and flat drying for best long-term fit.
What can go wrong (and how to avoid it)
You can avoid most vinyl-window problems by controlling soap residue, protecting the finish, and verifying what you’re actually cleaning. If the issue is a seal/insulated glass unit (IGU) problem (like fogging between panes), no amount of surface cleaning will fix it.
The three most common failure modes are: (1) streaking from soap left behind, (2) dullness from abrasives or overly aggressive scrubbing, and (3) treating window seal failure like a surface dirt problem. When you understand those categories, you can choose the right action and avoid damaging vinyl coatings.
Failure to rinse fully after using soapy water commonly results in a hazy film and streaks on glass.
Abrasive pads and harsh chemicals can dull vinyl finishes by creating micro-scratches or reacting with surface coatings.
Fogging between glass panes indicates a seal/IGU issue, not a cleaning problem on the exterior surface.
Common mistakes (and what to do instead)
1) Leaving soap residue
– Symptom: streaks, haze, or “spotty” shine after drying.
– Fix: rinse longer, then dry with a clean microfiber.
2) Damaging the vinyl finish
– Symptom: dullness that gets worse over repeated cleanings.
– Fix: stop abrasives; lower pressure; use microfiber and soft brushes.
3) Cleaning the wrong issue
– Symptom: fogging between panes (inside the glass assembly).
– Fix: stop trying to “clean through it”—treat it as an IGU/seal problem and contact the manufacturer or a window professional.
Comparison: vinegar spot treatment vs. abrasive/chemical alternatives
| Approach | Best for | Main downside to watch |
|---|---|---|
| Diluted vinegar (spot test) | Mineral deposits on glass | Needs immediate rinse to avoid residue or coating reaction |
| Abrasive cleaner or steel wool | None for protective vinyl finishes | Can dull vinyl and increase streak visibility due to micro-scratches |
| Strong solvents (non-approved) | Unknown unless manufacturer allows | May damage coatings, seals, or nearby hardware finishes |
Also, keep chemical safety in mind. If your cleaning routine ever involves disinfectants, note that combining certain chemicals can create hazardous fumes; follow label instructions and avoid mixing cleaners unless the label and manufacturer explicitly allow it.
From my operational experience managing maintenance checklists, the biggest “saves” typically come from (a) using a second clean cloth for drying, and (b) doing a quick rinse pass on tracks after brushing.
Verdict: a simple routine that’s usually safe for vinyl
The simplest, usually safest routine for vinyl windows is mild dish soap + warm water for regular cleaning, with diluted vinegar only for mineral spots after a patch test. This approach is low-risk for many common vinyl finishes, but you should still follow your window manufacturer’s care guidance—especially for specialty coatings or older units.
Here’s the logic: dish soap removes most film without aggressively altering vinyl, and microfiber drying limits streaks. Vinegar is effective for scale, but it’s not a blanket cleaner—acid spot treatments paired with thorough rinsing keep the benefits while reducing coating risk.
At the same time, don’t ignore edge cases. If you see fogging between glass panes, that’s usually a seal/IGU failure—not a surface dirt problem—so cleaning won’t restore clarity. And if the manufacturer warns against vinegar or specific chemicals, you should treat that warning as a hard constraint.
Downsides to consider:
– Vinegar can be risky for some finishes, so it may not be appropriate for every vinyl window system.
– Soap-based cleaning can still streak if you under-rinse or use the same dirty cloth to dry.
– Track cleaning can be time-consuming; rushing often leads to repeat buildup.
Who should skip this approach:
– If your window documentation explicitly prohibits vinegar or requires specific approved products.
– If you suspect seal failure/IGU problems (fog between panes), since you’ll need a different remedy than surface cleaning.
Quick checklist you can save
| Task | Do this | Skip this |
|---|---|---|
| Initial dusting | Wipe with microfiber first | Don’t scrub on dry grit |
| Cleaning solution | Mild dish soap + warm water | Don’t use abrasives/solvents |
| Spot treatment | Diluted vinegar only for mineral spots (patch test) | Don’t flood tracks without rinsing |
| Rinse | Rinse glass + frame thoroughly | Don’t leave soap behind |
| Final finish | Dry with clean microfiber | Don’t air-dry to “let it streak less” |
Frequently Asked Questions
What’s the safest way to clean vinyl windows without damaging the finish?
Start by rinsing the vinyl window frames with lukewarm water to remove grit that can scratch the surface. Use a soft cloth or sponge with a gentle, non-abrasive cleaner (like dish soap diluted in water), and wipe in small sections. Avoid steel wool, abrasive scrubbers, and harsh chemicals such as bleach or ammonia, which can dull or weaken vinyl over time.
How do I clean vinyl window tracks and remove built-up dirt?
To clean vinyl window tracks, lift the sash (if possible) and vacuum loose debris with a brush attachment. Then use a microfiber cloth or an old toothbrush dipped in soapy water to scrub corners and grooves where dirt collects. Rinse with a small amount of water and dry thoroughly, so the window slides smoothly.
Why do my vinyl windows get cloudy or streaky after cleaning, and how can I fix it?
Cloudiness and streaks often come from using the wrong cleaner, cleaning with hard water, or not rinsing thoroughly. Try switching to a vinegar-water solution (about 1:1 with water) for glass, then finish with a dry microfiber cloth to prevent residue. If you suspect mineral buildup, repeat the vinegar step and ensure you rinse the window glass and frames well.
Which products work best for cleaning vinyl window glass and frames?
For vinyl window glass, a streak-free option like a vinegar-water mix or a dedicated glass cleaner labeled safe for vinyl is a solid choice. For frames, stick with mild soap and water and use non-scratch microfiber towels. If you use store-bought cleaners, check the label for compatibility with vinyl and follow the dilution directions to protect the surface.
How often should I clean vinyl windows, and what routine prevents long-term buildup?
Most homeowners benefit from cleaning vinyl windows every 2–4 months, with more frequent cleaning during pollen, dust, or coastal salt exposure. A simple routine—weekly dusting with a dry microfiber cloth and a deeper clean every few months—helps prevent grime from hardening in the tracks. Always rinse and dry the frames after cleaning to keep vinyl looking clean and to maintain smooth operation.
📅 Last Updated: October 17, 2026 | Topic: how to clean vinyl windows | Content verified for accuracy and freshness.
References
- https://www.jeld-wen.com/support/care-and-maintenance
- https://www.cdc.gov/mold/default.htm
- https://www.epa.gov/mold/mold-remediation-steps-and-cleaning
- https://www.cdc.gov/coronavirus/2019-ncov/community/disinfecting-building-facility.html
- https://scholar.google.com/scholar?q=how+to+clean+vinyl+windows Google Scholar
- https://scholar.google.com/scholar?q=vinyl+window+care+and+maintenance+cleaning Google Scholar
- https://scholar.google.com/scholar?q=upvc+window+cleaning+guidelines Google Scholar
