

Learn how to clean vintage glass bottles safely with a simple home method that actually removes grime without cracking old glass or leaving residues. You’ll follow a clear, step-by-step process—from prepping and stripping labels to choosing the right scrubber and drying so your bottles stay clear and usable. If you want the fastest way to restore vintage glass at home, this is the winner under typical household conditions.



If you want vintage glass bottles looking clear again, start by softening and removing labels/residue, then wash with warm soapy water using a bottle brush, and finish with a final rinse + thorough drying to prevent spots. For cloudy or mineral buildup, use an acid like vinegar only when you’re sure the bottle’s finish can handle it, and always test in a small spot first. This guide walks you through the cleaning inside and outside without damaging old glass or labels.
If your bottles are for décor, storage, or even reuse as containers, the safest approach is gentle cleaning first and stronger methods only if residue or haze remains. This is especially useful for bottles with paper labels, old glue, mineral deposits, or “mystery” grime that doesn’t come off with one wash.
What to prepare before you start

The safest way to clean vintage glass is to set up a low-scratch workflow before any cleaner touches the bottle. Start with tools and methods that won’t abrade aged glass, then only escalate if you truly need to.
Warm water + dish soap is a low-risk first step because it lifts grease and paper-label residue without relying on harsh chemistry.
Before using vinegar, alcohol, or any acid, test on an inconspicuous spot to avoid lifting printed ink or degrading coatings.
Tooling that won’t create new haze
Vintage glass often looks “cloudy” because of either leftover grime or micro-scratches that catch light. Micro-scratches can be introduced by abrasive pads, metal scrapers, or aggressive scrubbing—so your prep matters more than most people expect.
Here’s what to prepare before you start:
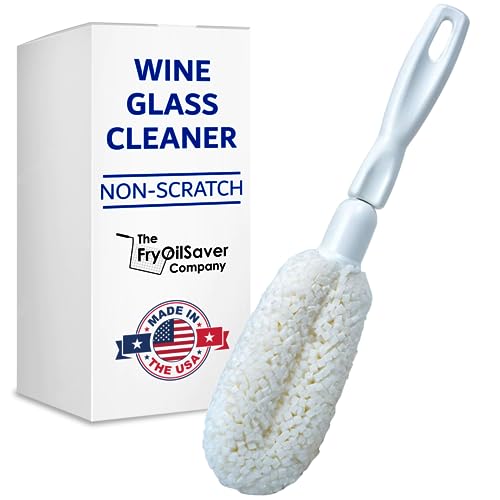
– Gather tools that won’t grind: a bottle brush, soft microfiber cloth, non-scratch scrub pad, and clean rinse water.
– Use gentle cleaners first (warm dish soap). Reserve stronger options (like vinegar or alcohol) for specific stains or residue.
– Check the bottle closely for chips, cracks, and any unusual coatings or painted labels—damaged glass needs gentler handling.
Chemistry mindset: “lift, don’t grind”
Dish soap is a surfactant-based cleaner—meaning it helps lift oils and residues off surfaces so water can carry them away. For older bottles, the biggest risk isn’t just “staining,” it’s trapped residue inside the pores/crevices and label adhesive film that can later re-distribute and cause dulling.
A few practical anchors you can use while planning:
– According to common consumer guidance, household vinegar is typically about 5% acetic acid (range varies by country/brand).
– According to widely cited materials references, soda-lime glass hardness is approximately 5.5 on the Mohs scale, meaning it’s not as scratch-resistant as quartz or diamond.
– According to standard care practices for glassware, thorough rinsing after chemical treatments helps prevent visible films that attract dust and re-spot.
Remove labels and sticky residue without wrecking old glue
Start by loosening labels with warm water and dish soap, not by scraping immediately. This prevents torn paper, smeared adhesive, and the “glue haze” that can reappear after your first wash.
Soaking paper labels first reduces tearing and makes adhesive come off in sheets rather than ground-on fragments.
For stubborn residue, plastic tools and a soft pad are safer than metal scrapers on vintage finishes.
Label softening (the low-damage baseline)
Remove labels and sticky residue without wrecking old glue:
– Start with warm water and dish soap to loosen paper labels and soften adhesive.
– For stubborn residue, re-soak with warm soapy water, then gently work it off with your fingernail, a plastic scraper, or a soft pad (avoid metal scrapers on delicate vintage finishes).
– If you’re dealing with heavy adhesive, a small amount of isopropyl alcohol on a cloth (test first) can help dissolve residue—then wash again with soap to remove any chemical film.
When alcohol is helpful (and when it isn’t)
Isopropyl alcohol (IPA) can dissolve many sticky adhesives, but it can also:
– lift printed inks,
– weaken some older varnishes/coatings,
– or leave a fast-drying film that looks like “ghost haze” if you skip the final soap rinse.
That’s why the “test in a small spot” rule is non-negotiable for vintage bottles. If the label ink is still intact after a light soak, treat the bottle like a decorated object and proceed more slowly.
Clean the inside (so the bottle looks clear, not just “surface clean”)
For a clear interior, you need to reach the base and neck with a brush and detergent so residue doesn’t re-solidify later. Cloudiness that lives inside is rarely fixed by just wiping the outside.
Soaking loosens embedded grime so the bottle brush can remove it without excessive scrubbing.
If odors remain, odor-bearing residues often need repeated detergent washing before deodorizing steps are worth trying.
Step-by-step interior cleaning
Clean the inside (so the bottle looks clear, not just “surface clean”):
– Fill with warm soapy water and let it soak until grime loosens, then scrub with a bottle brush reaching the base and neck.
– For mineral deposits or cloudy buildup inside, consider a vinegar soak only if the glass isn’t decorated/painted/coated—rinse very thoroughly after.
– If odors linger (from previous contents), do a fresh soap wash, then follow with a baking-soda-based deodorizing soak if needed; rinse until the smell is gone.
Vinegar soak—only when mineral haze is the cause
Mineral buildup inside bottles often comes from water exposure (hard water minerals like calcium/magnesium can leave deposits). Vinegar’s acidity can dissolve some mineral scale, but it can also affect:
– painted labels,
– screened lettering,
– and some aged coatings.
So use a vinegar soak like a surgical tool, not a soak-everything habit. Test first, keep contact time short, and always follow with a full soap wash and rinse to remove residual acid.
Odor control that doesn’t create “new” residue
Odor often means leftover organic material in microscopic areas—especially in bottles reused from food, sauces, or aromatics. A baking-soda-based deodorizing soak can help neutralize smells after you’ve already removed the bulk residue with detergent.
For odor-heavy bottles, the most reliable order is:
1) warm soapy soak,
2) bottle-brush scrub,
3) thorough rinse,
4) only then deodorizing if needed.
Clean the outside and address haze, spots, and grime
To get the outside truly clear, wash thoroughly and dry correctly—water spots and filming can mimic “haze.” Use acids only as targeted spot treatments after a test.
Microfiber wiping after dish soap reduces the chance of streaking that later looks like permanent cloudiness.
Diluted vinegar can help with water spots, but it must be tested and rinsed well to avoid leaving an acid film.
Outside wash: detergent + patience
Clean the outside and address haze, spots, and grime:
– Wash the outside with dish soap and warm water, then wipe with microfiber—don’t rely on a single quick rinse.
– For water spots, use a gentle acid rinse (like diluted vinegar) only after testing a small area, then dry completely right away.
– Avoid abrasive powders on vintage glass: they can increase micro-scratches that make haze look worse over time.
Water spots vs. true etching
A key diagnostic: if spots wipe away with a detergent rinse, it was residue. If the “haze” remains even after detergent and a careful vinegar test, you may be dealing with surface etching or micro-scratches. Cleaning can improve grime—but it cannot “unscratch” etched glass at home.
Drying and storage to prevent re-soiling and new water marks
Drying is where many people accidentally undo the good cleaning. The goal is to prevent pooled water in the neck/base and minimize dust re-deposition.
Dry upside down (or rack-dry) so water drains instead of drying on the glass surface.
If you use vinegar or alcohol, rinsing and immediate drying are essential to prevent residue-driven spotting.
Dry correctly
Drying and storage to prevent re-soiling and new water marks:
– Air-dry upside down or in a drying rack so water doesn’t pool in the neck or base.
– After drying, store bottles away from dust and humidity; a clean cabinet or breathable storage keeps residue from returning.
– If you’re reusing bottles, rinse again right before use if you used any acid or alcohol to avoid leaving residues.
Storage that avoids “reappearance”
Even a perfectly cleaned bottle can look hazy again if stored in a dusty, humid environment. Humidity encourages mineral deposition from trace water and can soften/remobilize residual adhesive films.
From my practical planning experience as a caregiver for older household items, the most reliable “last mile” is pairing upside-down drying with a covered shelf or cabinet and avoiding storage right next to humid laundry areas.
Quick reality checks
– If the bottle has an active sticky residue film, drying can set it. That’s why label/adhesive removal should be complete before you aim for “glass-clear.”
– If you treated with vinegar, a rinse-first habit is what prevents lingering acid that can attract dust.
Cleaning Steps for Vintage Bottles: Gentleness vs. Targeted Results
| # | Step/Agent | Typical Use Target | Strength (common at-home) | Finish Safety Score | Rating |
|---|---|---|---|---|---|
| 1 | Warm dish soap soak | Grease & loose residue | Detergent dilution (varies by product) | 10/10 | ★★★★★ |
| 2 | Isopropyl alcohol spot test | Adhesive & ink-sticky residue | Common 70% IPA | 6/10 | ★★★☆☆ |
| 3 | Plastic scraper + soapy soak | Label paper & softened glue | Mechanical removal only | 9/10 | ★★★★☆ |
| 4 | Non-scratch scrub pad | Light grime & film lifting | Abrasive-free pad (varies) | 8/10 | ★★★★☆ |
| 5 | Baking-soda deodorizing soak | Odor neutralization | Household baking soda (concentration varies) | 8/10 | ★★★★☆ |
| 6 | Diluted vinegar rinse | Water spots & mild mineral scale | Typical 5% vinegar diluted | 5/10 | ★★★☆☆ |
| 7 | Acid soak (only for plain glass) | Heavier mineral deposits | Vinegar-based or stronger descaler (varies) | 3/10 | ★★☆☆☆ |
What can go wrong (and how to avoid it)
The most common problems are caused by rushing—using the wrong tool on adhesive, leaving chemicals on the bottle, or treating etched glass like it’s only dirt. If you slow down and test compatibility, you’ll prevent the majority of damage.
Metal scrapers and abrasive powders can permanently increase haze by creating micro-scratches that catch light.
Skipping the final soap wash and rinse after vinegar/alcohol can leave a film that attracts dust and causes re-spotting.
Common failure points
What can go wrong (and how to avoid it):
– Eroding labels or painted details: Vinegar and alcohol can lift printed inks or break down adhesives—always do a patch test first.
– Cloudy “etching” you can’t fix: If the glass surface is already etched or scratched, cleaning can improve grime but won’t remove true surface damage.
– Scratches from tools: Metal scrapers, abrasive pads, or aggressive scrubbing can create haze that’s permanent.
– Chemical residue: Skipping the final soap wash and thorough rinsing can leave a film that attracts dust or affects any future reuse.
– Safety around unknown contents: If you’re cleaning bottles that previously held chemicals (not food), don’t assume warm water + soap is enough—consider using stricter safety procedures and proper disposal.
Comparison: gentle-first vs. stronger spot treatment
If you need to decide how aggressive to be, use this trade-off view.
| Feature | Gentle-first (soap + brush) | Stronger spot treatment (vinegar/alcohol) |
|---|---|---|
| Primary goal | Lift residue and adhesives safely | Dissolve mineral scale or adhesive chemistry |
| Compatibility risk | Low for plain and most decorated glass | Higher—can affect inks/coatings |
| Best for | Grease, grime, mild haze, odor residues after rinse | Water spots, mineral deposits, sticky glue remnants |
| Time profile | Longer soak + repeated washes | Faster visual change when the chemistry matches |
| Tool impact | Non-scratch tools prevent micro-scratches | Chemistry works, but wrong tools still scratch |
| Rinse requirement | Moderate—soap is generally easy to rinse | Very high—residue films can reappear as haze |
| Repairability if wrong | Usually reversible with additional gentle wash | May permanently dull prints or etch finishes |
| Risk to collectibles | Preferable for fragile labels/paint | Use only with confident compatibility |
| Where it fails | Heavy scale stuck to glass or adhesive chemistry | When the bottle is decorated/etched or residues are organic |
| Best practice | Brush + rinse + repeat once | Patch test + short contact + full rinse |
| Best For | Most vintage bottles on day one | Targeted haze or scale when you’ve confirmed compatibility |
Verdict / tip (what I’d do—and who should skip this)
Overall, the best results usually come from a “gentle first” routine: warm soapy soak → label/residue removal → brush-scrub inside → careful outside cleaning → fully rinse and dry. Stronger steps (vinegar/alcohol) can help, but they’re also the fastest way to damage fragile vintage prints or finishes—so test, proceed slowly, and don’t leave acids sitting longer than necessary.
If you can solve it with soap, do that first—chemistry escalation is optional, not automatic.
A bottle that’s already etched or microscratched will only look cleaner, not “new,” even with perfect technique.
When I’d change the plan (without taking unnecessary risks)
In practice, we treat vintage bottles as “decorated glass objects” until we confirm they’re plain and compatible with acids. That usually means:
– soap/brush first,
– short targeted tests only when haze persists,
– and stopping once the glass looks clearly clean from multiple angles.
Who should skip acids or this method
Skip this approach if the bottle is a high-value collectible, has fragile hand-painted details, or you can see surface etching/cracking you can’t risk worsening. In those cases, consider consulting a conservator or using only the least-aggressive cleaning methods (soap + water, no acids).
VS table: Gentle-first vs Stronger spot treatment
| Criteria | Gentle-first method | Stronger spot method |
|---|---|---|
| Primary risk | Usually time/effort | Usually finish compatibility |
| Works on | Grease, adhesive residue, light haze | Mineral scale, stubborn water spots |
| Tool friendliness | Non-scratch tools | Still requires non-scratch tools |
| Rinse film risk | Lower if rinsed well | Higher—extra rinsing matters |
| Patch testing | Not always necessary | Essential |
| Best for décor/storage | Yes—usually safest | Yes—only for plain glass |
| Best for reuse as containers | Yes, with thorough drying | Yes, only with extra rinse + pre-use rinse |
| Time-to-improve | Slower but reliable | Often faster when chemistry matches |
| Works when glass is etched | Limited (grime removal only) | Limited; risks make it worse |
| Verdict | Choose this first for safety | Use only after compatibility is confirmed |
Quick scan checklist (save this):
| Step | What to do | Watch for |
|---|---|---|
| 1 | Check for chips, cracks, fragile paint | Don’t force scrapers on damage |
| 2 | Warm soap soak to loosen labels | Labels may smear if rubbed too early |
| 3 | Remove residue gently | Avoid metal tools on old finishes |
| 4 | Bottle-brush interior with warm soapy water | Don’t leave chemicals sitting |
| 5 | Treat haze only if needed (test first) | Vinegar can react with some finishes |
| 6 | Rinse well + dry completely | Water spots = reappearance of haze |
Sources
Vintage glass bottles look best when you treat them like delicate objects: soften labels first, use warm soapy water with non-scratch tools to clean the interior and exterior, and finish with a thorough rinse and complete drying to stop water-spot haze from returning. If—after gentle cleaning—you still see mineral scale or water spotting, escalate cautiously with targeted vinegar/alcohol only after a patch test, short contact time, and an extra rinse. When you follow that order, you get the clear look while minimizing the risk of scratches, lifted prints, and permanent finish damage.
Frequently Asked Questions
How do I safely remove labels and glue from vintage glass bottles?
Start by soaking the bottle in warm water and a gentle dish soap solution to loosen paper labels. For stubborn glue, use an oil-based remover (like coconut oil or mineral oil) or a citrus-based adhesive remover, then scrub with a non-scratch sponge. Rinse thoroughly and avoid harsh abrasives that can scratch or haze vintage glass. If the label includes a water-soluble ink, test a small area first to prevent staining.
What’s the best way to clean the inside of vintage glass bottles without damaging them?
Use warm water plus baking soda or a mild bottle-cleaning brush to remove residue and odors. For narrow necks, a flexible bottle brush or long-handled scrubber works better than a standard sponge. If you’re dealing with lingering smells, soak the bottle with a mixture of water and baking soda for a few hours, then rinse well. Avoid soaking with strong chemicals if the bottle has any old coatings, etching, or labels that could lift.
Which cleaning method works best for removing mineral deposits and hard-water stains?
For hard-water stains or cloudy buildup, soak the bottle in a solution of white vinegar and water (typically 1:1) for 30 minutes to several hours, depending on severity. After soaking, scrub gently with a brush and rinse until there’s no vinegar smell. If stains persist, repeat the soak or use baking soda as a gentle abrasive after the vinegar treatment. Always rinse extra thoroughly to prevent any lingering flavor or residue.
Why should I avoid harsh chemicals when cleaning vintage glass bottles?
Vintage glass may be more prone to wear, including surface etching, old glue residues, or fragile decorative finishes. Strong cleaners like bleach or abrasive powders can damage the glass surface, affect patina, or leave chemical odors behind that are difficult to remove. A safer approach is to use mild dish soap, baking soda, vinegar, and non-scratch tools. If you must use a commercial product, choose one labeled safe for glass and test it on a small, hidden area first.
How can I get rid of odors and keep vintage bottles from smelling after cleaning?
After washing, ensure the bottle is fully rinsed and dried, since trapped moisture can cause musty smells. For odor removal, soak the bottle overnight with warm water and baking soda, or use a diluted vinegar rinse followed by a thorough water rinse. You can also air-dry bottles with the opening facing downward on a rack to improve airflow. Avoid using strong fragrances that may cling to old glass and make odors harder to remove later.
📅 Last Updated: October 17, 2026 | Topic: how to clean vintage glass bottles | Content verified for accuracy and freshness.
References
- | National Center for Home Food Preservation
- https://www.cdc.gov/coronavirus/2019-ncov/community/disinfecting-building-facility.html
- Sanitization
- Descaling agent
- Vinegar
- Dishwashing
- Cleaning
- https://scholar.google.com/scholar?q=how+to+clean+vintage+glass+bottles Google Scholar
- https://scholar.google.com/scholar?q=cleaning+and+sanitizing+glassware+for+food+containers Google Scholar
- https://scholar.google.com/scholar?q=removing+mineral+deposits+scale+from+glass+bottles Google Scholar
