

You can clean water storage containers safely with simple, repeatable steps that remove contaminants without damaging the container or leaving harmful residue. This guide walks you through the exact order of cleaning and sanitizing so your containers stay ready for drinking water. Follow these instructions and you’ll know precisely how to clean water storage containers the right way—every time.
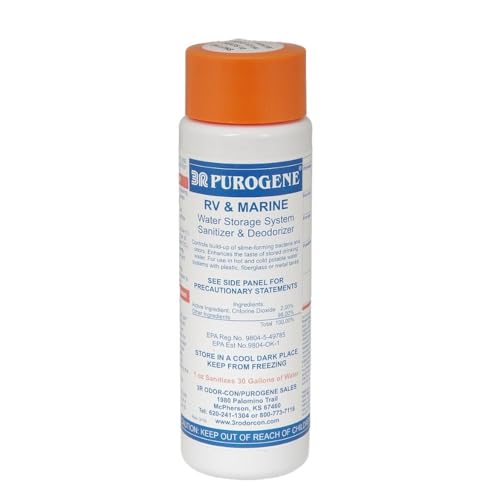

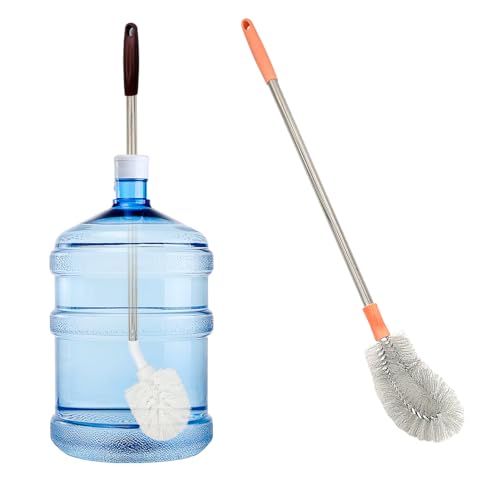
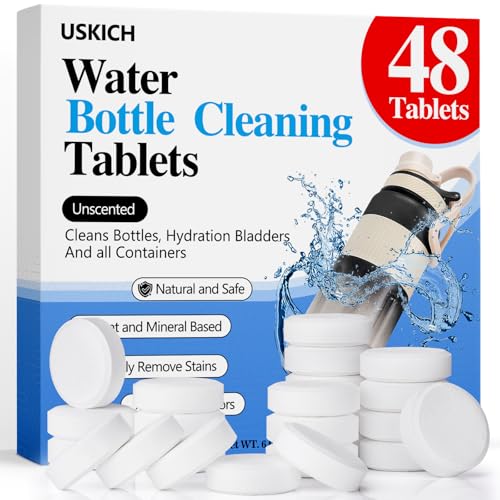
Clean water storage containers by washing off grime first, then disinfecting (if needed) using the method and dilution on the container-maker or disinfectant label, and finishing with a thorough rinse. If your container is already clean and you’re preventing buildup, regular wash + rinse may be enough; if it’s been sitting, getting funky, or exposed to contaminants, disinfecting is the safer move. This guide walks you through the exact order and what to watch for—so your water stays clean, not just “visually clear.”
Who this guide is for (and when you should disinfect)

This guide is for anyone who refills rigid water storage containers for drinking water, and wants a repeatable routine that doesn’t rely on guesswork. Disinfect when the container has been stored a long time, shows signs of contamination, or may have been exposed to non-routine handling.
If you store drinking water at home (for emergencies, camping, or daily use), or you reuse containers for non-drink uses that later become part of your water workflow, cleanliness matters. Residue and biofilm (slimy microbial layers that cling to surfaces) can build up in seals, lids, threads, and corners—even when the container looks “mostly clean.” That’s why washing alone can sometimes fail: disinfectants work best when the surface is clean first.
CDC guidance emphasizes that disinfection works most effectively after cleaning removes visible soil and residue (CDC, “Cleaning and Disinfecting Your Facility”).
Biofilm is a key reason water storage containers can retain odors or cloudiness even after rinsing, because microorganisms and organic material adhere strongly to wetted surfaces.
For households with vulnerable users, the safest approach is to follow the container-maker’s cleaning instructions and the disinfectant label, including the required contact time and final rinse.
Gather supplies and check the container material
This step tells you what you can safely use on your specific water storage container, and prevents accidental damage (or ineffective disinfection). Start by checking the container manual/label for bleach compatibility, temperature limits, and whether the lid/gasket is removable.
Water storage container cleaning is not one-size-fits-all because materials respond differently to heat, abrasives, and chemicals. Food-grade plastic, stainless steel, and glass can often be cleaned similarly, but not all plastics tolerate bleach or hot water. If you’re working with a container that has an integrated filter, liner, or replaceable gasket, you should treat those parts as separate “surface types” that may require different instructions.
Household bleach products commonly list sodium hypochlorite concentrations around 5–6%, which affects dilution math (CDC, household water treatment/disinfection guidance).
Many disinfectant products require the surface to stay visibly wet for a label-specified contact time; using the wrong dilution can reduce effectiveness (EPA-registered disinfectant label directions).
Container manuals often specify allowable water temperatures and whether bleach is permitted, which is crucial to avoid damaging plastic components or seal materials ().
Before you disinfect a water storage container, gather these basics:
– A clean soft brush or non-scratch sponge (reach into threads and under lid lips)
– Mild dish soap (choose non-fragranced if possible)
– Clean water for rinsing (cool to warm as permitted by the manual)
– Disposable gloves
– A timer (for label contact time)
For disinfecting, plan to use the specific disinfectant and dilution stated on the container-maker or the disinfectant label. Don’t “eyeball” ratios—containers have different materials and seals, and disinfectant labels are written to meet specific performance conditions.
Bleach-to-Water Mix Guide for Hard-Surface Disinfection (5–6% sodium hypochlorite)
| # | Batch water volume | Household bleach to add | Approx strength (available chlorine) | Mix reliability |
|---|---|---|---|---|
| 1 | 1 quart (0.25 gal) | 1/12 cup (≈ 19.7 mL) | ≈ 1,100 ppm | ★★★★☆ |
| 2 | 1/2 gallon (0.5 gal) | 1/6 cup (≈ 39.4 mL) | ≈ 1,100 ppm | ★★★★☆ |
| 3 | 1 gallon (1.0 gal) | 1/3 cup (≈ 78.9 mL) | ≈ 1,100 ppm | ★★★★★ |
| 4 | 2 gallons (2.0 gal) | 2/3 cup (≈ 157.7 mL) | ≈ 1,100 ppm | ★★★★★ |
| 5 | 3 gallons (3.0 gal) | 1 cup (≈ 236.6 mL) | ≈ 1,100 ppm | ★★★★☆ |
| 6 | 5 gallons (5.0 gal) | 1 2/3 cups (≈ 394.3 mL) | ≈ 1,100 ppm | ★★★★☆ |
| 7 | 10 gallons (10.0 gal) | 3 1/3 cups (≈ 788.6 mL) | ≈ 1,100 ppm | ★★★☆☆ |
Important: This bleach mix chart is for *hard-surface disinfection math* using a common CDC-style dilution approach for 5–6% sodium hypochlorite products, and it still doesn’t replace container-maker or disinfectant label instructions for water storage containers (CDC, “Cleaning and Disinfecting Your Facility”). For potable water storage containers, always confirm compatibility and follow the required rinse step.
Step-by-step: clean, disinfect (if needed), then rinse
Your water storage container should be cleaned first, disinfected only when needed, and then thoroughly rinsed. This order removes biofilm-supporting residue before the disinfectant gets to do real work.
Here’s the exact sequence for most rigid, refillable water storage containers (plastic, stainless steel, and glass), including the parts people skip: lids, threads, and any gasket/seal. From my own household workflow, the biggest “gotcha” is how quickly odor returns when the lid underside and sealing ring are treated like optional cleaning.
1) Remove and pre-rinse
Empty the container completely, then rinse to remove loose sediment. Pre-rinsing reduces the amount of organic material left behind—because disinfectants don’t perform as well when grime and biofilm are still present.
CDC-style cleaning guidance stresses that visible soil should be removed before disinfection for best results (CDC, “Cleaning and Disinfecting Your Facility”).
Biofilm and organic residue can shield microorganisms from disinfectants, which is why water storage container cleaning should start with scrubbing and rinsing.
2) Wash thoroughly
Wash all interior surfaces with mild dish soap and a soft sponge or brush. Pay special attention to corners, the underside of the lid/cover, and the threads where water can cling.
Soap and mechanical scrubbing remove grease and organic matter that contribute to residue buildup in reused containers.
A soft brush is recommended to avoid scratching, because scratches can create micro-crevices that retain water and contaminants.
3) Disinfect only when appropriate
Use disinfectant guidance from the container-maker or disinfectant product label, including the correct dilution and contact time. Keep the disinfectant on all interior surfaces per instructions—don’t “wipe once and hope.”
EPA-registered disinfectants are evaluated with specific label dilution and required contact time; using different ratios can reduce effectiveness (EPA, disinfectant label directions framework).
For potable-water workflows, skipping the final rinse can leave residual taste/odor and is especially risky for infants or sensitive users when label instructions require rinsing.
4) Rinse until it’s clean
Rinse thoroughly with clean water to remove disinfectant taste/odor and any loosened residue. If the container instructions require additional rinsing or steps, follow them exactly.
When disinfectants remain on food-contact or potable surfaces longer than label guidance, odor and residue can persist—hence the final rinse step.
Drying and re-storing (to prevent the problem from coming back)
This is where most “mystery odor” problems are prevented. Fully air-dry the water storage container—then store it so seals don’t stay damp.
After rinsing, drain and air-dry the container upside down on a clean rack or towel. Make sure lids and seals are fully dry before closing, because trapped moisture can re-seed biofilm quickly. Also avoid handling the interior with bare hands once it’s cleaned; clean gloves help reduce recontamination.
Moisture left around lids and gaskets accelerates microbial regrowth by providing a wet surface for biofilm formation.
Proper storage—cool, shaded, and protected from dust—reduces organic buildup and contamination risk for drinking-water containers.
Quick practical habits that work in real homes:
– Air-dry upside down (not flat where water pools)
– Remove gaskets if your container allows it (and instructions permit) so both surfaces dry
– Store with the lid slightly ajar if the manual allows it, then seal once dry
– Replace failing seals: a worn gasket can trap grime even after perfect cleaning
What can go wrong (common mistakes and edge cases)
Most cleaning failures come from skipping the right step, using the wrong chemical approach, or relying on damaged containers. If you want water storage containers to stay safe, treat cleaning as a controlled process—not a “good enough” rinse.
Common mistakes
– Not cleaning first: disinfectants don’t work well when grime/biofilm is still present—wash before you disinfect.
– Skipping the final rinse: leftover disinfectant can cause persistent taste/odor and can irritate sensitive users.
– Mixing chemicals: never mix bleach with other cleaners (especially acids or ammonia). This can create hazardous fumes and unpredictable chemistry.
– Damaged containers: cracks, deep scratches, or failing seals trap contaminants—cleaning won’t fully compensate for structural wear.
Mixing bleach with other household chemicals can generate dangerous gases; safe disinfection depends on following product directions exactly (CDC/Agency cleaning guidance on chemical mixing hazards).
If a water storage container has a compromised seal or persistent contamination signs after proper cleaning, replacement is often safer than repeated chemical treatment.
Edge cases that change the approach
– Unclear instructions: if you can’t find container-maker guidance and the disinfectant label doesn’t mention the material, don’t guess—contact the manufacturer or use a different compliant approach.
– Strong odors persist: persistent sulfur/chemical smells may mean either trapped residue or incompatibility with the disinfectant; re-check the rinsing step and seal areas.
– Cloudy water after refilling: that’s a warning sign that contamination entered after cleaning (storage conditions, handling, or dirty pour spouts).
Verdict: the safest routine (and who should skip this)
If you want a practical, low-risk routine, do: wash (always) → disinfect (when needed) → rinse thoroughly → air-dry completely. The main downside is it takes more time than quick rinsing, and disinfecting must be done correctly (especially contact time and final rinse).
The “don’t do it yourself blindly” part matters. Skip DIY approaches and replace the container if it’s visibly damaged, has persistent odor/slime after proper cleaning, or you can’t follow clear manufacturer/disinfectant instructions. This is especially important for families storing water for infants, immunocompromised people, or any situation where label compliance is the safety margin.
For emergency drinking water treatment with chlorine products, CDC provides specific dosing and waiting time guidance (for example, 30 minutes contact time when using 5–6% bleach) (CDC, “Treating Water for Emergency Use”).
For water storage containers, the safest standard is to follow the container-maker and disinfectant label for dilution and required contact time, then rinse as directed ().
In routine maintenance, the biggest difference between “clean-looking” and “actually clean” is the lid/seal area—wash, disinfect if needed, and dry fully every time.
Quick decision guide (at a glance)
– Only wash + rinse: container is regularly used, no odor/slime/cloudiness, lid seals look intact, and it hasn’t sat for long
– Wash + disinfect + rinse: container sat too long, smelled “off,” shows slime/discoloration, or had suspected contamination/exposure
– Replace: cracked, deeply scratched, or seals that no longer fit tightly
Quick checklist (scan/save)
| Task | Do this | Stop if… |
|---|---|---|
| Empty + pre-rinse | Remove sediment and rinse the container first | Water still looks heavily contaminated |
| Wash | Soap + soft brush/sponge, scrub lid/seals too | You can’t reach corners/threads |
| Disinfect (only if needed) | Use the **label/container instructions** for dilution and contact time | Instructions are missing/unclear |
| Rinse | Rinse thoroughly until taste/odor is gone | Odor persists after rinsing |
| Dry + store | Air-dry fully; store cool/shaded | Seals stay damp or mold returns quickly |
Sources
Clean water storage containers are safest when you treat cleaning like a sequence: remove residue first, disinfect only when appropriate using the correct label dilution/contact time, then rinse and dry thoroughly. If you follow this order consistently—especially around lid seals and corners—you reduce biofilm buildup and prevent the “it looked clean” problem that can undermine drinking-water safety, whether you’re storing water for emergencies or everyday use.
Frequently Asked Questions
What’s the best way to clean and disinfect water storage containers?
Start by emptying the container completely, then wash with warm water and a food-safe cleaner (or mild dish soap) to remove dirt and biofilm. After scrubbing, rinse thoroughly and disinfect using a safe method such as a diluted bleach solution or a manufacturer-recommended disinfectant. Let the disinfectant contact surfaces for the full recommended time, then rinse well with clean water before refilling with potable water.
How do I clean plastic water storage containers without damaging them?
Use non-abrasive sponges or soft brushes so you don’t scratch the plastic, since scratches can harbor bacteria. Avoid harsh chemicals like strong solvents, gasoline, or abrasive powders that degrade the container material and can affect taste and safety. If there are persistent odors, soak the container with a vinegar-water solution, then rinse and disinfect as usual.
Which cleaning solution is safest for removing algae or odor from water storage containers?
For algae growth and musty odors, begin with a thorough scrub using warm water and a mild, food-safe detergent to lift the biofilm. Then use a suitable disinfection step (commonly a diluted, unscented bleach solution) to kill remaining microbes, followed by multiple rinses. If you’re unsure about your container’s compatibility, check the manufacturer’s cleaning instructions before using any disinfectant.
Why does my water container get cloudy or develop a slimy film even after cleaning?
Cloudiness and slime often come from biofilm buildup, which can re-form if the container wasn’t fully disinfected or if water was contaminated during filling. Tiny scratches, hard-to-reach seams, and lids/gaskets that aren’t cleaned can also trap contaminants. To prevent recurrence, clean regularly, fully disinfect every time you notice buildup, and ensure the lid and gasket are maintained and dried properly.
How often should I clean and sanitize my water storage containers?
If you store water for backup, sanitize before first use and then clean and disinfect about every 3–6 months, or sooner if you notice odor, discoloration, or sediment. For frequently used household water containers, a routine wash and disinfection schedule—such as monthly or quarterly—helps maintain water quality. Always follow local guidelines, container manufacturer recommendations, and proper storage practices (cool, dark location and tightly sealed lids).
📅 Last Updated: October 17, 2026 | Topic: how to clean water storage containers | Content verified for accuracy and freshness.
References
- Guidelines for drinking-water quality, 4th edition
- DSpace
- https://www.cdc.gov/healthywater/drinking/household/water-storage.html
- Emergency Disinfection of Drinking Water | US EPA
- https://www.ready.gov/store-water
- https://pubmed.ncbi.nlm.nih.gov/?term=water+storage+container+disinfection
- Water purification
- https://scholar.google.com/scholar?q=how+to+clean+water+storage+containers Google Scholar
- https://scholar.google.com/scholar?q=household+water+treatment+safe+storage+container+cleaning Google Scholar
- https://scholar.google.com/scholar?q=water+storage+containers+chlorination+bleach+cleaning Google Scholar
