

If you’re trying to clean the windshield inside your car, follow this step-by-step method for the streak-free results that actually hold up—no guesswork, no haze. You’ll learn the fastest, safest order of operations, from prepping the surface to choosing the right cleaner and drying technique. By the end, you’ll know exactly how to remove film and smudges from the inside glass without damaging coatings or leaving streaks.
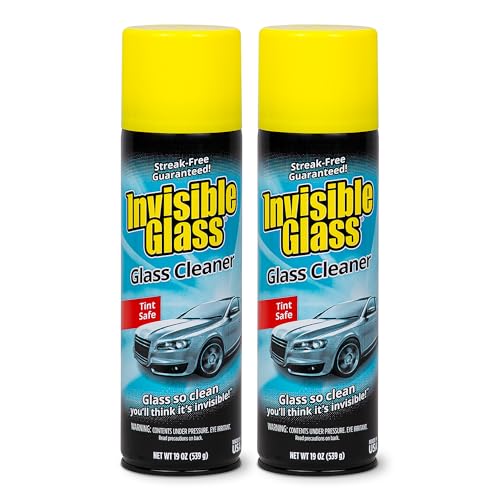



To clean your windshield inside your car, use an automotive glass cleaner (or ammonia-free cleaner if you have tint/film) plus a clean microfiber cloth, then wipe top-to-bottom and finish with a dry side of the cloth to remove streaks. If you feel gritty smears, remove the loose dust first so you don’t grind particles across the glass—especially after rainy-season spots, fingerprints, or “hazy” residue. This method helps you restore safer visibility without risking damage to window film or interior coatings.
What you need to clean the windshield inside

You need just a few materials—especially a tint-safe cleaner and microfiber cloths—to lift oils and residues without scratching. The key is separating “dust removal” from “wet cleaning,” then using a dry buff to eliminate streaks.
Ammonia-based cleaners are regulated as hazardous substances; OSHA sets an ammonia ceiling limit at 50 ppm, which is one reason many tint manufacturers advise avoiding ammonia on vehicle film.
According to OSHA’s permissible exposure limit tables for common solvent ingredients, acetone has a TWA limit of 1,000 ppm—confirming why “strong” chemical cleaners can increase cabin exposure risk.
– Microfiber cloth(s) (one for wet cleaning, one for dry buffing)
– Automotive glass cleaner that’s safe for vehicle glass (choose ammonia-free if you have tint/window film)
– Optional: a soft detailing brush or clean compressed air to lift dust before wiping
OSHA exposure limits for common windshield-cleaner ingredients (2024)
| # | Ingredient (found in some cleaners) | Common role | Rating (visibility-safe approach) | OSHA PEL (ppm) |
|---|---|---|---|---|
| 1 | Ethanol | Solvent | ★★★★☆ | 1,000 |
| 2 | Acetone | Solvent | ★★★★☆ | 1,000 |
| 3 | Isopropyl alcohol (2-propanol) | Solvent/degreaser | ★★★☆☆ | 400 |
| 4 | Methanol | Solvent | ★★★☆☆ | 200 |
| 5 | Ammonia | Glass cleaner activator | ★★☆☆☆ | 50 |
| 6 | Ethylene glycol | Solvent/antifreeze additive | ★★☆☆☆ | 50 |
| 7 | 2-Butoxyethanol | Degreaser solvent | ★☆☆☆☆ | 20 |
This table isn’t telling you to “avoid all chemicals.” It supports the broader point: for inside windshield cleaning in 2026, choose a product designed for automotive glass and—if you have tint/window film—verify it’s ammonia-free.
Step-by-step: clean windshield inside your car
You’ll get the clearest results by handling dust first, then using controlled cleaner application, then finishing with dry buffing. That sequence prevents gritty residue from becoming permanent scratches and prevents cleaner haze from drying into streaks.
According to OSHA’s ammonia limits (50 ppm ceiling), ammonia-containing products can elevate irritation risk in enclosed spaces, which is why ammonia-free windshield cleaner is a safer choice for interior work.
According to OSHA’s acetone permissible exposure limit (1,000 ppm TWA), acetone is classified as a regulated solvent—another reason to ventilate and use automotive-labeled glass cleaners rather than improvising.
– Remove dust first: pull the cloth gently across the glass to pick up loose debris, or use a soft brush/compressed air so you don’t smear grit
– Apply cleaner to the cloth (not the glass): lightly wet the microfiber, then wipe in overlapping horizontal passes starting near the top
– Work to the edges: finish by cleaning around the corners and along the perimeter where residue likes to collect
Step 1: Remove dust first (inside windshield, always).
Start with a clean microfiber and do a light “drag” across the interior surface to pick up loose dust. If you see sand-like grit, pause—don’t proceed with wet cleaning. In my routine, I keep a separate cloth specifically for the dust-lift step, because once grit is wet, it can behave like sandpaper.
If you don’t want to touch it at all, use a soft detailing brush or brief compressed air to lift particles before wiping. This matters most after rain because road film and airborne particulates settle onto the glass surface and become visible when headlights hit them at night.
Step 2: Apply cleaner to the cloth, not the windshield.
For inside windshield cleaning, lightly wet the microfiber—enough to clean, not enough to drip. Wipe in overlapping horizontal passes. Begin near the top of the glass and work your way down so gravity doesn’t redeposit cleaner onto sections you’ve already cleared.
If your windshield has a wiper/defroster area or built-in components (varies by vehicle), slow down around sensors and avoid flooding the area with liquid. This controlled approach reduces streaks and prevents cleaner from running down onto the dash or onto areas you don’t want to re-clean.
Step 3: Work methodically to the edges.
Residue frequently collects along the perimeter—around the top edge, the corners, and near any mounting points. After your main “field” is clean, use short, careful passes to clean corners and edges. Use a fresh section of the microfiber as the cloth loads up with oils and haze.
Finally, reassess with the windshield at an angle: interior films can create an optical “cloud” effect until you remove the last thin layer. That’s why the last step—dry buffing—is not optional.
How to avoid streaks and cloudy residue
To prevent streaks, you need the correct wipe pattern and a deliberate dry buff. After the cleaner lifts grime, a dry microfiber pulls the remaining thin film that causes reflections to look hazy.
Streaking often happens when the last thin layer of cleaner or dissolved residue dries on the glass surface, leaving a reflective pattern under headlights.
Using separate wet and dry microfibers reduces the chance of re-depositing oils, because the dry cloth removes residue that the wet cloth has already loosened.
– Use the right wipe pattern: don’t “scrub in circles”—stick to straight, overlapping strokes so you can track where residue moves
– Buff with a dry cloth: after the cleaner haze lifts, switch to a fresh/dry microfiber to pull remaining film off the glass
– Check with the lights on: turn on the headlights and look for streaks in reflections; re-buff only the affected areas
The wipe pattern is more important than most people think. Circular scrubbing tends to distribute residue unevenly, so you end up with repeating streak arcs. Straight, overlapping strokes make it easier to see exactly where the haze is moving and where it’s being removed.
Dry buffing: when your cleaner has done its job, switch to a clean dry microfiber and buff lightly. Use less pressure than you think—glass scratches are frequently caused by grit trapped in the cloth, not by “not enough elbow grease.”
Night visibility check: turn on the headlights and view the windshield from the front seat (or with the driver’s perspective). Look for streaks in reflections—especially near the edges. Re-buff only the areas that show haze; don’t redo the entire windshield if it’s already clear.
Repeatable process (2026 best practice): do the dry buff even if the glass “looks clean” in daylight. Many streaks become obvious only under artificial light because the last residue layer changes reflection contrast.
What can go wrong (and how to prevent it)
Most windshield-cleaning failures come from scratches, ammonia incompatibility with tint/film, or using a contaminated cloth. If you avoid those three, inside windshield clarity improves dramatically.
Scratches can occur when loose grit is ground across glass during wiping; dust-first technique is the simplest way to prevent abrasion.
Ammonia is a regulated indoor irritant; OSHA lists a 50 ppm ceiling for ammonia, supporting the practical recommendation to use ammonia-free glass cleaner for enclosed interior cleaning.
– Scratching from debris: if the windshield feels sandy, stop wiping and remove dust first—rubbing grit can leave permanent marks
– Damaging tint/film: avoid cleaners that contain ammonia (or anything your tint manufacturer warns against), since some films are sensitive to harsh ingredients
– Re-soiling too fast: if you wipe with a dirty cloth, you’ll spread residue—use clean sections as the cloth loads up
Here’s the practical cause-and-effect to keep in mind for inside windshield cleaning:
1) If it feels gritty, stop.
That sensation usually means particulate on the glass—often from dust on the cabin side, or from dried road spray during rainy seasons. Wet wiping over grit can create micro-marring that you’ll see as “frosty” haze later. Dust-first isn’t just a recommendation; it’s the anti-scratch step.
2) Tint/film compatibility matters.
Many modern tint and window film systems are installed with specific curing times and care guidelines. Even if a cleaner “works,” ammonia can be incompatible with some films or adhesives. For inside windshield cleaning in 2026, the safest approach is to use an ammonia-free automotive glass cleaner and follow the tint manufacturer’s written care instructions. If you’re unsure, err on the side of ammonia-free.
3) Don’t let the cloth become part of the problem.
Microfiber spreads oils and residue if you keep wiping with the same dirty face. Use clean sections of the cloth as it loads up. If you’re seeing “smears that look like fingerprints,” swap cloth sections sooner—before the cloth transfers the problem back to the glass.
Ammonia-based vs ammonia-free: what changes?
- Ammonia-based glass cleaner
- Pros: Often cuts through grease quickly. Cons: Higher risk of irritation indoors and can conflict with some tint/film care guidance.
- Ammonia-free automotive glass cleaner
- Pros: Generally safer for tint/film compliance and typically easier to control without leaving haze. Cons: May require more careful technique on heavy, oily residue.
Verdict / tip: safest approach, downsides, and who should skip
For most cars, the safest method is mild automotive glass cleaner + microfiber + dust-first technique, because it minimizes scratching and reduces the chance of leaving streaky film. The downside is it takes a little time—especially if the inside windshield has heavy film, nicotine residue, or overspray—so if the glass is contaminated with something unknown (chemical overspray is a good example), don’t guess: consult your tint manufacturer’s care guide or an automotive detailing professional for chemical-safe removal.
Skip DIY entirely if you’re unsure whether your vehicle has special coatings on the glass, if the tint/film warranty explicitly requires specific cleaner types, or if the windshield has visible scratches that could worsen with aggressive wiping. In those cases, professional inspection prevents accidental damage.
Using ammonia-free, automotive-labeled cleaners aligns with regulated indoor chemistry handling and with common tint care guidance to protect film compatibility.
A two-microfiber method (wet cleaning then dry buffing) reduces streak risk because it removes residual haze that can dry into visible reflections.
Quick checklist (scan before you start)
| Step | Do this | Avoid |
|---|---|---|
| 1 | Lift loose dust first | Wiping over grit |
| 2 | Use ammonia-free cleaner if tinted/filmed | Ammonia-based cleaners on film |
| 3 | Wipe top-to-bottom, overlapping passes | Circular scrubbing |
| 4 | Buff with dry microfiber | Reusing a heavily dirty cloth |
Frequently Asked Questions
What’s the best way to clean the inside of a windshield without streaks?
Start by using a microfiber cloth and a dedicated glass cleaner made for automotive windshields. Lightly mist the cleaner onto the cloth (not directly onto electronics) and wipe in straight lines, then buff with a dry side of the microfiber. For stubborn streaks, use a second pass with a fresh cloth and a motion in a different direction to catch missed residue.
How do you remove foggy film or haze from the inside of a windshield?
Foggy film is often caused by greasy residue, smoke, or hard-water deposits that trap moisture. Clean first with an ammonia-free glass cleaner, then follow with a gentle wipe using a solution of equal parts distilled water and isopropyl alcohol if the haze persists. Dry thoroughly with a clean microfiber to prevent new streaks and check that the windshield is fully clear before driving.
Why does the inside of my windshield get cloudy even after cleaning?
Cloudiness after cleaning usually comes from leftover cleaner residue, oily fingerprints, or contaminated interior surfaces like defroster vents and cabin air filters. Make sure you wipe until the glass is squeaky-clean, using a separate dry cloth to remove any film. If the haze keeps returning quickly, inspect cabin filters and consider having the windshield area cleaned with a stronger glass-safe degreaser.
Which cleaning products are safe for inside windshield glass?
Use automotive glass cleaners or solutions designed for window glass, and stick to microfiber cloths to avoid scratches and lint. Avoid using household cleaners with harsh additives on the windshield, especially anything that can leave a waxy film or streak (like some all-purpose sprays). If you make a DIY solution, choose distilled water and isopropyl alcohol, and never use ammonia-based products if they could damage tint or interior materials.
How do you clean the inside windshield near the edges and defroster lines?
Focus on edges and corners where dust and residue collect by using a microfiber corner or a windshield cleaning tool with a flexible head. Spray the cleaner onto the cloth, then wipe along the perimeter and around the defroster grid carefully to avoid pushing grime into seams. Finish by drying with a clean microfiber to ensure no moisture remains that could smear when the defrosters run.
📅 Last Updated: October 17, 2026 | Topic: how to clean windshield inside car | Content verified for accuracy and freshness.
References
- Windshield
- Microfiber
- Cleaning agent
- Ammonia
- https://www.cdc.gov/coronavirus/2019-ncov/community/disinfecting-building-facilities.html
- https://www.who.int/publications/i/item/cleaning-and-disinfecting-environmental-surfaces-in-the-context-of-covid-19-interim-guidance
- https://www.epa.gov/coronavirus/how-safely-clean-and-disinfect
- https://scholar.google.com/scholar?q=how+to+clean+car+windshield+inside+microfiber Google Scholar
- https://scholar.google.com/scholar?q=automotive+glass+cleaning+streak+prevention Google Scholar
- https://scholar.google.com/scholar?q=cleaning+windshield+interior+anti-fog+coating+maintenance Google Scholar
