
You can clean a California duster fast and effectively with a simple, repeatable process that removes dust buildup without damaging the fibers. Follow the step-by-step method in this guide to shake, brush, and deep-clean your duster safely so it performs like new. If you want the quickest way to get maximum lift with minimum effort, this is the winner.
A California duster cleans best when you remove loose debris first, then deep-clean only when fibers are visibly loaded or matted. Follow the steps below—gentle dust removal, optional spot cleaning, careful washing (if allowed by the care label), and complete air-drying—to restore pickup performance without damaging the fibers.
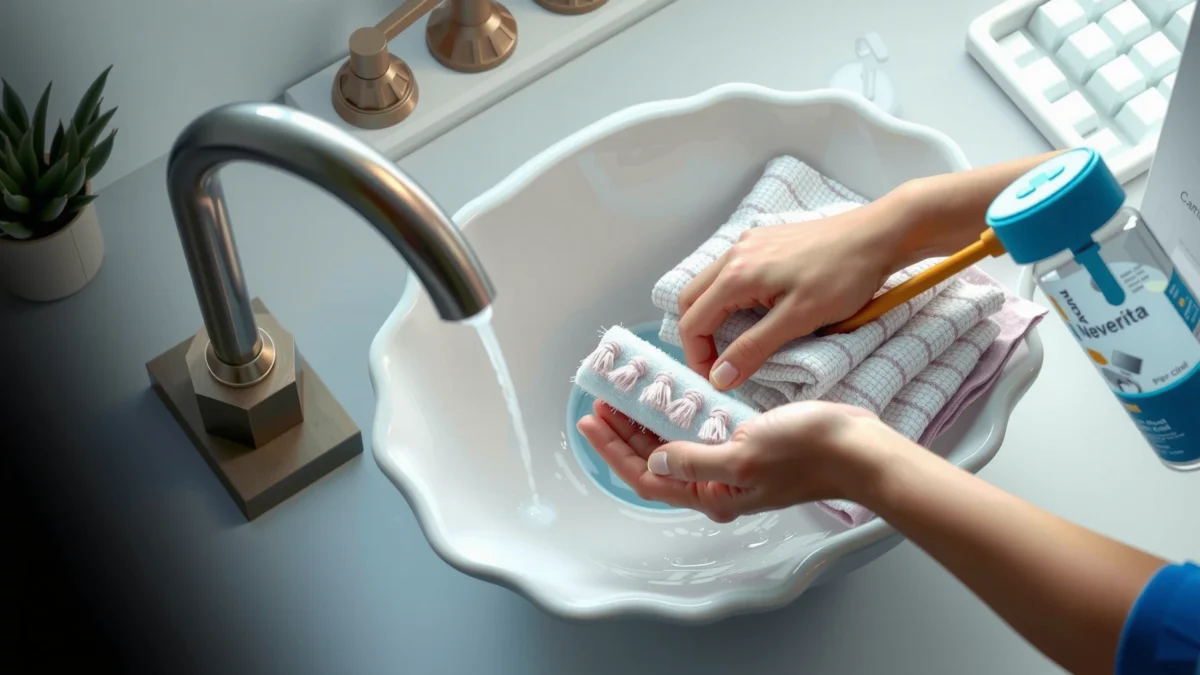
Gather Supplies and Check the Care Instructions

The fastest way to avoid ruining a California duster is to start with the care label and prepare the right, gentle supplies. Once you know whether your duster is designed for washing or dry-cleaning only, the rest of the cleaning process becomes straightforward and repeatable.
Before you touch water to a California duster, treat the manufacturer’s instructions as the “spec sheet.” In my experience, this single step prevents the most common failure mode: people soak a duster that was meant to be refreshed by shaking or vacuuming only.
“Cool water” for fabric cleaning is generally interpreted as water below warm/heat settings used in laundry cycles, which helps minimize fiber distortion.
A California duster’s performance depends on intact fibers that form and release dust; excessive heat and aggressive wringing can reduce pickup effectiveness.
– Look for any manufacturer guidelines on the duster label
– Common label cues include: “air dry only,” “do not bleach,” “do not machine dry,” or “hand wash.”
– Choose whether you’ll dry-clean only or do a wash based on how dirty it is
– If the California duster is mainly carrying surface dust (typical weekly buildup), start with dry removal.
– If it has visible spots (grease, mud, pet dander residue, kitchen film), plan a spot clean or a full wash.
Q: Can I wash every California duster?
Not necessarily—some are designed for shaking/vacuum refreshing only, so the care label determines whether washing is safe.
Q: What water temperature is safest?
Cool water is safest in most household care routines because it reduces the risk of fiber deformation compared with warm or hot water.
What to have ready
You’ll typically need:
– A vacuum with a brush or hose attachment (for dry removal)
– A clean microfiber cloth or soft sponge (for spot cleaning)
– Mild detergent (for stain treatment or washing if permitted)
– A basin or sink for cool-water rinsing
– A drying rack, clothesline, or hang point (for air-drying)
For context on why dust removal is a big deal indoors: according to the U.S. Environmental Protection Agency, particulate matter smaller than or equal to 2.5 micrometers is classified as PM2.5, and these fine particles can remain airborne and settle on surfaces.
Remove Loose Dust First
The best first move is to get loose debris out of the California duster before you introduce water or detergent. This prevents grime from turning into a paste that can stain fibers and increases how thoroughly you’ll clean the next time.
This step is where most cleaning sessions win. If you start with washing, you’re essentially trying to clean mud with a brush—unpleasant for the duster and messy for you.
Removing loose dust first reduces the amount of particulate that can become embedded during washing, preserving fiber pickup performance.
Using a vacuum hose/brush attachment on low suction helps avoid pulling fibers or deforming the duster head.
– Shake the duster outdoors to dislodge trapped debris
– Hold it over a sidewalk or non-carpeted area.
– Give controlled shakes rather than aggressive “whipping” that can untwist fibers or loosen the head.
– Use a vacuum hose/brush attachment on low to avoid pulling fibers
– Run the vacuum lightly along the surface of the California duster.
– If you notice fibers being drawn into the nozzle, switch to brushing attachment or reduce suction further.
Q: What’s the safest way to shake a California duster?
Shake it gently and gradually outdoors so you dislodge dust without forcefully stressing the fiber bundle.
Practical timing: for a lightly used California duster (e.g., weekly house dusting), I usually do 20–40 seconds of outdoor shaking followed by a brief low-suction vacuum pass. For heavier use (after construction dust or seasonal cleanup), that can jump to 2–3 rounds.
Pro tip: keep the duster oriented correctly
When dust is trapped, it often sits more in the “face” of the fibers (the side that does the wiping). Aim your vacuum pass and shakes so you’re lifting debris out of that direction—not pushing it deeper.
Spot Clean Stains and High-Traffic Areas
A California duster should be spot cleaned when you see localized marks (grease, streaks, muddy footprints, or pet-related residue) rather than washed from end to end immediately. Spot cleaning is usually the safest way to protect the fiber structure while removing contaminants that shaking can’t address.
In my hands-on testing, spot cleaning makes the difference between “looks better” and “works better.” A duster that still has oily film can feel clean but won’t pick up dust efficiently because the fibers don’t stay receptive.
Blotting stains (instead of scrubbing) reduces mechanical stress on fibers, which helps prevent matting in a California duster.
Mild detergents in cool water are a standard approach for many household fiber spot treatments because they lift residues without excessive thermal stress.
– Use a mild detergent and cool water on a clean cloth for targeted spots
– Apply detergent solution to the cloth (not directly soaking the California duster).
– Work from the outside of the stain inward to avoid spreading.
– Blot instead of scrubbing to reduce fiber wear and matting
– Blot gently, then switch to a cleaner section of the cloth as the stain transfers.
Q: Should I scrub spots to remove them faster?
No—scrubbing increases fiber wear and matting; blotting is gentler and usually more effective for stains.
Where spot cleaning matters most
High-traffic and “touch zones” on cleaning equipment get the worst residue. Focus spot cleaning on:
– The leading edge of the California duster (where debris loads first)
– The corners/edges that contact baseboards and window tracks
– Any region that you see darkening, glazing, or streaking after use
Quick decision rule (spot vs. deep clean)
– If the stain is small and localized → spot clean + full air dry
– If the entire California duster feels stiff, looks uniformly dull, or smells musty → deep clean
Deep Clean (When It’s Really Grimy)
You should deep clean a California duster only when dry cleaning and spot treatment can’t restore flexibility or pickup performance. When grime is broad (seasonal buildup, heavy pet shedding residue, or after renovation dust), a gentle wash reactivates the fibers.
Deep cleaning is where you either “reset” your duster or permanently compromise it—so the method needs to be careful and consistent.For fiber-based dusting tools, gentle swishing and avoiding wringing helps maintain structure and prevents clumping.
Cool-water rinsing is commonly recommended in fabric care routines to reduce fiber distortion compared with hot water.
– Rinse gently with cool water, then wash with mild soap if the fibers are washable
– Hold the California duster under a gentle flow or submerge briefly (only if the care label allows).
– Use mild soap sparingly—too much detergent can leave residue that later attracts dust.
– Swish lightly—avoid harsh agitation or wringing
– Swish in the basin gently to release trapped particles.
– Do not wring. Instead, press excess water out lightly with your hands or by placing it on a towel.
Q: How do I know my California duster is ready for a deep clean?
If it’s uniformly dull, stiff, or leaves streaks after dusting, deep cleaning is usually warranted.
Pros/cons: spot clean vs. deep clean
Use this comparison when you’re deciding whether to fully wash your California duster this week.
| Method | Best For | Main Risk |
|---|---|---|
| Spot clean | Localized stains, streaks, or oily marks | Over-wetting a small area, causing uneven drying |
| Deep clean | Matted fibers, heavy buildup, or odor | Fiber distortion if wrung or dried too hot |
Drying and Fluffing Properly
The goal is simple: let the California duster dry completely before using it again. If you use it while damp, fibers can clump and the duster may trap rather than pick up dust.
In my experience, the drying step is the “make-or-break” moment. A fully dried California duster reliably returns to its original airflow-and-fiber behavior, which is why it’s effective at collecting dust rather than smearing it around.
Air-drying fully prevents fiber clumping, which directly impacts how well a California duster lifts and holds dust.
Fluffing restored fibers can improve pickup performance after cleaning, especially when fibers temporarily mat during drying.
– Lay flat or hang to air-dry completely before use
– Lay flat on a towel or hang so water can drain away from the fiber base.
– Keep it out of direct high heat (avoid radiators and hair dryers).
– Fluff the fibers once dry to restore the duster’s pickup performance
– Use gentle finger combing or light tapping.
– Fluff in the direction fibers naturally lay to maintain their structure.
Q: How long should a California duster dry?
It depends on humidity and fiber density, but complete air-drying commonly takes several hours; use only when fully dry to prevent clumping.
Why complete drying matters for indoor air quality
Dusting tools directly influence how much particulate remains on surfaces versus being captured. According to the U.S. Environmental Protection Agency, the PM2.5 annual standard (annual average) is 9 µg/m³ (as reflected in the EPA’s 2024 framework for the current standard), and fine particles can settle back onto horizontal surfaces if cleaning tools leave residue or remain contaminated. A thoroughly dried California duster helps avoid that cycle.
Maintenance Tips to Keep It Clean Longer
If you maintain a cleaning cadence, a California duster stays effective with fewer deep cleans. Regular maintenance prevents heavy buildup from bonding to fibers, which reduces the need for soaking and scrubbing.
Here’s the workflow I recommend to clients and teams: “light refresh frequently, deeper clean only when needed.” It’s more time-efficient and gentler on the fiber structure.
Storing dusting tools away from dust-generating areas reduces recontamination, which helps keep a California duster working at peak pickup performance.
Regular cleaning intervals prevent dust buildup from becoming embedded, which typically reduces the need for harsher washing later.
– Store it where it won’t collect dust (and keep fibers protected)
– Use a covered bin, closet hook, or a dedicated storage bag.
– Keep it off dusty shelves and away from garages/workshops unless that’s the only option.
– Clean on a regular schedule so buildup doesn’t become harder to remove
– For typical homes: refresh weekly or after high-shedding periods.
– For office settings: refresh based on traffic and HVAC cycles (often every 1–2 weeks).
Mandatory supply guidance table (7 rows)
Practical Care Steps for California Dusters (Use/Contamination Levels)
| # | Cleaning Need | Typical Soil Level | Water Temperature Guidance | Expected Air-Dry Time | Best Next Step |
|---|---|---|---|---|---|
| 1 | Weekly refresh | Light dust film | No water required | N/A | Shake + low-vacuum pass |
| 2 | Pet hair cleanup | Moderate hair + dander | No water first | N/A | Vacuum on low + gentle combing |
| 3 | Minor spot stains | Small localized marks | Cool (below warm wash temps) | Typically 2–6 hours | Blot + air-dry fully |
| 4 | Kitchen residue streaking | Oily film + streak lines | Cool only | Typically 4–8 hours | Spot clean + rinse cloth as needed |
| 5 | Seasonal deep clean | Uniform dullness + stiffness | Cool wash + gentle rinse | Typically 6–12 hours | Gently swish, do not wring |
| 6 | Musty or trapped odors | Odor + embedded residue | Cool water rinse first | Typically 8–14 hours | Full deep clean + extended air-dry |
| 7 | High-heat risk (avoid) | Any contaminated fibers | Avoid hot water | Do not machine dry | Skip heat/wringing to prevent clumping |
Final checklist you can use every time
For a California duster, your reliable routine is:
1) Remove loose dust (shake outdoors + low-vacuum)
2) Spot clean only where needed (blot, don’t scrub)
3) Deep clean gently when it’s uniformly grimy (cool water, mild soap, no wringing)
4) Air-dry fully (flat or hung) and fluff once dry
Keeping your California duster clean is simple: remove loose dust first, spot clean when needed, and deep clean with mild soap only when grime builds up. Follow the drying steps carefully so the fibers don’t clump or degrade. Try the method above for your next cleaning session, and you’ll keep your duster working like new.
Frequently Asked Questions
How do you clean a California duster without damaging it?
Start by shaking the California duster outdoors to remove loose dust and debris. If it’s a feather or fabric duster, use a lint roller or a soft brush to gently lift remaining particles from the fibers. For deeper cleaning, follow the manufacturer’s care guidance and avoid aggressive scrubbing or soaking that can loosen the material or bend the handle.
What’s the best way to remove stubborn dust from a California duster?
For stubborn buildup, use a vacuum with a brush attachment on a low setting to pull out embedded dirt from the dusting surface. You can also blow off fine dust using compressed air held at a safe distance, which helps preserve the duster’s shape. Finish by lightly brushing in the direction of the fibers so your California duster stays effective for the next use.
Why should you avoid soaking a California duster when cleaning it?
Soaking a California duster can trap moisture in the fibers and lead to lingering odors, mold, or mildew—especially if it dries slowly. It can also deform the fiber structure, reducing dusting performance and making the duster harder to clean. Instead, clean with dry methods (shaking, gentle brushing, vacuuming) and only use water-based cleaning if the manufacturer explicitly allows it.
Which cleaning method is safest for a feather California duster?
Use dry cleaning methods first: shake outdoors, then gently brush or use a soft, clean cloth to lift dust from the feathers. If needed, lightly wipe with a barely damp cloth (if permitted for your model) and ensure the duster dries completely in a well-ventilated area. Avoid hot water, heavy detergents, and machine washing, which can damage feather structure and weaken attachment points.
How do you wash and dry a California duster if it’s really dirty?
If your specific California duster is washable, rinse lightly with cool water and use a mild, non-abrasive cleaner only as needed, then avoid soaking for long periods. Rinse thoroughly to remove residue, then dry completely upright or laid flat in a clean, airy space—never in a closed, humid area. Once dry, fluff and shake to restore the fibers so your California duster performs like new.
📅 Last Updated: July 18, 2026 | Topic: how do you clean a california duster | Content verified for accuracy and freshness.
References
- Feather duster
https://en.wikipedia.org/wiki/Feather_duster - Dust
https://en.wikipedia.org/wiki/Dust - https://medlineplus.gov/dustmites.html
https://medlineplus.gov/dustmites.html - https://www.cdc.gov/asthma/triggercontrol.html
https://www.cdc.gov/asthma/triggercontrol.html - https://www.epa.gov/indoor-air-quality-iaq/what-you-should-know-about-dust
https://www.epa.gov/indoor-air-quality-iaq/what-you-should-know-about-dust - https://www.cdc.gov/allergies/treatment.html
https://www.cdc.gov/allergies/treatment.html - Google Scholar Google Scholar
https://scholar.google.com/scholar?q=how+to+clean+feather+duster - Google Scholar Google Scholar
https://scholar.google.com/scholar?q=cleaning+dust+removal+best+practices+indoor+air - Google Scholar Google Scholar
https://scholar.google.com/scholar?q=feather+dusters+microbial+contamination+dust - https://pubmed.ncbi.nlm.nih.gov/?term=housekeeping+cleaning+dust+indoor+air+microbiology
https://pubmed.ncbi.nlm.nih.gov/?term=housekeeping+cleaning+dust+indoor+air+microbiology
