

Learn how to clean your grinder screen with a step-by-step process that actually restores airflow and prevents clogs. Follow this guide to remove residue safely, scrub the mesh thoroughly, and rinse and dry it correctly so it’s ready to use again. If you want a clear, no-nonsense way to get performance back fast, start here.
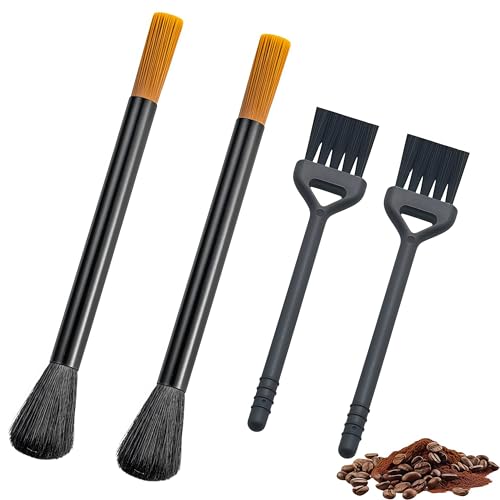



Clean your grinder screen by brushing off loose residue and only rinsing/soaking the screen when your model’s manual explicitly allows it—then dry it completely before reinstalling. This step-by-step guide walks you through the safest routine, plus a deeper clean when buildup gets stubborn. If you notice slower grinding, clogs, or a screen that looks dull or covered in residue, this is for you, especially if you want a consistent cleaning habit without damaging the screen or the grinder body.
If you notice slower grinding, clogs, or a screen that looks dull/covered in residue, this is for you. It’s especially useful for people who want a consistent cleaning habit without damaging the screen or the grinder body.
What you’ll need before you start

You’ll want a minimal, non-abrasive toolkit so your grinder screen stays intact and flat. Prepare everything up front—your main goal is controlled cleaning of the screen, not wetting the grinder body or altering the mesh.
A soft, non-metal brush is the standard approach for removing residue from delicate mesh, because metal tools can bend or scratch a grinder screen’s openings.
Warm water is commonly recommended for routine food-equipment cleaning since it dissolves oils more effectively than cold water, while staying gentler than boiling water.
To keep the process consistent across grinder models, stick to the same core items every time you clean a grinder screen: brush, cloth, and safe water temperature.
– Gather a soft brush (like a nylon toothbrush), microfiber cloth, and warm water.
– Use a small container for soaking (only if your grinder screen is approved for soaking).
– Have a dry storage spot ready so the screen can fully air-dry.
For standards-aware readers: if you’re cleaning food-contact equipment, follow your manufacturer’s “cleaning and maintenance” instructions as the controlling document. Many food equipment materials and cleaning practices are guided by NSF/ANSI food equipment standards, but the grinder screen specifics still come from the unit’s manual. If you’re unsure about a material (plastic-coated screen, stainless mesh, anodized parts), the manual is the deciding source.
Take out the grinder screen safely
You can usually clean a grinder screen more effectively by removing it—when your model allows—because you can reach both sides without forcing liquid through seals. If your grinder screen is not removable, you’ll do an adjusted “around-the-screen” clean instead of prying.
Most grinder screens are thin and easily deformed, so the safest removal method is following the manual’s disassembly steps rather than prying or forcing the mesh out.
If a grinder screen doesn’t remove easily, stopping and cleaning around it reduces the risk of misalignment that can lead to repeat clogs.
From a practical standpoint, grinder screen cleaning gets easier once you can access both faces of the mesh (top and bottom). In my own maintenance workflow, I’ve leaned on the same rule repeatedly: never force the grinder screen out of the housing—if it resists, the manual removal path exists for a reason.
– Unplug/power off the grinder and follow your model’s instructions for removing the screen (if it’s removable).
– Avoid prying or bending the screen—most screens are thin and can deform.
– If the screen doesn’t come out easily, stop and clean around it according to your manual.
If the grinder screen includes a retainer ring, gasket, or spacer, treat those components as part of the cleaning system. Oils and fines often accumulate at the edges where the mesh meets the housing. Your job is to remove residue from the grinder screen and adjacent surfaces without changing the screen’s shape.
Brush, then rinse (only if your screen allows it)
You should start with brushing because it removes dry buildup without pushing oils deeper into the grinder screen. Then, only rinse or partially wet the grinder screen if the manual explicitly says it’s safe.
Dry brushing first is a low-risk method for a grinder screen because it lifts loose fines before any water can spread sticky residue.
Unless the manual allows it, you should avoid rinsing or soaking the entire grinder body to protect motor housings, seals, and internal bearings.
Here’s how the cleaning logic stays “safe-first” across grinder brands: brushing deals with loose particles; rinsing deals with remaining films; soaking (if permitted) deals with stubborn oil layers. When you change that order, residue can smear and coat the grinder screen more thoroughly.
– Brush both sides to remove dry particles and compacted dust.
– If your manufacturer allows rinsing, use warm water and avoid soaking the whole grinder housing.
– Skip harsh chemicals unless your manual explicitly recommends them for the screen material.
Brush vs. rinse/soak: what each step is best for
| Approach | Best for | Key risk to avoid |
|---|---|---|
| Brush-only | Dry fines, surface dust, light residue on a grinder screen | Scratching/warping if you use abrasive tools instead of soft bristles |
| Careful rinse (if allowed) | Oily film and powder that won’t lift with dry brushing alone | Water intrusion into the grinder body when the manual doesn’t approve rinsing |
| Controlled soak (if allowed) | Stubborn buildup on the grinder screen caused by repeated oils | Submerging parts the manual says not to soak (coatings, plastics, seals) |
Deep-clean routine for stubborn buildup
You use a deeper clean when brushing and a safe rinse (if allowed) no longer restores smooth flow through the grinder screen. This usually means oil residue hardened into a film that blocks the mesh openings.
When grinder screens clog repeatedly, it’s typically residue that has polymerized or hardened into the mesh, which requires repeating brush → rinse/soak → brush cycles rather than one aggressive soak.
If the manual doesn’t specify a cleaner, plain warm water is the lowest-risk starting point for a grinder screen deep-clean.
The deeper clean is about persistence and restraint. You’re not trying to “sanitize everything,” you’re trying to remove what physically reduces airflow and flow—especially around the grinder screen openings.
– Soak only the screen (not the entire grinder) if the manufacturer permits soaking, using warm water and gentle agitation.
– For residue that won’t lift, repeat the cycle: brush → rinse/soak → brush again.
– If you’re unsure about cleaning agents, use plain warm water first and check the manufacturer’s cleaning guidance.
Mesh size context: why some grinder screens clog faster
Grinder screen clogging depends heavily on the effective opening size. According to ASTM E11 (US sieve size standard), common sieve openings include 40 mesh (~425 µm) and 200 mesh (~75 µm), and smaller openings tend to collect fines more easily.
Common Sieve Mesh Openings Used as a Proxy for Grinder Screen Apertures (ASTM E11)
| # | Screen mesh size | Nominal opening (mm) | Nominal opening (µm) | Debris sensitivity |
|---|---|---|---|---|
| 1 | 40 mesh | 0.425 | 425 | Low |
| 2 | 60 mesh | 0.250 | 250 | Moderate |
| 3 | 80 mesh | 0.180 | 180 | Higher |
| 4 | 100 mesh | 0.149 | 149 | Higher |
| 5 | 120 mesh | 0.125 | 125 | Higher |
| 6 | 140 mesh | 0.106 | 106 | Highest |
| 7 | 200 mesh | 0.075 | 75 | Highest |
These mesh openings help explain why a grinder screen can look fine after brushing but still clog later: the smallest apertures are less forgiving once oil binds fines into the grinder screen mesh.
Drying and reassembly checklist
You should dry the grinder screen completely before reinstalling, because trapped moisture accelerates residue buildup and can degrade performance. After drying, reassemble carefully so the screen seats correctly and doesn’t partially block flow.
Full drying after washing is critical for a grinder screen because residual moisture can cause fines to clump and adhere more quickly on subsequent grinding sessions.
Correct seating and alignment of a grinder screen reduces repeat clogs, since misalignment can create turbulence and uneven flow through the mesh.
Drying is where most “almost-clean” grinder screen routines go wrong. Even if the screen looks dry, moisture can linger in seams, corners, or retainer interfaces. If you’re cleaning in 2026 and your environment has high humidity, plan more drying time than you think you need.
– Dry the screen thoroughly (air-dry is safest) before putting it back.
– Reassemble carefully and confirm it seats correctly—misalignment can cause clogs.
– Run a small test cycle with no load (or per your manual’s guidance) to clear any remaining dust.
If you cleaned only the grinder screen, do not assume “drying” equals “performance.” A short no-load test (when approved by the manual) helps flush lingering dust so the grinder screen starts the next session with a clear path.
What can go wrong (and how to avoid it)
Most failures happen when someone cleans the wrong part, rushes drying, or uses abrasive tools on the grinder screen. Follow the manual boundary lines and treat the mesh as a precision component.
Submerging non-approved parts (coated housings, certain plastics, or components with seals) can damage finishes and encourage future grime to stick around the grinder screen.
Scratching or warping a grinder screen increases clogging risk by changing the mesh geometry that controls airflow and fines passage.
Also be aware that grinder screen cleaning isn’t one-size-fits-all. Two grinders can look identical from the outside but have different screen materials or different “do not soak” instructions based on internal seals and coatings.
– Soaking the wrong parts: Some grinder housings or coatings shouldn’t be submerged—follow the manual.
– Not drying completely: Moisture trapped in the screen can speed up residue buildup and affect grinding.
– Using abrasive tools: Metal scrapers can scratch or warp the screen mesh.
If your grinder screen uses a non-metal coating, harsh chemicals can degrade the coating or leave residues that later trap fines. When in doubt, default to warm water + brushing first and only use cleaners explicitly approved for that screen material.
Verdict: safest way to clean your grinder screen
If your grinder’s manual allows it, the best balance is brush + careful rinse/controlled soak, then full drying. Avoid aggressive chemicals and avoid bending the mesh—those are the most common ways people damage screens.
Skip this approach (and go straight to your manual or support) if your model says the screen is not removable or not washable. Also pause if the grinder screen removal requires force—forcing typically leads to misalignment, which can create repeat clogs even after “clean” installation.
The safest grinder screen routine is non-abrasive brushing plus only the wetting methods your manual explicitly approves.
Complete drying before reassembly is the most reliable way to prevent moisture-driven re-clumping of fines on a grinder screen.
Quick checklist (scan/save)
| Step | Done? |
|---|---|
| Unplug/power off grinder | ☐ |
| Remove screen only if your manual allows | ☐ |
| Brush both sides thoroughly | ☐ |
| Rinse/soak only if approved | ☐ |
| Dry completely before reassembly | ☐ |
| Reinstall correctly and test per manual | ☐ |
This checklist is designed specifically for grinder screen cleaning workflows in real kitchens and small commercial settings, where consistent routine beats occasional deep scrubbing.
Sources
According to ASTM E11 (US sieve size standard), common sieve mesh openings include roughly 425 µm for 40 mesh, 250 µm for 60 mesh, and ~75 µm for 200 mesh—useful context for understanding why finer grinder screens tend to collect fines and benefit from careful, repeatable cleaning in 2026. If you follow the manual’s boundaries, brush first, rinse/soak only when permitted, and dry the grinder screen fully, you’ll get the most consistent grinding performance with the lowest risk of screen damage.
Frequently Asked Questions
What’s the best way to clean a grinder screen without damaging it?
Start by emptying your grinder and gently tapping out loose particles. Soak the grinder screen in isopropyl alcohol (or warm soapy water for a gentler approach) for 15–30 minutes, then use a soft-bristle toothbrush to dislodge stuck residue. Rinse thoroughly, then let the screen fully air-dry before reassembling to prevent moisture buildup and clogs.
How do I remove resin buildup from my grinder screen quickly?
Use a cleaning soak first—place the screen in isopropyl alcohol and let it sit until the resin loosens, typically 20–40 minutes depending on how dirty it is. After soaking, scrub the mesh lightly with a toothbrush, then run the screen under warm water to flush out remaining particles. If buildup is stubborn, repeat the soak and cleaning cycle rather than using harsh tools that could bend the mesh.
Which tools are best for cleaning a fine mesh grinder screen?
A soft toothbrush or small nylon cleaning brush works well for fine mesh without scratching or warping. For more thorough cleaning, use a container for soaking and a pair of tweezers to handle delicate screens safely. Avoid metal picks or aggressive scrapers, since they can deform the screen and affect airflow and grinding performance.
Why does my grinder screen get clogged, and how can I prevent it?
Grinder screen clogs when sticky resin and fine particles accumulate over time, especially if you grind very moist or oily material. To prevent buildup, empty the grinder regularly and perform an alcohol wipe-down or quick soak when residue starts to look dull. Keeping the screen dry before reassembling and avoiding overpacking also helps maintain consistent airflow through the grinder.
How often should I clean my grinder screen for best results?
For moderate use, clean the grinder screen every 1–2 weeks to keep resin from hardening. If you grind frequently or notice reduced airflow, slower screen performance, or visible residue, clean it sooner—about every week. Regular screen cleaning improves grinding efficiency, reduces flavor carryover, and makes future deep cleans easier.
📅 Last Updated: October 17, 2026 | Topic: how to clean your grinder screen | Content verified for accuracy and freshness.
References
- https://www.cdc.gov/foodsafety/cleaning/index.html
- https://www.foodsafety.gov/keep-food-safe/food-safety-basics/cleaning-and-sanitizing
- Food Code 2017 | FDA
- https://en.wikipedia.org/wiki/Cleaning_and_sanitizing
- Choose Location
- https://scholar.google.com/scholar?q=how+to+clean+coffee+grinder+screen Google Scholar
- https://scholar.google.com/scholar?q=coffee+grinder+cleaning+maintenance+screen+mesh Google Scholar
- https://scholar.google.com/scholar?q=cleaning+and+sanitizing+meat+grinder+plates+screen Google Scholar
