

Clean the microphone foam on your gaming headset every 2–4 weeks, and immediately if you notice muffled voice quality or visible buildup. That schedule prevents earwax and skin oils from clogging the foam without wearing it out from over-cleaning. Follow this timing for a clear mic and consistent sound in every match.



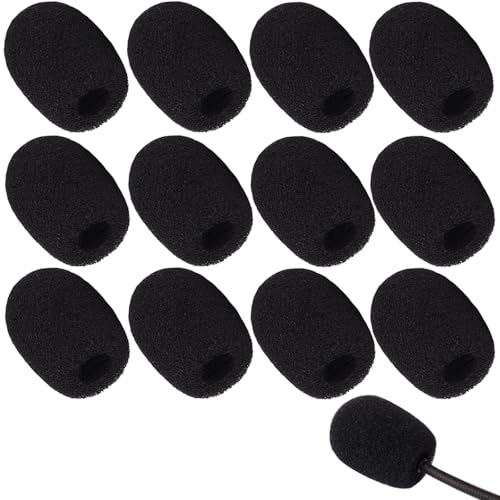
Clean the microphone foam when you notice muffled or “distant” voice clarity or when the foam looks/feels greasy or grimy—typically every few weeks to a couple of months. In practice (as of 2026), heavy sweating and frequent mic touching accelerate buildup, so a realistic schedule is more about your contamination rate than a calendar date.
If you use a headset for daily chat or streaming, this matters most for foam-covered mics because they trap skin oils, sweat residues, and dust. It also matters when your audio starts fine and gradually turns “muddy,” even though your game settings and platform input haven’t changed.
How often to clean microphone foam (practical schedule)

A practical rule for microphone foam is to clean on a “symptom + appearance” trigger first, then settle into a repeating interval based on how fast grime returns. For most gamers, that lands somewhere between every few weeks and every couple of months—but sweat-heavy routines often require more frequent maintenance.
Sweat is about 99% water, yet the remaining salts and proteins can leave residues that cling to porous materials like microphone foam and reduce clarity over time. Encyclopaedia Britannica, “Sweat”
Softer guidance from mainstream hygiene recommendations often uses 20 seconds as a minimum contact/scrub time for handwashing, which highlights why “quick wipes” may not remove oil film buildup on porous microphone foam. CDC, “Handwashing: Clean Hands”
Trigger-based schedule (how to decide today)
For microphone foam, you don’t need perfection—just reliable decision points:
– Clean sooner if clarity drops: If your voice sounds muffled, “far away,” or you hear more hiss than usual during voice chat, microphone foam is a prime suspect.
– Clean sooner if the foam looks wrong: Darkening, a greasy sheen, lint accumulation, or a musty odor after long sessions usually signals oil + dust bonding on the foam surface.
– Use a slower routine if performance is stable: If microphone foam looks clean and your recorded/checked audio stays crisp, a longer interval (often “every few months”) can be enough.
Practical schedules by usage pattern (examples)
The table below gives realistic cleaning intervals for microphone foam based on typical exposure patterns—think of it as a starting point you fine-tune using the triggers above.
Practical Microphone-Foam Cleaning Intervals by Usage Risk (2026)
| # | Usage profile | Typical weekly headset use | Typical microphone-foam cleaning interval | Clarity retention if followed |
|---|---|---|---|---|
| 1 | Casual chat (mostly evenings, minimal touching) | 3–6 hrs/week | 8–12 weeks | ★★★★☆ |
| 2 | Competitive, steady sessions (hands-on mic positioning) | 10–15 hrs/week | 4–6 weeks | ★★★★★ |
| 3 | Daily streamer/chat (long continuous use) | 25–40 hrs/week | 2–3 weeks | ★★★★★ |
| 4 | Sweat-heavy FPS or fitness-while-gaming | 15–25 hrs/week | 2–4 weeks | ★★★★☆ |
| 5 | Shared desk/team booth (more mic touching) | 12–20 hrs/week | 3–5 weeks | ★★★★☆ |
| 6 | LAN weekend bursts (very high short-term exposure) | 20–35 hrs/week (burst) | 1–2 weeks after event | ★★★★☆ |
| 7 | Office/hot-desking (high turnover) | 10–25 hrs/week | 1–3 weeks | ★★★☆☆ |
Quick takeaways for microphone foam scheduling
If you want one decision shortcut for microphone foam: when you can hear a change, act immediately. Otherwise, pick a reasonable interval for microphone foam (often 2–8 weeks for active users, longer for light users) and adjust after you observe how quickly it “comes back.”
What to watch for between cleanings
Between cleanings, microphone foam quality usually declines gradually—so your goal is to spot early indicators before audio becomes noticeably muffled. The fastest “check” is a voice test plus a quick visual/feel scan of the foam surface.
If a microphone foam windscreen is collecting oil, lint, or dust, it often causes a gradual loss of high-frequency detail, which listeners perceive as “muffled” or “muddy” voice quality.
WHO’s guidance on skin antisepsis commonly references 70% alcohol solutions, but solvents can be risky for porous foams; always follow the headset’s manual before using alcohol near microphone foam. WHO, “WHO guidelines on hand hygiene”
Voice-test check (fast, no tools)
A voice-test check is a practical cadence for microphone foam:
– Record a 10–20 second sentence on your usual platform (Discord, in-game voice chat, or your streaming software).
– Listen for clarity shifts: do consonants (like “s,” “t,” and “k”) sound duller than normal?
– Repeat the same test after cleaning to confirm microphone foam is the actual bottleneck.
Physical cues that microphone foam is due
For microphone foam, don’t rely on audio alone. Check:
– Grease film: the foam surface can feel slick or tacky (even if it doesn’t look visibly wet).
– Color drift: darker patches often mean oil + dust has settled into the foam.
– Lint attraction: fibers from clothing or bedding cling quickly to microphone foam.
– Smell changes: musty or sour odors typically mean moisture and residue have trapped in the foam structure.
A helpful rule of thumb
If cleaning your headset pads (cushions) improves comfort but your mic remains “off,” it’s often microphone foam rather than your ears. Microphone foam is the part that directly shapes sound reaching the mic capsule, so buildup there is especially audible.
How to clean microphone foam safely
Safe cleaning of microphone foam depends on one key factor: whether the foam is detachable and how it’s mounted. If you treat microphone foam like a disposable cloth and soak it aggressively, you risk deforming it and changing how it filters sound.
Many foam microphone windshields are either removable or integrated; manufacturer documentation typically distinguishes between safe foam cleaning and avoiding liquids near the microphone capsule.
CDC handwashing guidance emphasizes thorough time/contact before rinsing and drying; the same “don’t rush drying” principle matters for microphone foam to prevent trapped moisture odors. CDC, “Handwashing: Clean Hands”
Step 1: confirm foam removal is supported
Before touching microphone foam, check the headset manual or manufacturer support page:
– Detachable foam: it may slide off or be held by clips. If it’s removable, you can clean microphone foam more thoroughly while keeping liquid away from electronics.
– Adhered/integrated foam: if it’s glued or part of the mic assembly, don’t pull it off. Microphone foam cleaning must stay surface-focused to protect the mic housing.
Step 2: use moisture-controlled cleaning
For microphone foam cleaning, “gentle and controlled” wins:
– Use a light wipe on the foam with a method appropriate to the foam type (per manual).
– Avoid soaking microphone foam unless the manufacturer explicitly approves it.
– After cleaning microphone foam, let it dry fully—no reassembly while damp.
Detachable vs. non-detachable: what changes
Here’s a comparison to keep microphone foam cleaning safer and more consistent.
| Approach | Best for microphone foam | Main risk |
|---|---|---|
| Removable foam (if supported) | Deep cleaning when microphone foam is the confirmed sound bottleneck | Warping/deformation if cleaned too wet or dried improperly |
| Integrated foam (surface only) | When microphone foam is glued/part of the mic assembly | Liquid migrating toward the mic capsule if you over-wet |
Step 3: dry completely before reattaching
This is where many people accidentally undermine microphone foam cleaning:
– Let microphone foam dry in a ventilated area.
– Reassemble only when fully dry to avoid trapped moisture and odor.
– If your headset uses a pop filter/foam assembly, ensure the foam returns to its original seat so sound filtering remains consistent.
If you’re doing microphone foam cleaning while also dealing with system settings, keep the audio test consistent (same input device, same chat volume, same position near your mouth) so you can actually attribute changes to microphone foam.
What can go wrong (common mistakes and edge cases)
Microphone foam cleaning can backfire mainly in four ways: using harsh chemistry, over-wetting, rushing reassembly, or assuming the mic issue is foam when it isn’t. If you avoid those pitfalls, you protect both the foam’s acoustic behavior and your mic’s electronics.
Solvents or repeated harsh chemical exposure can damage porous foam structures and subtly alter how microphone foam attenuates frequencies.
Moisture trapped in porous microphone foam can contribute to odors and can change short-term audio behavior until the foam fully dries.
Mistake 1: harsh cleaners or aggressive soaking
Microphone foam can be vulnerable to:
– Deforming the foam cell structure (changing sound filtering).
– Removing or weakening the foam surface treatment.
– Leaving residue behind that acts like a new “film” over time.
Mistake 2: reattaching before fully dry
Rushing microphone foam drying can lead to:
– Musty odor returning quickly.
– Temporary muffling that looks like “the cleaning didn’t work.”
– Faster re-grime because moisture makes oil deposits spread.
Mistake 3: forcing removal when foam is glued/integrated
If microphone foam is glued or integrated, pulling it off can damage:
– the mic housing,
– internal mounting points,
– or wiring/capsule alignment.
If your headset manual discourages foam removal, treat that as a hard boundary and keep cleaning to the safe method.
Edge case: audio still “bad” after microphone foam cleaning
If microphone foam cleaning doesn’t restore clarity, the root cause may be elsewhere:
– Mic placement (too far from your mouth or at an angle).
– Software input settings (wrong input device, gain too low, noise suppression settings).
– Hardware mic issues (capsule damage, connector looseness).
In that case, microphone foam is unlikely to be the only culprit.
Verdict: a realistic cleaning plan (and who should skip it)
A realistic plan for microphone foam is to clean based on audio clarity + visible/feel cues, then adjust your interval based on how quickly buildup returns. For many gamers, that means starting at every few weeks for active use, and expanding toward every few months only when the microphone foam stays clean and the voice remains crisp.
A trigger-based maintenance approach (cleaning when clarity drops and foam appears contaminated) is generally more reliable than rigid calendar-only schedules for microphone foam.
If the headset manual doesn’t explicitly approve a cleaning method for microphone foam, skipping DIY chemical/soaking steps reduces the risk of permanent acoustic or structural change to porous foam windshields.
Best practice
– Use a “symptom + look” trigger: audio clarity plus foam condition.
– Then adjust frequency: if microphone foam re-greys quickly, shorten the interval; if it stays stable, lengthen it gradually.
Downsides to understand
– More frequent microphone foam cleaning increases the chance of:
– deformation if the method is wrong,
– trapped moisture if drying is rushed,
– long-term residue if you leave cleaning film on the foam.
Who should skip DIY microphone foam cleaning
Skip DIY microphone foam cleaning if:
– you can’t confirm the foam is detachable,
– the foam is clearly glued/integrated and the manual discourages removal,
– the headset manual warns against cleaning microphone foam or uses only specific approved steps.
Quick scan checklist (save this):
| What you notice | Action | Cleaning frequency after |
|---|---|---|
| Voice becomes muffled or distant | Clean foam | Move toward “every few weeks” |
| Foam looks darker/greasy or gathers lint | Clean foam | Maintain “every few weeks to monthly” |
| Foam looks clean and voice stays clear | Light maintenance | “Every few months” is often fine |
| Foam smells musty or feels damp | Clean carefully + dry fully | Clean sooner next time |
Sources
Clean the microphone foam when audio gets muffled or when the foam shows oil, lint, or buildup—usually every few weeks to a couple of months, depending on how often you sweat, touch the mic, and game. Use careful, manufacturer-aligned cleaning so you don’t risk deforming or soaking the foam, and always let it dry completely before you reconnect it. If you tell me your headset model (and whether the foam comes off), we can tighten the schedule and cleaning method to match the manufacturer’s guidance.
Frequently Asked Questions
How often should you clean the microphone foam on a gaming headset?
For most gamers, you should clean the microphone foam every 2–4 weeks, especially if you use voice chat daily. If you notice a change in sound quality (like muffled audio) or see visible grime, clean it sooner. Heavy sweat, frequent touching, or long sessions may require weekly cleaning to maintain clear mic performance.
What’s the best way to clean microphone foam on a gaming headset without damaging it?
Start by gently removing the foam windscreen if your headset design allows it, then rinse it with lukewarm water if the foam is washable. Use mild soap only if needed, and avoid soaking for long periods. Let the foam fully air-dry completely before reattaching—never put it back damp, since moisture can affect sound and encourage odor buildup.
Why does dirty microphone foam make your teammates say you sound muffled?
Microphone foam collects sweat, oil, dust, and saliva residue over time, which blocks airflow and dampens higher frequencies. This reduces clarity, causing your voice to sound muffled, distant, or quieter in Discord, in-game chat, or streaming software. Regular cleaning helps the microphone foam maintain proper acoustic filtering so your voice stays crisp.
Which cleaning method is safest for foam windshields on popular gaming headsets?
The safest approach is usually gentle hand-cleaning using mild soap and lukewarm water, then thorough air-drying. If your foam is not removable or if the manufacturer advises against washing, use a light wipe with a slightly damp cloth and let it dry fully. Avoid harsh chemicals, alcohol-heavy cleaners, or compressed air blasting directly into the microphone area, since these can damage materials or push debris deeper.
How do you know when it’s time to clean your headset mic foam sooner than usual?
Clean sooner if you smell sweat or stale odor coming from the mic, if the foam looks visibly discolored, or if your friends report reduced clarity. You should also clean after illness, intense gaming marathons, or extended outdoor use where dust and grime accumulate. Keeping a simple schedule and doing a quick visual check weekly can prevent buildup that affects microphone performance.
📅 Last Updated: October 19, 2026 | Topic: How Often Should You Clean the Microphone Foam on Your Gaming Headset? | Content verified for accuracy and freshness.
References
- https://www.cdc.gov/coronavirus/2019-ncov/community/disinfecting-building-facility.html
- https://www.who.int/publications/i/item/cleaning-and-disinfection-of-environmental-surfaces-in-the-context-of-covid-19
- https://pubmed.ncbi.nlm.nih.gov/?term=headphones+bacterial+contamination
- earphones microbial contamination disinfection cleaning – Search Results – PubMed
- audio devices microbial contamination cleaning – Search Results – PubMed
- microphone cleaning microbial contamination windshield foams – Search Results – PubMed
- Headphones
- https://scholar.google.com/scholar?q=how+often+should+you+clean+headset+microphone+foam+windscreen Google Scholar
- https://scholar.google.com/scholar?q=microbial+contamination+headphones+earphones+cleaning+disinfection+frequency Google Scholar
- https://scholar.google.com/scholar?q=microphone+windscreen+foam+cleaning+how+to+disinfect Google Scholar
