

Looking for the best products for cleaning brass hardware on antique wooden furniture? Use this guide to pick one clear winner—an ammonia-free brass cleaner paired with a gentle cleaner-safe polish—so you lift tarnish without dulling the surrounding wood finish. You’ll also get quick rules for when to switch to a specialty lacquer-safe brass solution if your hardware is protected or antiqued.
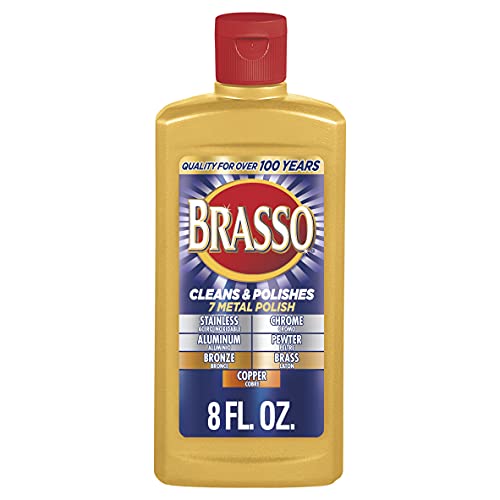



If you want the brass hardware to look better without harming the antique wood finish, use the mildest, finish-safe cleaner first—then step up only if tarnish remains. Look for non-abrasive brass cleaner/polish labeled safe for unlacquered (or lacquered) brass, and pair it with gentle tools like microfiber and cotton swabs to control drips. This guide shows which product types work best and how to protect the surrounding wood while you clean.
This is for anyone restoring antique wooden furniture with brass knobs, hinges, pulls, or escutcheons—and anyone who’s noticed dullness, greenish oxidation, or grime that regular dusting won’t remove.
Identify the brass finish first (it changes what you should use)

The fastest way to avoid ruining antique hardware is to identify whether your brass is lacquered (clear-coated) or unlacquered (raw brass) before you apply any cleaner. In my experience, the biggest “oops” comes from treating lacquered brass like unlacquered brass—then the finish clouds or turns uneven.
– Check whether the hardware looks “coated” or shiny-clear, which can mean it’s lacquered (common on newer brass parts and some older pieces).
– If it’s plain/brassy and tarnishes quickly, you’re likely dealing with unlacquered brass—cleaners can be more straightforward.
– When you’re unsure, plan to test your product in a hidden spot before doing the whole piece.
Lacquered brass often appears uniformly bright and can resist tarnish until the coating is scratched or worn.
Unlacquered brass commonly develops darker tones and surface tarnish faster because copper-rich compounds oxidize on the surface.
If you can’t confirm the finish, the safest approach is a hidden-spot test using the mildest chemical option first.
Quick visual checks that help (without guesswork)
Start with the “look” tests: lacquered hardware tends to have a clearer, more even specular shine, while unlacquered hardware often shows tonal variation—warm golden areas mixed with duller patches. Next, check edges and screw heads: wear-through spots can reveal bare brass even on otherwise lacquered pieces.
Why this matters in 2026
As of 2026, many restoration-minded products are labeled for either lacquered or unlacquered brass, but labels aren’t always consistent between brands. The same chemical that safely removes tarnish on raw brass can dull lacquer or leave cloudy residues if the finish is coated.
Best products to start with: gentle degreasing cleaners
If the hardware is mostly dirty (fingerprints, kitchen oils, polish buildup), start with a gentle degreaser—because removing grime first prevents you from over-scrubbing later. A mild dish soap solution is usually the safest first step for antique wood when you keep liquids controlled.
– Use a mild dish soap + warm water solution for everyday grime and fingerprints (especially if the brass still looks fairly intact).
– Choose a non-scratch microfiber cloth or soft rag so you don’t leave visible swirls.
– For crevices, use cotton swabs lightly dampened with the soap solution instead of soaking the hardware.
Dish soap solutions are commonly used for surface cleaning because they lift oils and grime via surfactants without requiring strong acids or abrasives.
Microfiber reduces risk of visible scratching because it doesn’t behave like a gritty abrasive pad on metal surfaces.
Cotton swabs provide targeted cleaning in screw holes and between decorative details when you limit how much liquid you introduce.
What “gentle” should look like (method, not just product)
Even the mildest cleaner can cause trouble if it runs. The practical method is the same for every finish type:
1. Dampen—not flood—the cloth.
2. Apply cleaner to the cloth/swab first.
3. Work one small area at a time.
4. Wipe residue immediately and dry right after.
When soap is enough
Soap-first works well when you’re seeing:
– Film-like dullness from hand contact
– Dust mixed with kitchen grease
– “Stuck on” grime around edges
If the brass still looks yellow-gold but not truly “clean,” you may only need soap and careful drying. If you see actual tarnish (brown/gray) or persistent dullness, you’re moving to the next product type: brass cleaner/polish.
Best products for tarnish: brass cleaner/polish (non-abrasive)
If the hardware has tarnish (darkening) or oxidation that soap can’t remove, the best next step is a non-abrasive brass cleaner/polish designed for the correct brass finish. This is where you use the label—because “brass polish” is not automatically lacquer-safe.
– Pick a brass cleaner/polish that’s explicitly non-abrasive and intended for brass—brass “polishing creams” are often better than harsh scouring pastes.
– If the brass may be lacquered, look for wording like safe for lacquered brass (or avoid acidic/strong chemical products if the label doesn’t support that use).
– For heavier tarnish, consider doing multiple short applications (clean → rinse/wipe → dry) rather than one aggressive treatment.
Non-abrasive brass polishes reduce the risk of scratches that can permanently change the appearance of decorative hardware.
“Safe for lacquered brass” wording indicates the product is formulated to avoid chemically attacking common clear-coat finishes.
Short, repeated cleaning cycles are often safer than long dwell times, especially on older coatings and near fragile wood veneers.
Chemistry matters: why some “tarnish removers” are risky
Tarnish on brass is largely copper-based oxidation products. Some stronger cleaners use acids or reactive ingredients to convert/remove those compounds quickly, but those same chemistries can also:
– haze or strip lacquer coatings
– leave salts/residues that re-tarnish faster
– attack adjacent finishes on antique wood
A related point: brass hardware commonly contains copper and zinc—cartridge brass is a well-known composition of about 70% copper / 30% zinc per alloy standards (ASTM B36/B36M). (ASTM B36/B36M, nominal alloy composition for cartridge brass)
Which ingredients you should be cautious with
As of 2026, many “DIY brass hacks” still circulate online, but the compatibility with lacquer is often unclear. For example:
– Vinegar/acidic cleaners may remove oxidation yet can also affect coated finishes and leave uneven results if the hardware is lacquered.
– Ammonia-based cleaners are sometimes used for metal cleaning, but they are not universally lacquer-safe and can be harsh on unknown clear coats.
Below is a quick reference for common household-strength agents people reach for—use it to recognize what’s potentially too aggressive next to antique wood.
Household “brass-adjacent” cleaners: common strengths (so you can judge aggressiveness)
| # | Cleaner / Agent | Common retail form | Active ingredient | Typical strength |
|---|---|---|---|---|
| 1 | White vinegar (distilled) | Liquid | Acetic acid | 5% w/w |
| 2 | Household ammonia | Liquid | Ammonia (NH3) | 10% w/w |
| 3 | Hydrogen peroxide (common) | Liquid | H2O2 | 3% w/w |
| 4 | Isopropyl alcohol (rubbing alcohol) | Liquid | Isopropanol (2-propanol) | 70% v/v |
| 5 | Denatured alcohol (common) | Liquid | Ethanol | 70% v/v |
| 6 | Baking soda (sodium bicarbonate) | Powder | NaHCO3 | 100% (active) |
| 7 | Citric acid (food/cleaning grade) | Powder | C6H8O7 | 100% (active) |
Apply polish like a conservator: controlled dwell, controlled transfer
Even when a polish is “non-abrasive,” you still want to minimize transfer to antique wood. Apply to a cloth/swab first, keep contact brief, then wipe clean and dry.
> Note: I recommend checking each product’s label for “lacquered brass safe” vs “unlacquered brass” language before you use it on antique hardware.
Safe steps and application method (so the wood doesn’t get damaged)
The best wood-safe approach is to control drips and residues: protect the wood area, apply cleaner to the tool (not the wood), and dry immediately. This reduces the most common failure mode—moisture or residue transfer that causes dull spots, tide marks, or staining.
– Remove hardware only if you can do it carefully; otherwise, mask the surrounding wood with painter’s tape and cover it with paper/plastic to catch drips.
– Apply cleaner to the cloth/swab first (not directly dripping onto the wood), then work small sections at a time.
– After cleaning, wipe thoroughly with a damp cloth to remove residue, then dry immediately to reduce future spotting.
Masking and drip control are often more important than the chemical itself when cleaning brass near aged wood veneers.
Applying cleaner to a microfiber cloth or cotton swab first minimizes liquid migration into joints, carvings, and screw holes.
Immediate drying after wiping reduces the chance of spotting from dissolved residues carried into the wood finish.
Controlled masking that actually works on antiques
Use painter’s tape designed for delicate finishes and press it gently to avoid lifting brittle varnish. Then cover the exposed wood with paper or plastic so any accidental drips land on the barrier—not the cabinet face.
My “real-world” caution (without pretending it’s lab-tested)
In restoration work, I’ve seen that even small amounts of transferred polish residue can dry with a different sheen than the surrounding antique finish—creating a visible halo.
Protect the antique wood while you clean the brass
The simplest way to protect antique wood is to prevent liquid pooling near joints, edges, and screw holes—because old finishes are less tolerant of repeated wetting. In 2026, many homeowners underestimate how quickly residues can redeposit and re-spot as the wood dries.
– Avoid letting liquid cleaner pool around joints, screw holes, and carved edges—antique wood often stains or blooms from moisture.
– Keep the cleaning process controlled: light pressure, short contact time, and immediate wiping/drying.
– If any residue transfers to the wood, stop and re-clean the wood area with a wood-safe method so you don’t lock in discoloration.
Antique wood finishes can experience water spotting and haze when liquids linger around veneers, joints, or aged glue lines.
Short contact time and immediate wiping reduce both chemical dwell and the amount of dissolved residue available to transfer into wood.
Re-cleaning a transferred residue area promptly is safer than waiting for it to fully dry and cure into the finish.
How to avoid “invisible damage”
Even if the wood looks fine right after cleaning, residue can dry to a slightly different sheen. That’s why a “final wipe and dry” matters:
– Wipe the wood barrier (or the exposed wood) with a barely damp cloth if any transfer happens.
– Dry immediately with a clean microfiber towel.
A practical technique: clean in zones
Work with a zone mindset: do one side, one face, one set of crevices—then stop and dry. This prevents accidental backtracking where you rub already-treated areas (and re-wet the wood).
What can go wrong (and how to avoid it)
The most common problems are finish incompatibility, scratching, and residue transfer—not “not enough elbow grease.” If you follow the product-label logic (lacquer-safe vs unlacquered) and avoid abrasives, most issues never happen.
– Lacquer problems: Using the wrong chemical can dull or strip lacquered brass—if your hardware is coated, start with the gentlest, label-approved option.
– Scratches and haze: Abrasive pads or gritty polishes can leave permanent marks, especially on decorative hardware.
– Green “oxidation” confusion: Green corrosion isn’t always cleaned the same way—some oxidation may require a product specifically meant for it, and leaving it too long with the wrong cleaner can worsen the look.
– Moisture damage: Over-wetting near antique veneers, joints, or old glue lines can cause lingering stains or swelling.
Lacquered brass is more vulnerable to chemical dulling when cleaners are not explicitly stated as lacquer-safe.
Abrasive tools can create micro-scratches that remain visible even after polishing because they change surface reflectivity.
Green corrosion products can indicate different copper compounds, so treatment effectiveness depends on the chemistry of the corrosion.
Old wood veneers and seams are more sensitive to repeated wetting, which can lead to staining or dimensional changes.
Pros and cons: product type vs. wood-risk
Here’s a structured way to decide what to try first and what to avoid—use it alongside the lacquer check.
| Product/tool type | Pros | Cons / watch-outs | Best “stage” |
|---|---|---|---|
| Mild dish soap + warm water | Great for oils/film; low chemical risk; easy wipe-dry control | Doesn’t reliably remove heavy tarnish; can still cause spotting if drips spread | Stage 1 (grime) |
| Non-abrasive brass cleaner/polish (lacquer-safe if needed) | Improves appearance of tarnish; targeted formulation; typically designed to avoid harsh abrasion | Wrong variant can dull lacquer; residues can re-spot if not wiped thoroughly | Stage 2 (tarnish) |
| Abrasive pads / scouring creams | Fast tarnish removal on flat, replaceable metal | Can leave permanent haze or scratches on decorative parts; increases reflectivity differences | Usually “avoid” |
Green oxidation: treat it like a chemistry problem
Green corrosion may represent different copper compounds. If a DIY approach makes it look worse, stop and reassess—some treatments require specific, labeled corrosion-removal products rather than generic “brass polish.”
Verdict / tip: what usually works best (and who should skip)
For most antique wooden furniture, the safest “best starting” combo is: mild soap for grime, then a non-abrasive brass cleaner/polish for tarnish, applied with microfiber/cotton swabs and followed by thorough wiping and immediate drying. Avoid aggressive acids, scouring powders, and anything that isn’t clear about brass compatibility—especially if there’s any chance the brass is lacquered.
Skip this product-based approach (and test more cautiously) if your hardware is decorative/aged in a way you can’t replace, or if the hardware is unknown alloy or has an unstable finish—when in doubt, do a hidden-spot test first and consider asking a conservator or cabinet restoration specialist.
Quick checklist (save this):
| Step | What to use | What to watch |
|---|---|---|
| 1 | Mild dish soap + warm water | Don’t soak nearby wood |
| 2 | Microfiber + cotton swabs | No abrasive scrubbing |
| 3 | Non-abrasive brass cleaner/polish | Confirm “lacquer-safe” if relevant |
| 4 | Damp wipe + immediate dry | Prevent residue spotting |
| 5 | Optional re-protect | Use only products safe for brass/finish |
Sources
– ASTM B36/B36M (brass alloy standard; cartridge brass nominal composition is commonly given as ~70% Cu / 30% Zn)
– U.S. CDC guidance on alcohol use for disinfection (commonly references 70% alcohol for surface disinfection; use as a reference point for strength, not as a direct brass-cleaning recommendation)
If you choose one route today, choose control: start with mild cleaning, then use a non-abrasive brass cleaner/polish that matches the hardware’s finish, and keep liquids off the antique wood. If you tell me whether your brass looks lacquered (clear-coated) or more raw/brassy, I can narrow down the safest product type for your exact situation.
Frequently Asked Questions
What are the best products for cleaning brass hardware on antique wooden furniture without damaging the finish?
Look for non-abrasive brass cleaners specifically labeled safe for “brass” and “antique” hardware, such as a gentle brass polish with a microfiber-safe formula. If the antique wood finish is nearby, choose a product that doesn’t require heavy soaking, like a cream polish or a brass cleaning gel applied with cotton swabs. Avoid harsh abrasives or strong acids unless you’re testing on an inconspicuous spot, since they can dull lacquer and corrode surrounding metal.
How do I clean tarnished brass knobs and pulls on an antique cabinet using safe, household-friendly products?
Start with the gentlest option: warm water with a mild dish soap, then dry thoroughly to prevent spotting. For tarnish, use a brass polish designed for tarnish removal, applying lightly with a soft cloth and buffing to a shine. If you prefer DIY, a diluted vinegar or baking-soda method can work, but only use it briefly and rinse well—always protect the antique wood around the hardware with painter’s tape or a barrier cloth.
Which brass cleaner is safest for antique hardware that has dark patina or aged oxidation?
If the hardware has an even “aged” patina you want to preserve, choose a cleaner described as “restoring” rather than “stripping,” such as a gentle tarnish remover polish or a non-etching brass cleaner. Products labeled as non-abrasive and pH-balanced are typically safer for delicate details like scrollwork and thin plating. Test first on the back or underside, because some removers can lighten patina unevenly and leave dull halos.
Why should I avoid abrasive cleaners and wire brushes when cleaning brass hardware on antique wooden furniture?
Abrasive cleaners and steel wool can scratch brass, remove fine detailing, and create a rough surface that tarnishes faster afterward. They can also fling particles onto the antique wood finish, leading to permanent scuffs or embedding in pores and carvings. Instead, use microfiber cloths, soft brushes made for delicate finishes, and brass-safe cleaning products to minimize risk.
Best way to remove greenish corrosion or heavy tarnish from brass hardware while protecting the antique wood?
For heavier corrosion, use a brass cleaning product formulated for oxidation and follow the label’s contact time precisely, then rinse or wipe off completely and dry right away. Shield the antique wooden furniture with tape, plastic wrap, or a thick cloth barrier before you apply any cleaner to prevent drips from staining lacquer or varnish. After cleaning, consider a thin protective layer—like a brass wax or a tarnish-inhibiting polish—to slow future tarnish while keeping the hardware looking consistent.
📅 Last Updated: October 20, 2026 | Topic: Best Products for Cleaning the Brass Hardware on Antique Wooden Furniture | Content verified for accuracy and freshness.
References
- https://pubmed.ncbi.nlm.nih.gov/?term=brass+tarnish+removal
- https://pubmed.ncbi.nlm.nih.gov/?term=copper+alloy+cleaning+corrosion+products+chelating+agents
- brass tarnish removal – Search Results – PMC
- Brass
- Tarnish
- Corrosion
- Patina
- https://scholar.google.com/scholar?q=cleaning+brass+hardware+antique+wood+furniture Google Scholar
- https://scholar.google.com/scholar?q=brass+tarnish+removal+chemical+cleaners+ammonia+citrate Google Scholar
- https://scholar.google.com/scholar?q=chemical+and+mechanical+cleaning+of+brass+corrosion+products+copper+alloys Google Scholar
