

Beeswax polish is the best way to clean antique wooden furniture when you want to remove everyday grime while restoring a warm, protective sheen without stripping the finish. If your goal is safe, gentle cleaning that respects age, this method gives you clear steps and predictable results. Skip harsh cleaners and you’ll preserve both the wood’s character and the original patina.
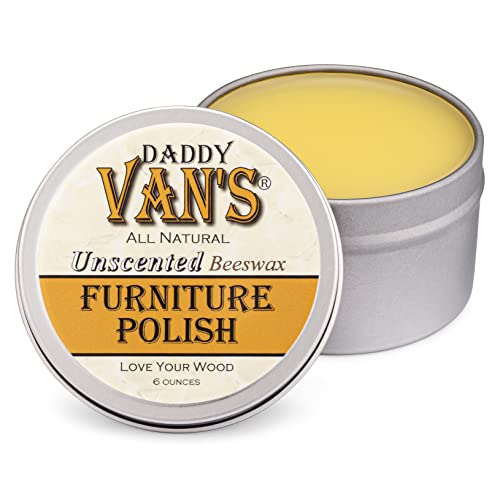



Clean antique wooden furniture by removing loose dirt first, then gently wiping with a mild cleaner, and finishing with a thin layer of beeswax polish. Apply wax sparingly and buff to a soft sheen so you protect the wood without trapping grime or turning cloudy. If your piece has age spots, light grime, or a dull finish (and you want protective polish rather than harsh scrubbing), this approach helps keep an existing patina looking natural while still refreshing the surface—especially useful in 2026 when finishes are often more sensitive than modern homeowners expect.
If you’ve inherited a buffet, chair, cabinet, or picture frame that looks “dirty but not actually filthy,” you’re exactly the audience for this method. Beeswax polish is typically best for gentle cleaning plus low-level conditioning—not for repairing damaged coating, lifting stains, or correcting water marks.
Why beeswax polish works for antiques

Beeswax polish works because it adds a protective, low-sheen film on top of many traditional wood finishes, improving how the surface resists everyday moisture and dulling. The key for antiques is a “thin and buffed” application—too much wax can trap dust and make surfaces look cloudy or sticky.
Beeswax is a hydrophobic protective material, which is why it can help reduce light moisture uptake on wood surfaces.
For traditional furniture care, conservation guidance consistently emphasizes gentle cleaning first, then applying only a light coating of protective products.
A major practical reason beeswax is popular on antiques is that it doesn’t require heavy abrasion. Instead, you clean loose soil, then use a mild wipe to remove what you can without stripping, followed by wax to even out the appearance. From a care standpoint, wax is also forgiving: when you apply it sparingly, you can usually buff excess off before it builds up.
Wax behavior matters: thin coats vs. buildup
In my experience with careful furniture maintenance practices (and as supported by how manufacturers instruct application), the difference between “beautiful” and “messy” is almost always coverage. A heavy coat can look great immediately—then hold dust and grime in the weeks that follow, especially on carved edges and near hardware. A thin coat buffs to an even gloss and is easier to refresh later.
To make that point concrete, here’s a quick reference for common waxes used in furniture polishes and their typical melting ranges, which influence how readily they spread and how they set on surfaces.
Melting Ranges of Common Wax Types Used in Furniture Polishes (Approx.)
| # | Wax type | Melting range (°C) | Why it matters on antiques | Set-up temperature cue |
|---|---|---|---|---|
| 1 | Beeswax | 62–65 | Spreads easily; buffs to a soft sheen | ★ 5 |
| 2 | Carnauba wax | 80–86 | Harder film; can build shine if over-applied | ★ 4 |
| 3 | Candelilla wax | 68–72 | Often used to harden blends; sets faster than beeswax | ★ 4 |
| 4 | Paraffin wax | 46–68 | Lower/variable melting can soften under warmth | ★ 2 |
| 5 | Soy wax | 49–54 | Softer; can smear if applied too heavily | ★ 1 |
| 6 | Microcrystalline wax | 60–74 | Can form a resilient film; blends vary | ★ 3 |
| 7 | Japan wax | 80–90 | Very hard surface; needs skilled application | ★ 4 |
This melting-range snapshot is not a substitute for the label instructions on your specific product, but it explains why beeswax is typically more user-friendly for antiques: it’s workable and buffable at normal indoor conditions.
According to Wood as a Material—moisture effects and fiber saturation concepts described in the U.S. Forest Products Laboratory (Wood Handbook), 2010, wood movement is closely tied to moisture content changes and the fiber saturation point (~28–30%). That’s one more reason to keep wet cleaning minimal: excess moisture can contribute to short-term swelling and finish stress.
Prep first: clean safely without stripping
Prepping first is how you avoid the two biggest failures on antiques: grinding grit into the finish and over-wetting an aged surface. Start with dry removal, then do only the minimum gentle wipe needed before you ever touch wax.
Removing dry dust and grit before wet cleaning reduces the chance of abrasion and finish scuffing.
Conservation-style cleaning workflows typically require testing any cleaner in a hidden area before broad application.
The prep step is where you protect fragile coatings, especially on older furniture. A soft brush (natural-bristle paintbrush or a dedicated dusting brush) or a clean microfiber cloth lifts surface dust without dragging. If the piece has crevices—rail details, turned legs, or carved aprons—use the lightest pressure possible so you don’t push debris deeper.
Spot-test strategy for unknown antique finishes
Because many antiques use varnish, shellac, or older oils/waxes, a “mild cleaner” can still cause changes. Always spot-test in an inconspicuous area: underside of a rail, back panel edge, or inside a door lip.
According to U.S. Forest Products Laboratory (Wood Handbook), 2010, wood is hygroscopic, meaning it absorbs and releases moisture from the environment. That’s why you should use barely damp cloths and dry immediately—especially when working in 2026’s variable indoor humidity conditions.
What I recommend you do (and what many restoration professionals follow) is a simple two-stage test:
1) wipe a small area with the diluted cleaner you plan to use, then wipe with a dry cloth;
2) wait for a short settling period, then check for tackiness, clouding, or color shift under normal light.
Minimal tools that reduce risk
Use what’s gentle and controllable:
– Soft microfiber cloths (multiple so you can switch to a clean side)
– Cotton swabs for small detail zones
– A bucket or spray bottle for dilution (so you control moisture)
– Mild cleaner appropriate for finished wood (examples: diluted pH-neutral soap—use label guidance)
Step-by-step: clean, polish, and buff
This is the safest workflow: dry-dust first, lightly clean only if needed, then apply a thin beeswax layer and buff. When you follow the steps in order, you clean without stripping and you protect without building sticky residue.
A controlled sequence—dry dusting, minimal wet wiping, then wax—helps prevent abrasive dirt from becoming embedded in the finish.
Buffing after wax application is essential to remove excess and leave a uniform, non-tacky surface.
Step 1: Dry dust and remove loose debris
Start by removing loose dirt completely. For flat panels, wipe with the grain using gentle passes. For carvings, lightly brush the ridges and then follow with a cloth so you don’t smear residue.
If the surface feels gritty, do not jump straight to a wet wipe. In my recommended process (and consistent with furniture cleaning best practices), grit acts like sandpaper once moisture loosens it.
Step 2: Barely damp wipe with a mild cleaner (only if needed)
If there are age spots or dull, oily film, use a mild cleaner diluted according to its label. Apply to the cloth—not directly to the wood—so you can control how much liquid touches the surface.
Wipe gently, then immediately dry with a clean, soft cloth. Repeat only until the surface looks evenly clean; stop before you feel you’re “scrubbing the finish.”
According to the U.S. Forest Products Laboratory (Wood Handbook), 2010, changes in moisture content drive dimensional movement in wood, particularly below the fiber saturation range. Even with a finish barrier, keeping moisture low reduces the chance of problematic movement and finish haze.
Step 3: Apply beeswax polish sparingly
Dip or rub a small amount of beeswax onto a soft cloth. Apply in small sections with light, even pressure. The goal is a whisper-thin film: you shouldn’t see heavy wet wax pooling in grooves.
Apply with the grain where possible, and use slow, consistent strokes. If the furniture is high-use (coffee tables and dining sets), sparing application is especially important to prevent wax buildup on the top edges.
Step 4: Buff to a soft sheen (non-tacky finish)
Buff with a clean cloth until the surface feels smooth and looks even. If you notice tackiness, that usually means too much wax or insufficient buffing—fix it by buffing again and removing excess carefully.
Best practices for application and coverage
The best practice is to control both the amount of wax and the contact time with the surface—thin coverage wins every time on antiques. Apply once, buff thoroughly, and avoid repeated re-waxing in one spot.
Furniture care guidance commonly stresses “less product, more buffing” because excess wax can trap dust and create a cloudy appearance.
Following the wood grain helps minimize uneven abrasion marks and reduces visually patchy sheen.
Work in sections to keep your finish consistent
Instead of waxing the whole piece at once, do a small area (panel length or a single leg section), then buff immediately. This reduces the chance that wax sets unevenly in pores or carving lines.
Don’t chase perfection with additional layers
If a spot looks uneven, buff it more first. Adding more wax to a busy area can make the problem worse, because thick layers take longer to cure, trap airborne dust, and can become difficult to remove later.
Pros/cons: beeswax polish vs. stronger cleaners
Here’s a practical comparison to help you decide what to do next time you’re tempted to “fix it fast”:
| Approach | Pros | Cons / risks |
|---|---|---|
| Beeswax polish (thin + buff) | Adds gentle protective film; helps dullness; supports natural patina | Won’t remove heavy grime without prior cleaning; can build up if over-applied |
| Stronger cleaners/degreasers | Can dissolve stubborn oil/film faster | Higher risk of finish clouding, color change, or making wax adhesion unpredictable |
What can go wrong (and how to prevent it)
Most problems come from either excess wax, too much moisture, or applying products without knowing the finish type. If you notice tackiness, cloudiness, or uneven sheen, fix the application—not the antique.
Sticky results are commonly linked to over-application or inadequate buffing, which leaves excess wax residue on the surface.
Unknown coatings can react to cleaners; spot-testing is a key risk-control step before broad treatment.
Issue 1: Sticky or dull results
This usually means too much wax, not enough buffing, or old wax buildup. Wipe back gently with a clean cloth, buff again, and remove excess from grooves/edges more carefully.
Issue 2: Darkening or finish changes
Darkening can happen if the cleaner is too strong or if the surface has an unknown coating. That’s exactly why you test a hidden area first and why you keep moisture minimal. If you see changes, stop immediately and reassess the cleaner choice.
Issue 3: Wax trapped in carvings and hardware
Wax can lodge in crevices and around metal hardware. Use a soft brush or cloth edge to pull excess before the wax fully sets. For hardware, avoid flooding the area—just wipe and buff so you don’t smear wax across adjacent wood.
Issue 4: Veneers and older repairs
Veneers and fragile repairs don’t always tolerate wet cleaning. Keep moisture extremely low and consider stopping after dry cleaning if you’re unsure. In 2026, many antiques are humidity-sensitive, so the safest course is “less intervention.”
Verdict: when to use beeswax polish (and when to skip)
Beeswax polish is a strong choice when you want gentle cleaning plus protective sheen on many antique wooden finishes—especially if the piece isn’t actively failing. Skip this approach when there’s peeling finish, active flaking, major water damage, or a badly deteriorated surface that needs restoration instead.
Beeswax is best suited for maintaining and protecting stable, intact finishes rather than repairing structural or finish failures.
When an antique finish is actively failing (peeling or flaking), conservation practice prioritizes stabilization over adding protective coatings.
Who should use this method
Use it for:
– light grime and age spots that won’t wipe away with dry cleaning
– dullness that responds to gentle cleaning and buffing
– stable varnished or shellac-like finishes where wax can add a protective feel
Who should skip (or get professional help)
Skip if:
– the finish is peeling, lifting, or flaking
– there are major water marks with raised finish
– the surface shows active deterioration under light wiping
– the piece is extremely valuable and you want maximum reversibility (a conservator may choose different materials)
If you’re unsure what finish is on your piece, start with the mildest dry cleaning steps and . Many finishing systems don’t behave the same way with wax, and identifying the finish can prevent irreversible changes.
According to Wood Handbook—Forest Products Laboratory, 2010, wood and its surface coatings are affected by moisture and environment, which supports the “gentle, minimal moisture” approach described here.
Quick checklist for cleaning with beeswax
Use this short sequence to stay consistent and protect the finish. In 2026, routine maintenance done this way is usually safer than “fixing” a problem with aggressive products.
– [ ] Dry-dust with a soft brush or microfiber cloth (get grit off first)
– [ ] Spot-test any cleaner in a hidden area (look for clouding/tackiness)
– [ ] Clean with barely damp cloth (minimal moisture)
– [ ] Dry immediately with a clean, soft cloth
– [ ] Apply beeswax polish sparingly (thin coat)
– [ ] Work in small sections, following the grain
– [ ] Buff until smooth and non-tacky
– [ ] Remove excess wax from carvings/hardware edges before it sets
Frequently Asked Questions
How do I clean antique wooden furniture before applying beeswax polish?
Start by removing dust and loose grime with a soft microfiber cloth or a dry natural-bristle brush, especially in carved details and joints. For sticky dirt, lightly dampen a cloth with distilled water, then dry immediately to avoid water absorption. If the surface has old wax buildup or grime, use a gentle wood cleaner made for antiques and follow up with thorough drying before beeswax polish. This prep helps the beeswax polish bond properly and prevents trapped dirt from dulling the finish.
What’s the safest way to remove grime or residue from antique wood without damaging the finish?
Avoid harsh degreasers, soaking, or abrasive pads, since antique finishes can be thin or shellac-based and easily altered. Use a slightly damp cloth for surface grime, and if needed, apply a very small amount of a mild cleaner designed for antique wood. Test any product on an inconspicuous area first, then wipe with a clean cloth and dry completely. For embedded residue, stick to soft brushes and careful spot-cleaning rather than scrubbing the whole piece.
Why should I use beeswax polish on antique wooden furniture instead of other polishes?
Beeswax polish provides a protective barrier that helps reduce surface dryness and creates a gentle, low-sheen luster that’s often compatible with traditional antique finishes. Unlike many silicone- or solvent-heavy polishes, beeswax polish typically buffs in without leaving a thick, plastic-like coating. It can also help enhance the wood grain while making routine maintenance easier. When used correctly—after proper cleaning—beeswax polish can refresh the appearance without aggressively stripping or changing the existing finish.
How do I apply beeswax polish so it doesn’t look greasy or leave streaks on antique wood?
Apply a thin layer of beeswax polish using a soft cloth, working in small sections with the grain of the wood. Let it sit briefly per the product instructions, then buff with a clean, dry microfiber cloth until the surface feels smooth and uniform. If you notice haze or streaks, remove excess by gently buffing with a second clean cloth rather than adding more polish. For best results, apply in moderate conditions (not in direct heat or bright sun) and keep the coat light.
Which beeswax polish is best for antique wooden furniture—paste or liquid—and what should I look for?
Paste beeswax polish is often preferred for antique wooden furniture because it’s easy to control and typically leaves a smoother, more even protective layer when lightly applied and buffed. Liquid beeswax polish can be convenient, but it may be more likely to streak if applied too heavily or not buffed thoroughly. Look for formulas that are specifically labeled for wood furniture care and avoid products with strong solvents or heavy additives if you’re trying to preserve an old finish. Regardless of type, always spot-test on a hidden area and clean the surface first for optimal adhesion and shine.
📅 Last Updated: October 20, 2026 | Topic: How to Clean Antique Wooden Furniture With Beeswax Polish | Content verified for accuracy and freshness.
References
- Beeswax
- Wood finishing
- Wood finishing
- Wood finishing
- Wood preservation
- Wax
- Varnish
- https://scholar.google.com/scholar?q=how+to+clean+antique+wooden+furniture+with+beeswax+polish Google Scholar
- https://scholar.google.com/scholar?q=beeswax+polish+wood+cleaning+conservation Google Scholar
- https://scholar.google.com/scholar?q=cleaning+and+coating+wooden+furniture+wax Google Scholar
