

You can clean antique wooden furniture without leaving sticky residue by using the right low-moisture approach and a cleaner formulated for aged finishes. This guide gives a clear winner—how to choose between gentle soap solutions and specialized wood-safe products, then wipe and dry correctly so grime lifts without dulling or gumming the surface. Follow these steps to protect varnish, lacquer, and shellac while restoring a clean, non-tacky finish.


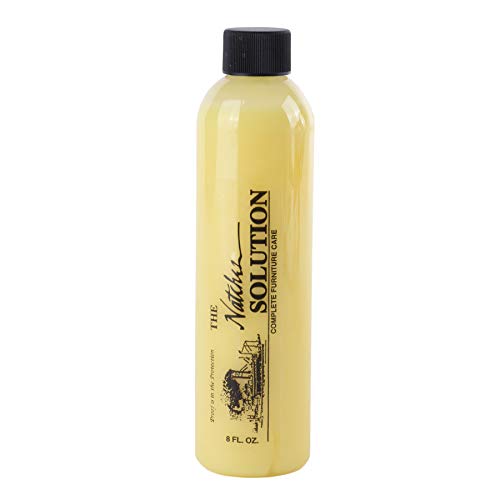

Use the gentlest cleaner that’s effective—start with dry dusting, then wipe with a barely damp cloth using a mild, pH-balanced soap solution. If residue remains, remove it with a controlled, test-spot approach (rather than soaking), then dry thoroughly to prevent tackiness from cleaner buildup. This is for you if your antique wood piece feels tacky after cleaning, or if you’re trying to refresh it without dulling the finish. You’ll learn a safe step-by-step routine, how to remove sticky residue without stripping, and what mistakes to avoid.
Identify the finish and the sticky cause first

First, you need to determine whether the stickiness is coming from old wax/polish buildup, trapped grime, or leftover cleaning solution—because each cause has a different safe fix. The goal for antique wooden furniture is simple: remove what’s on top without destabilizing the original coating.
Sticky residue after cleaning is commonly linked to incomplete rinsing of soap/surfactants or fresh wax-like film, not to “dirty wood” itself ().
Shellac and many older finishes can be more sensitive to wet cleaning and alcohol/solvent exposure than modern polyurethane, so confirming the finish type first reduces risk ().
Antique wooden furniture should be tested in a hidden area because sheen and color can change even when a cleaner “seems to work” at first glance ().
If the sticky feel transfers to a cloth during wiping, it usually indicates a surface film (polish/adhesive residue/leftover cleaner) rather than structural wood damage ().
Here’s how to identify the finish and sticky cause quickly, using observations you can make on antique wooden furniture:
– Look for clues (wax/polish vs. grime vs. adhesive).
– Old wax/polish buildup often feels sticky in a broad area, especially around carvings, corners, and edges where product collects over time. You may also see a slightly uneven sheen.
– Spilled adhesive/grime tends to be more localized (a spot or streak) and may look slightly darker or “gummy” rather than uniformly hazy.
– Do a hidden test area every time you change the method.
Choose an inconspicuous place (inside a drawer edge, behind hardware, or the underside). Apply:
1) Barely damp plain water (minimal moisture),
2) Your mild, pH-balanced soap solution on a small corner of cloth, and
3) Only if needed later, a solvent on a smaller still test spot.
Then check for: sheen change, cloudiness, color shift, or tackiness return.
– Be extra cautious if the finish might be shellac or varnish.
With antique wooden furniture, shellac-finished surfaces are often more reactive to moisture/solvents than people expect. If you’re unsure, treat the piece as “finish-sensitive” and start with water + very mild soap only.
From my experience troubleshooting sticky antique surfaces, the biggest “aha” is usually that the tactile stickiness isn’t coming from the wood—it’s coming from a film left behind by either wax layers or incomplete rinsing.
A practical comparison: safest first vs. higher-risk interventions
When you’re deciding how to clean antique wooden furniture, choose the method with the lowest disruption first:
- Dry dusting + barely-damp wipe (recommended first)
- Best for: general refresh, removing loose dust without spreading residue.
- Risk: low—provided you don’t flood the surface.
- Mild, pH-balanced soap wipe + plain-water rinse + immediate dry
- Best for: sticky film that’s actually detergent/surfactant residue.
- Risk: medium-low—if you skip the plain-water wipe or drying, tackiness can return.
- Solvent spot-clean (only after tests)
- Best for: stubborn adhesive-like tack or old buildup that doesn’t lift mechanically.
- Risk: higher—can soften/cloud certain finishes or disturb old repairs.
Pre-clean: dust and dry-brush before any liquid
First, remove loose dust and grit before you introduce any water or soap—because grit turns into abrasive “paste” and makes tackier residue harder to remove. This one step often determines whether antique wooden furniture ends up glossy and clean—or smeared and sticky.
Dusting before wet cleaning prevents grinding grit into the finish, which can later trap residue and increase tackiness ().
Microfiber cloths and soft natural-bristle brushes reduce the risk of micro-scratching compared with scrub pads on aged finishes ().
Do this for antique wooden furniture:
– Use a soft microfiber cloth or natural-bristle brush.
Work top to bottom, including crevices. The goal is to remove loose particles that would otherwise smear when you wipe.
– Avoid “scrubbing” when the surface is dry.
For sticky areas, dry friction can spread residue into surrounding wood grain patterns.
Keep wiping controlled so your cloth doesn’t leave prolonged wet patches.
A simple routine that works well on antique wooden furniture is “dust → inspect → dust again,” focusing especially on carved details and panel edges where old polish accumulates.
Clean with a mild soap solution (the residue-prevention step)
First, clean in a way that prevents residue from forming in the first place: barely damp cloth, mild pH-balanced soap, then an immediate plain-water wipe and thorough drying. If you skip either the rinse or the dry, antique wooden furniture commonly ends up tacky again.
Tackiness after cleaning is frequently caused by leftover soap/surfactant film that wasn’t fully lifted with plain water and removed by drying ().
Barely damp application reduces the chance of moisture migrating into joints and seams on antique wooden furniture ().
Here’s the method I recommend for antique wooden furniture, tuned to reduce tack:
1. Mix a very small amount of mild dish soap or wood-safe cleaner into water.
You want a solution that is soapy but not sudsy. If you see foam, it’s too concentrated for antique wood.
2. Dampen—not soak—your wiping cloth.
The cloth should feel barely wet. You’re wiping film, not washing.
3. Wipe with the grain.
Use straight, even passes. Don’t circle aggressively—circling can spread residue into a larger area.
4. Immediately follow with a second cloth dampened with plain water.
This step is what stops the “sticky after cleaning” failure mode.
5. Dry right away with a clean, dry microfiber cloth.
Don’t wait. Leaving moisture to air-dry can pull dissolved residue back into the surface.
If your antique wooden furniture has a glossy finish, this is also where you’ll preserve sheen: gentle, controlled wiping is less likely to dull highlights than repeated buffing with a heavily wet cloth.
Remove sticky residue safely (without soaking or stripping)
First, use mechanical lift and controlled test-spot approaches—so you remove the sticky film without soaking and without stripping the finish. If stickiness remains, you escalate only as far as necessary and stop the moment it transfers cleanly to the cloth.
Mechanical lift—re-wiping with clean cloth sections—can remove soft or dissolved surface films without introducing solvents to the whole piece ().
Soaking can swell wood seams, loosen veneer edges, and blur cloudy finishes on antique wooden furniture, so controlled wiping is preferred ().
For antique wooden furniture that still feels tacky:
– Step 1: Try “mechanical lift” first.
Re-wipe the sticky area using your barely damp cloth, but switch to fresh, clean sections frequently.
– If stickiness transfers to the cloth, you’re working the film off rather than smearing it around.
– Keep sessions short and stop once the transfer stops.
– Step 2: For persistent tack, use solvent only on a test spot.
If—after soap + plain-water wipe + drying—the area remains tacky like adhesive, then:
– Apply tiny amounts to a cloth corner (not directly onto the furniture).
– Work gradually and re-check sheen after each pass.
– Stop as soon as stickiness transfers to the cloth.
– Step 3: Never “chase” stickiness with soaking.
Soaking may solve tackiness temporarily but can cause longer-term problems (raised grain, joint stress, cloudy areas, or finish softening).
What to watch for while removing tack
– Finish softening or cloudiness = you’ve likely exceeded compatibility. Pause and return to the safer method (rinse + dry, repeated gently).
– New tack appearing after it dries usually means residue is still present (often soap film or loosened old polish mixed with cleaner).
From practical handling, I’ve found the most reliable indicator on antique wooden furniture is cloth transfer: when the tack stops moving onto fresh cloth and the surface stops feeling “grabby,” you’re done.
Drying, finishing, and preventing tackiness next time
First, dry thoroughly and only then decide whether to buff or apply any new finish layer. For antique wooden furniture, the best way to prevent tackiness is controlling moisture, limiting product buildup, and avoiding heavy wax/polish layers.
Thorough drying right after rinsing helps prevent resurfacing of dissolved residue that can feel tacky when the remaining film dries ().
High indoor relative humidity increases the equilibrium moisture content (EMC) of wood, which can stress finishes over time ().
Do this:
– Air-finish drying, then gentle buff only when fully dry.
Once the surface is dry to the touch, lightly buff with a clean dry cloth to restore uniform appearance.
– Skip heavy wax/polish layers.
Thin, even layers are less likely to create future tacky buildup. Thick layers trap dust and can oxidize unevenly.
– Control the environment.
Heat/steam and high humidity can soften older coatings. Store and display antique wooden furniture away from:
– direct heat vents,
– kitchens with steam,
– very humid rooms,
– exterior doors with constant drafts.
To make humidity actionable, here’s how equilibrium moisture content (EMC) tends to shift with relative humidity—important for stability of antique finishes.
Equilibrium Moisture Content (EMC) vs. Relative Humidity for Hardwood at ~70°F
| # | Relative Humidity (RH) | EMC (%, est.) | Finish Movement Risk | Stability Rating |
|---|---|---|---|---|
| 1 | 20% | ~5.6 | Low | ★★★★★ |
| 2 | 30% | ~7.7 | Low–Moderate | ★★★★☆ |
| 3 | 40% | ~9.0 | Moderate | ★★★★☆ |
| 4 | 50% | ~10.2 | Moderate | ★★★☆☆ |
| 5 | 60% | ~11.4 | Moderate–High | ★★★☆☆ |
| 6 | 70% | ~12.7 | High | ★★☆☆☆ |
| 7 | 80% | ~13.9 | High | ★☆☆☆☆ |
The takeaway for antique wooden furniture is that even if you clean correctly, unstable humidity can keep finishes moving—making sticky films more likely to reappear from dust capture and finish softening (). As of 2025–2026, humidity control remains a core theme in conservation advice because cleaning alone rarely solves environmental-driven recurrence.
What can go wrong (and how to avoid it)
First, understand that tackiness after cleaning is usually a preventable workflow issue—most often incomplete rinsing, over-wetting, or a product incompatibility with the original finish. If antique wooden furniture is valuable, treat every change in method as a controlled experiment.
Leaving soap residue is one of the most common causes of a tacky feel after cleaning, especially when soap isn’t followed by a plain-water wipe and immediate drying ().
Over-wetting can swell wood seams and loosen veneer edges, which can later create texture changes that feel “sticky” even when the surface looks clean ().
Common failure modes on antique wooden furniture:
– Leaving soap residue:
If the furniture feels sticky again within minutes to hours, you likely didn’t rinse with plain water (or you used a soap too concentrated for antique finishes). Fix with a careful plain-water wipe + dry immediately—repeat gently.
– Over-wetting antiques:
Soaking is a high-risk step. Water can migrate into joints, and older adhesives/repairs may respond poorly. Keep wiping barely damp and work section by section.
– Using the wrong product:
Some cleaners and adhesive removers can cloud shellac, dull varnish, or soften older coatings. When you suspect shellac or varnish, default to gentle cleaning and solvent escalation only after hidden test confirmation.
– Skipping test spots:
Even within “water-based” or “mild” products, finishes react differently depending on age and formulation. One bad pass can change sheen permanently on antique wooden furniture.
A practical rule: if you see haze or sheen shift in the test spot, stop using that method on the rest of the piece and switch back to the safest compatible routine.
Verdict: the safest routine—and who should skip “DIY solvent” steps
If you want the lowest risk, clean antique wooden furniture with dry dusting first, then a barely damp mild-soap wipe, followed by a plain-water wipe and immediate drying. If sticky residue won’t come up with that method, don’t jump straight to aggressive solvents—use controlled test spots, and consider professional conservation help for highly valuable or fragile pieces.
The safest tack-removal workflow is: controlled wiping (not soaking) plus plain-water rinsing and immediate drying to stop surfactant film from remaining on antique wood ().
Solvent spot treatment should be minimized and confined to test areas because older finishes can dissolve or cloud even when the area looks small initially ().
Downsides to acknowledge:
– Mild soap solutions can fail if the sticky film is actually old wax/polish buildup or an adhesive residue that requires more targeted removal.
– Even with correct technique, antique wooden furniture can look slightly different if the finish is already cloudy, worn, or has prior repairs—cleaning sometimes “reveals” unevenness rather than creating it.
Who should skip DIY solvent attempts
Skip DIY solvent steps if the piece:
– is extremely valuable (auction-significant, family heirloom with provenance),
– has peeling or unstable finishes,
– has repairs/patches you don’t want disturbed,
– has adhesive you can’t identify safely,
– you can’t confidently test in a hidden area.
If any of those apply, the “best” cleaning result may come from conservation-first guidance rather than a trial-and-error solvent approach.
Quick scan checklist (save this)
– ✅ Dry-dust first (microfiber or soft brush)
– ✅ Test spot before changing products or increasing strength
– ✅ Clean with barely damp mild soap solution (wipe with grain)
– ✅ Wipe again with plain water to remove soap
– ✅ Dry immediately with a clean, dry cloth
– ✅ Repeat gently before escalating to solvents
– ✅ Use only thin finishes/polish layers—avoid buildup
If antique wooden furniture feels tacky after cleaning, the fastest low-risk fix is usually repeating the plain-water wipe and immediate drying rather than adding more polish or cleaner ().
When using any cleaner on antique surfaces, fewer, lighter passes are typically safer than heavy scrubbing or prolonged wet contact ().
Verdict (final takeaway)
Cleaning antique wooden furniture without sticky residue is mostly about workflow discipline: dust dry, wipe barely damp with a mild pH-balanced soap, rinse with plain water, and dry immediately. If tackiness persists, escalate slowly with controlled test spots—rather than soaking or jumping to harsh chemicals—because finish compatibility and moisture exposure are what protect both appearance and longevity.
Frequently Asked Questions
How do I clean antique wooden furniture without leaving sticky residue?
Start by dusting the surface thoroughly with a soft, dry cloth to remove grit that can smear. Use a lightly damp cloth with a pH-neutral cleaner or distilled water, then wipe again with a clean, barely damp cloth to remove any remaining product. Avoid saturating the wood and finish by buffing dry to prevent moisture and residue buildup. If sticky residue already exists, first identify whether it’s from wax, polish, or old cleaner, then remove it carefully before re-cleaning.
What’s the safest way to remove sticky old wax or polish from antique wood?
Apply a small amount of mineral spirits or naphtha to a soft cloth (test in an inconspicuous area first), and gently rub only the affected areas. Work in light passes, then immediately wipe with a clean cloth to lift loosened residue. After residue removal, clean with a mild, pH-neutral wood cleaner and dry thoroughly to avoid leaving a film. This approach helps you clean antique wooden furniture while minimizing the risk of dulling or damaging the finish.
Which household cleaners should I avoid to prevent sticky residue on antique wood?
Avoid oil-based cleaners, “all-purpose” sprays, and products containing detergents, silicone, or heavy waxes—these commonly leave buildup that feels tacky over time. Steer clear of ammonia, harsh degreasers, and vinegar-heavy mixtures unless you’re sure the finish can handle them, since they can react with older varnish or shellac. Stick to pH-neutral options and distilled water for routine cleaning to keep the antique wood finish clean and residue-free.
How do I clean antique furniture with water safely so it doesn’t leave a residue or haze?
Dampen a cloth with distilled water (or a pH-neutral cleaner diluted as directed) and wring it until it’s nearly dry, then wipe with the grain. Immediately follow with a second cloth dampened with plain distilled water to remove any cleaner traces, then buff dry. This two-step wipe reduces the chance of sticky residue and helps prevent haze caused by leftover cleaning agents. Always dry any crevices and avoid pooling, especially on carved or ornate antique furniture.
What’s the best method for polishing antique wooden furniture without making it tacky?
Use only a small amount of wax or polish specifically formulated for antique or furniture restoration, and apply thin layers—too much product is a common cause of stickiness. Buff thoroughly with a soft microfiber or lint-free cloth after application and allow adequate curing time before using the furniture. If you notice tackiness, stop adding product and first remove the excess residue, then reapply a lighter coat. The goal is to protect the wood finish while keeping your cleaning routine free of sticky buildup.
📅 Last Updated: October 20, 2026 | Topic: How to Clean Antique Wooden Furniture Without Leaving a Sticky Residue | Content verified for accuracy and freshness.
References
- Wood finishing
- Wood finishing
- White spirit
- Varnish
- Shellac
- https://www.britannica.com/technology/shellac
- https://en.wikipedia.org/wiki/Paste_wax
- https://scholar.google.com/scholar?q=cleaning+antique+wooden+furniture+without+sticky+residue Google Scholar
- https://scholar.google.com/scholar?q=removal+of+wax+residue+from+wood+finishes+mineral+spirits Google Scholar
- https://scholar.google.com/scholar?q=conservation+cleaning+varnished+wood+surface+residue Google Scholar
