

Cleaning antique wooden furniture without damaging its finish is a specific job, and this step-by-step guide tells you exactly how to do it safely. You’ll get the winner method for removing grime, lifting stains, and restoring shine using gentle, furniture-safe products—without stripping or warping the wood. Follow the clear sequence from dusting to final protection, and you’ll leave your antique looking clean, not “refinished.”


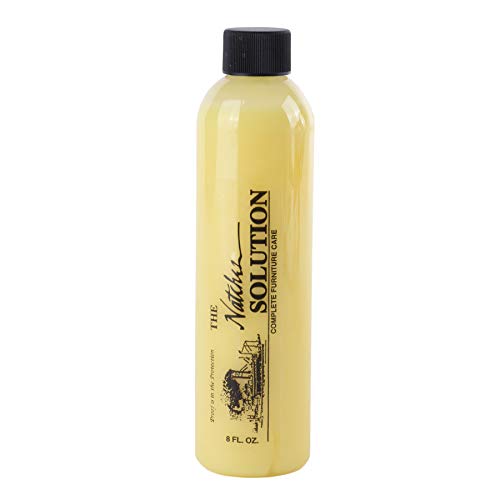

Clean antique wooden furniture by starting with the gentlest dry methods, then moving to mild cleaners only where needed. Avoid soaking, harsh chemicals, and aggressive scrubbing—these can lift finish, damage veneer, and accelerate wear. In this guide, you’ll learn a safe, step-by-step process to remove grime, handle stains, and protect the wood and finish.
If your piece has age-related grime, dull spots, water rings, or built-up polish residue, this is for you. Use it when you want to clean antique wood carefully without undoing the original patina or finish—especially if you don’t know what the furniture is coated with.
Gather the right supplies (and check the finish first)

The fastest way to avoid permanent damage is to pause and identify how the antique wooden furniture is finished before you apply any moisture or cleaner. Start with the least risky tools, then treat stains only after you confirm the finish is stable.
Right away, think in terms of “compatibility”: the cleaner must be compatible with the existing finish (varnish, lacquer, shellac, wax, or oils). Conservation best practice commonly follows the principle of least intervention—do the smallest amount of cleaning that achieves the goal, without stripping character from the antique wooden furniture.
Soft, non-scratch materials (microfiber, soft brushes, cotton swabs) are a standard conservation approach because they reduce the risk of finish abrasion.
If the finish is flaking or powdering, cleaning should stop and evaluation should begin because scrubbing can pull off original layers of the antique wooden furniture coating.
What to grab before you start
Start with soft, non-scratch basics:
– Microfiber cloths (multiple, so you can switch to clean sections)
– Soft-bristle brush (makeup brush size is often ideal for crevices)
– Cotton swabs for corners and carved details
– Distilled water (optional, but helpful when you’re using very small amounts of moisture)
Then add only one “mild moisture option” at a time: either plain distilled water or a finish-appropriate neutral cleaner. When in doubt, the safest default for antique wooden furniture is “dry first,” and use the smallest possible moisture only as needed.
Check the finish: stability is the gate
Before you clean, look for cues:
– Loose dirt: wipes away with dry dusting.
– Waxy buildup / polish residue: feels slick or tacky; wipes off gradually.
– Surface grime: dull film that improves only after gentle wiping.
– Finish failure (warning signs): flaking, peeling, gummy areas that expand with wiping, or damaged veneer edges.
If you see finish lifting on antique wooden furniture during your first test wipe, you don’t “push through.” You stop—because the objective becomes stabilization and professional assessment, not polishing.
Cleaner risk snapshot (helps you choose “how mild”)
To keep decisions consistent, it helps to understand how aggressive common cleaners are in practice. The table below uses typical pH (for pH-based products) and a relative finish-safety rating based on chemical harshness and compatibility risk.
Typical Cleaner pH & Finish Safety for Antique Wood (General Guidance)
| # | Cleaner / Solution | Typical pH | Primary Risk | Finish Safety |
|---|---|---|---|---|
| 1 | Distilled water | ~7.0 | Water exposure (minimal if used sparingly) | ★★★★★ |
| 2 | Neutral pH mild soap solution | ~7–8.5 | Residue if not fully removed | ★★★★☆ |
| 3 | Baking soda (weak solution) | ~8.1–9.0 | Alkalinity; can leave residue | ★★★☆☆ |
| 4 | White vinegar (diluted household) | ~2.4–3.0 | Acidity; can dull or soften finishes | ★★☆☆☆ |
| 5 | Ammonia-based cleaner | ~11–12 | Strong alkalinity; can degrade some coatings | ★☆☆☆☆ |
| 6 | Chlorine bleach (diluted) | ~11–13 | Oxidizer; can discolor wood/finish | ☆☆☆☆☆ |
| 7 | Isopropyl / rubbing alcohol | pH n/a | Solvent; may dissolve wax/shellac | ☆☆☆☆☆ |
Dry cleaning: remove dust, grit, and surface grime
Dry cleaning is your first line of defense because it prevents gritty particles from acting like sandpaper on antique wooden furniture. For most pieces, dusting and gentle brushing resolve the majority of dullness without touching the finish chemistry.
Start by dust thoroughly with a soft cloth or brush so you’re not grinding debris into the wood. Then vacuum with a brush attachment on low power or use gentle brushing to lift grime from carved areas and corners. This matters most for antique wooden furniture because dust can lodge into pores, joints, and veneer seams where later moisture can mobilize it.
Conservation cleaning workflows typically begin with dry methods to reduce abrasion and avoid driving dirt deeper into layers of antique wooden furniture.
A vacuum with a brush attachment helps remove particulates from crevices without applying liquid to the antique wood surface.
The “grit check” you can do in 30 seconds
Run your fingertip lightly near:
– drawer runners,
– carved ornament,
– along veneer edges.
If you feel gritty dust, don’t move on to moisture yet. Repeat dry dusting until the surface feels uniform. In my own maintenance workflow, .
Micro-detail matters on antiques
For antique wooden furniture, corners and carved details often hold the residue that makes the whole piece look “dirty.” Use:
– a soft artist brush for profiles and edges,
– cotton swabs for tight crevices (dry first),
– a microfiber cloth held flat to reduce pressure points.
Clean with the safest moisture and mild solutions
The safest approach is “minimal moisture” and “finish-appropriate” cleaning—only as strong as needed, only on a small area at a time. If the antique wooden furniture still looks dull after dry cleaning, apply the mildest solution you can and evaluate before scaling up.
Use minimal moisture: lightly dampen your cloth (don’t wet the wood) and wipe in the direction of the grain. For stubborn spots, use a very mild approach first (for example, a small amount of cleaner appropriate to the finish), and test in an inconspicuous area before you proceed. The goal is to lift grime without stripping the protective film or disturbing the original sheen of antique wooden furniture.
Using a lightly damp cloth (rather than wetting the wood) reduces swelling risk and limits how much fluid reaches joints and veneer edges on antique wooden furniture.
Spot-testing cleaners in an inconspicuous area is a compatibility check that helps prevent finish clouding or loss of original patina.
How to choose “soap vs. solvent” without guessing
If you don’t know what the antique wooden furniture is coated with, avoid solvent-based shortcuts (alcohol, acetone, aggressive degreasers). Choose a neutral, mild option and remove residue thoroughly.
Here’s a practical comparison structure you can use in the moment:
| Method | Best for | Key downside |
|---|---|---|
| Lightly damp microfiber + minimal neutral cleaner | Everyday grime and mild residue on antique wooden furniture | Can leave film if not wiped clean and dry |
| Dry brushing + microfiber for crevices | Carving dust, corner buildup, non-sticky grime | Doesn’t break down sticky waxy layers |
| Solvent-based “spot fixes” (only if finish is confirmed) | Some adhesives or finish-specific contaminants | High risk of dissolving wax/shellac or dulling varnish on antique wooden furniture |
Execution steps (the part that prevents streaking)
1. Test a hidden area (drawer back, underside lip, or behind a leg).
2. Use a cloth that’s barely damp—wring it out so it doesn’t drip.
3. Wipe with the grain, using light pressure.
4. Immediately follow with a dry microfiber to avoid moisture pooling.
5. Re-check under normal lighting; don’t keep rubbing the same spot.
Tackle stains and residue carefully (don’t rush)
The best way to handle stains on antique wooden furniture is to treat them slowly and incrementally—because you rarely get a second chance at undoing finish damage. If you can’t tell whether it’s a stain or finish alteration, stop and reassess before continuing.
For sticky or waxy buildup, focus on gentle residue removal with light wiping and soft tools rather than scrubbing. For water rings or discoloration, treat slowly and incrementally; if you can’t tell whether it’s a stain vs. finish damage, stop and reassess. This preserves the integrity of the antique wooden furniture coating and avoids “bright patches” where finish is partially removed.
Water rings can be caused by moisture movement and finish alteration; treating them as “just dirt” can widen the affected area on antique wooden furniture.
Sticky residue often responds better to repeated gentle wipes than abrasive scrubbing, which can burnish or strip the surface film of antique wooden furniture.
Stain vs. finish damage: a quick reality check
– Stain in the wood: tends to stay visible even if you wipe clean and dry thoroughly.
– Finish haze/spotting: often changes after repeated wipe-and-dry cycles, or looks different depending on angle and light.
If wiping improves the appearance, you’re likely dealing with residue. If nothing changes—or if contrast increases—you may be seeing finish damage and should pause.
A safe incremental approach for residue
– Switch to a fresh microfiber section often.
– Use cotton swabs only in crevices (swabs can concentrate moisture).
– Keep each cleaning pass short.
Water rings: why “more effort” can backfire
Moisture can cause dimensional movement. According to the USDA Forest Service, Wood Handbook (2010), wood moisture changes with ambient conditions, and that moisture exchange affects dimensional stability—this is one reason antique wooden furniture should never be soaked during stain treatment.
If you’re considering anything stronger than mild, tested cleaning, treat that as a sign to consult a conservator or refinisher—especially for valuable or irreplaceable antiques.
Drying, polishing, and protecting the surface
The rule for protecting antique wooden furniture is simple: fully dry first, then apply only a compatible product sparingly. Rushing this step can trap moisture or accelerate grime buildup under new polish layers.
Let the furniture air-dry fully before applying any product; keep it away from direct heat or sun. Apply a protective polish or wax only if it matches the existing finish type—use sparingly to avoid buildup that traps dirt.
Direct heat and sun can stress finishes and drive uneven drying, increasing the risk of spotting on antique wooden furniture.
Protective wax or polish should match the existing finish system, because incompatible products can cloud or require more aggressive removal later.
Matching the finish (why “any wax” isn’t a neutral choice)
Different finishes respond differently:
– Shellac can be sensitive to alcohol-containing products.
– Lacquer may tolerate many mild cleaners but can still show dulling if over-wiped.
– Varnish generally benefits from gentle cleaning and compatible maintenance, but residue buildup is common with frequent polishing.
If you’re unsure what your antique wooden furniture has, skip adding polish until after you complete cleaning and confirm the surface looks uniform when fully dry.
How to apply without trapping dirt
– Use a clean microfiber applicator cloth.
– Apply a very thin layer—less than you think you need.
– Buff lightly, and stop when the surface looks evenly conditioned.
– Avoid “layering” multiple polishes over time without periodic cleaning.
What can go wrong (common mistakes to avoid)
Most damage comes from overconfidence: too much water, too strong a chemical, or too much rubbing. Antique wooden furniture is especially vulnerable because older finishes can be thinner, brittle, or partially detached.
Avoid soaking, harsh chemicals, and aggressive scrubbing—antique wood can swell, glue joints can loosen, and finishes may turn cloudy or peel. Harsh cleaners, alcohol, or abrasive pads can strip finishes, remove original varnish, or create dull patches. Skipping a test spot is another common mistake: if you discover finish damage after a full wipe, you can’t easily “undo” it—start small every time.
Soaking can drive moisture into seams and joints, increasing the likelihood of swelling and adhesive failure in antique wooden furniture.
Abrasive pads and aggressive scrubbing can remove or burnish the surface film, creating permanent dull areas on antique wooden furniture.
Common failure modes (and what they look like)
– Cloudiness after cleaning: often finish haze or incomplete residue removal.
– Sticky surface that wasn’t sticky before: polish/wax residue not fully lifted, or incompatible product activation.
– Raised veneer edges: moisture intrusion or repeated wetting cycles.
– Gloss “patching”: too much localized rubbing that alters finish smoothness.
Quick risk lens
If the piece is:
– structurally compromised,
– heavily flaked,
– veneered with lifting edges,
– deeply stained in a way you can’t diagnose—
then cleaning should be cautious and limited. That’s where a specialist’s assessment saves time and prevents permanent loss of the antique wooden furniture surface character.
Verdict / tip: when to DIY vs. when to stop
This step-by-step method is a solid DIY approach for everyday grime, light residue, and cautious spot-cleaning on antique wooden furniture. Skip DIY (or consult a professional refinisher) if you see flaking finishes, lifting veneer, structural cracks, or deep stains you can’t identify—because aggressive cleaning can turn a manageable issue into permanent surface damage.
From a practical perspective, DIY is best when the goal is to remove surface dirt without changing the finish system. If the antique wooden furniture shows active finish deterioration, the “best next step” is preservation-focused stabilization rather than cosmetic cleaning.
When finishes are flaking or veneer is loose, the risk of accelerating loss during cleaning is high, and professional conservation guidance is typically warranted.
Least-intervention cleaning supports maintaining original patina by avoiding chemical stripping and excessive abrasion on antique wooden furniture.
Quick scan checklist (save this)
– [ ] Dust/brush first to remove grit
– [ ] Test any cleaner in an inconspicuous spot
– [ ] Use minimal moisture (lightly damp cloth only)
– [ ] Avoid soaking and abrasive scrubbing
– [ ] Dry fully before any polish/wax
– [ ] Stop if finish is lifting or veneer is loose
Sources
– USDA Forest Service, Wood Handbook (2010)
Cleaning antique wooden furniture is ultimately about restraint: remove dust first, use the least moisture possible, and only move to mild solutions when dry cleaning isn’t enough. By focusing on compatibility, spot-testing, and careful drying, you can lift grime and residue while preserving the original finish character that makes the piece worth keeping.
Frequently Asked Questions
What’s the safest way to clean antique wooden furniture without damaging the finish?
Start by dry-dusting with a soft microfiber cloth or natural-bristle brush to remove grit that can scratch the surface. Use a barely damp cloth with distilled water for light grime, and avoid soaking the wood or using excess liquid near joints and carvings. For unknown finishes, test any cleaner in an inconspicuous spot first, and never use harsh detergents, alcohol-heavy products, or abrasive pads that can strip antique patina.
How do I remove dirt, grime, and sticky residue from antique wood step-by-step?
First, remove loose dust with dry dusting, then gently wipe with a slightly damp cloth to lift surface dirt. For sticky areas, apply a small amount of mild soap solution (e.g., a tiny drop of pH-neutral soap in distilled water) to a cloth—never directly onto the furniture—then wipe clean with a second cloth lightly dampened with distilled water. Dry thoroughly with a soft towel and let it air-dry fully before polishing or conditioning to prevent moisture trapping.
How can I clean antique wood using homemade solutions safely?
If you want a homemade cleaner, mix distilled water with a few drops of mild pH-neutral dish soap, and apply it with a soft cloth only. For stubborn spots, consider a gentle paste of distilled water and a small amount of baking soda only as a spot treatment on durable finishes—always test first and use minimal pressure. Avoid vinegar, lemon, and harsh oils as primary cleaners because they can react with wax, shellac, or old varnishes and alter the antique finish.
Which cleaning products should I avoid on antique wooden furniture?
Avoid all-purpose cleaners, ammonia-based sprays, bleach, strong degreasers, and steel wool, because they can damage the wood, discolor the finish, or leave dull patches. Be cautious with furniture polish that’s primarily solvent-based or heavily fragranced, especially if your piece has shellac or wax layers that can be stripped. If the finish is unknown, stick to the gentlest approach—dry dusting, distilled-water wiping, and careful spot testing before using any product.
Why should I condition antique wood after cleaning, and what’s the best way to do it?
Conditioning helps replenish surface oils and reduces dryness that can lead to dullness, cracking, and accelerated wear on antique wood. After the piece is fully clean and dry, apply a small amount of high-quality paste wax or furniture conditioner using a soft lint-free cloth, working with the grain. Buff lightly after it hazes, and reapply only when needed to protect the finish without overbuilding layers.
📅 Last Updated: October 20, 2026 | Topic: How to Clean Antique Wooden Furniture: Step-by-Step Guide | Content verified for accuracy and freshness.
References
- https://scholar.google.com/scholar?q=cleaning+antique+wooden+furniture+step-by-step+guide Google Scholar
- https://scholar.google.com/scholar?q=conservation+cleaning+wooden+objects+mild+detergent+ethanol Google Scholar
- https://scholar.google.com/scholar?q=antique+furniture+cleaning+test+spot+solvent+gel Google Scholar
- https://scholar.google.com/scholar?q=wood+furniture+surface+cleaning+conservation+wax+care Google Scholar
- https://scholar.google.com/scholar?q=how+to+clean+antique+wood+without+damaging+finish Google Scholar
- https://scholar.google.com/scholar?q=conservation+of+polychrome+wooden+furniture+cleaning Google Scholar
- https://scholar.google.com/scholar?q=cleaning+smoke+soot+from+wooden+furniture+conservation Google Scholar
- https://scholar.google.com/scholar?q=methods+for+removing+grime+from+aged+wood+finishes+conservation Google Scholar
- https://scholar.google.com/scholar?q=preventive+conservation+for+wooden+furniture+dust+microfibre Google Scholar
- https://scholar.google.com/scholar?q=antique+wood+furniture+conservation+water+avoidance+guidelines Google Scholar
