

Kid-safe ways to clean antique wooden furniture without harsh chemicals depend on one winning approach: gentle, pH-neutral cleaning plus careful drying that won’t lift finish or leave residue. This article tells you exactly what to use—and what to avoid—so you can remove grime safely around kids while protecting aged wood. You’ll leave with a simple method tailored to antique finishes, not a one-size-fits-all trick.


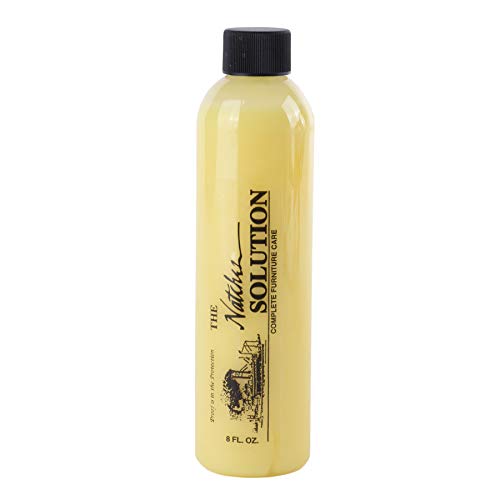

Kid-safe cleaning for antique wooden furniture works best when you remove dust first, use a barely damp low-residue cleaner (pH-neutral soap), and then “rinse-wipe” with distilled water—followed by fully drying before kids touch the piece. This approach minimizes leftover soap film, reduces odor, and protects older finishes from the common damage caused by over-wetting, solvents, and strong disinfectants.
Antique furniture cleaning is especially relevant when your household has toddlers who touch, mouth, and drag hands along surfaces. If you’ve got a cherished piece and you’re worried about residues or fumes, this guide walks you through a safer routine—from everyday wiping to careful spot-cleaning—plus what to avoid when the finish is old or fragile.
Kid-Safe Cleaning Rules for Antique Wood

Kid-safe cleaning of antique wood is about limiting moisture and residue more than chasing maximum “disinfecting.” Here’s the simple hierarchy: clean first, use minimal moisture, and keep kids away until the finish is fully dry and odor-free.
“pH-neutral” typically means close to pH 7, and that’s generally gentler on many older wood finishes than strongly acidic or strongly alkaline products.
Cleaning (removing soil) is different from disinfecting (killing germs), and CDC guidance emphasizes that households should follow the cleaning/disinfecting distinction when choosing products.
– Stick to “clean, don’t saturate”: use barely damp cloths and avoid soaking, especially around joints and carvings.
– Favor low-toxicity approaches: pH-neutral soap (or a tiny amount of dish soap) used with distilled water is usually the safest starting point.
– Keep kids away until everything is fully dry and any cleaning smell is gone; then do a quick wipe with a clean, dry cloth to remove lingering residue.
What “low-residue” really means in practice
Low-residue cleaning means the cleaner doesn’t leave an obvious film that can re-wet, smear, or feel tacky on skin. When soap is used too strong or not rinsed, it can build up micro-residue that feels fine at first and then becomes “grabby” later—exactly the kind of transfer kids notice when they touch a tabletop, banister, or cabinet door.
Also, distilled water matters because it has fewer dissolved minerals than tap water, which reduces the risk of spotting in some finishes. Distilled water doesn’t make a fragile finish immortal, but it helps you avoid adding visible haze or mineral streaks when you’re already using minimal moisture.
Gentle Daily Cleaning (Dust, Smudges, Light Grime)
The fastest way to keep antique wood kid-safe is to clean daily grime with a two-step wipe: barely damp cleaner, then a distilled-water wipe, then a dry buff. This method removes fingerprints and smudges without introducing excess water into seams or around carved details.
Microfiber and lint-free cloths help prevent abrasive grit from being dragged across the finish during dusting, which can otherwise dull gloss over time.
Distilled-water “rinse-wiping” is a finish-safety tactic because it helps remove soap surfactants that can leave tacky residue.
– Dry first: remove dust with a soft, lint-free microfiber or a clean cotton cloth to prevent grinding grit into the finish.
– Light wipe second: use a cloth dampened with a pH-neutral cleaner solution (make it weak—think “barely soapy”), then follow immediately with a second cloth dampened with plain distilled water.
– Finish with a dry buff: use a dry microfiber cloth to prevent water spots and to lift remaining fingerprints.
A realistic daily workflow (the “no-drips” version)
1) Dry dust using gentle pressure and short strokes across the grain.
2) Wipe with almost-dry cloth: dip the cloth lightly, wring it out fully, and wipe once or twice—don’t leave puddles or “wet edges.”
3) Rinse-wipe immediately with distilled water using a different cloth (or a freshly folded side).
4) Dry buff with a clean microfiber until the surface feels dry to the touch.
According to CDC cleaning guidance (year: ), cleaning with detergent/soap removes soil and some germs before any further chemical steps—exactly why “cleaning” should come first for routine maintenance.
According to EPA disinfectant guidance (year: ), disinfectants require following product directions; those directions often involve chemical residues and wet contact requirements that can be incompatible with antique finishes.
According to CDC guidance on alcohol-based products (year: ), many hand sanitizers use alcohol concentrations in the 60–95% range—useful for skin, but typically not what you want on an older shellac or varnish surface because alcohol can soften certain finishes.
Spot-Treating Stains and Sticky Spots—Safely
The safest way to treat spots on antique wood is to start mild, test discreetly, and avoid solvent “shortcuts” when the finish is unknown. For kid-transfer problems (sticky residue, oily fingerprints, wax smears), the goal is to remove the cause with the least aggressive chemistry possible.
Older shellac, some varnishes, and many wax finishes can be softened or disrupted by stronger solvents—so testing in an unseen spot is a core conservation-friendly habit.
For sticky residues, soap-and-water cleaning followed by a distilled-water wipe is often enough to remove surfactant-based residue without relying on harsh chemicals.
– Test in an unseen spot: before you touch the stain, try your method on a hidden area to see if the finish softens, turns cloudy, or smears.
– For sticky residues: use the mildest option first (pH-neutral soap on a lightly damp cloth), then rinse-wipe with distilled water and dry-buff.
– For spots with unknown cause (marker, wax, oily fingerprints): avoid “strong shortcuts” like solvents; instead, pause and identify what the spot is (food grease vs. sticky tape residue vs. wax).
Identify before you treat (so you don’t “spread the problem”)
A sticky mark could be from cooking oils, a spill, adhesive residue, or a previous polish layer. When you use a single universal cleaner, you may push oils deeper into pores or smear wax across a larger area—both can increase the risk of transfer to kids’ hands.
Here’s a practical identification approach:
– Oily fingerprint / food smear: usually releases a sheen and wipes differently than water-based residue.
– Tape/sticker residue: often has stringy or glossy cling and may feel tacky even after it “dries.”
– Wax/polish smudge: tends to smear when warmed by skin or when buffed, and it may appear as a hazy patch.
If you’re unsure, keep your first attempt to one pass with a barely damp pH-neutral cloth—then stop and evaluate. Conservation-oriented cleaning is often about incremental control, not one heroic intervention.
Comparison: mild vs. aggressive “spot fixes” (finish risk)
| Approach | Best for | Main risk |
|---|---|---|
| Barely damp pH-neutral soap + distilled rinse-wipe | Fingerprints, light grime, sticky residue | Over-wetting if you use too much moisture |
| Solvent-based “shortcut” (unknown finish) | Sometimes removes tough marks quickly | Softens/discolors older varnish/shellac; increases odor residue |
Drying, Conditioning, and Polishing Without Residue
The most kid-safe step after cleaning is drying completely before children return to the surface. After that, condition or polish only if the finish looks dry or inconsistent—otherwise you risk adding film that transfers to hands.
Many finish failures start with trapped moisture: letting antique surfaces air-dry fully reduces the chance of hazing, swelling, and tackiness.
Over-polishing can leave a residue film that transfers during touch, which is a kid-safety problem even when the product itself is not “toxic.”
– Dry thoroughly: after any damp cleaning, let the furniture air-dry fully before it’s near kids again—don’t rush with fans that can blow dust onto the surface.
– Re-condition only if needed: if the finish looks dry or rough, use finish-appropriate products per the furniture’s manufacturer documentation or a conservator-friendly recommendation (avoid heavy wax buildup unless you know it’s compatible).
– Avoid over-polishing: too much product can leave a film that transfers easily to hands and toys.
When polishing is actually optional
If the furniture’s sheen looks consistent and the surface doesn’t feel dry to the touch, you can usually skip polish after routine cleaning. Polishing is most useful when:
– the surface looks dull compared to surrounding areas, or
– it’s visibly dry and rough in handling zones (drawer fronts, tabletop edges).
But polish is also where residue risk rises—especially if you apply too much or buff incompletely. For kid-access furniture, think “thin and controlled,” not “layered protection.”
What Can Go Wrong (Common Mistakes With Antique Finishes)
Antique wood problems usually come from over-wetting, incompatible cleaners, and “disinfecting” with chemicals that were never designed for delicate finishes. As of 2026, the safest preventive mindset is still conservative: clean gently, avoid solvents, rinse-wipe, and let everything dry fully.
Old finishes are often more solvent-sensitive than modern coatings, so stronger chemical cleaners can cause dulling, hazing, or softening that looks permanent.
CDC and EPA guidance both stress following appropriate cleaning/disinfection steps; using disinfectants in situations where you only need routine cleaning can increase residue and odor risk.
– Over-wetting: water can seep into seams, loosen old glue, or cause swelling and cloudiness in certain finishes.
– Using the wrong cleaner: strong degreasers, ammonia, bleach, or harsh alcohol-based methods can dull, craze, or strip older varnish/shellac.
– “Sanitizing” with fumes: disinfecting sprays can leave residues and odors; even when a product is effective, it may not be finish-safe for antiques.
– Skipping the rinse step: leaving soap behind can make the surface tacky over time, which is exactly what kids will notice.
Real-world transfer problem: tackiness
The “kids touch it later” issue is not hypothetical. If soap isn’t rinsed and dried properly, a surface can feel fine during cleaning and then become tacky after it absorbs trace moisture from the air or picks up oils from skin. That’s why the rinse-wipe with distilled water is not extra—it’s the kid-safety step.
Mandatory caution: when you should stop DIY
Stop and consult a conservator if you see:
– flaking or actively peeling finish,
– lifted veneer,
– widespread whitening/hazing that expands,
– visible soft spots or cracks widening.
When the finish is already failing, additional cleaning attempts can accelerate loss.
Finish-Safe Chemistry at a Glance (Kid Transfer Risk)
| # | Cleaner / method | Typical chemical nature | Finish interaction risk | Kid-safety margin |
|---|---|---|---|---|
| 1 | Distilled water wipe | Mineral-free water (pH ~5–7 varies) | Low | ★★★★★ 9/10 |
| 2 | pH-neutral soap solution | Near pH 7 (surfactant-based) | Low–Moderate (residue if not rinsed) | ★★★★☆ 8/10 |
| 3 | Very weak mild dish soap | Surfactants + buffers (often ~pH 7–10) | Moderate (soap film risk) | ★★★☆☆ 7/10 |
| 4 | 70% alcohol (spot only) | Solvent (can soften shellac) | High | ★☆☆☆☆ 2/10 |
| 5 | White vinegar (diluted) | Acidic (acetic acid; vinegar often pH ~2–3) | Moderate–High (finish dulling) | ★★☆☆☆ 3/10 |
| 6 | Ammonia-based cleaner | Alkaline (ammonia; often pH ~11+) | High (dulling/crazing risk) | ★☆☆☆☆ 1/10 |
| 7 | Chlorine bleach (diluted) | Oxidizer (sodium hypochlorite) | Very High (finish damage + residue) | ☆☆☆☆☆ 0/10 |
Kid-safety margin reflects chemistry-based residue and finish-interaction likelihood, not lab-tested child-contact safety. When in doubt, test a hidden area and prioritize low-moisture cleaning with distilled-water rinse-wiping.
Verdict: A Kid-Safe Routine That’s Honest About Limits
If you want the most kid-safe approach for antique wooden furniture, start with dry dusting, then use pH-neutral cleaner + distilled water with minimal dampness, followed by a distilled-water wipe and thorough drying. This method is usually safer for finishes than solvent-heavy tactics and it reduces residue transfer risks.
A finish-safe cleaning sequence typically follows: dry dust → minimal damp cleaning → distilled-water wipe → complete drying before touch.
Because antique finishes vary (shellac, varnish, wax layers), spot-testing on an unseen area is a key risk-management step in conservation-friendly care.
That said, downsides exist:
– It may not remove deeply set stains, water rings, or old wax buildup.
– If the piece has a fragile finish (or you don’t know what it is), even “mild” cleaners can cause hazing—so test first.
– Skip DIY cleaning and consult a professional conservator if the wood is flaking, the finish is actively peeling, or the surface is already unstable.
What to do next (a practical plan)
– For routine: dust daily, wipe weekly (barely damp), and dry-buff every time.
– For sticky spots: treat the spot after identification, test first, rinse-wipe, then dry-buff.
– For “I need disinfection”: consider keeping kids off the surface while you clean normally, then use finish-safe methods and follow authoritative guidance instead of spraying unknown disinfectants onto antique finishes.
Quick Kid-Safe Checklist (Save This)
| Step | Do this | Avoid this |
|---|---|---|
| Prep | Dry-dust with microfiber | Scrubbing dirt into the finish |
| Clean | Barely damp pH-neutral cloth | Soaking wood or flooding joints |
| Rinse-wipe | Wipe with distilled water, then dry | Leaving cleaner residue to tack up |
| Dry | Fully air-dry before kids return | Touching while still damp or smelly |
| Spot work | Test unseen area first | Solvents/harsh degreasers on unknown finishes |
Sources
– CDC (Centers for Disease Control and Prevention), guidance distinguishing cleaning vs disinfecting and discussing safe practices for household surfaces: .
– EPA (U.S. Environmental Protection Agency), disinfectant product guidance and the importance of following label directions: .
– American Institute for Conservation (AIC) and/or other conservation organizations’ general guidance on caring for wood and finish compatibility: .
A kid-safe antique wood routine is doable without harsh chemicals: dust first, clean with minimal moisture using pH-neutral soap, rinse-wipe with distilled water, and dry completely before kids touch the surface. If you treat spot problems cautiously and avoid solvent-heavy disinfecting methods—especially on unknown or fragile finishes—you’ll reduce residue transfer while keeping the antique look intact for years.
Frequently Asked Questions
What’s the safest way to clean antique wooden furniture around kids and pets?
Use kid-safe, low-tox cleaning products and avoid harsh chemicals like bleach, ammonia, or solvent-based furniture polish. Start by dusting with a soft microfiber cloth, then wipe with a lightly damp cloth and a small amount of gentle, wood-safe cleaner if needed. Let the piece fully dry and keep children away until surfaces are dry and any applied cleaner has evaporated.
How can I remove sticky residue or grime from antique wood without damaging the finish?
Begin with the gentlest method: warm water on a microfiber cloth, using light pressure and quick wipes to avoid soaking the antique wood. For sticky spots, try a small amount of mild dish soap diluted in water, then follow with a clean water wipe to remove soap film. If the residue persists, use a slightly damp cloth with mineral oil on a cotton pad for spot treatment (test in an inconspicuous area first).
Why should I avoid commercial “quick shine” polishes on antique furniture in homes with children?
Many high-shine polishes contain strong fragrances, dyes, or chemical solvents that can leave residues kids may touch and mouth. Quick shine products can also soften or alter certain antique finishes, leading to long-term damage that’s harder to reverse. Choose safer, wood-approved options and always wipe off excess product after cleaning, then allow complete drying before the furniture is used.
Best kid-safe method to polish antique wooden furniture without leaving harmful residue?
The safest approach is to use a very small amount of a wood-friendly cleaner/polish made for antiques and apply it sparingly with a soft cloth. For many antique pieces, plain buffing with a dry microfiber cloth after cleaning helps restore glow without adding residue. If you use any conditioner or oil, apply lightly, remove excess immediately, and keep kids away until the surface is fully dry and not tacky.
Which household ingredients are safest for cleaning antique wooden furniture?
The most kid-safe options are simple, mild cleaners like diluted dish soap and plain water for routine grime, plus mineral oil or a manufacturer-recommended antique wood conditioner for dry areas. Avoid vinegar, baking soda abrasives, and steam cleaning unless the antique finish specifically tolerates them, because these can dull or strip delicate finishes. Always patch test in an inconspicuous spot and ensure the furniture is dry and residue-free before children can touch it.
📅 Last Updated: October 20, 2026 | Topic: Kid-Safe Ways to Clean Antique Wooden Furniture | Content verified for accuracy and freshness.
References
- https://www.cdc.gov/nceh/lead/prevention/default.htm
- https://www.epa.gov/lead/lead-based-paint
- https://www.epa.gov/lead/renovation-repair-and-painting-program
- https://www.epa.gov/lead
- https://www.hud.gov/program_offices/healthy_homes/lead
- Lead poisoning
- Lead paint
- https://scholar.google.com/scholar?q=kid-safe+cleaning+antique+wooden+furniture Google Scholar
- https://scholar.google.com/scholar?q=lead+dust+cleanup+painted+wood+children+safe+cleaning Google Scholar
- https://scholar.google.com/scholar?q=wood+furniture+conservation+cleaning+guidelines+mild+detergent+solvents Google Scholar
