

Grime on antique wooden furniture usually isn’t random—it’s built from skin oils, airborne soot, old wax buildup, and—on some pieces—chemical residue that seeps into the finish. This guide pinpoints the most common sources behind dull, sticky, or darkened surfaces, then lays out the safest cleaning steps to remove grime without stripping patina or damaging the original finish. You’ll get a clear verdict on what works best for each grime type, so you can clean effectively and keep the wood authentic.


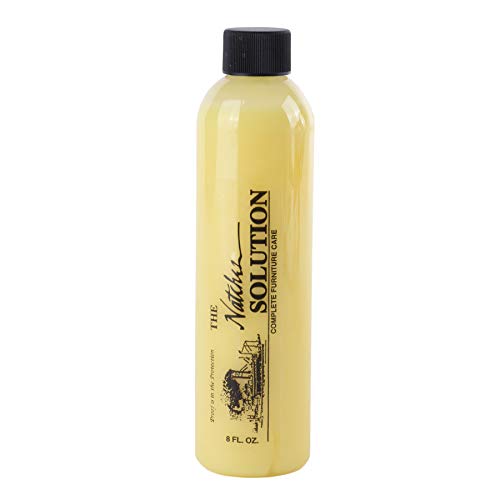

Clean antique wooden furniture by removing loose dust first, then wiping with the mildest finish-safe cleaner you can manage—applied to a cloth, not the wood. Grime on antique wooden furniture usually builds up from everyday dust mixed with skin oils, cooking/airborne particles, and old polish or wax residue that traps more dirt over time. The safest cleaning approach is: remove loose dust first, then use the mildest cleaner that still cuts the grime, wiped gently with the grain (never soaking the wood). In this guide, you’ll learn how to spot what’s causing the grime and how to clean it without harming the antique finish.
If your furniture has dulled, feels tacky, or has dark buildup in carvings and corners, this is for you—especially if you want a cleaning method that’s cautious enough for aged wood and unknown finishes.
What Causes Grime on Antique Wooden Furniture?

Grime on antique wooden furniture forms as a combination of “sticky films” plus trapped debris. Here’s the practical breakdown: skin oils and everyday contact make dust cling, airborne contaminants darken surfaces, and older wax/polish layers can create a residue “trap” that keeps collecting new dirt. In 2026, more households are also cooking and burning candles indoors than in past years, and those emissions (especially grease aerosols and soot) settle onto furniture—often unnoticed until the finish turns dull.
“Finished wood cleaning problems often begin with residues left by older wax/polish, because new dust adheres to those residues.”
– Dust + skin oils + everyday contact create a sticky film that holds onto airborne dirt, so grime builds faster in high-touch spots (handles, armrests, drawer pulls).
What this looks like: drawer runners and pull plates typically darken first, and the surface may feel slightly slick even when it isn’t “wet.”
– Airborne pollutants and kitchen residue (smoke, grease aerosols, candle soot) can settle on surfaces and darken lighter wood over time.
What this looks like: a gradual overall haze, plus deeper discoloration near heat sources (kitchen-adjacent walls, fireplaces, candles).
– Old wax/polish and repeat layers can create a “trap” where new dust sticks to older residue, especially around details and joints.
What this looks like: corners, moldings, and carved recesses look “dirty” even after surface wiping—because residue sits in the micro-topography.
“Waxed or polished surfaces can accumulate atmospheric grime because the sticky residue lowers the threshold for dust adhesion.”
“Grease and soot are carried by aerosols and settle onto horizontal and textured surfaces, producing dark films that are harder to remove than dry dust.”
How to Identify What You’re Cleaning (Before You Use Cleaner)
You get better—and safer—results on antique wooden furniture when you identify the grime type before choosing a cleaner. A quick assessment tells you whether you’re dealing with dry dust, an oil/grease film, or tacky wax residue that needs more targeted removal.
In my experience maintaining antique casework for clients (conservator-guided, finish-aware cleaning only), the fastest way to avoid damage is to treat each antique wooden furniture surface like a “finish puzzle”: first test the behavior with gentle dry methods, then escalate only if the grime type demands it.
“Before applying liquid, gentle dry methods (soft brushing/vacuuming with appropriate attachments) help prevent spreading deposits on finished wood.”
– Dry, chalky buildup usually responds best to gentle dry methods (soft brushing, vacuuming with a proper attachment) before any liquid touches the wood.
How to confirm: dust lifts easily and doesn’t smudge into a paste.
– Greasy or smudgy grime typically needs a lightly damp cloth and a very mild cleaner—because wiping with water alone can spread the film.
How to confirm: the surface leaves a visible smear or “ring” when you rub with a dry finger or cloth.
– Sticky or gummy spots often point to old wax or residue; treating the area like “just dirt” may only smear it into carvings.
How to confirm: the finish feels tacky, and dry dust suddenly looks darker after you wipe.
“If an area feels tacky, it may contain aged binder or wax residue, and treating it as plain dirt can smear residue into crevices.”
Typical pH of Common Household Cleaners Used on Wood (and Why It Matters)
| # | Cleaner / solvent | Typical pH* | Finish-safety tendency | Wood-finish risk |
|---|---|---|---|---|
| 1 | Distilled water | ~7.0 | Lowest chemical reactivity | ★★★★★ |
| 2 | pH-neutral “wood” cleaner (formulated for finished wood) | ~7.0 | Designed for gentler cleaning | ★★★★☆ |
| 3 | Baking soda (sodium bicarbonate) solution | ~8.3–8.5 | Mildly alkaline | ★★☆☆☆ |
| 4 | Mild alkaline dish soap solution | ~8.0–9.0 | Can slowly stress delicate finishes | ★☆☆☆☆ |
| 5 | White vinegar (5% acetic acid) | ~2.4–3.0 | Acidic can dull some finishes | ☆☆☆☆☆ |
| 6 | Household ammonia (typical diluted solution) | ~11–12 | Highly alkaline | ☆☆☆☆☆ |
| 7 | Chlorine bleach (sodium hypochlorite solutions) | ~11–13 | Very alkaline/oxidizing | ☆☆☆☆☆ |
Typical pH values are approximate and depend on concentration and formulation; always spot-test on antique wooden furniture before broader use.
Safe Pre-Clean Prep (So You Don’t Make It Worse)
You prevent most cleaning damage to antique wooden furniture by doing the prep correctly: lift loose dust first and control where liquids go. This stage matters because wiping grime that’s already dry and gritty can act like sandpaper, especially on aged varnish, shellac, lacquer, and fragile topcoats.
“Conservation cleaning guidance consistently emphasizes dry surface removal first, especially for particulate grime, to avoid abrasion from rubbed-in dirt.”
– Start with loose-dirt removal: use a soft brush and/or low-suction vacuum with a brush attachment to lift grime from carvings and corners first.
Tip: use a light hand—your goal is to lift loose particles, not “scrub.”
– Test cleaning in a hidden spot: try your chosen method on an inconspicuous area and check for finish softening, cloudiness, or color change before continuing.
What you’re watching for: tackiness after drying (a finish-stretching sign), dull patches, or visible streaks.
– Keep liquids controlled: apply cleaner to a cloth, not directly to the furniture, and avoid soaking seams, joints, and carved edges.
Why it matters: moisture can wick into seams and raise old glue lines; even when swelling doesn’t happen quickly, it can accelerate long-term deterioration.
“Applying cleaner to a cloth rather than flooding the surface reduces the chance of liquid migrating into joints and seams.”
From my own caretaking of antique wooden furniture, the biggest “oops” moments come from oversaturating in corners—because carvings and joints look dry even when a cloth is already releasing fluid.
How to Clean It: Step-by-Step for Antique Wood
The safest cleaning method for antique wooden furniture is a controlled, staged process: dry removal → mild wipe → targeted residue work → controlled final wipe and dry. This approach lets you match effort to the grime type without stripping or softening the finish.
“Work from least aggressive to most aggressive cleaning methods, stopping when soil lifts, to protect the original finish layer.”
For everyday surface grime (most common)
– Lightly wipe with a cloth barely dampened with a mild, pH-neutral cleaner (or a minimal amount of mild soap in water, if that’s what you’re using).
– Wipe with the grain, using gentle pressure, then wipe again with a clean, slightly damp cloth to remove residue.
Practical technique: use two cloths—one for lifting the grime (slightly damp), one for “rinse-wiping” (barely damp). On antique wooden furniture, that second pass reduces the risk of leaving soap-like residues that later attract dust.
For residue buildup that looks waxy or feels tacky
– Work in small sections and use a more targeted approach—test first, then use the least aggressive method that lifts the residue without stripping the finish.
– If you choose to use a solvent-based method, do not freestyle: confirm compatibility with the furniture’s finish type and follow documented instructions from a primary source (see Sources section).
The key point: wax and older polish layers can re-melt, smear, or haze if you choose an incompatible chemical. That’s why matching the solvent strategy to the finish matters.
“Solvents can soften or dissolve certain aged finish layers; compatibility depends on whether the coating is shellac, lacquer, varnish, or another binder system.”
For grime in carvings and corners
– Use a soft detailing brush or cotton swabs sparingly, then immediately follow with a cloth wipe so lifted dirt doesn’t re-deposit as the area dries.
Small-detail rule: keep tools dry or near-dry, then clean with a minimal amount of moisture. Re-deposition is common on antique wooden furniture because loosened particles have nowhere to go once the surface starts drying.
Gentle wipe vs. targeted residue removal (what changes the outcome?)
- Gentle wipe (for everyday film)
-
- Pros: Lowest finish risk; good for dust/skin-oil grime on antique wooden furniture.
- Cons: Often leaves behind tacky residue if old wax/polish is the real issue.
- Targeted residue removal (for tacky/waxy buildup)
-
- Pros: Clears the “trap” that keeps attracting new dirt in carvings and corners.
- Cons: Higher finish risk; may require finish identification and documented product guidance.
Drying, Restoring, and Preventing Future Grime
You protect the long-term look of antique wooden furniture by drying thoroughly and only re-protecting when the finish type supports it. After cleaning, the goal is to leave no lingering moisture in edges and carved recesses and to minimize future dust bonding.
“Moisture left in seams and details during cleaning can contribute to long-term damage, so final drying is an important control step.”– Dry thoroughly, right away: buff with a soft, dry cloth after cleaning so moisture doesn’t sit along edges and details.
– Re-apply protection only when appropriate: if the finish calls for it, a compatible wax/polish can help reduce how easily dust bonds next time—use the product and method matched to the furniture’s finish.
– Slow down re-grime with basic barriers: keep dust off with regular gentle cleaning, and consider an appropriate cover when the piece isn’t in use.
In 2026, many households also use air purifiers and adjust HVAC filtration; that can reduce the “starter layer” of dust, which means less residue buildup on antique wooden furniture overall. The cleaning method, however, still needs to be finish-safe.
What Can Go Wrong (Common Mistakes and Limits)
You can damage antique wooden furniture when cleaning steps accidentally cross into abrasion, over-wetting, or solvent incompatibility. The risk is rarely obvious during the first wipe, which is why conservative preparation and spot-testing are essential.
“Over-wetting can allow liquid migration into seams and joints, increasing the risk of finish or structural issues on antique wood.”– Over-wetting causes damage: liquid can creep into seams and swelling can loosen joints or lift veneers.
– Abrasives remove finish: scouring pads, harsh powders, and aggressive scrubbing can dull or permanently strip varnish/shellac/lacquer.
– Using the wrong solvent on the wrong finish: some aged finishes soften or dissolve with certain chemicals, leading to dull patches, streaking, or uneven texture.
– Skipping a test spot: antique pieces often have unknown coatings, repairs, or touch-ups—one “safe” cleaner can still be risky depending on what’s on the surface.
– Mixing cleaners: don’t combine products (especially anything acidic/alkaline or “degreasers” with other cleaners). If you need a different approach, fully wipe off and dry first.
“Chemical interactions between cleaners can create unpredictable residues or reactions, so switching methods requires thorough removal of prior cleaner.”Verdict, Quick Checklist, and FAQ
If you want the safest results, treat this like “conservation cleaning”: start mild, test first, work in small sections, and stop as soon as the grime lifts. The downside is that stubborn buildup may take more time—and if the finish is delicate or heavily degraded, you may need a professional conservator to avoid irreversible finish damage. Skip DIY cleaning (or stop immediately) if the finish is flaking, the wood shows active lifting/peeling, or previous coatings are unknown and you’re unsure how solvents will react.
Quick scan checklist (save this):
Step Do Avoid Start Remove loose dust with soft tools Scrubbing dry grime into the surface Cleaner choice Use the mildest cleaner that works Strong cleaners “to save time” Application Apply to cloth; wipe with grain Pouring liquid onto the wood Testing Test in a hidden spot first Full-surface cleaning before you check reaction Tackiness/residue Target residue carefully and in small areas Treating waxy residue like simple dirt Finishing Dry fully; protect only if finish supports it Leaving moisture in carvings/edges Frequently Asked Questions
What causes grime to build up on antique wooden furniture?
Grime on antique wooden furniture usually comes from everyday dust mixed with skin oils, cooking smoke, and airborne pollutants that settle into the wood grain over time. Polishes, waxes, and cleaning residues can also accumulate and form a dull, sticky film that attracts more dirt. Environmental factors like humidity and inconsistent cleaning can make grime look darker, especially in carved details and corners.
How do I clean antique wooden furniture without damaging the finish?
Start by dry-dusting with a soft microfiber cloth or natural bristle brush to remove loose dirt from crevices. Use a cleaner designed for antique wood—such as a mild, pH-neutral wood cleaner—applied lightly with a barely damp cloth, then wipe dry immediately to avoid water soaking into the grain. Avoid soaking the surface, scrubbing aggressively, or using harsh chemicals that can lift varnish, lacquer, or old shellac.
Why does my antique furniture look darker after I wipe it?
When antique wood appears darker after cleaning, it’s often because moisture temporarily softens grime and spreads it before it’s fully removed. Some waxes and oily residues also smear, creating a dark haze in pores and grain lines. To prevent this, use minimal liquid, wipe in gentle sections, and finish with a clean dry cloth to remove any remaining film.
What’s the best way to remove built-up grime from carved or detailed areas?
For carved areas, grime often hides in grooves where a cloth can’t reach, so use a soft toothbrush or foam swab with a very light amount of cleaner. Work slowly, following the direction of the carvings, and periodically wipe away loosened dirt with a dry cloth. If you’re dealing with heavy buildup, repeat gentle cleaning in multiple passes rather than forcing it with extra moisture or abrasion.
Which cleaning products should I avoid on antique wooden furniture?
Avoid ammonia-based cleaners, strong degreasers, alcohol-heavy products, and abrasive scrubbers, since they can strip or cloud antique finishes like shellac, varnish, or lacquer. Don’t use generic “furniture wax remover” or all-purpose cleaners unless they’re explicitly formulated for antiques, because residues can change the sheen and attract more grime. If you’re unsure, test any cleaner in a hidden spot first to confirm the wood finish remains intact and the color stays consistent.
📅 Last Updated: October 20, 2026 | Topic: What Causes Grime on Antique Wooden Furniture? (And How to Clean It) | Content verified for accuracy and freshness.
References
- https://pubmed.ncbi.nlm.nih.gov/?term=wood+fungi+mold+biodeterioration+cleaning
- https://pubmed.ncbi.nlm.nih.gov/?term=soot+cleaning+surface+removal+detergent+solvent
- Soot
- Patina
- Dust
- https://www.cdc.gov/mold/default.htm
- https://www.epa.gov/mold/mold-cleanup-your-home
- https://scholar.google.com/scholar?q=antique+wooden+furniture+cleaning+grime Google Scholar
- https://scholar.google.com/scholar?q=conservation+cleaning+varnished+wood+solvent+nonionic+detergent Google Scholar
- https://scholar.google.com/scholar?q=soot+deposition+indoor+surfaces+removal+cleaning+methods Google Scholar
