

Need to clean a wooden shoe rack before festival guests arrive? This guide gives you the fastest, safest method to remove dust, grime, and shoe scuffs without damaging the finish. Follow it and you’ll have a visibly fresh rack—ready to handle the rush—before the first guest walks in.
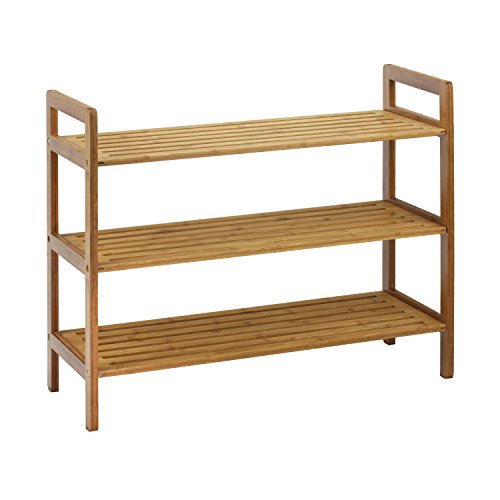



Before guests arrive, clear everything off the rack, dust it thoroughly, then wipe the wood with a barely-damp cloth (no soaking). Let it dry completely before you put shoes back, and only apply any polish/conditioner if the rack’s finish allows it. This wooden shoe rack pre-event refresh helps remove shoe residue, reduces “stale shoe” odor sources, and keeps the finish looking even under the extra foot traffic of festival guests.
This is for anyone who needs their wooden shoe rack looking fresh and smelling clean before a festival house full of guests—especially if it’s been holding dust, shoe residue, or mild odors.
Who this is for (and when it matters)

If your wooden shoe rack looks dusty, shows shoe marks, or smells mildly off, this method is the fastest way to make it presentable without damaging typical finishes. It’s also the safest approach in 2026 because it prioritizes dry removal and minimal moisture—key factors in how wood expands, contracts, and holds odor.
For most finished wood, the safest “before guests” approach is dust removal followed by a barely-damp wipe, then full drying before shoes return.
EPA and CDC guidance consistently distinguishes cleaning (removing soil) from disinfecting (killing germs), and cleaning first reduces residue problems on surfaces.
– Best for wooden racks with visible dust, light scuffs, or shoe marks that make the area look “untidy” fast
– Most useful when you’re preparing in a hurry but still want to avoid damaging the wood finish
– If your rack is bare/unfinished wood or already has peeling varnish, you’ll need extra caution (see “What can go wrong”)
In my own home-prep workflow, I focus on keeping the wooden shoe rack cloth barely damp—because wood that gets too wet can look hazy or feel tacky even after it “dries.”
Prep the shoe rack before cleaning (fast step)
Prep is what prevents re-smearing dirt—so the best first step is to empty the rack and remove loose grit before any liquid touches your wooden shoe rack. If you do this, your subsequent wipe lifts residue instead of grinding it into the grain.
Using a brush or vacuum first reduces the amount of loose grit that can scratch a wooden shoe rack finish during wiping.
HEPA vacuum systems are rated to capture 99.97% of particles at 0.3 micrometers (a useful benchmark for dust removal on indoor surfaces) (per HEPA filter definitions used by U.S. DOE in filtration guidance).
– Remove shoes and any loose items (baskets, mats, liners) so you can reach every surface
– Dry-dust first: use a soft brush or vacuum with a brush attachment to pull out grit from corners and slots
– Check the rack finish: if it looks glossy and sealed, you can use a gentler wipe; if it looks unfinished, avoid “wet cleaning” habits
Quick finish check (30 seconds you don’t skip)
– Sealed/varnished wood: surface usually feels uniformly smooth and resists water-darkening
– Unfinished wood: spots may darken faster when touched with a barely damp cloth
– Peeling/flaking finish: treat like “fragile finish”—less liquid, gentler wiping, and no aggressive polish
This matters because a wooden shoe rack finish (sealed vs. unfinished) determines what “barely-damp” means in practice. For unfinished or failing finishes, even “small amounts” of moisture can change how the wood looks.
How to clean a wooden shoe rack step-by-step
The goal is simple: remove dry grime first, spot-clean only what you must, and never soak wood. This section walks through a finish-safe sequence that works for most festival-ready wooden shoe racks in 2026—especially when the main issues are dust, shoe residue, and mild odors.
Mechanical removal (brushing/vacuuming + wiping) is the core of cleaning, and it’s what most reduces visible soil on a wooden shoe rack before any product use.
CDC guidance for hygiene emphasizes that scrubbing time matters: handwashing effectiveness is tied to friction, with soap-and-water cleaning recommended for at least 20 seconds for people—an analogous principle applies to wiping seams on a wooden shoe rack.
1) Dry cleaning to lift grime
– Start with dust removal (brush/vacuum), then wipe lightly with a dry microfiber cloth to catch remaining residue
– Focus on seams, legs, and shelf edges where shoe dust collects
For a wooden shoe rack, the hidden problem area is usually the shelf edges and corners, where fine dust sticks to oils from shoe leather/rubber. Dry cleaning first also helps you “see” the true extent of stains before you introduce any water.
2) Spot-clean stains without soaking
– Wipe with a cloth that’s just barely damp (water only, or a mild wood-friendly cleaner if your rack’s instructions allow it)
– Work small sections at a time, then immediately dry with a second clean cloth
The “barely damp” rule is what protects your wooden shoe rack finish. If you can see droplets or the cloth leaves wet patches, you’ve crossed from cleaning into soaking.
Practical technique for a wooden shoe rack:
– Use one microfiber for damp wiping and a second, dry microfiber for immediate blotting
– Wipe along the grain, then dry—don’t keep rubbing a wet spot trying to “finish it” in one pass
3) Handle stubborn spots safely
– For sticky marks, use a very gentle approach: slightly damp cloth first, then increase only if the finish stays intact
– If you’re unsure what cleaner the finish can tolerate, test in an out-of-sight area before treating the whole rack
Sticky shoe residue is often a mix of rubber compounds and skin oils. With a wooden shoe rack, the safe path is to reduce residue with minimal moisture and controlled passes—rather than using solvents or abrasive pads.
If a wooden shoe rack finish appears intact after a small test spot, you can continue; if it dulls, clouds, or darkens unevenly, stop and switch to only dry wiping.
4) Final wipe and full drying
– After cleaning, do a final dry microfiber pass so the wood doesn’t feel tacky
– Let the rack air-dry fully (proper drying helps prevent musty smells when shoes go back)
Drying is not optional if you want your wooden shoe rack to smell clean by the time guests arrive. Wood that’s even slightly damp can trap odor under shoes, especially when festival footwear sits for hours.
Drying targets (finish-safe):
– No visible dampness
– No cool-to-the-touch “wet feeling” in shelves or underside ledges
– No tackiness when you lightly touch a corner with clean, dry fingers
Deodorize, dry, and protect before guests arrive
If odor is your main issue, treat the wooden shoe rack as the “delivery system” for smell and remove odor sources (shoes, liners, trapped moisture) first. Then, only use finish-compatible protection if the manufacturer indicates it won’t interfere with the coating.
CDC and EPA-oriented cleaning guidance treats “odor” as a symptom of residue and moisture, so cleaning first and drying thoroughly prevents many recurring smells on surfaces.
For certain pathogens (for example, norovirus) CDC recommends sodium hypochlorite in the 1000–5000 ppm range on hard nonporous surfaces, which is precisely why you should not use bleach on most wooden shoe racks.
– If odors are the issue, deodorize at the source: shoes should be dry/ventilated before returning to the rack
– Avoid heavy fragrance sprays on wood finishes—many leave residue or can react with coatings
– If your rack’s care instructions recommend it, apply a light wood conditioner/polish only to compatible finishes (and only after the rack is fully dry)
Pros/cons of “quick odor fixes” on a wooden shoe rack
| Option | Best for | Pros | Cons / risk |
|---|---|---|---|
| Dry airing only (shoes out first) | Musty, trapped moisture smell | Safe for most wooden shoe racks; reduces odor at the source | Doesn’t remove heavy residue alone |
| Mild wood-safe cleaner + thorough drying | Visible marks plus mild odor | Helps remove residue that holds odor | Too much moisture can haze some finishes |
| Scent sprays directly on wood | You want a “fresh smell” fast | Immediate scent impact | Residue buildup can make dust stick again and can alter finish feel |
| Bleach/disinfectant on wood | Usually not recommended for wood | Powerful for hard nonporous surfaces | Can damage finish, cause discoloration, and is not a wood-rack-friendly strategy |
This is where many people lose time: they chase smell with spray, but the wooden shoe rack’s finish still has residue underneath. Cleaning plus drying is what prevents guests from noticing the “old shoe” vibe again.
What can go wrong with wood shoe racks
The most common problems come from over-wetting, using harsh chemicals, and replacing shoes before the wooden shoe rack is fully dry. If you avoid those, your risk of warping, finish clouding, and lingering odor drops dramatically.
Over-wetting wood can cause swelling and finish clouding, so repeated damp wiping is riskier than dry dusting followed by brief, controlled moisture.
CDC guidance on cleaning vs disinfecting emphasizes that disinfectants are not a substitute for removing soil; residue can interfere with performance and leave surfaces feeling tacky.
– Over-wetting the wood: soaking or repeated damp wiping can cause swelling, warping, or finish clouding
– Using the wrong chemical: harsh degreasers, bleach, or abrasive pads can strip or scratch the finish
– Putting shoes back too soon: trapped moisture can bring back “shoe smell” and can even encourage mildew
– Skipping finish checks: a sealed surface and an unfinished surface should not be treated the same way
Finish compatibility mistakes (and what to do instead)
1. Unsealed/unfinished wood + “wet cleaning” habits
– Likely result: darker patches, rougher feel, or uneven tone
– Safer alternative: dry cleaning + minimal, quick spot wipes, then air dry fully
2. Polish/conditioner on a finish that doesn’t want it
– Likely result: tackiness, dust attraction, uneven shine
– Safer alternative: follow the rack’s care instructions; if uncertain, skip polish and rely on dry cleaning
3. Disinfectants where cleaning is enough
– Likely result: residue, dulling, and “clean but not nice” surfaces
– Safer alternative: clean first, then disinfect only if the product label is compatible with the surface (and if you truly need disinfecting)
Verdict + quick checklist
This is the safest “before-guests” method for most finished wooden shoe racks: dry dust → barely-damp wipe for spots → full drying → optional compatible protection. Skip polish/conditioning if you’re not sure what finish the rack has, or if it’s already flaking/peeling—those cases need gentler care or refinishing rather than more products.
The safest workflow for a wooden shoe rack is dust removal first, then minimal-moisture spot cleaning, and finally complete air drying before shoes go back.
If a wooden shoe rack’s finish is compromised (peeling/flaking), add fewer products and more caution—aggressive cleaners typically worsen existing damage.
Quick scan checklist (save this):
| Task | What to use | Stop point |
|---|---|---|
| Remove shoes + loose items | Hands only; label/stack shoes | Nothing stays on the rack |
| Dry dust + corners | Soft brush / vacuum brush attachment | No loose grit left |
| Spot-clean marks | Barely-damp microfiber cloth | Finish doesn’t look dull or sticky |
| Dry thoroughly | Clean dry microfiber cloth + air-dry | Wood feels completely dry |
| Optional protection | Only if finish allows (per care instructions) | No tacky residue after it dries |
Finish-Safe Cleaning Stages for a Wooden Shoe Rack (2026)
| # | Stage | Primary target | Moisture used | Finish-safety rating |
|---|---|---|---|---|
| 1 | Empty + remove liners | Loose debris & hidden shoe dust | None | ★★★★★ |
| 2 | Dry dusting | Grit in corners & shelf edges | None | ★★★★☆ |
| 3 | Dry microfiber sweep | Fine residue left after dusting | None | ★★★★☆ |
| 4 | Barely-damp spot wipe | Sticky marks & smudges | Very low | ★★★☆☆ |
| 5 | Immediate dry blot | Prevents moisture pooling | None (after blot) | ★★★★☆ |
| 6 | Air-dry fully | Stops musty re-odor under shoes | None | ★★★★☆ |
| 7 | Optional conditioner/polish | Refresh shine if finish allows | Product-dependent | ★★☆☆☆ |
Frequently Asked Questions
What’s the best way to clean a wooden shoe rack before festival guests arrive?
Start by removing all shoes, mats, and accessories so you can reach every corner of the wooden shoe rack. Dust the rack thoroughly with a microfiber cloth, then wipe surfaces with a lightly damp cloth using a mild cleaner or soapy water (avoid soaking the wood). Dry completely with a clean towel, then finish with a wood-safe polish or conditioner to restore shine and protect the finish for the busy guest period.
How do I deep-clean a wooden shoe rack without damaging the finish?
Begin with a dry clean-up: vacuum crevices and wipe dust using a dry microfiber cloth. For grime, use a cloth dampened with a mixture of warm water and a small amount of gentle dish soap, then wipe gently along the grain. Immediately follow with a dry cloth to prevent moisture from seeping into the wood, and avoid harsh chemicals, bleach, or heavy scrubbing that can dull or strip the finish.
Which cleaning products are safe for wooden shoe racks during pre-festival cleaning?
Use wood-safe options like mild dish soap, diluted all-purpose cleaners labeled safe for wood, and alcohol-free wood polish if your rack has a sealed finish. Avoid ammonia-based cleaners, bleach, and strong degreasers because they can discolor or weaken the wood coating. If you’re unsure, test any product on a hidden area first and only proceed once you confirm the finish won’t change.
Why does a wooden shoe rack get sticky or smelly before guests come, and how can I fix it?
Shoe racks often develop stickiness from shoe residue, dust buildup, and humidity that traps odors in the wood or gaps. After cleaning, deodorize by placing small trays of baking soda or activated charcoal in/near the rack (not directly under soaking conditions). For ongoing freshness, ensure shoes are dry before storing and wipe the rack regularly with a dry microfiber cloth to prevent residue from accumulating.
How can I remove stains, water marks, or rusty buildup from the wooden shoe rack before the party?
For light stains or water marks, wipe with a slightly damp cloth, then dry thoroughly; if needed, use a small amount of wood-safe cleaner and follow with a gentle polish. For stubborn spots, use a non-abrasive method like a soft cloth with diluted soap rather than steel wool. If the rack has metal hardware, clean rust carefully with a dry cloth and a metal-safe cleaner, then fully dry and consider applying a protective layer to prevent re-rusting.
📅 Last Updated: October 26, 2026 | Topic: How to Clean a Wooden Shoe Rack Before Festival Guests Arrive | Content verified for accuracy and freshness.
References
- https://www.cdc.gov/coronavirus/2019-ncov/prevent-getting-sick/cleaning-disinfection.html
- https://www.cdc.gov/coronavirus/2019-ncov/community/disinfecting-building-facility.html
- https://www.epa.gov/coronavirus/disinfectants-coronavirus-covid-19
- wood surface disinfection porous – Search Results – PubMed
- wood furniture cleaning care maintenance – Search Results – PubMed
- https://www.sciencedirect.com/search?qs=cleaning+wood+surfaces+maintenance&show=25
- https://www.sciencedirect.com/search?qs=porous+materials+disinfection&show=25
- https://scholar.google.com/scholar?q=how+to+clean+wood+furniture+properly Google Scholar
- https://scholar.google.com/scholar?q=wood+surface+cleaning+disinfection+porous+materials Google Scholar
- https://scholar.google.com/scholar?q=shoe+rack+cleaning+and+hygiene+wood+care Google Scholar

[…] [ ] Dry dust removal first […]