

You can clean a wooden shoe rack using only a damp microfiber cloth—no harsh cleaners needed. This method is the fastest, safest option when your rack has everyday dust, light grime, or scuff marks and you want to avoid warping or finish damage. Follow the simple wiping and drying steps to restore the rack’s look without soaking the wood.
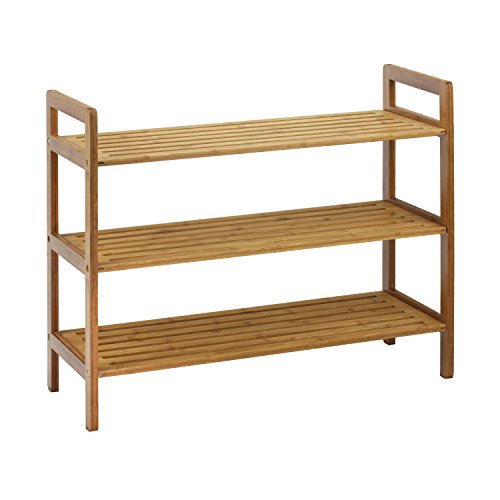



Use a damp (not wet) microfiber cloth to wipe the rack clean, then immediately dry the wood with a second dry cloth. This removes dust, light grime, and shoe scuffs without soaking the wood or lifting the finish, and it also gives you a safe “default” until you decide a finish-safe cleaner is necessary.
If your shoe rack is sealed or finished wood (most are), this method is the safest go-to for routine cleaning and quick refreshes. It’s also ideal when you want a simple process that won’t risk warping or streaking from excess moisture. In 2026, the same basic moisture-control principles still matter because finished wood only tolerates small, quickly removed water exposure—bigger wetting events are what lead to dull spots, swelling, and finish breakdown.
Who this is for (and when it applies)

This damp-microfiber approach is designed for finished wooden shoe racks where the goal is removing day-to-day soil without stressing the coating. It’s a low-risk routine because you control moisture at the cloth level and you dry immediately—two factors that directly reduce finish stress on a wooden shoe rack.
It’s also a practical method for people who don’t want to guess which cleaner is safe. As long as the wooden shoe rack has an intact varnish, lacquer, polyurethane, or similar topcoat, a damp cloth wipe plus immediate drying aligns with how most manufacturers advise caring for finished wood.
A “moisture-managed” wipe is safer for a wooden shoe rack than soaking, because wood swelling risk increases when moisture stays in the surface longer than a brief wipe.
Most routine furniture-care guidance emphasizes removing dust first and avoiding excess liquid contact with seams, edges, and joints on finished wood.
– Best for finished/varnished wooden shoe racks that collect dust and light dirt
– Works well for weekly cleaning or spot-cleaning scuffs with minimal grime
– Not ideal if the rack is unfinished wood or has peeling/failed coating
When to switch from “damp cloth only” to a finish-safe cleaner
This method stays “damp cloth only” until visible residue persists after gentle passes. On a wooden shoe rack, sticky shoe marks, oily smudges, or embedded grime often require a finish-safe cleaner—but only after you’ve confirmed the coating is intact (no peeling, bubbling, or powdery residue).
If residue remains after you’ve wiped and dried, the next safest step for a wooden shoe rack is usually a manufacturer-approved or finish-safe cleaner—because many household products are too aggressive for cured topcoats.
Supplies you’ll need
This is a straightforward process: use two microfiber cloths and control moisture precisely. For a wooden shoe rack, the “right” supplies are the ones that let you wipe lightly and dry immediately, not soak and wait.
Microfiber cloths are effective for a wooden shoe rack because their fine fibers lift dust and residue without the roughness that can scratch some finishes.
Two-cloth cleaning (damp wipe + immediate dry) is a core technique to prevent prolonged moisture contact with finished wood on a wooden shoe rack.
– Two microfiber cloths (one damp, one dry) for wipe + immediate drying
– Clean water (or )
– Optional: soft brush or vacuum with a soft brush attachment for loose dust
A note on moisture level (the part people usually get wrong)
For a wooden shoe rack, the damp microfiber cloth should feel “damp,” not dripping or wet. Wet cloths increase contact time and can drive water into seams and edges—especially at shelf fronts, corner miter joints, and any carved grooves.
In wood care, brief surface moisture is less risky than leaving water present, because wood dimensional changes are strongly tied to how moisture moves in and out of the surface.
Step-by-step: clean the rack with a damp microfiber cloth
This step-by-step method keeps the wooden shoe rack clean while minimizing moisture exposure. The key sequence is dust removal first, a controlled damp wipe next, and immediate drying right afterward.
In 2026, this workflow remains the practical standard because it prevents gritty particles from turning into abrasive “paste” during wiping. It also prevents trapped moisture, which is where dulling and finish haze often begin.
Dust should be removed before wet wiping a wooden shoe rack to avoid dragging grit across the finish and creating micro-scratches.
Wood science describes swelling risk as moisture content rises toward and beyond the fiber saturation point—keeping the wipe brief helps a wooden shoe rack stay below damaging moisture exposure.
– Dust first: remove loose grit so you don’t drag particles across the wood
– Wipe with a damp cloth: use gentle pressure and follow the grain; re-wet the cloth as needed, but keep it damp
– Finish with immediate drying: go over the same areas with the dry microfiber right away to prevent moisture damage
Step 1: Dry clean first (so you don’t grind dirt into the finish)
Start with dry dust removal on the wooden shoe rack using a soft brush or a vacuum attachment with soft bristles. If you don’t have a brush, use the dry microfiber cloth to lift dust rather than pressing it in.
According to the USDA Forest Service Wood Handbook, changes in wood dimensions are driven by moisture content changes (and swelling becomes a concern when moisture increases beyond safe, brief surface contact) (USDA Forest Service, Wood Handbook). The practical implication for a wooden shoe rack is simple: grit + water + pressure can damage coatings faster than dust alone.
Step 2: Dampen the cloth correctly, then wipe with the grain
Wring the damp cloth so it isn’t leaving puddles or streak runs on the wooden shoe rack. Wipe with gentle pressure and follow the grain direction. Re-dampen as needed, but keep the cloth in the “damp” zone.
As a reference point for how moisture measurement is defined in wood testing, ASTM D4442 uses oven-drying at 103 ± 2 °C to determine moisture content (ASTM International, ASTM D4442). Cleaning isn’t oven-drying, but it highlights why moisture level and drying behavior matter: the wood is sensitive to how water content changes.
Step 3: Dry immediately (especially seams and corners)
Immediately follow with the dry microfiber cloth. On a wooden shoe rack, add extra attention to:
– shelf edges and front rails
– corners and miters
– grooves, carvings, and any decorative detailing
– metal fasteners where seams can hold moisture
According to the USDA Forest Service Wood Handbook, wood moisture content in heated indoor buildings commonly stabilizes around the single digits to low teens percent (commonly roughly 8–12% under typical indoor conditions) (USDA Forest Service, Wood Handbook). Your goal during cleaning is not to “normalize” moisture—your goal is to prevent extra moisture from lingering on the surface of the wooden shoe rack.
Drying and protecting the wood finish
This section is where you prevent most cleaning-related finish issues. For a wooden shoe rack, thorough drying right after wiping is what keeps routine cleaning from turning into dullness or trapped moisture marks.
The protective part is also about timing. If the rack finish is intact, you don’t need constant reconditioning; you need correct cleaning and controlled drying, then periodic maintenance following the manufacturer schedule.
Immediate drying reduces the time water sits on a wooden shoe rack’s surface, which lowers the risk of finish haze and moisture-related spotting.
– Dry thoroughly: extra attention at corners, joints, and any grooves where water can sit
– Avoid pooling: never let water gather on shelves or soak seams/edges
– If needed, re-protect later: use only the manufacturer-recommended wood finish/maintenance schedule ()
Drying method that works for most shoe racks
After you wipe a section, dry it with firm-but-gentle passes. Then “spot check” with your hand: run your fingertips lightly over shelf fronts and along grooves of the wooden shoe rack. If any area feels cool/damp, dry it again before moving on.
Protecting without overdoing it
If your wooden shoe rack finish looks dry or the water behavior changes (water no longer beads or spreads slower than before), schedule maintenance according to the manufacturer. Re-oiling or re-waxing too often can attract dust and can interfere with future refinishing.
For finished wood on a wooden shoe rack, maintenance products should match the original finish type and follow the manufacturer’s schedule to avoid residue build-up or finish incompatibility.
What can go wrong
This is the section that keeps your wooden shoe rack from turning “clean” into “damaged.” Most problems come from excess moisture, skipping the dry pass, or using cleaners that aren’t compatible with your rack’s finish.
In 2026, product-label compliance is still the safest rule: when manufacturers say “lightly damp cloth only,” that phrasing usually reflects real-world risk (softening, residue, or finish stripping).
Using too-wet cloths increases exposure time and makes a wooden shoe rack more likely to develop cloudy spots or visible water marks.
Skipping immediate drying can trap moisture in the wood’s surface texture and seams, raising the chance of dullness on a wooden shoe rack.
– Too wet = risk of swelling, warping, or cloudy spots—microfiber should feel damp, not dripping
– Skipping the dry cloth = water stays trapped and can dull the finish
– Using the wrong cleaner = some household products can strip waxes, soften finishes, or leave residue ()
Quick comparison: damp microfiber vs. “just spray it”
If you’re deciding whether to move beyond damp wiping on a wooden shoe rack, this comparison helps you choose the safer path first.
| Approach | Best for on a wooden shoe rack | Primary risk | Safer next step if residue remains |
|---|---|---|---|
| Damp microfiber + immediate dry | Dust, light dirt, shoe scuffs with minimal residue | Moisture marks if cloth is wet or drying is delayed | Repeat gentle damp passes, then dry again |
| Spraying cleaners directly | Only when manufacturer allows direct application | Liquid pooling in seams/edges; finish dulling | Apply cleaner to cloth (not rack), then wipe/dry per label |
Verdict / tip
This is a smart, low-risk method for routine cleaning of a wooden shoe rack: damp microfiber wipe + immediate drying. It keeps the process controlled, and it’s especially suitable for sealed or finished wood with an intact topcoat.
The downside is it won’t reliably remove heavy grease, deep embedded dirt, or widespread stains on a wooden shoe rack. Those situations usually require a finish-safe cleaner, careful spot treatment, and—if the finish is compromised—restoration steps.
A damp-wipe method maintains safety when the finish is intact, but it cannot “dissolve” embedded grease the way a finish-safe cleaner can.
When a wooden shoe rack’s coating is peeling or failed, moisture-wipe methods can spread damage—repair or refinishing guidance becomes the priority.
Who should skip this approach
Skip this approach (and check finish instructions first) if:
– the rack is explicitly labeled “unfinished” or “do not wet”
– the coating is peeling, bubbling, or powdering
– you’re dealing with severe damage where moisture would worsen failure
When you should switch cleaning strategies (practical rule)
On a wooden shoe rack, after 2–3 gentle damp passes with immediate drying, if marks remain sticky or oily, switch to a finish-safe cleaner specifically permitted for your finish type. If you don’t know the finish, use before applying anything stronger than clean water.
Quick checklist (scan/save) + FAQ + Sources
| Step | What to do | You’re aiming for |
|---|---|---|
| 1 | Dry dust removal (brush/vacuum or dry cloth) | No gritty debris before wiping |
| 2 | Dampen microfiber with clean water | Cloth feels damp, not wet |
| 3 | Wipe with grain, gentle pressure | Light soil removed without smearing |
| 4 | Dry immediately with second cloth | No lingering moisture on wood |
| 5 | Let it air-dry fully if needed | Touch-dry, no damp corners |
Frequently Asked Questions
How do I clean a wooden shoe rack using a damp microfiber cloth without damaging the finish?
Lightly dampen a microfiber cloth with clean water and wring it out so it isn’t dripping. Wipe the wooden shoe rack gently, following the wood grain, and avoid soaking seams, joints, or any unfinished edges. Immediately dry the surface with a second dry microfiber cloth to prevent water spots and warping, then let it air-dry fully.
What’s the best way to remove dirt and grime from a wooden shoe rack when I only want to use water?
Start by dusting the shoe rack thoroughly with a dry microfiber cloth or soft brush to lift loose dirt. Then wipe with a damp microfiber cloth to tackle remaining grime, focusing on corners, grooves, and shelf edges where buildup collects. If grime is stubborn, use a slightly more damp cloth and re-wipe quickly, but don’t let moisture linger—dry immediately after.
Which cleaners are safe for a wooden shoe rack if water alone doesn’t work?
For most finished wood shoe racks, use a mild wood-safe cleaner diluted according to the label, applied to the microfiber cloth (not directly to the wood). Avoid harsh chemicals, ammonia, bleach, or abrasive pads that can strip the finish or dull the surface. Always spot-test in a hidden area first, and follow up by wiping with a slightly damp cloth and drying completely to protect the wood.
Why should I avoid soaking a wooden shoe rack during cleaning?
Wood can absorb moisture, and prolonged dampness can cause swelling, warping, or separation at joints. Excess water can also seep into hinges, screws, and shelf joints, leading to deterioration or rough spots over time. Using a damp microfiber cloth with quick wiping and immediate drying helps keep your wooden shoe rack clean without compromising its structure.
What’s the best routine for maintaining a wooden shoe rack so it stays clean and protected?
Clean with a damp microfiber cloth regularly—such as once a week or whenever you notice dust buildup—to keep grime from accumulating in grooves and corners. Dry thoroughly after each wipe, and consider using a wood polish or conditioner that matches your rack’s finish only if the manufacturer recommends it. Keeping shoes off the rack when they’re wet and using mats or liners can also reduce moisture and help your wooden shoe rack stay in good condition.
📅 Last Updated: October 26, 2026 | Topic: How to Clean a Wooden Shoe Rack With a Damp Microfiber Cloth | Content verified for accuracy and freshness.
References
- https://www.cdc.gov/coronavirus/2019-ncov/community/disinfecting-building-facility.html
- https://www.who.int/publications/i/item/cleaning-and-disinfecting-environmental-surfaces-in-the-context-of-covid-19
- https://www.epa.gov/coronavirus/cleaning-and-disinfecting
- Microfiber
- Wood finishing
- Wood finishing
- Wood-decay fungus
- https://scholar.google.com/scholar?q=how+to+clean+wooden+furniture+damp+microfiber+cloth Google Scholar
- https://scholar.google.com/scholar?q=wood+furniture+cleaning+avoid+excess+water+care+instructions Google Scholar
- https://scholar.google.com/scholar?q=microfiber+cloth+cleaning+efficacy+wood+surfaces+study Google Scholar

[…] damaging the finish? Use a gentle, finish-safe approach: dust first, then wipe with a lightly damp microfiber cloth and a mild pH-neutral cleaner to remove grime without dulling or stripping. For stubborn spots, […]