

Want to deep clean a wooden shoe rack like a pro without damaging the finish? This guide delivers the fastest, safest method to remove grime, odors, and buildup while keeping wood clean and protected. If you’ve been stuck with sticky residue or dark stains, follow these steps for a truly thorough result.
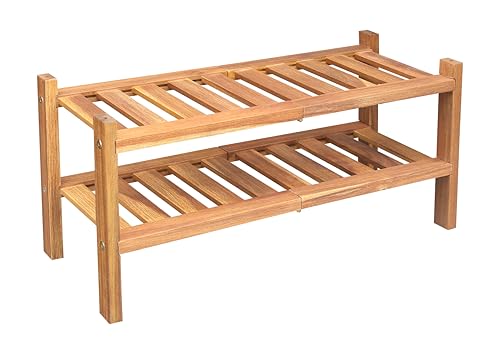


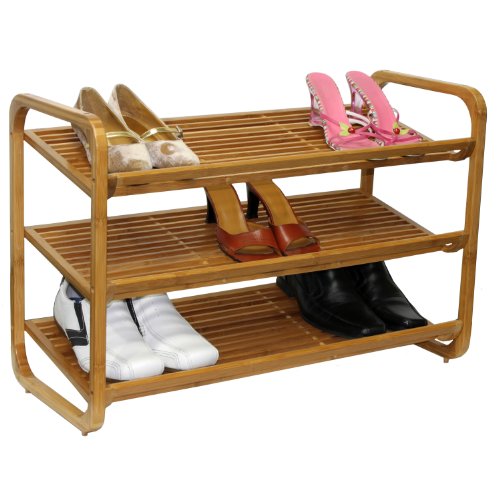
Deep clean a wooden shoe rack by removing everything, dry-brushing out dust and grit, then wiping with a nearly-dry microfiber cloth using a wood-safe cleaner (or minimal-water mild dish soap). Avoid soaking the wood—water left to sit can swell or warp it. Finish by drying thoroughly and, if needed, applying a light wood conditioner/protectant to keep the surface sealed.
If your rack has built-up grime, dust in the corners, sticky residue near the bottom, or an old odor from shoes, this process gives you a safer “deep clean” without damaging the finish. It’s also a good approach when you want it to look refreshed but don’t want to strip and refinish.
Prep the rack (so you don’t spread grime)

Start by fully emptying the wooden shoe rack so you can clean the frame, shelves, and corners without pushing dirt deeper. Then check the rack’s condition first—major finish damage changes the right approach.
This is especially important in 2026 because many shoe racks now use modern film finishes (polyurethane, lacquer) or layered stains that can react differently to moisture. The goal of preparation is to protect the wood surface while you remove soil from every contact point.
Wood dimensional change is driven by moisture content changes: according to the U.S. Forest Products Laboratory, dimensional shrinkage/swelling occurs when wood moisture drops below the fiber saturation point (about 25–30% moisture content).
The same Wood Handbook reference explains that typical tangential shrinkage from fiber saturation to oven-dry for many species is often on the order of ~6–12%, while radial shrinkage is commonly ~3–6%—a reminder why “minimal water” matters for a wooden shoe rack.
Step-by-step prep (what to do first)
– Remove shoes, liners, and any removable shelves/dividers; label parts if needed.
– Set up ventilation and protect floors with a towel or plastic sheet.
– Do a quick inspection for loose screws, peeling finish, or swelling—stop and repair first if you see major damage.
My practical rule for wooden shoe rack prep: if I can see bubbling, peeling edges, or soft spots on the base, I don’t “go deeper” with water—I switch to gentler spot cleaning until the finish is stabilized.
Dry clean first: dust, grit, and hidden debris
Dust is the first enemy of a pro-level deep clean because dry grit can turn into sandpaper when you add moisture. So for a wooden shoe rack, you dry-brush and vacuum first, then only wipe when the surface is already free of loose debris.
For wooden shoe rack cleaning, this “layered cleaning” approach reduces the chance of scratching slats and pushing grime into joints—especially where shoe soles and laces shed fine particles.
The U.S. Forest Products Laboratory’s wood-moisture guidance emphasizes that moisture exposure changes the wood; removing dust and grit first helps you avoid turning debris into an abrasive slurry on a wooden shoe rack.
Microfiber cloths are designed to trap and lift fine particles via contact and capillary action, so they work best after dry removal of grit on finished wood surfaces.
If you vacuum crevices first, you reduce the amount of particulate matter that can lodge into seams during the first damp wipe of a wooden shoe rack.
Dry removal (no liquids yet)
– Use a soft brush or dry microfiber to lift dust from corners, joints, and slats.
– Vacuum crevices with a brush attachment (low power) before you use any moisture.
– Wipe once with a barely-damp cloth after dry removal only if the surface is already clean of loose grit.
Pro detail: hold the brush bristles at a shallow angle and “follow the grain” along slats and rails. On many wooden shoe racks, corners collect the heaviest dust load—so spend extra time there before you ever touch water to the wood.
Deep clean with minimal water (wood-safe approach)
Once the wooden shoe rack is free of loose grit, the safest deep clean comes from a nearly-dry microfiber wipe—using the least liquid necessary to lift residue. You’re not trying to “wash” the wood; you’re cleaning the film surface gently and immediately drying afterward.
This method is designed around the same moisture principle used in professional wood care: keep moisture exposure short and controlled to prevent swelling/warp risk on a wooden shoe rack.
Wood swelling and shrinking are moisture-driven; the U.S. Forest Products Laboratory notes that below the fiber saturation point, moisture changes can produce measurable dimensional movement.
A wood-care principle reflected across wood-finishing references is that leaving liquids to sit increases risk of spotting, raised grain, and finish damage on finished wooden furniture surfaces.
In practice, a nearly-dry microfiber wipe limits water contact time, which reduces the likelihood of localized finish softening on a wooden shoe rack.
How to mix and apply cleaner safely
– Mix a small amount of mild dish soap into water, then wring the cloth nearly dry (the cloth should feel damp, not wet).
– Wipe in the direction of the grain; use cotton swabs for seams and screw heads.
– For stubborn marks, spot-clean gently and test in an inconspicuous area first (avoid harsh solvents unless the finish manufacturer explicitly allows them).
– If you use vinegar or baking-soda-type cleaners, confirm they’re compatible with your rack’s finish first: .
Quick “finished wood” cleaning mindset
Think of the wood finish as a protective barrier. When you use a wooden shoe rack cleaner, you want to remove soil that’s on top of the barrier—not saturate or dissolve it. If you see any tackiness after cleaning, stop, rinse-minimize with a well-wrung plain-water cloth, and dry immediately.
Moisture Targets That Influence Wood Movement (70°F / 21°C)
| # | Indoor Relative Humidity | Equilibrium Moisture Content (EMC) | Wood Movement Risk | Finish-Safety Rating |
|---|---|---|---|---|
| 1 | 30% RH | ~5.5% | Low | ★★★★★ |
| 2 | 40% RH | ~7.4% | Moderate | ★★★★☆ |
| 3 | 50% RH | ~9.0% | Moderate | ★★★☆☆ |
| 4 | 60% RH | ~10.9% | Elevated | ★★☆☆☆ |
| 5 | 70% RH | ~13.0% | Elevated | ★☆☆☆☆ |
| 6 | 80% RH | ~15.3% | High | ☆☆☆☆☆ |
| 7 | Fiber Saturation* | ~28–30% | Very High | ☆☆☆☆☆ |
Fiber saturation point is the moisture content where cell walls are saturated and additional water no longer causes shrinkage; wood movement risk remains high if you allow puddling or prolonged dampness on a wooden shoe rack.
Note: EMC values above are approximate equilibrium moisture content benchmarks used in wood-moisture references at ~70°F. For the exact EMC table that matches your temperature, check the wood-moisture reference you’re using.
Drying, deodorizing, and re-protecting the finish
You finish a pro-level deep clean by drying immediately, then re-protecting only if the wooden shoe rack’s finish looks dull, dry, or porous. This final phase prevents moisture from lingering in seams and helps restore surface protection.
Drying is also where many wooden shoe rack owners “accidentally undo” good cleaning—by leaving the rack in a humid spot or not allowing airflow after the last wipe. As of 2026, the most reliable approach is still airflow + complete drying before any protectant.
Because dimensional change is moisture-driven, finishing your wooden shoe rack cleaning with immediate drying and airflow helps minimize the moisture exposure window.
Wood-moisture references describe fiber saturation (~25–30% moisture content) as the threshold above which added water does not create additional shrinkage, but lingering wetness can still damage finishes and enable swelling before equilibrium.
Dry immediately (don’t “let it sit”)
– Dry immediately with a clean microfiber towel; then let it air-dry with airflow (fan nearby is fine).
– For lingering shoe odors, place an odor absorber in the rack area while it fully dries (don’t trap moisture inside).
– Once dry, apply a thin layer of wood conditioner/protectant if your rack’s finish looks dull or porous—follow the product directions exactly: .
Deodorizing without soaking
If shoe odor is your main complaint, keep the deodorizing dry and indirect. A wooden shoe rack deodorization strategy is: remove moisture drivers first (wet shoes/liners), dry the rack thoroughly, then use a dry odor absorber in the surrounding area while airflow continues.
What can go wrong (and how to avoid damage)
A pro deep clean still has limits: if you use too much water, pick incompatible cleaners, or leave the wooden shoe rack damp, you can cause swelling, finish clouding, or residue buildup. Avoid these issues by controlling moisture and testing first.
This section is practical because “wood safe” is not the same as “finish-safe.” A mild dish soap can still create residue if you overapply, and vinegar can soften certain finishes depending on formulation and exposure time.
The U.S. Forest Products Laboratory’s wood-moisture guidance ties movement risk to moisture content changes below the fiber saturation point (about 25–30%).
Across furniture care references, one consistent recommendation is to avoid letting cleaners or water remain on the surface—especially on edges and seams—because lingering moisture increases finish and wood damage risk.
Common failure modes
– Warping/swelling: Usually from soaking, puddles, or leaving damp cloths on the wood. Keep liquids to a minimum and dry fast.
– Finish clouding or discoloration: Can happen with the wrong cleaner, too much water, or aggressive scrubbing—test first.
– Residue buildup: Overusing soap can leave a film; do a final wipe with a cloth that’s just water-damp (well-wrung), then dry.
Quick contrast: clean gently vs. strip/refinish
If you’re debating whether to deep clean or refinish, here’s a decision-focused comparison for a wooden shoe rack.
| Criteria | Deep clean with minimal water (this method) | Strip/refinish |
|---|---|---|
| Moisture exposure | Low | High (stripping + refinishing cycles) |
| Risk of warping | Lower when dried immediately | Can still occur if not dried and acclimated properly |
| Time investment | Typically shorter (depends on drying) | Often longer |
| Finish preservation | Usually yes, if finish is intact | Finish removed |
| Works on light grime | Yes | Often more than needed |
| Works on heavy staining | Partial | More complete restoration |
| Repair for peeling varnish | Limited (can’t fix delamination fully) | Better for severely failing finishes |
| Odor removal | Moderate (focus on drying + dry deodorizing) | Can be better if odor is in the finish |
| Equipment needs | Brush, microfiber, mild cleaner | Solvents/strippers, sanding, topcoat |
| Best for | Routine refresh and safe “deep clean” | Restoration after major finish failure |
| **Best For** | **Wooden shoe racks with intact finishes and surface grime** | **Racks with peeling, bare wood, or extensive water damage** |
Verdict: a pro-level method—with a couple of limits
This method is “pro” because it controls moisture, cleans in layers (dry first, then lightly damp), and finishes with thorough drying and optional re-protection. The downside is that it won’t fully fix heavily damaged or deeply stained finishes without refinishing.
Skip (or proceed cautiously with extra testing) if your wooden shoe rack has peeling varnish, severe water damage, or bare/unfinished wood—in those cases, you may need professional refinishing or a finish-compatible restoration plan.
Wood movement is tied to moisture below the fiber saturation point (~25–30%), so the biggest pro advantage of this method is minimizing time and volume of moisture on the wooden shoe rack.
Wood-care guidance consistently emphasizes drying quickly after any damp wipe to reduce moisture exposure and limit swelling/warping risk in finished wood furniture.
Quick checklist (save this before you start)
| Step | What to do | Watch for |
|---|---|---|
| 1 | Remove shoes & accessories | Loose hardware—tighten first |
| 2 | Dry-brush + vacuum crevices | Don’t press grit into seams |
| 3 | Light soap solution, nearly-dry cloth | Keep wood from getting wet |
| 4 | Spot-test tough stains | Avoid harsh chemicals unless approved |
| 5 | Dry immediately + air-dry | No trapped moisture |
| 6 | Optional: recondition/protect | Use finish-compatible products |
Sources
– U.S. Forest Products Laboratory (Wood Handbook): chapters on wood moisture content, fiber saturation point, and dimensional stability/shrinkage.
– U.S. Forest Products Laboratory (Wood Handbook): equilibrium moisture content and wood movement under changing relative humidity.
Deep cleaning a wooden shoe rack “like a pro” comes down to three things: remove debris dry first, clean with minimal moisture (nearly-dry cloths), and dry immediately before re-protecting the surface. If you follow the steps above and test any stain treatment in a hidden spot, you’ll get a noticeably fresher rack without risking swelling or finish damage—then do a quick monthly dry wipe to keep buildup from returning.
Frequently Asked Questions
How do I deep clean a wooden shoe rack without damaging the finish?
Start by removing shoes and loosening dust with a dry microfiber cloth or vacuum with a brush attachment. For cleaning, use a slightly damp cloth with a pH-neutral wood cleaner (or a very mild soap solution) and wipe in the direction of the grain. Avoid soaking the rack or using harsh chemicals that can strip varnish or stain; dry immediately with a clean towel and let it air-dry fully before restyling.
What’s the best way to clean out dirt and grime from shoe rack crevices and shelves?
Use a soft toothbrush, cotton swabs, or a small detailing brush to lift embedded dirt from corners, slats, and shelf edges. For stubborn buildup, lightly dampen the brush with your wood-safe cleaner, then wipe afterward with a damp cloth to remove residue. Finish by drying every nook thoroughly so moisture doesn’t lead to warping or musty odors.
Why does my wooden shoe rack look dull after cleaning, and how can I prevent it?
A dull finish often happens when cleaner residue is left behind, when too much water is used, or when the wrong product dulls the protective topcoat. Prevent this by using minimal moisture, sticking to pH-neutral cleaners, and wiping again with a lightly damp cloth to remove any soapy film. Once fully dry, apply a thin layer of wood polish or furniture oil recommended for your rack’s finish to restore shine.
Which products are safest to use for deep cleaning sealed vs. unfinished wooden shoe racks?
For sealed wood (painted, varnished, or lacquered), you can typically use a pH-neutral wood cleaner and a lightly damp microfiber cloth since the surface resists absorption. For unfinished or oil-finished racks, choose products specifically labeled safe for unfinished wood—avoid strong detergents and minimize wet cleaning. If you’re unsure, test any cleaner in a hidden area first, then adjust your method based on how the wood reacts.
How can I remove shoe odor and mildew from a wooden shoe rack during deep cleaning?
Remove all shoes, then wipe the rack with a wood-safe cleaner and focus on underside shelves, back panels, and any crevices where moisture collects. If mildew is present, use a lightly diluted solution made for wood-safe cleaning and do not saturate the wood; dry thoroughly with fans or by air-drying in a well-ventilated area. After cleaning and drying, consider placing odor absorbers (like baking-soda sachets) in the rack and ensure shoes are completely dry before storing them again.
📅 Last Updated: October 26, 2026 | Topic: How to Deep Clean a Wooden Shoe Rack Like a Pro | Content verified for accuracy and freshness.
References
- https://www.epa.gov/mold/mold-cleanup-do-it-yourselfers
- Mold | US EPA
- https://www.cdc.gov/mold/default.htm
- https://www.cdc.gov/coronavirus/2019-ncov/community/disinfecting-building-facility.html
- mold remediation porous surfaces cleaning – Search Results – PubMed
- Mold
- Wood preservation
- https://scholar.google.com/scholar?q=deep+clean+wooden+furniture+mold+removal Google Scholar
- https://scholar.google.com/scholar?q=wood+cleaning+disinfection+methods+avoid+damage Google Scholar
- https://scholar.google.com/scholar?q=shoe+rack+cleaning+odor+microbes+study Google Scholar
