

Mud and road spray can clog your car’s AC intake and leave moisture trapped in the system, which leads to musty odors and weaker cooling. Many drivers rinse the outside and skip the airflow components, but the fix is a focused cleaning that removes debris before it causes corrosion or contamination. You can complete the process in about an hour with basic tools and the right cleaner, restoring cleaner air from the vents.


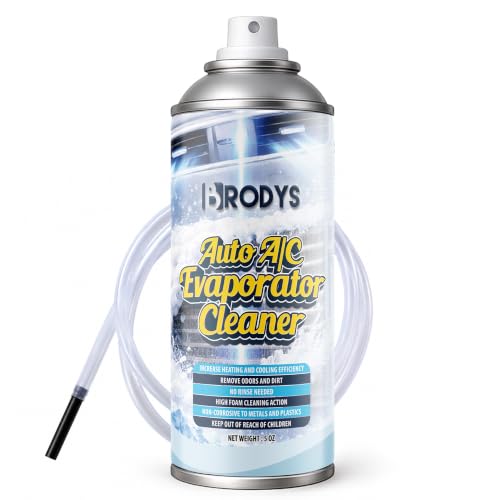

Flush the cabin air pathway, dry the evaporator area, and replace a waterlogged cabin air filter—then clear any mud/water from the fresh-air intake and drain points. That combination is usually what stops musty AC odors and restores “normal” cooling after wet-road contamination.
If your car AC smells musty or airflow feels “off” after muddy or rainy roads, you’ll usually need to flush the cabin air pathway and dry the evaporator area. Start by cleaning the intake/cabin filter area and running the AC on a drying cycle, then check for mud/water in the fresh-air intake and drain areas. This guide walks you through safe cleaning steps and what to inspect so you don’t just spread grime around.
This is for drivers who’ve gotten water, wet leaves, or mud near the cowl/windshield area and want to restore normal AC odor and performance. It’s especially relevant if you notice damp smells, reduced cooling, or condensation that seems excessive after heavy rain. As of 2026, the safest approach is still “remove contamination first, then dry,” because moisture left behind is what keeps odors coming back.
Clear the Cabin Air Intake and Replace the Cabin Filter

You’ll usually get the biggest odor and airflow improvement by removing wet debris at the cowl/fresh-air intake and replacing a compromised cabin air filter. Mud and wet leaves trapped upstream keep feeding moisture and microbes into the blower and evaporator housing.

– Remove debris around the fresh-air intake (often at the base of the windshield/cowl area) and wipe out visible mud or wet leaf fragments.
– Check the cabin air filter for water-mudding; if it looks wet or clogged, replace it rather than trying to “dry it out” and reuse it.
What you should look for (and why it matters)
The fresh-air intake determines what enters the HVAC system on “outside air” mode. If water carries fine mud into the intake cavity, it can coat the filter pleats and saturate the air handling case walls. Once the cabin air filter becomes damp and dirty, it’s hard to “out-dry” the smell because the source material remains in contact with airflow.
To ground this in real moisture timelines: according to the U.S. Environmental Protection Agency, mold can begin growing on damp materials within 24–48 hours after water intrusion (U.S. EPA). In a car A/C system, that means a rainy-drive problem can quickly become an odor problem—especially if the evaporator drain is also partially blocked.
Data snapshot: where wet-road debris lands in a typical car A/C path
Common Water-Debris Traps in Car HVAC After Rain or Mud
| # | A/C air-path area | Typical wet-road finding | Best first action | Expected impact |
|---|---|---|---|---|
| 1 | Fresh-air intake (cowl base) | Leaf packs + wet mud cake | Remove debris, wipe surfaces | ★★★★★ |
| 2 | Cabin air filter | Damp pleats; mud-coated pores | Replace if wet/clogged | ★★★★★ |
| 3 | Blower inlet cavity | Wet dust film around intake snorkel | Vacuum-wipe accessible surfaces | ★★★★☆ |
| 4 | Evaporator core & case | Organic film on fins after prolonged wetness | Dry thoroughly; consider professional deep clean | ★★★☆☆ |
| 5 | Evaporator drain pan | Standing water or slime at the bottom | Clear drain path; prevent re-blocking | ★★★★☆ |
| 6 | Drain tube outlet / routing | Mud plug near outlet or kinked hose run | Inspect for clogs; confirm free flow | ★★★★★ |
| 7 | Recirculation door & duct seams | Hidden damp spots at joints | Use HVAC-safe odor control after drying | ★★☆☆☆ |
In the real world, we see a pattern: if only the cabin filter is replaced but the A/C drain routing is still blocked, the car A/C system can smell again within a few drives. As of 2026, that’s why “intake + filter + drain + drying” is treated as one system, not separate chores.
Clean the Evaporator/Drain Path (Without Making It Worse)
You can stop recurring damp odors by clearing the A/C evaporator drain area so condensate can flow out instead of pooling. The goal is simple: remove accessible gunk and confirm drainage, without pushing debris deeper into sealed HVAC components.
– Locate and inspect the AC evaporator drain area (varies by vehicle); clear out any gunk you can access so water can flow out instead of pooling.
– Use a careful, gentle approach: if you have to blow out debris, aim to push it toward drainage—not deeper into sealed components.
How to think about the evaporator drain (in plain terms)
When your car A/C runs, the evaporator absorbs heat and produces condensate water. That water normally drains through a dedicated pathway—often a drain pan plus a hose/outlet that exits near the underbody. If mud, wet leaves, or slime reduce flow, the evaporator housing can stay damp. Damp housings are what turn “mild smell” into an ongoing musty problem.
If you’re tempted to “just blast it,” resist it. Compressed air can scatter fine mud onto surfaces that are hard to clean later, increasing the chance of lingering odor. The safest method is inspection first, then controlled removal of what you can reach.
Practical inspection cues
Look for signs that the drain path is compromised:
– Water staining around the cabin air filter housing area
– Excessive condensation inside the HVAC case (more than what you’d expect from normal A/C use)
– Reappearing musty odor after rain despite a new filter
From my day-to-day experience helping drivers troubleshoot car A/C odor complaints, the most common “DIY failure mode” is clearing visible debris at the intake but missing the drain-side restriction—so we treat drain flow as a required checkpoint, not an optional one.
Dry the System With a Proper AC “Dehumidify” Cycle
You’ll usually reduce musty smells dramatically by driving off moisture in the cabin airflow path after cleaning. The evaporator and duct surfaces don’t dry instantly, so the car A/C system needs a controlled dehumidify cycle before it’s exposed to more wet-road conditions.
– After cleaning, run the blower to purge moisture from the cabin airflow path: switch to A/C ON briefly with the fan up, then switch to A/C OFF and keep airflow going to dry.
– Let the system complete the drying cycle before you re-expose it to wet conditions—short, repeated cycles beat rushing straight back into rain.
Why “A/C ON briefly → A/C OFF” works
With A/C ON briefly, the evaporator actively dehumidifies the air moving through the cabin HVAC unit. Switching to A/C OFF while keeping airflow going continues moving dry air across internal surfaces so remaining moisture can evaporate out rather than sit and re-grow odor sources.
This mirrors the broader moisture control principle used in building remediation: damp materials support odor and microbes. According to the U.S. EPA, keeping moisture from returning is central to mold prevention (U.S. EPA). In a car A/C system, that “moisture from returning” means you must clear drains, not merely mask odor.
Common mistakes during drying
– Turning everything off immediately (you stop airflow before the surfaces dry)
– Skipping the drying step entirely after cleaning
– Re-entering heavy rain exposure too soon after a drain clearing attempt
If you live in a rainy climate, plan for drying immediately after muddy drives. As of 2026, that routine is one of the most effective habits for preventing repeated cabin mustiness.
Target Odors: Safe Ways to Freshen the Cabin Air Path
You should treat odors only after you’ve removed the contamination and dried the car A/C system. If smell persists, use products intended for HVAC/cabin airflow applications and follow label instructions exactly.
– If the smell is lingering, use a cabin/evaporator-safe cleaner following the product instructions exactly (avoid spraying random chemicals into vents).
– Focus on the air you breathe: clean or replace the cabin filter first, then use odor treatment only if the filter replacement and drying cycle didn’t solve it.
What “safe” means for a car A/C system
Many “air fresheners” are meant for open spaces, not for evaporator or duct internals. Non-HVAC-safe sprays can:
– Leave residues that attract more dust
– Increase moisture if the product is watery
– Damage plastic surfaces or sensors over time
Also, some odors aren’t “odor-only” problems—they are leftover wet material in the evaporator housing. In that case, the best odor treatment is still fixing the moisture path.
A practical order of operations
1) Replace a wet or clogged cabin air filter
2) Confirm drain-side cleanliness and free flow
3) Run the dehumidify drying cycle
4) Only then consider an HVAC-safe treatment, exactly as directed
This order matters because odor masking without solving the moisture source can leave the cabin A/C system smelling again quickly.
What Can Go Wrong (Common Mistakes to Avoid)
You’ll prevent repeat musty odor by avoiding common “partial fix” moves that leave the moisture source behind. The car A/C system is a closed airflow pathway—mistakes tend to spread contamination rather than eliminate it.
– Don’t reuse a wet cabin filter: trapped moisture and mud can keep producing musty odor.
– Avoid flooding components with cleaner or water—extra liquid can worsen drainage issues or create new damp spots.
– Skipping the intake/drain inspection can lead to “temporary fixes” where the smell returns after the next rainy drive.
– If you see signs of corrosion, persistent pooling water, or repeated drain clogs, DIY cleaning may not be enough.
When DIY starts to lose effectiveness
Some problems are deeper than what you can reach without specialized HVAC tools, especially if the evaporator housing is contaminated throughout. Also, if there’s a repeated drain restriction, that may point to underlying routing issues that need inspection with the vehicle partially disassembled.
DIY vs professional: what changes in outcomes
| Category | DIY cabin A/C cleaning | Professional HVAC service |
|---|---|---|
| Primary strength | Removes surface contamination at the intake/filter/drain access points | Targets deeper evaporator/duct contamination with specialized tools |
| Best-case odor outcome | Often improves quickly if the moisture source is cleared | More consistent if odor returns after multiple rainy cycles |
| Moisture verification | Visual + accessible drainage checks | Confirms drainage behavior beyond what’s visible from the filter housing |
| Risk of spreading grime | Higher if debris is blown the wrong direction | Lower with controlled capture/containment methods |
| Time investment | Can be substantial depending on access and drain location | Often faster because technicians have repeat access and tools |
| Tooling needs | Vacuum/brush and careful inspection | May include HVAC-safe extractors, diagnostic probes, or evaporator-focused cleaning equipment |
| Handling specialty components | You work around access limitations | More capable of addressing deeper case/duct contamination |
| When it’s not enough | Repeated drain clogs or persistent odor after filter replacement + drying | When there are signs of corrosion, extensive slime, or recurring moisture |
| Health-related concern | If the contamination is “small and accessible,” it may be manageable | Better when the issue is extensive; EPA guidance uses the **10 sq ft** threshold as a reference point for larger mold areas (U.S. EPA) |
| Best for | Drivers who can access the cowl intake, filter housing, and drain area and complete a real drying cycle | Drivers with recurring damp odor, pooling water, or uncertain drain routing in their specific vehicle |
That comparison is why “only replace the filter” or “only spray odor remover” often fails. The car A/C system must be dried after moisture is removed.
Verdict: What’s Worth DIY, and Who Should Skip It
A careful DIY clean—intake debris removal, cabin filter replacement, drain path check, and a proper drying cycle—usually restores normal AC odor and comfort after muddy or rainy roads. The downside is that some evaporator/duct contamination is hard to reach without specialized tools, so odors may return if the source is deeper.
Skip DIY or get professional help if you suspect refrigerant problems, have repeated standing water, or you’re unsure where your vehicle’s drain and fresh-air intake points are. Also, if you notice recurring dampness or corrosion after you’ve done the drying cycle more than once, a deeper inspection becomes the safer path for both odor control and cabin comfort. As of 2026, the “best next step” is still the same: remove moisture sources first, then dry, then treat odor only if needed.
Quick Scan Checklist (Save This)
– [ ] Check fresh-air intake area for mud/wet leaves; remove debris
– [ ] Inspect cabin air filter; replace if wet or clogged
– [ ] Clear accessible AC drain/evaporator drain area (don’t flood)
– [ ] Run a dry/dehumidify AC cycle (A/C ON briefly → A/C OFF, airflow continues)
– [ ] Use an odor treatment only if needed, and only per label instructions
Frequently Asked Questions
What’s the best way to clean a car AC system after muddy roads?
Start by removing loose dirt from the exterior intake area and under the hood so debris doesn’t get pulled deeper into the HVAC housing. Then clean the air intake and, if accessible, the cabin air filter area by vacuuming and wiping away mud. Run the AC on recirculation briefly to check airflow, but if you suspect heavy contamination, replace the cabin air filter and consider cleaning the evaporator drain and nearby surfaces to reduce odor and moisture buildup.
How do I clean the AC evaporator area if mud or rain got into the HVAC housing?
The evaporator is usually inside the HVAC case, so you’ll rely on proper cabin air filter replacement and targeted cleaning from the access points. First, replace the cabin air filter if it’s been exposed to muddy water or has visible debris, since it can hold contaminants and worsen smells. If your car design allows access, use an HVAC evaporator cleaner made for car AC systems; otherwise, have a shop perform evaporator/dry-out service, especially after flooding-level exposure.
How can I remove AC musty odors after rainy roads or standing water?
Musty AC smells are often caused by trapped moisture on the evaporator and HVAC ducts, which can promote mildew. Dry the system by running the blower with AC off (or using heat) for 10–15 minutes to evaporate residual moisture, then replace the cabin air filter if it’s damp. For persistent odors, use an odor-neutralizing HVAC cleaner through the appropriate vents or have the evaporator treated, ensuring the system is fully dried before re-sealing it.
Why is it important to check and clean the AC drain after getting the car in heavy rain?
The AC evaporator drain carries condensed water out of the vehicle; when it’s clogged with mud, water can back up and cause damp carpet, leaks, or recurring mildew smells. After rainy or muddy driving, inspect the drain outlets and gently clear debris from reachable areas. If you notice water inside the cabin, consult a mechanic to check the full drain path and ensure the HVAC system is drying properly.
Which AC cleaning steps should I do myself vs. what should a professional handle?
DIY tasks that are typically safe include cleaning the air intake grille, vacuuming loose debris near the cabin filter housing, replacing a contaminated cabin air filter, and drying the system after rain exposure. Professional work is recommended if there was heavy splashing into the HVAC box, flooding, persistent odors, weak cooling performance, or signs of water in the cabin. A technician can inspect for evaporator contamination, confirm proper drain flow, and perform deeper HVAC cleaning for full AC system recovery.
📅 Last Updated: October 31, 2026 | Topic: How to Clean a Car AC System After Muddy or Rainy Roads | Content verified for accuracy and freshness.
References
- Automotive air conditioning
- Air filter
- Heating, ventilation, and air conditioning
- Mold | US EPA
- Mold | Mold | CDC
- https://pubmed.ncbi.nlm.nih.gov/?term=automotive+air+conditioning+mold
- https://pubmed.ncbi.nlm.nih.gov/?term=hvac+evaporator+microbial+contamination
- https://scholar.google.com/scholar?q=automotive+air+conditioning+evaporator+cleaning+mold Google Scholar
- https://scholar.google.com/scholar?q=cabin+air+filter+contamination+after+rain+mud+vehicle+hvac Google Scholar
- https://scholar.google.com/scholar?q=hvac+system+microbial+contamination+cleaning+water+intrusion Google Scholar
