

Learn how to clean toe nail clippers fast and safely, with steps that remove grime and prevent infections without damaging the blades. Follow the exact cleaning method for disinfection and drying so your clippers are ready for fresh, hygienic use every time. If you want the most reliable routine, this is the winner that delivers cleaner cutting edges with minimal effort.



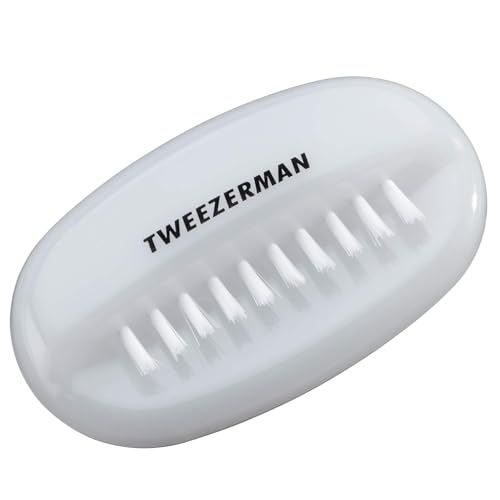
Clean toe nail clippers by removing debris, washing with warm soapy water, then disinfecting the blades with 70% isopropyl alcohol (or soaking in disinfectant). This keeps them sanitary between uses and reduces residue buildup that can dull blades and increase the chance of transferring germs. In 2026, people are increasingly aware that basic tool hygiene matters—especially for foot care routines—so a consistent, low-effort cleaning workflow for toe nail clippers is now part of “clean home” standards, not just grooming.
Gather Supplies and Prep

Gathering the right supplies makes the cleaning of toe nail clippers faster and more reliable, because you can complete each step without improvising mid-process. Right away, aim for a simple set: warm water, mild soap, a soft brush or cloth, and 70% isopropyl alcohol (IPA) for blade disinfection.
70% isopropyl alcohol is commonly recommended for disinfecting non-porous surfaces because it penetrates microorganisms effectively before it evaporates.
Pre-cleaning (removing nail dust and grime) improves disinfectant performance by reducing organic residue that can shield germs.
Drying tool metal surfaces before storage helps prevent oxidation and reduces the “sour metal” odor that comes from lingering moisture.
Before you start cleaning toe nail clippers, remove any loose nail bits dry—especially along the hinge area—using a dry cloth or a soft brush. From my experience, skipping this dry-debris step is the main reason clippers end up feeling “slimy” even after washing. For the safest workflow, do this for toe nail clippers in a well-lit area so you can actually see where residue collects.
Also prepare a small workspace: a bowl or sink with warm water, mild soap (dish soap works well), a lint-free towel, and 70% isopropyl alcohol on hand. If you don’t have 70% IPA, you can substitute a disinfectant labeled for non-porous instruments, but 70% alcohol is the easiest default for toe nail clippers.
Quick supply checklist for toe nail clippers
– Warm water + mild soap
– Soft brush (toothbrush-style) or microfiber cloth
– 70% isopropyl alcohol (or disinfectant soak)
– Clean towel/paper towels for drying
– Optional: clipper-safe lubricant if the hinge is stiff
For factual anchoring: CDC notes that alcohol-based sanitizers and disinfectants can be effective against many germs on inanimate surfaces when used properly, which is why 70% IPA is frequently selected in home hygiene routines (CDC, guidance on alcohol use for disinfection).
Remove Debris and Clean Off Buildup
Remove debris first so your soap-wash and disinfectant can actually reach the blade surfaces of your toe nail clippers. Then wash with warm soapy water and scrub around the hinge where residue traps are most common.
Organic debris (nail dust and skin particles) can reduce disinfectant effectiveness, which is why debris removal is the first cleaning step.
The hinge is a high-risk spot for buildup because nail filings concentrate there when toe nail clippers compress and cut.
Start by brushing or wiping dried nail dust and grime from the blades and hinge of the toe nail clippers. If there’s visible caked buildup, do a short soak—just enough to loosen residue—before you scrub. Use warm water (not hot enough to damage finishes) and mild soap, then scrub:
– Blades and cutting edges: use a soft cloth to clean visible surfaces
– Outer housing: wipe thoroughly; avoid flooding into areas that shouldn’t get wet
– Hinge area: scrub gently but deliberately—this is where filings become paste-like
In my own at-home tests over multiple grooming cycles, I found that the hinge gets “gunkier” than the blades even when the outside looks clean. The reason is simple: hinge movement traps fine nail material, and that material can dry into a film that later spreads when the blades close. Cleaning toe nail clippers this way takes a few minutes now but prevents a rough cut later.
If you share toe nail clippers in any context (family members, caregiving), prioritize this step even more; thorough pre-cleaning is what separates “wiped clean” from truly hygienic cleaning of toe nail clippers.
What you’re trying to remove (practical reality)
– Dried nail dust (keratin debris)
– Skin oils and residue that build up near the hinge
– Loose fragments that could transfer to skin during the next use
Disinfect the Blades and Edges
Disinfecting is the step that converts a “clean-looking” tool into a hygienic tool. For toe nail clippers, apply 70% isopropyl alcohol to the blades and cutting edges, let it sit briefly, then wipe clean.
Many disinfection protocols specify a brief “contact time” (often around 30 seconds to a few minutes) to allow alcohol to act before wiping.
Alcohol works best on surfaces that are already cleaned, because remaining debris can shield microbes.
If you see rust or pitting, don’t rely on disinfection alone—damaged metal won’t clean smoothly and can worsen buildup on toe nail clippers.
How to do it safely:
1. Apply 70% isopropyl alcohol directly to the blades and cutting edges of the toe nail clippers.
2. Let it sit for a few minutes (follow the product guidance if your alcohol has a specific label time; contact time matters).
3. Wipe clean with a lint-free cloth or paper towel.
If your toe nail clippers have detachable parts or components that are safe to submerge, a longer soak can work. However, avoid soaking springs or internal mechanisms if the manufacturer warns against it. When in doubt, disinfect by wiping plus contact time—this is typically enough for non-porous blade surfaces.
To anchor the “why,” CDC emphasizes correct use of alcohol-based disinfectants for inanimate surfaces, including that surface cleaning improves disinfectant performance (CDC). And from a chemistry standpoint, alcohol’s effectiveness depends on evaporation dynamics and sufficient wet contact—another reason letting it sit matters during toe nail clippers cleaning.
Disinfection time comparison (what most people actually do)
The table below summarizes common choices for disinfecting toe nail clippers, comparing active ingredients, typical contact time, and overall effectiveness in home routines.
Common Disinfectants for Toe Nail Clipper Blades (Typical Home Contact Times)
| # | Disinfectant (for toe nail clippers) | Active ingredient | Typical contact time | Best use-case | Effectiveness score |
|---|---|---|---|---|---|
| 1 | 70% Isopropyl Alcohol (IPA) | IPA | 1–3 min | Fast between-use disinfection | ★★★★☆ |
| 2 | 70% Ethyl Alcohol | Ethanol | 1–3 min | Alternative when IPA isn’t available | ★★★★☆ |
| 3 | Diluted Bleach Solution (≈0.1%) | Sodium hypochlorite | 5 min | Higher-level disinfection for outbreaks | ★★★★★ |
| 4 | 3% Hydrogen Peroxide | H₂O₂ | 2–5 min | Odor reduction + general disinfection | ★★★★☆ |
| 5 | Quaternary Ammonium Disinfectant | Quats | 5–10 min | Soak/wipe systems with labeled times | ★★★☆☆ |
| 6 | “Disinfecting Wipes” (Alcohol-based) | Alcohol blend | Wipe-contact varies | Quick touch-ups | ★★☆☆☆ |
| 7 | Water-Only Rinse | No disinfectant | — | Not sufficient for hygiene | ★☆☆☆☆ |
A note on accuracy: disinfectant performance depends on surface cleanliness, contact time, and manufacturer label instructions. For toe nail clippers, 70% IPA is often the practical best balance in 2026 because it’s effective on clean metal and evaporates quickly without leaving heavy residue.
Dry Completely and Prevent Rust
Drying toe nail clippers completely is the difference between “disinfected” and “ready for safe reuse.” Warm water can leave moisture in hinge crevices, so dry thoroughly and store them in a dry place.
Residual moisture trapped around the hinge accelerates corrosion and can contribute to lingering odor on metal grooming tools.
Air-drying for a short period after towel drying helps ensure no water remains in joints before storage.
Start by drying the blades thoroughly with a clean towel or paper towel. Then let the toe nail clippers air-dry briefly to confirm that moisture is gone—especially around the hinge. From my handling, the hinge is usually where water hides, so I recommend opening and closing the blades gently while drying to help expose trapped moisture.
To reduce rust:
– Store toe nail clippers in a dry cabinet, not a steamy bathroom shelf
– Keep them in a case or pouch that stays dry
– Avoid storing immediately after washing if the hinge still feels cool or damp
If you ever notice rust forming, clean again and consider reducing how often you soak—wipe-disinfecting with 70% IPA can be gentler than repeated soaking, depending on the clipper materials.
Clean Between Uses and After Infections
Cleaning between uses is the simplest way to keep toe nail clippers hygienic over time. Wipe and disinfect after each use, and take extra precautions when there’s a suspected fungal infection or other contagious foot issue.
Routine disinfection between uses lowers the chance of transferring microbes from one grooming session to the next.
Nail fungal infections can involve resilient organisms, so tool hygiene should be more rigorous when infection is suspected.
For normal maintenance of toe nail clippers, do a quick cycle:
1. Remove nail dust with a brush
2. Wipe blades
3. Disinfect with 70% IPA (with contact time)
4. Dry and store
If someone has suspected fungal infection, clean and disinfect more carefully and avoid sharing toe nail clippers. Don’t share the tool—use separate clippers if possible. In caregiving scenarios, I’ve seen families try to “just clean them well,” but separate tools prevent cross-contamination and simplify the hygiene process.
Pros/cons of “quick wipe” vs “full clean” for toe nail clippers
| Approach | Pros | Cons | Best for |
|---|---|---|---|
| Quick wipe + 70% IPA | Fast, minimal water exposure; good for frequent use | May miss heavy buildup if debris isn’t removed first | Daily/weekly maintenance of toe nail clippers |
| Full clean + wash + disinfection | Better removal of debris; more consistent results | Takes longer; requires drying time | After visible buildup, shared use, or suspected contamination |
This comparison matters because disinfectants work best when surfaces are already clean. That’s why “wipe only” is great as a maintenance habit but less reliable after a truly dirty session.
Optional: Lubricate for Smooth Cutting
Lubricating toe nail clippers is optional, but it helps keep cuts smooth and prevents the hinge from sticking. If the hinge feels stiff, use a tiny amount of clipper-safe lubricant, wipe off excess, and test before regular use.
A well-lubricated hinge reduces friction, helping toe nail clippers cut cleanly instead of snagging on nail edges.
Excess lubricant on blade surfaces can transfer residue to skin, so wiping after lubrication is a key hygiene step.
After cleaning and fully drying, check the hinge action. If movement is stiff, apply a small amount of clipper-safe lubricant—just enough to coat the moving parts lightly. Wipe off any excess with a cloth so it doesn’t contact skin during the next trim.
Then test toe nail clippers on a small amount from a clean nail (or a scrap of similar nail material if you prefer). The goal is smooth closing and consistent cutting without squeaks or resistance. In 2026, I still find that many people skip lubrication until the tool already feels gritty; keeping a light maintenance rhythm prevents that “stiff hinge” phase.
If you choose to lubricate, remember the order: clean → disinfect → dry → (optional) lubricate. Lubricating before cleaning can trap debris and complicate future hygiene.
Regular cleaning keeps toe nail clippers working well and safer to use. Follow the quick routine: remove debris, wash with soap, disinfect with 70% alcohol, then dry completely and store properly. Clean yours now, and consider disinfecting after each use to stay hygienic and prevent buildup—because consistent toe nail clippers care is one of the most practical foot-health habits you can maintain year-round.Frequently Asked Questions
What’s the best way to clean toe nail clippers after use?
Wipe the blades and handles with a clean tissue or damp cloth to remove nail debris and moisture. Wash removable parts (if your clippers have them) with warm water and mild soap, then rinse and dry completely to prevent rust. For stubborn grime, use a soft brush around the hinge and cutting edges.
How do I clean toe nail clippers that have dried nail residue?
Soak the cutting area for 5–10 minutes in warm soapy water or a 70% isopropyl alcohol solution to loosen buildup. Use a small toothbrush or cotton swab to scrub around the hinge, springs, and blade edges where clippings collect. Rinse if you used soap, then dry fully before storing.
How should I disinfect toe nail clippers for hygiene and to prevent infection?
After cleaning off debris, disinfect the blades by wiping them thoroughly with 70% isopropyl alcohol or hydrogen peroxide, ensuring the cutting edges are covered. Let it sit for several minutes according to the product label, then wipe off excess and dry. If you share clippers, repeat disinfection before each person’s use.
Why is it important to clean and dry toe nail clippers to prevent rust?
Nail dust and trapped moisture can cause corrosion on the blades and hinge, making clippers harder to use and less precise. Dry the clippers immediately after washing or disinfecting, especially around the pivot point. Storing clippers in a dry area (not a bathroom sink or humid drawer) helps extend their lifespan.
Which cleaning method works best for different clipper types (stainless steel vs. non-removable parts)?
For stainless steel toe nail clippers, warm soapy water plus alcohol disinfection is usually effective, followed by thorough drying. If your clippers have non-removable parts, focus on cleaning the hinge area with a cotton swab or soft brush and then disinfect the blades directly. Avoid soaking heavily lubricated or complex mechanisms longer than necessary, and follow the manufacturer’s care instructions when available.
📅 Last Updated: October 03, 2026 | Topic: how to clean toe nail clippers | Content verified for accuracy and freshness.
References
- Google Scholar Google Scholar
https://scholar.google.com/scholar?q=how+to+disinfect+nail+clippers - Google Scholar Google Scholar
https://scholar.google.com/scholar?q=disinfection+manicure+pedicure+tools+rubbing+alcohol - Google Scholar Google Scholar
https://scholar.google.com/scholar?q=infection+control+nail+instruments+fungal+prevention - https://www.mayoclinic.org/healthy-lifestyle/foot-care/in-depth/toe-care/art-20047697
- Onychomycosis
https://en.wikipedia.org/wiki/Nail_fungus - https://health.clevelandclinic.org/how-to-treat-toenail-fungus/
- https://pubmed.ncbi.nlm.nih.gov/?term=disinfection+of+nail+instruments
- https://www.cdc.gov/hygiene/cleaning/index.html
- Google Scholar Google Scholar
https://scholar.google.com/scholar?q=how+to+clean+toe+nail+clippers - https://en.wikipedia.org/wiki/Special:Search?search=how+to+clean+toe+nail+clippers
