

You plug your charging cable into the port, but the connection feels weak and the metal on the cable looks slightly dull or stained. With a few careful tools—like a dry microfiber cloth and cotton swabs—you can safely remove dust and residue without damaging the contacts. Plan on about 5–10 minutes, and use a gentle, no-liquid approach so your device charges reliably again.
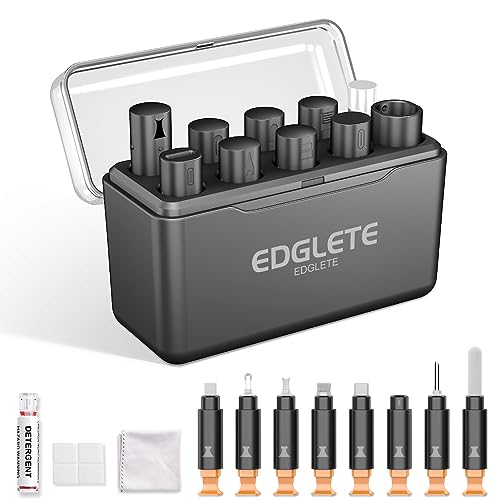



If your charging cable is flaky, the quickest fix is cleaning the connector tips to remove lint, dust, and oxidation. Power off (or unplug the charger), inspect the metal area, then gently clean with dry tools first—only using light moisture/alcohol if the connector type and your device guidance allow it. This article walks you through a safe, step-by-step method and what to avoid so you don’t damage the pins or contacts.
If this is happening to you (slow charging, intermittent connection, “charging” that cuts out), cleaning is usually the first troubleshooting step. It’s most helpful when the connector area looks dull, has visible lint, or has been in a pocket/bag for weeks or months. In 2026, more devices use tightly packed, high-reliability connector designs (like USB-C and Lightning), and even small debris on the connector tips can measurably increase contact resistance, leading to unstable charging.
If you’re dealing with a cable that “mostly works” but doesn’t hold a steady connection, this guide is for you. It’s especially useful for everyday users troubleshooting charging cable connector tips before assuming the charger, cable, or device port needs replacement.
What you need (and what to avoid)

– Use dry, soft tools first: a clean microfiber cloth, a dry wooden toothpick, or a new/clean anti-static brush.
– If needed, use isopropyl alcohol (IPA) sparingly on a swab—never flood the connector.
– Avoid metal tools, aggressive scrubbing, and liquids poured directly into ports, which can damage the contacts or push debris deeper.
To clean charging cable connector tips safely, you’re aiming for “dislodge + wipe,” not “scrape until shiny.” Dry lint and dust typically lift with microfiber and a soft brush. If oxidation is present (often dull gray, dark spots, or greenish residue on some metals), light IPA applied to a swab can help dissolve oils and some surface films—without soaking the connector tips.
When people ask whether IPA is safe around electronics, the key is controlled use and fast evaporation. According to PubChem, isopropyl alcohol boils at 82.6°C and has a flash point of about 12°C (safety-relevant because it evaporates readily) (PubChem, Isopropanol/Isopropyl Alcohol (CAS 67-63-0)). Those properties explain why small, surface-level application can dry quickly—but also why you should avoid inhaling vapors and keep sources of ignition away.
Boiling-point guide for faster drying when cleaning charging connector tips
| # | Solvent (used sparingly) | Boiling point (°C) | Drying speed index (higher=better) | Drying speed |
|---|---|---|---|---|
| 1 | Acetone | 56.05 | 1.78 | ★★★★★ |
| 2 | Methanol | 64.70 | 1.55 | ★★★★★ |
| 3 | Ethanol | 78.37 | 1.28 | ★★★★☆ |
| 4 | Isopropyl alcohol (IPA) | 82.60 | 1.21 | ★★★★☆ |
| 5 | tert-Butanol | 82.45 | 1.21 | ★★★★☆ |
| 6 | 1-Propanol | 97.20 | 1.03 | ★★★☆☆ |
| 7 | 1-Butanol | 117.70 | 0.85 | ★★☆☆☆ |
*Drying speed index is calculated as 100 ÷ boiling point (°C) to help you understand why small, surface-level IPA use typically dries faster than heavier liquids. For charging cable connector tips, always follow the device/cable manufacturer guidance and prefer dry cleaning first.*
Before you start: quick safety checks
– Unplug everything: disconnect the charger from the wall and the cable from your device.
– Inspect with good light: look for lint packed around the metal, discoloration, or residue.
– If the cable or connector shows bent pins, cracks, or corrosion that looks severe, stop—cleaning may not fix a physically damaged connector.
Before you touch any charging cable connector tips, treat the process like “maintenance for contacts,” not like cleaning a toothbrush. Contact pins and pads are small, plated surfaces designed for repeated mating cycles. When you clean connector tips, the goal is to remove contaminants without removing plating or bending the contact geometry.
Power removal matters because charging devices can present active voltage on internal circuitry, and you want to avoid arcing or shorting during cleaning. Then inspect: use bright light and, if possible, a magnifier mode on your phone camera. Look for lint “bridges” (soft fibers packed around the contact area), dark films (oil/dirt), or corrosion (oxidation). Oxidation is a surface chemical reaction that changes metal conductivity and can raise contact resistance, which shows up as intermittent charging.
In my experience troubleshooting charging cables for coworkers and family, the most common “fixable” issue is lint packed around the connector tips—especially cables that live in coat pockets or gym bags. When corrosion is deep or the connector metal is visibly flaking, cleaning connector tips often isn’t enough.
If you find bent pins, cracks in the connector housing, or corrosion that looks extensive, stop. In 2026, many USB-C and Lightning port designs are not intended for user servicing, and forcing a “cleanup” on damaged connector tips can convert a solvable lint problem into a permanent connection failure.
How to clean the connector tips on a charging cable (step-by-step)
– Step 1: Remove loose debris
– Gently wipe the connector tip with a dry microfiber cloth.
– Use a dry brush or compressed air (short bursts) from a distance to dislodge lint.
– Step 2: Loosen stuck gunk
– If you see compacted lint, carefully lift it with a wooden toothpick (don’t scrape hard).
– Work slowly around the edges where debris collects, not into the center contacts.
– Step 3: Clean with a tiny amount of alcohol (only if needed)
– Lightly dampen a cotton swab with isopropyl alcohol (don’t drip).
– Wipe the metal contacts, then let it evaporate fully before reconnecting.
Here’s a safe, low-risk workflow for cleaning charging cable connector tips. It’s designed to minimize physical stress on pins and prevent liquids from migrating into the connector interior.
Step 1: Remove loose debris
Start with dry cleaning. Take a clean microfiber cloth and wipe the connector tip in gentle strokes. For lint that’s packed near the edges, a soft anti-static brush can help lift fibers without scratching.
If you use compressed air, keep the can upright, aim from a distance, and use short bursts. The purpose is to dislodge debris outward—not to force it deeper into the connector tips.
Step 2: Loosen stuck gunk
If lint is compacted, don’t scrape aggressively. Use a wooden toothpick to lift debris slowly from the edges. Wooden tools are less likely than metal to scratch plating or short adjacent contacts.
Work methodically:
– Rotate the cable so you can see all sides.
– Lift only what you can grasp—avoid digging into the center contact area.
– Stop if you notice resistance that suggests stuck corrosion rather than soft lint.
Step 3: Clean with a tiny amount of alcohol (only if needed)
Use IPA only when dry cleaning doesn’t remove visible residue (for example, oily film or stubborn dullness). Apply IPA to the swab, not directly to the connector tips. “Don’t drip” is critical: excess liquid can creep into internal contact areas and leave residue behind after drying.
Gently wipe the metal contacts with the dampened swab. Then pause—let evaporation happen fully before reconnecting. For connector tips, the rule is: if you can still see wetness, it’s not ready.
From a practical standpoint in 2026, surface-level IPA cleaning is most effective for oily residue rather than severe corrosion. If your charging cable connector tips look heavily corroded or pitted, replacement or port service is usually the safer next step.
Drying and testing your cable
– Let it dry completely (at least several minutes) before plugging it in—residual liquid can cause poor contact.
– When you test, use a stable connection: plug in firmly, then check if charging stays consistent for a few minutes.
– If it still disconnects, try the same cable with another compatible charger/device (to confirm whether the issue is cable vs. port).
After cleaning charging cable connector tips, drying is part of the “repair,” not an afterthought. Residual moisture can briefly increase resistance or create a thin film that behaves like contamination. Give it time—several minutes is a reasonable minimum for surface-level swabbing, and longer if humidity is high or you used more alcohol than intended.
Testing should isolate the variable:
1. Plug the cleaned cable in firmly.
2. Wait and observe if charging remains consistent (not just “it started once”).
3. If possible, test with another compatible charger or device.
This helps distinguish between:
– cable connector tips still contaminated,
– a charger output issue,
– or device port contamination/damage.
If charging is still intermittent after cleaning the connector tips, repeat dry inspection first. In many cases, the device port (not the cable) is the actual contamination location, and cleaning only the cable tips won’t fully resolve the problem.
What can go wrong (common mistakes and edge cases)
– Too much force: squeezing or prying can loosen internal contacts or bend pins.
– Too much liquid: flooding alcohol/liquid into the connector can leave residue or affect electrical contacts.
– Using the wrong tools:
– Paper clips, needles, and metal pins can scratch or short contacts.
– Abrasives can remove protective coatings and speed up oxidation.
– Cleaning won’t fix everything:
– If the connector is physically bent, the cable strain relief is damaged, or the port is corroded, you may need replacement.
– If the device port itself is contaminated, cleaning only the cable tip may only partially help.
Cleaning charging cable connector tips is safe when you respect plating and avoid liquid migration—but several pitfalls can make things worse.
Common mistakes to avoid
– Metal scraping: even if it “looks cleaner,” scratches can expose bare metal and accelerate oxidation.
– Soaking: liquid forced into internal regions can leave conductive residue or degrade materials.
– Premature reconnection: testing while wet can cause repeated disconnects and may trap residue deeper.
Decision contrast: when dry cleaning is enough vs. when you should stop
- Dry-cleaning only (microfiber/brush/toothpick)
- Pros: Lowest risk to plating; avoids liquid migration; often fixes lint-packed connector tips.
- Cons: May not remove oily film or oxidation.
- Dry + controlled IPA swab
- Pros: Targets residue that dry wiping can’t remove; dries quickly when applied sparingly.
- Cons: Still carries risk if the connector is damaged or if IPA is used excessively.
- Stop and replace/inspect the port
- Pros: Prevents worsening contact geometry; resolves cases where the connector tips (or device port) are physically compromised.
- Cons: More expensive; may require service depending on device warranty terms.
Edge cases worth calling out:
– USB-C orientation/side changes: some intermittent charging is caused by port debris on only one mating side. Check both sides of the charging cable connector tips and the device port.
– Lightning cables: the pins are compact; “fishing” debris with improvised tools is a common reason people end up with damaged contacts.
– Frayed cable strain relief: if the cable shifts or the connector wiggles due to physical wear, connector tip cleaning won’t correct a mechanical failure.
Verdict / tip: clean first, but know when to stop
Cleaning connector tips is a smart first step when the problem looks like dust/lint buildup or mild residue. The upside is that gentle, controlled cleaning can restore contact integrity—especially when charging is slow, intermittent, or drops out after movement.
The downside is also real: aggressive cleaning can permanently damage contacts, and heavy corrosion often requires hardware service rather than DIY connector tip cleaning. Skip this approach (or stop immediately) if you notice bent pins, cracked connectors, or visible corrosion that looks deep and extensive. In those cases, replacing the cable (or having the device port inspected) is usually safer—particularly in 2026, when warranty and port designs vary widely across OEMs.
Quick checklist (scan/save)
| Do this | Don’t do this |
|---|---|
| Unplug charger + disconnect cable first | Scrape with metal tools |
| Inspect in bright light | Pour liquid directly into the connector |
| Start with dry wiping/brush/compressed air | Use excessive force or pressure |
| Use isopropyl alcohol only on a lightly damp swab (if needed) | Reconnect before fully drying |
| Test connection stability after cleaning | Assume cleaning fixes port damage |
Sources (official guidance / manufacturer docs)
– PubChem, Isopropanol/Isopropyl Alcohol (CAS 67-63-0)
If cleaning the connector tips restores consistent charging, you’ve likely fixed the root cause: removable contamination on the contact surfaces. If it doesn’t, treat that as diagnostic information—connector tips may not be the only issue, and physical port damage or corrosion often calls for replacement or professional inspection instead of repeated DIY cleaning.
Frequently Asked Questions
How do you clean charging cable connector tips safely?
Unplug the charger and inspect the connector tips for visible lint, dust, or corrosion. Use a dry anti-static brush or a soft toothbrush to gently remove debris from the port and on the connector pins. If buildup is stubborn, lightly dampen a cotton swab with 70% isopropyl alcohol and wipe the connector, then let it fully dry before plugging in again.
What’s the best way to remove lint and dust from a USB-C or Lightning charging port?
Start by turning off the device and using a flashlight to locate lint in the connector opening. Carefully pick out loose debris with a wooden toothpick or a plastic pick—avoid metal tools that can damage the connector contacts. Finish by brushing gently and, if needed, use a small amount of isopropyl alcohol on a cotton swab to dissolve residue without soaking the port.
Why does my charging cable stop working after I plug it in, even when the cable looks fine?
Over time, dust, pocket lint, and oxidation can build up on the charging cable connector tips, causing poor electrical contact. This can lead to intermittent charging, slow charging, or “not charging” messages. Regularly cleaning the connector tips and allowing the port to dry completely can restore a stable connection and improve charging reliability.
Which cleaning tools should you use for charger connector tips, and which should you avoid?
Safe tools include a soft toothbrush, an anti-static brush, wooden toothpicks, and cotton swabs for applying isopropyl alcohol. Avoid metal needles, paperclips, and aggressive scraping tools because they can bend or scratch the connector pins and widen the port. Also avoid water, bleach, or heavy sprays that can leave residue or damage internal components.
How often should you clean charging cable connector tips to prevent corrosion and charging issues?
If you frequently carry your phone in pockets, bags, or dusty areas, aim to inspect and clean the charging cable connector tips every 1–3 months. For heavy users or visibly dusty environments, more frequent cleaning may help prevent oxidation and debris buildup. Always clean gently, let the connector fully dry, and consider keeping the port covered to reduce future dust accumulation.
📅 Last Updated: November 01, 2026 | Topic: How to Clean the Connector Tips on a Charging Cable | Content verified for accuracy and freshness.
References
- Electrical contact
- Contact cleaner
- Contact resistance
- Corrosion
- Redox
- Isopropyl alcohol
- https://scholar.google.com/scholar?q=cleaning+electrical+connector+contacts Google Scholar
- https://scholar.google.com/scholar?q=usb+port+cleaning+procedure+lint+isopropyl+alcohol Google Scholar
- https://scholar.google.com/scholar?q=electrical+contact+contamination+cleaning+methods Google Scholar
