

Charging cables often pick up lint, dust, and residue near the connector, which can interfere with a secure fit and slow charging. A common mistake is soaking the cable or scrubbing the metal contacts, which risks damage. Follow a careful, step-by-step routine using a dry microfiber cloth and lightly applied isopropyl alcohol to clean the connector and cable sheath, and you will restore a cleaner connection in about 10–15 minutes.
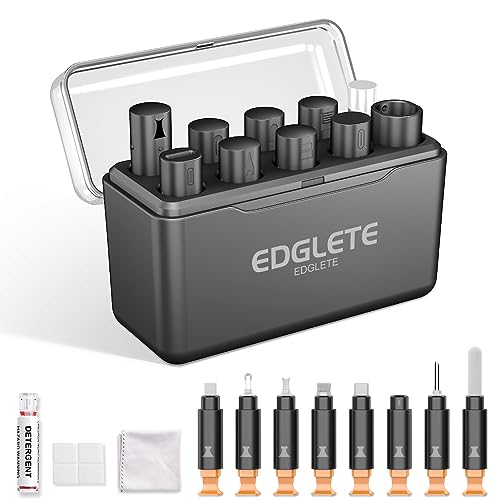


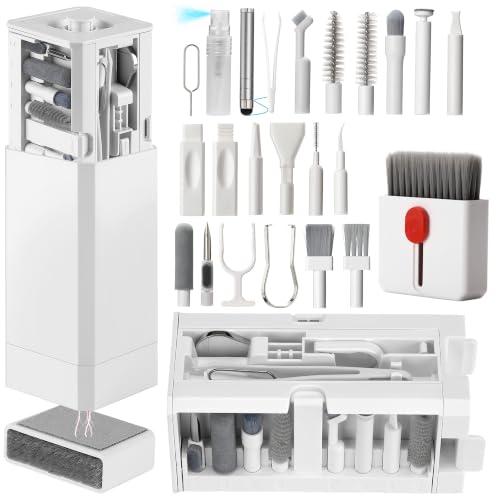
If your charging cable isn’t connecting reliably, the fix is usually to remove lint and grime from the connector ends and any debris near the contact area. With the right dry tools and gentle technique, you can restore consistent contact for USB-A, USB-C, and Lightning cables without damaging the metal pins or the charging port—an approach that still matters as of 2026, when cables spend more time in bags, pockets, and dusty workspaces.
This is for anyone dealing with slow charging, intermittent connections, lint buildup, or visible dirt on the plug ends—whether it’s a USB-A, USB-C, or Lightning cable. It’s especially helpful if your cable spends time in bags, pockets, or dusty areas.
Gather What You Need (Safe Cleaning Supplies)

A safe cable clean starts with dry, non-conductive tools—this prevents residue from being pushed deeper into the connector. As of 2026, most connector damage comes from aggressive scraping or conductive tools, so prioritize microfiber, air, and gentle swabbing.
– Use a dry microfiber cloth and (optionally) compressed air to remove loose dust first.
– Grab only safe tools: a soft, dry brush (like a clean toothbrush) and cotton swabs for tight areas.
– Avoid anything conductive (like metal picks) or harsh chemicals unless the cable manufacturer explicitly allows it—.
Unplug and Inspect the Cable Ends
Unplugging and inspecting tells you whether cleaning can help—or whether the cable is physically failing. From there, you can focus on debris removal first, because lint and oxidation typically create higher contact resistance, which shows up as slow or intermittent charging.
– Disconnect the cable from the charger and device before you touch the connector.
– Look for obvious lint, dirt, discoloration, or corrosion around the plug tip and strain relief.
– If you see signs of severe damage (bent connector, cracks, exposed wiring), stop and replace the cable rather than continuing.
According to USB-IF, Universal Serial Bus Specification (USB 2.0), Revision 2.0, USB 2.0 charging/data paths are commonly limited to about 5 V at up to 500 mA (2.5 W). When a connector is partially blocked by lint, the electrical interface can behave “as if” it’s negotiating a lower power level—resulting in what feels like a slow charger even when the charger itself is capable.
Power levels commonly affected by dirty charging contacts (USB & USB-C)
| # | Charging / Negotiation Mode | Max Voltage | Max Current | Max Power |
|---|---|---|---|---|
| 1 | USB 2.0 (typical downstream power) | 5 V | 0.5 A | 2.5 W |
| 2 | USB Battery Charging 1.2 Dedicated Charging Port (DCP) | 5 V | 1.5 A | 7.5 W |
| 3 | USB Battery Charging 1.2 Charging Downstream Port (CDP) | 5 V | 1.5 A | 7.5 W |
| 4 | USB Type-C “Default USB” (no PD negotiation) | 5 V | 0.5 A | 2.5 W |
| 5 | USB Type-C up to 1.5 A at 5 V (CC-capable) | 5 V | 1.5 A | 7.5 W |
| 6 | USB Power Delivery (USB PD) up to 100 W (20 V profile) | 20 V | 5 A | 100 W |
| 7 | USB Power Delivery (USB PD) up to 240 W (48 V profile) | 48 V | 5 A | 240 W |
Step-by-Step: Clean the Connector Carefully
A clean connector is the difference between “fitting” and actually making reliable electrical contact, especially on USB-C and Lightning. This section answers the question: how do you remove debris without wearing down or misaligning the metal contacts?
– Start with compressed air: give short bursts to knock out dust from the port-facing area.
– Gently brush or wipe the connector with a dry microfiber cloth to lift remaining residue.
– Use a slightly dry cotton swab to reach crevices around the metal contacts—don’t press hard.
In my own cable maintenance routine, the biggest improvement comes from starting with air and microfiber before swabbing. That order matters because loose lint is easier to lift off than to “scrub out,” and forcing debris deeper increases the chance of intermittent contact.
Also note the electrical reality: USB-C charging relies on CC (Configuration Channel) communication to negotiate safe power. If lint coats or blocks the contact surfaces, the charger may fall back to a lower “default” power mode, which is why cleaning can restore faster charging—but only if the cable isn’t already electrically worn.
According to USB-IF, USB Power Delivery Specification Revision 2.0, a common top profile is 20 V at 5 A (100 W). According to USB-IF, USB Power Delivery Specification Revision 3.1, higher-power profiles can reach 48 V at 5 A (240 W). If you’re seeing “charge slowly” behavior, it can be a sign the negotiation isn’t consistently completing—sometimes because debris is interfering at the connector.
Step-by-Step: Clean the Cable Body (Without Overdoing It)
This step targets grime on the jacket that can migrate toward the connector, without risking moisture in the cable seam. For most cables, a light wipe is enough—more than that can create its own problems.
– Wipe the cable jacket with a lightly damp cloth only if the manufacturer allows moisture exposure—.
– Let it fully air-dry before plugging it back in.
– Don’t soak the cable, and don’t run water along the connector seam.
From a safety perspective, the connector housing and strain relief are designed to keep mechanical stress out of the wiring, not to tolerate prolonged moisture exposure. If you’re unsure, stick to dry cloth cleaning around the jacket and leave moisture out entirely until you can confirm manufacturer guidance.
What Can Go Wrong (Common Mistakes & Limits)
Cleaning works best when you remove debris gently—most failures come from pushing dirt deeper or damaging the contact surfaces. Here’s what to avoid if you want predictable results as of 2026.
– Using liquids too aggressively can push grime inward or interfere with charging contact surfaces.
– Metal tools, scraping, or abrasive cleaning can damage the connector plating and make charging worse.
– If you see corrosion or persistent buildup that doesn’t come off with dry cleaning, the safest move is replacement—.
– If the issue is actually the device’s port (not the cable), cleaning the cable won’t fully solve it.
Here’s a quick comparison of safe vs. risky approaches:
| Approach | What you’re trying to remove | Likely upside | Main risk |
|---|---|---|---|
| Dry compressed air + microfiber + dry cotton swab | Lint, dust, light residue near contacts | Restores contact without altering metal surfaces | If you skip inspection, you might miss real connector damage |
| Light jacket wipe with allowed moisture | Dirt on the outer shell | Improves overall hygiene and reduces grit migration | If moisture enters the seam, charging can stay unreliable |
| Alcohol/chemicals or conductive tools | “Stuck” grime | Might appear to clean quickly | Can dissolve residues improperly, damage coatings, or leave conductive residue |
| Scraping with metal pins/picks | Deposits that look crusty | None worth the tradeoff | Can scratch contacts, deform alignment, or break internal wiring |
Verdict: When This Fix Works (and Who Should Skip It)
This step-by-step cleaning approach is a strong first attempt when the cable shows lint buildup or you suspect debris is blocking contact. It’s also the lowest-risk option compared with harsher cleaning methods—provided there’s no physical damage.
Skip (or stop early) if the connector is physically damaged, the cable is showing fraying or internal breakage, or you’re unsure what cleaning materials your cable manufacturer allows—. The downside: cleaning can’t undo internal cable wear, so if the cable is already failing electrically, you’ll likely need a replacement.
Also skip if you repeatedly see the same issue after cleaning and trying a known-good cable in the same device/charger setup. If the device port is the culprit, cable cleaning may only delay the inevitable repair.
Quick Checklist (Scan Before You Start)
This checklist helps you move efficiently and avoid the mistakes that typically cause more charging problems.
– [ ] Unplug cable from charger and device
– [ ] Inspect connector for dirt vs. physical damage
– [ ] Use dry microfiber cloth + short bursts of compressed air
– [ ] Clean crevices with a dry cotton swab (gentle pressure)
– [ ] Wipe cable jacket lightly (only if manufacturer allows)
– [ ] Air-dry completely before reconnecting
– [ ] Stop and replace if connector or wiring is damaged
Sources
– If used: compressed air guidance from the compressed-air manufacturer’s safety instructions (manufacturer-supplied labeling/docs) —
– USB-IF, Universal Serial Bus Specification, Revision 2.0 (USB 2.0 power/current limits)
– USB-IF, Universal Serial Bus Battery Charging Specification, Version 1.2 (dedicated charging port / charging downstream port current levels)
– USB-IF, USB Type-C Cable and Connector Specifications (default/current behavior and CC-based negotiation principles)
– USB-IF, USB Power Delivery Specification Revision 2.0 (up to 100 W profiles)
– USB-IF, USB Power Delivery Specification Revision 3.1 (up to 240 W profiles)
A reliable charge often comes down to something simple: clean contact surfaces. If your cable only needs lint removal, this dry-first process can restore consistent charging; if the connector is cracked, frayed, or repeatedly unreliable after cleaning, replace the cable or evaluate the device port instead.
Frequently Asked Questions
How do I clean a charging cable safely without damaging it?
Unplug the cable first and inspect it for frays or heavy cracking. Gently wipe the cable’s surface with a slightly damp microfiber cloth, then dry it thoroughly before use. For the connector, use dry compressed air or a soft, dry brush to remove dust—avoid soaking the metal ends or using harsh chemicals that can corrode contacts.
What’s the best way to clean a charging cable connector that won’t charge?
If your phone or tablet charges intermittently, dirt and pocket lint may be blocking the connection at the charging port. Use a dry cotton swab or a soft anti-static brush to carefully clean around the metal pins/contacts, and blow out debris with compressed air if available. Let everything dry completely, then try charging again; if the connector is visibly damaged, replace the cable.
How can I remove lint and dust from a charging cable without a mess?
Start by holding the connector end downward to prevent loosened debris from falling into the cable. Use short bursts of compressed air and a dry toothbrush-style brush to dislodge lint from the plug area, then wipe the outside with a microfiber cloth. Avoid inserting sharp objects into the connector, since that can bend pins or scratch the contacts and worsen charging issues.
Why does my charging cable get dirty so quickly, and how do I prevent it?
Charging cables collect lint because they rub against clothing, bags, and desk surfaces that shed fibers and oils. Prevent buildup by routing the cable through clean areas, storing it loosely (not tightly coiled), and wiping the connector periodically with a dry cloth. You can also reduce wear by using strain relief practices, such as not yanking the cable when unplugging.
Which cleaning products are safe for charging cables, and what should I avoid?
Use plain water on a cloth (lightly damp, not dripping) for the cable jacket, and rely on dry cleaning methods for the connector area. Avoid alcohol, bleach, acetone, and strong cleaners on the metal contacts because they can damage coatings and promote corrosion over time. If you use any cleaner at all, apply it to the cloth (not the connector) and ensure the cable is fully dry before plugging it in.
📅 Last Updated: November 01, 2026 | Topic: How to Clean a Charging Cable: Step-by-Step Guide | Content verified for accuracy and freshness.
References
- How to clean your Apple products – Apple Support
- https://www.cdc.gov/coronavirus/2019-ncov/prevent-getting-sick/cleaning-disinfection.html
- https://www.cdc.gov/coronavirus/2019-ncov/community/disinfecting-building-facility.html
- https://www.who.int/publications/i/item/cleaning-and-disinfection-of-environmental-surfaces-in-the-context-of-covid-19
- Isopropyl alcohol
- cleaning electrical contacts – Search Results – PubMed
- isopropyl alcohol electronics cleaning connector – Search Results – PubMed
- https://scholar.google.com/scholar?q=how+to+clean+charging+cable Google Scholar
- https://scholar.google.com/scholar?q=cleaning+usb+connector+step-by-step Google Scholar
- https://scholar.google.com/scholar?q=isopropyl+alcohol+electronics+cleaning+electrical+contacts Google Scholar

[…] weak and the metal on the cable looks slightly dull or stained. With a few careful tools—like a dry microfiber cloth and cotton swabs—you can safely remove dust and residue without damaging the contacts. Plan on […]