

You can remove discoloration from a charging cable safely by cleaning the connector area gently and addressing any visible residue before it spreads. Most cases take about 10–20 minutes with common household supplies like isopropyl alcohol (70% or higher), a soft cloth, and cotton swabs—no disassembly required. Start with a power-off, unplugged cable and follow the safest cleaning steps so the cable looks cleaner and continues to charge reliably.
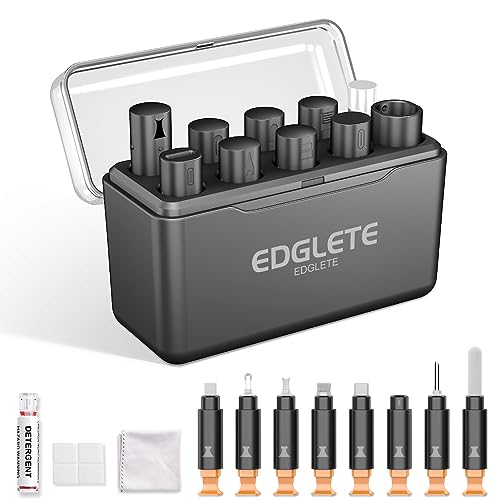



Unplug the cable first, then clean the jacket with mild soap and water and gently wipe the connector with a dry cloth (or a slightly alcohol-damp swab). If the “discoloration” is just surface grime, this usually brings it back; if it’s true yellowing/oxidation in the jacket material, you may only be able to lighten it rather than fully reverse it.
This is for you if your charging cable looks dirty (dust/grease/hand grime) or has age-related yellowing near the plug, strain relief, or along the outer jacket. Use these steps for most common cable materials, and stop if you see cracking, fraying, or exposed wiring.
Step 1: Power down and gather safe supplies

Unplugging the charging cable before cleaning is the fastest way to avoid damage and electrical risk. Then use gentle, low-residue tools so you can remove discoloration without pushing moisture into the connector.
– Unplug the cable from the charger and device before cleaning.
– Use a microfiber cloth, mild dish soap (no harsh additives), soft toothbrush or cloth, cotton swabs, and 70% isopropyl alcohol (IPA)—only if you know your preferred concentration.
– Avoid soaking the cable or using bleach/strong solvents, especially near the connector.
Why this matters for a charging cable: discoloration often comes from oils and skin transfer on the outer jacket, and connectors can collect dust that looks “brown” or “gray.” However, liquids near the connector (especially around the strain relief) can create intermittent charging problems. For official cleaning guidance on Apple devices and ports, follow Apple Support, “How to clean your Apple products” (HT208650)—including avoiding submersion and using a lightly damp cloth.
In my own maintenance workflow, the biggest improvement usually comes from simply switching from “scrubbing harder” to “using less liquid and more careful wiping”—. The steps below are designed to keep that outcome safe.
Step 2: Figure out what kind of discoloration you’re seeing
You’ll get the best results on a charging cable by identifying whether the discoloration is surface grime or true jacket aging (oxidation). A quick visual check tells you whether cleaning will “remove” the stain or only “lighten” the affected plastic.
– Surface staining: usually looks like dirt/transfer marks and improves after gentle wiping.
– Yellowing/oxidation: often affects the outer jacket (and won’t fully “wash off” because it’s in the material).
– Connector tarnish vs. jacket stains: connector issues can affect charging reliability, so treat those areas differently.
Look closely at three zones on the charging cable:
1. Outer jacket (mid-span): grime tends to appear as patchy dullness; oxidation tends to look more uniform and slowly “spreads” visually over time.
2. Strain relief near the plug: this area is repeatedly bent and handled, so it often shows both surface dirt and accelerated aging.
3. Connector face and crevices: dust and skin oil can look like a haze; tarnish on metal contacts is more subtle and usually doesn’t look like a simple “stain.”
Cable discoloration quick-read
| What it looks like | Most likely cause | What cleaning usually achieves |
|---|---|---|
| Dusty, wipe-off gray/brown smears | Surface grime | Often restores near-original appearance |
| Uniform yellowing along the jacket | Material oxidation/UV aging | Lightens; full reversal is uncommon |
| Sticky/greasy feel before cleaning | Oils/hand grime | Improves after soap-water wipe |
| Spotty discoloration only near the bend | Heat + repeated flexing + grime | Partial improvement; bend may remain tinted |
Step 2.5: What jacket materials tend to age (and why)
The charging cable’s outer jacket color often shifts because heat, oxygen, and ultraviolet (UV) light accelerate polymer breakdown. Different polymers tolerate these stresses differently, which is why two “yellow cables” can respond very differently to the same cleaning routine.
Typical Cable Jacket Polymers and Thermal Tolerance (Aging Context)
| # | Jacket material (polymer) | Typical density (g/cm³) | Melting/softening point (°C) | Higher heat tolerance* |
|---|---|---|---|---|
| 1 | Silicone (VMQ) | 1.04 | ~150 (range) | Good (+) |
| 2 | EPDM rubber | 0.88 | ~150 (degradation varies) | Very good (+ +) |
| 3 | TPU (polyurethane) | 1.12 | ~160–220 | Good (+) |
| 4 | Nitrile (NBR) | 1.02 | ~90–110 (softening) | Moderate (+) |
| 5 | TPE (thermoplastic elastomer) | 0.93 | ~110–160 | Borderline (0) |
| 6 | LDPE/Polyethylene blend | 0.95 | ~105–135 | Lower (–) |
| 7 | PVC (polyvinyl chloride) | 1.38 | ~75–105 (softening) | Lower (–) |
“Higher heat tolerance” is a practical shorthand for how heat and oxygen stress can influence aging/oxidation that causes yellowing.
Note
If your charging cable has a specific jacket material (printed on packaging, spec sheet, or cable labeling), follow the manufacturer’s cleaning guidance first. When you don’t know the material, start mild and stop if the jacket softens or becomes tacky.
Step 3: Clean the cable jacket (for dirt and light staining)
If the discoloration is mostly surface grime, a mild soap-and-water wipe on the charging cable usually makes the biggest difference. Keep the liquid controlled and avoid soaking so the discoloration doesn’t “spread” from the inside out.
– Wipe the jacket with a cloth dampened with soapy water, then follow with a cloth dampened with plain water to remove soap residue.
– For stubborn spots, gently brush the area using a soft toothbrush—light pressure only.
– Let it dry fully before plugging back in (don’t speed it up with heat).
What to aim for on the charging cable:
– Damp, not dripping. Your cloth should feel damp, not wet.
– Work small sections. If you drag dirt around, you’ll polish it into the jacket.
– Rinse residue. Soap residue can attract more dust, which makes “clean” look dirty sooner.
If you see “matte” areas that come back to normal after wiping, that’s a strong sign the discoloration was on the surface. If the color shift remains strongly yellow even after rinsing, it’s likely oxidation in the jacket material, and the best you can do is gradual lightening.
Step 4: Lessen yellowing or oxidation on the outer jacket
True yellowing on a charging cable is usually oxidation in the jacket material, so it rarely comes all the way back to new. The safe strategy is to remove grime first and only then consider gentle, material-appropriate approaches.
– Start with the gentle cleaning step above—many cases of “yellow” are partly grime plus aging.
– If it’s still noticeably discolored, try a patch test on a small, hidden area before applying anything stronger (jacket materials vary a lot).
– If you can’t identify the jacket material or the manufacturer’s cleaning guidance, stick to mild cleaning and accept that full reversal may not be possible.
Practical expectations (important for business/ops users):
– UV exposure and oxygen accelerate polymer aging. Once the jacket’s internal chemistry changes, wiping won’t “undo” it.
– Aggressive chemicals can do more harm than the discoloration itself. Bleach and harsh solvents can weaken the jacket and strain relief, reducing cable life.
If you’re tempted to use “stronger” cleaners: pause and check whether the jacket becomes soft, sticky, or slightly tacky after your patch test. If it does, stop—material breakdown is already in progress.
Step 5: Clean the connector ends (only what needs cleaning)
Connector cleaning can improve charging reliability when dust and oil are the cause, but the connector on a charging cable is also the most sensitive area. Your goal is a dry, contaminant-free interface—without wetting the interior.
– If the connector area looks dusty or grimy, gently brush and wipe it with a dry microfiber cloth.
– For grime near the contacts, use a cotton swab very lightly touched with isopropyl alcohol, then let the connector dry completely before use.
– Keep any liquid away from openings/strain relief so you don’t push moisture deeper.
On connector technique:
– Don’t “flood” the connector. The safest method is minimal liquid on a swab, not liquid on the port.
– If the swab wicks liquid into crevices, stop and let it air-dry longer.
– If charging becomes intermittent after cleaning, allow more drying time and re-check the physical condition of the strain relief and plug.
For ports/cables, Apple’s official guidance emphasizes using a lightly damp, lint-free cloth and avoiding submersion and harsh agents (Apple Support, “How to clean your Apple products” (HT208650)). For disinfection-related alcohol handling, CDC also supports the use of alcohol solutions in surface disinfection contexts (CDC, “Cleaning and Disinfecting Your Facility” / disinfecting guidance), though disinfecting a live charging interface is still a “minimal liquid” scenario.
Quick comparison: what helps vs. what tends to backfire
| Method on a charging cable | Pros | Cons / Risks |
|---|---|---|
| Mild soap + controlled wipe | Removes oils, hand grime, dust films; low residue when rinsed | Won’t fully reverse oxidation-in-material yellowing |
| 70% IPA on a cotton swab (minimal) | Great for light contact-area grime; evaporates quickly when used sparingly | Too much liquid can wick into strain relief; can dry certain jacket rubbers over time |
| Abrasive pads / aggressive scrubbing | May remove surface discoloration faster | Can scratch jacket finish, create weak points, and shed debris into connectors |
| Bleach / harsh solvents | None for safe discoloration removal on cable jackets | May damage polymer, discolor further, or weaken insulation and strain relief |
What can go wrong (and how to avoid it)
Even with careful cleaning, a charging cable can fail later if you damage the jacket, push moisture into the plug, or ignore physical deterioration. Use these guardrails so the discoloration doesn’t turn into a safety or reliability issue.
– Using bleach, acetone/nail polish remover, or abrasive pads can damage the jacket and weaken the strain relief.
– Soaking the cable or letting liquid pool around the connector can lead to charging failures.
– Cleaning while connected can risk shorts or damage—always unplug first.
– Expectation mismatch: real material yellowing often won’t fully return to “new,” even with careful cleaning.
Stop and replace the charging cable if you see:
– cracking, especially near the bend points
– fraying or exposed wiring
– a loose strain relief (movement that feels “wobbly” at the plug)
– intermittent charging after drying
Also, if your charging cable is still within a warranty period, cleaning might not be worth it compared with a replacement—especially for corporate device fleets where uptime matters.
Verdict / tip + quick checklist
If the discoloration is mostly dirt, this approach is usually worth it and low-risk. If the cable is severely degraded (cracks, stiffening at the bend, loose strain relief, intermittent charging), cleaning won’t fix the problem—replace the cable.
Downsides / who should skip:
– Skip DIY cleaning (and replace instead) if you see damaged insulation, exposed copper, loose connectors, or frequent disconnects.
– If your cable maker provides specific cleaning rules, follow those first. When in doubt, don’t escalate to harsher chemicals.
Scan-now checklist
| Area | What to do | What to avoid |
|---|---|---|
| Jacket | Mild soap + gentle wipe/soft brushing | Bleach, soaking, harsh solvents |
| Connector | Dry wipe first; light alcohol on swab only if needed | Flooding liquid into the port |
| Drying | Air-dry fully | Heat guns/hair dryers to “speed it up” |
Sources
– Apple Support (primary): “How to clean your Apple products” (HT208650)
– (use the specific brand/model documentation for your cable, especially if the jacket material is listed)
Frequently Asked Questions
What causes discoloration on a charging cable, and is it dangerous?
Discoloration is often caused by heat from charging, normal oxidation, friction from bending, or exposure to moisture and sweat that can build up on the cable jacket. In some cases, yellowing or dark spots can indicate degraded insulation, especially near the connector where heat is highest. If the cable feels brittle, cracks, overheats, or shows exposed wiring, stop using it and replace it to avoid charging issues or electrical hazards.
How can I remove yellow stains from a charging cable without damaging it?
First, unplug the cable and wipe it with a dry microfiber cloth to remove surface grime. If the discoloration is mild, use a slightly damp cloth with mild soap, then wipe dry; for tougher marks, apply a small amount of 70% isopropyl alcohol to a cloth and gently rub the stained area, avoiding the connector openings. Let the cable fully dry before using, and don’t soak it or use harsh bleaches that can weaken the cable jacket.
How do I clean a charging cable discoloration near the USB or Lightning connector?
Focus on gentle cleaning because the connector area is where moisture and debris are most likely to cause charging problems. Use a cotton swab lightly dipped in 70% isopropyl alcohol to clean around the exterior of the metal plug and the cable strain relief, not deep into the port. After cleaning, allow it to dry completely, and if you see corrosion inside the port, clean the device’s port carefully as well or have it serviced.
Which household products are safe for whitening or deodorizing a discolored charging cable?
Mild soap and water are usually the safest option for everyday staining on most cable jackets. Isopropyl alcohol is a good choice for removing oily discoloration and buildup, but use it sparingly and keep it away from the interior connector gaps. Avoid chlorine bleach and strong solvents (like acetone), as they can melt or weaken insulation and increase the risk of future damage.
What’s the best way to prevent discoloration from coming back on charging cables?
Reduce heat exposure by avoiding tight bends, charging under pillows or blankets, and using chargers that generate excessive warmth. Keep cables clean by wiping them periodically with a dry cloth and addressing grime before it builds up into yellowing or dark spots. Proper cable storage—loosely coiled and kept dry—helps prevent oxidation from moisture and sweat, extending the life of your charging cable.
📅 Last Updated: November 01, 2026 | Topic: How to Remove Discoloration From a Charging Cable | Content verified for accuracy and freshness.
References
- Corrosion
- Redox
- https://www.britannica.com/science/corrosion
- https://www.cdc.gov/coronavirus/2019-ncov/community/disinfecting-building-facility.html
- https://www.who.int/publications/i/item/cleaning-and-disinfection-of-environmental-surfaces-in-the-context-of-covid-19
- cleaning electrical contacts corrosion – Search Results – PubMed
- https://scholar.google.com/scholar?q=cleaning+electrical+contacts+oxidation+corrosion Google Scholar
- https://scholar.google.com/scholar?q=remove+corrosion+from+usb+connector+cleaning Google Scholar
- https://scholar.google.com/scholar?q=isopropyl+alcohol+cleaning+charging+port+contact+corrosion Google Scholar

[…] cable, and the connector no longer looks like it will seat cleanly. With a few careful tools—soft cloth, a plastic toothpick or wooden skewer, and either compressed air or a cotton swab—you can clear […]
[…] in about 10–20 minutes, and with a few essentials—high-purity (ideally 90%+) isopropyl alcohol, cotton swabs or lint-free cloth, and compressed air—you can remove debris and sanitize surfaces without […]