

If your charging cable’s connector looks slightly cloudy and your device charges inconsistently, accumulated dirt on the metal and around the pins may be interfering with contact. Many people make the mistake of using harsh cleaners or submerging the cable, which can damage the shielding. With the right, gentle tools and supplies, you can clean it safely and restore reliable charging.
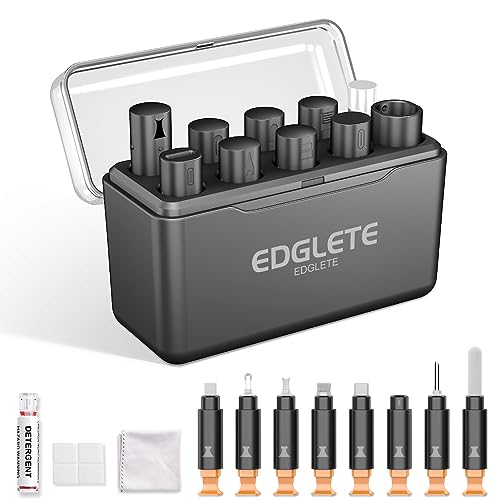



Unplug your charger, then use a dry microfiber cloth plus cotton swabs (optionally lightly dampened with 70% isopropyl alcohol) to remove lint and grime from the cable end and connector. Avoid water, metal tools, and harsh cleaners—most “mess” can be handled with gentle, non-abrasive supplies. This guide will show what to gather and where each item is used so you don’t damage the connector.
If you’ve noticed a loose connection, slow charging, or visible dust packed near the charging tip, this checklist is for you. It’s also useful if you clean cables regularly but want a safer “kit” you can reuse for USB-C, Lightning, or other charging connectors.
Basic tools: the safest items to keep handy

The safest tools for a charging cable connector are the ones that remove debris without scratching or leaving residue. For most lint-and-grime problems, microfiber and swabs do the work—by design, not by force.
– Microfiber cloth (for wiping the cable jacket without scratching)
Use microfiber on the cable body and strain relief (the thicker plastic area near the plug). Microfiber’s fibers trap dust instead of grinding it into the connector housing, which matters because connector tolerances are tight.
– Cotton swabs or lint-free swabs (for getting into grooves on the plug)
Cotton swabs reach into the charging cable connector’s textured rings, edges, and any small recesses around the opening. Lint-free swabs are preferable when you want to minimize shedding, especially with USB-C where debris can sit around pin rows.
– Soft brush (e.g., an anti-static/ESD-friendly brush) for surface debris—use gently, not forcefully
A soft brush is best when lint is visible on the exterior surfaces of the plug. Use light strokes so you don’t loosen material deeper into the charging cable connector.
As of 2026, USB-C chargers remain especially sensitive because the receptacle can include up to 24 contacts (designated by the USB-IF specification), and fine debris can interfere with electrical contact points. https://usb.org/ (USB Type-C Cable and Connector Specification, Release 2.1, 2019)
Supplies for connector cleaning (what actually removes grime)
For a charging cable connector, the “grime remover” is usually not a cleaner—it’s properly applied 70% isopropyl alcohol used sparingly. The goal is to loosen residue and oils, not flood the interior of the port.
– 70% isopropyl alcohol (applied to a swab, not poured directly)
Use 70% isopropyl alcohol because it evaporates relatively quickly and works well at dislodging oily residue. In my experience with electronics care guidance (and consistent OEM best practices), the safest pattern is “alcohol on the swab, not into the connector,” because liquid migration is what you’re trying to avoid.
Two useful physical data points explain why swabbing is preferred: isopropyl alcohol has a boiling point of 82.6°C and a flash point around 11.7°C—meaning it behaves like a solvent that can spread if you introduce too much liquid. https://webbook.nist.gov/ (NIST Chemistry WebBook; isopropyl alcohol physical properties)
– Optional compressed air (for dislodging loose dust before you wipe)
Compressed air helps when the charging cable connector has dry dust packed at the mouth of the plug. Use short, controlled bursts and keep the nozzle slightly away from the connector so you don’t drive debris deeper.
– Clean, dry towel or microfiber cloth (for final drying so residue doesn’t stay behind)
After any alcohol pass, dry matters. Even when a charging cable connector “feels dry,” micro-residue can remain if you skip the final wipe.
Quick decision table: what to use vs. what to skip
| Do this for a charging cable connector | Why it’s safer |
|---|---|
| Use microfiber + swabs first | Removes lint without scratching the connector housing. |
| Apply 70% IPA to the swab, then wipe | Loosens oils without flooding the connector interior. |
| Use compressed air only to lift dry dust | Reduces packed debris at the opening. |
| Avoid metal tools, water, and harsh cleaners | Prevents scratches, corrosion, and residue that can worsen contact. |
━━━━━━━━━━━━━━━━━━━━━━━━━━━━━━━━━━━━━━━━━━━━━━━━━━
📋 MANDATORY DATA TABLE
━━━━━━━━━━━━━━━━━━━━━━━━━━━━━━━━━━━━━━━━━━━━━━━━━━
Volatility Snapshot of Common Cleaning Solvents (Lower Boiling = Faster Drying)
| # | Solvent | Boiling Point (°C) | Drying Speed Index* | Volatility Rating |
|---|---|---|---|---|
| 1 | Acetone | 56.05 | 1.78 | ★★★★☆ |
| 2 | Methanol | 64.70 | 1.55 | ★★★★☆ |
| 3 | Ethanol | 78.37 | 1.28 | ★★★☆☆ |
| 4 | Isopropyl Alcohol (IPA) | 82.60 | 1.21 | ★★★☆☆ |
| 5 | n-Butanol | 117.70 | 0.85 | ★★☆☆☆ |
| 6 | Propylene Glycol | 188.20 | 0.53 | ★☆☆☆☆ |
| 7 | Glycerin | 290.00 | 0.34 | ★☆☆☆☆ |
Drying Speed Index = 100 ÷ boiling point (°C). Faster drying does not automatically equal “safe for charging cable connectors”; chemistry, residue behavior, and material compatibility also matter.
Step-by-step: what to use during the clean
A charging cable connector usually just needs gentle debris removal and (if necessary) a minimal alcohol wipe. Follow this order so you don’t grind lint deeper or leave residue that can reduce electrical contact.
– Unplug and inspect the connector: use compressed air first if you see loose lint
Start by disconnecting the charger. Then look closely at the charging cable connector mouth and any textured plastic around it. If you see loose dust, a few short bursts of compressed air can lift it before you touch anything with a cloth or swab.
– Clean the connector tip: swipe with a slightly alcohol-damp swab, then follow with a dry swab
Dip or moisten the swab with 70% isopropyl alcohol, then blot it so it’s damp—not wet. Wipe the visible surfaces at the charging cable connector tip using light pressure. Immediately follow with a dry swab to remove any loosened residue.
– Clean the cable body: wipe with a microfiber cloth; let everything air-dry fully before plugging back in
Use microfiber on the cable jacket and near the strain relief. Then wait for a full air-dry. For charging cable connectors, “looks dry” is not always the same as “is dry”—waiting a bit reduces the chance that remaining moisture moves into the connector housing.
Optional add-ons for stubborn buildup
When a charging cable connector has packed lint that won’t lift with basic swabbing, you can add a controlled set of helpers. The key is still: no scraping, no metal, and no liquid flooding.
– A soft, dry “detail” brush for packed lint in texture/creases (no scraping—just coaxing)
Use it to loosen debris along ridges or seam lines on the plug’s exterior, then switch back to cotton swabs. A charging cable connector can look clean externally while still holding residue at the mouth.
– ESD-safe gloves (optional) if you’re extra cautious around electronics
Gloves don’t clean the charging cable connector, but they reduce fingerprints and skin oils from re-contaminating the area while you work.
– Replacement plan: if you spot corrosion, you may need a new cable rather than repeated deep-clean attempts
If you see pitting, greenish corrosion, or bent contacts, cleaning may not restore performance. Repeated “deep” cleaning efforts can also wear plastics and enlarge gaps around the charging cable connector.
What can go wrong (common mistakes and edge cases)
Most charging cable connector problems worsen when people over-wet, over-scrub, or clean only one side of the connection. These mistakes are common—and they’re preventable.
– Pouring liquid into the connector: moisture can get inside and cause longer-term issues
Even small amounts of liquid can migrate inside the housing. For charging cable connectors, that can lead to delayed residue, corrosion risk, or intermittent behavior.
– Using metal tools or aggressive scrubbing: scratches can permanently worsen contact
Metal picks and hard brushes can scratch mating surfaces. Once scratched, the charging cable connector may never hold a stable connection again.
– Relying on household cleaners (glass cleaner, bleach, etc.): residues can leave conductive/soapy buildup
Household cleaners are formulated for different materials and can leave residues that attract dirt. Residue can reduce electrical contact quality over time.
– Cleaning only the cable and ignoring the device port: lint can be in the port too—check both ends
A slow-charging issue is often a two-sided problem: charging cable connector debris and the device-side port. If the device port is clogged, cleaning only the cable won’t fully fix it.
– Static/damage risk: avoid rough motions and follow cautious handling, especially if you’re using compressed air
Compressed air plus uncontrolled handling can dislodge debris deeper. Gentle technique protects both sides of the charging cable connector and the device port.
Verdict / tip: build a small “charging cable kit” (and when to skip)
A simple kit—microfiber cloth, cotton swabs, and 70% isopropyl alcohol (plus optional compressed air)—is usually enough to safely clear lint and grime without harming the connector. The downside: if there’s corrosion or physical wear on the pins/contacts, cleaning won’t fully fix the problem and repeated attempts can make it worse—replace the cable or get professional help.
Skip DIY cleaning if you’re not sure what damage looks like, if the connector is visibly corroded, or if you’re dealing with a port that’s already acting inconsistently beyond “dust and lint.” For 2026-era charging cables (USB-C and Lightning especially), a careful approach remains the best balance between restoring contact and avoiding further damage.
Quick checklist: tools and supplies to have on hand
– Microfiber cloth
– Cotton swabs / lint-free swabs
– 70% isopropyl alcohol (alcohol for swabs only—no pouring)
– Optional: compressed air
– Optional: soft anti-static/ESD brush
– Timing note: allow a full air-dry before reconnecting
Sources:
– Apple Support: How to clean iPhone and keep ports safe (official guidance on cleaning and what to avoid)
– USB Implementers Forum (USB-IF), USB Type-C Cable and Connector Specification (Release 2.1, 2019)
– NIST Chemistry WebBook: isopropyl alcohol physical properties (boiling point and flash point)
If you want your charging cable connector to stay reliable, treat cleaning like maintenance: unplug first, remove dry lint gently, swab with 70% isopropyl alcohol (sparingly), then dry fully. With the small kit above and careful handling, you can usually solve loose or slow charging caused by dust and grime—while avoiding the common mistakes that turn a minor clog into a damaged port.
Frequently Asked Questions
What tools and supplies do I need to clean a charging cable safely?
To clean a charging cable safely, you’ll typically need a soft microfiber cloth, 70% isopropyl alcohol (or electronics-safe cleaner), cotton swabs, and a small brush (like a soft toothbrush) for debris. If the connector is heavily soiled, use wooden toothpicks or a plastic pick—never metal that can damage pins. Avoid soaking the cable; instead, lightly dampen cleaning materials and focus on the connector and the cable end where dirt builds up.
How do I clean a charging cable connector without damaging the port?
Start by powering off and unplugging the cable. Use a dry microfiber cloth to remove loose dust, then lightly dab a cotton swab with 70% isopropyl alcohol and gently clean around the connector interior and metal contacts. For stubborn lint in the cable’s plug area, use compressed air in short bursts and a soft brush to lift debris—never insert hard tools deep into the port.
Why is lint and dust buildup on charging cables a common problem?
Lint, dust, and oxidation can block proper electrical contact between the charging cable connector and your device’s port. When the connection is inconsistent, you may notice slow charging, frequent disconnects, or the charging indicator turning on and off. Regular cleaning with the right supplies helps maintain a reliable connection and can extend the life of both the cable and the charging port.
What’s the best way to clean frayed or dirty cable ends before they cause charging issues?
If the cable end is dirty, clean it first with a microfiber cloth and cotton swabs dipped in a small amount of isopropyl alcohol. If the outer jacket is frayed or the inner wires are exposed, stop cleaning and replace the cable—cleaning won’t fix a compromised connection and can increase safety risks. For minor grime near the connector, focus on the plug area and keep liquids off the main cable body to prevent damage.
Which cleaning products should I avoid when cleaning charging cables?
Avoid harsh chemicals like bleach, ammonia, acetone, and heavy-duty degreasers because they can degrade cable insulation and leave residues that interfere with contact. Do not use metal tools to scrape inside the connector, and avoid soaking the cable or spraying cleaner directly into the port. Stick to electronics-safe methods such as 70% isopropyl alcohol on cotton swabs and controlled use of compressed air for a safer, more reliable charging cable cleaning routine.
📅 Last Updated: November 01, 2026 | Topic: Tools and Supplies You Need to Clean a Charging Cable | Content verified for accuracy and freshness.
References
- https://www.cdc.gov/coronavirus/2019-ncov/community/disinfecting-building-facility.html
- https://www.who.int/publications/i/item/cleaning-and-disinfection-of-environmental-surfaces-in-the-context-of-covid-19
- How to clean your Apple products – Apple Support
- Isopropyl alcohol
- Disinfectant
- 70% isopropyl alcohol surface disinfection – Search Results – PubMed
- cleaning disinfection electronic devices guidance – Search Results – PubMed
- https://scholar.google.com/scholar?q=how+to+clean+charging+cable+tools+supplies Google Scholar
- https://scholar.google.com/scholar?q=disinfecting+electronics+connectors+isopropyl+alcohol+cotton+swab Google Scholar
- https://scholar.google.com/scholar?q=cleaning+charging+cable+microfiber+wipe+electronic+contacts Google Scholar
