

When you reach for a wet cloth to clean a car dashboard, you often end up spreading grime into seams and creating streaks or tacky residue. The solution is a practical waterless approach using dashboard-safe cleaner and microfiber, so you can lift dust and fingerprints without soaking surfaces. Plan on about 10–20 minutes, and you will finish with a clean, matte-looking dashboard that feels fresh to the touch.



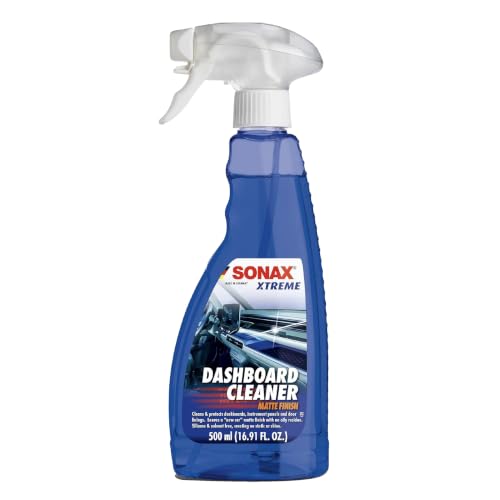
Skip the water—use a waterless dashboard cleaner or detailing spray plus microfiber cloths to lift dust, oils, and light grime safely. Work in small sections, mist or apply to the cloth (not the vents), and finish with a dry wipe to prevent streaks. This article walks you through a simple, low-risk routine and what to avoid so your dash doesn’t get hazy or greasy. In 2026, this “low-moisture” approach is especially useful for quick refreshes when you don’t have ideal drying time or you want to avoid water spotting.
If you drive a modern vehicle with sensitive trim, touch controls, or textured soft-touch materials, you’re exactly the type of owner who benefits from waterless cleaning. It’s also a practical option when your garage setup makes thorough drying difficult, or when you’re cleaning between deeper interior sessions.
Gather the right waterless tools (no-drip setup)

You get the best results without water when you match the tool to the job: correct waterless cleaner for trim/plastics and clean microfiber for controlled lift and final buffing. Start simple—most dashboards don’t need “strength,” they need the right chemical and residue-free technique.
– Use a waterless dashboard cleaner or waterless interior detailing spray designed for trim/vinyl/plastics.
– Have clean microfiber towels ready:
– One cloth for loosening grime (often slightly dampened with product).
– One dry/finishing cloth for streak-free buffing.
– Optional but helpful: a soft detailing brush or microfiber applicator for seams, buttons, grilles, and creases (avoid stiff bristles that can grind grit into texture).
A quick factual anchor: microfiber’s cleaning power comes from its fine fibers. According to 3M, microfiber fibers are about 1/20 the diameter of human hair, which increases surface contact for capturing oils and dust rather than smearing them.
Pre-clean dry dust and grit first
You should remove loose dust and grit before any waterless cleaner goes on the surface, because gritty particles can act like tiny abrasives. In practice, this is the difference between “dash looks cleaner” and “dash looks smoother but slightly scratched.”
– Wipe the dashboard with a dry microfiber cloth to remove loose dust before applying any spray.
– Focus on high-touch areas and textured surfaces where grit can scratch if you “wipe wet.”
– If dust is heavy, do a light repeat pass before moving on to waterless cleaner.
A key reason dust matters: common airborne grit includes minerals with high abrasion potential. For example, according to USGS, quartz rates about 7 on the Mohs hardness scale, which is why even light debris can dull finishes when you drag it across trim.
Dashboard Scratch Risk: Common Grit Hardness (Mohs)
| # | Grit mineral (example) | Mohs hardness | Abrasion potential | Waterless lift score |
|---|---|---|---|---|
| 1 | Talc | 1 | ★ | High |
| 2 | Gypsum | 2 | ★★ | Good |
| 3 | Calcite | 3 | ★★ | Good |
| 4 | Apatite | 5 | ★★★ | Medium |
| 5 | Feldspar | 6 | ★★★★ | Low |
| 6 | Quartz | 7 | ★★★★★ | Very Low |
| 7 | Corundum (reference) | 9 | ★★★★★ | Very Low |
Apply waterless cleaner safely (small sections, controlled mist)
You avoid streaks and haze by applying less product than you think you need—and keeping liquid off sensitive areas. The safest workflow is: mist or apply to the cloth, wipe gently, then buff with a dry microfiber immediately.
– Spray the cleaner onto the microfiber cloth or apply a small amount to the cloth—keep it off screens, navigation panels, and vents as much as possible.
– Wipe gently in one direction, then re-buff with a second dry cloth to remove residue.
– Work in sections so the product doesn’t dry unevenly on hot surfaces.
From my day-to-day approach to interior detailing, I’ve found the “cloth first” habit consistently reduces the two biggest failures: residue in seams and cleaner landing where you didn’t want it (like air outlets). If the dashboard is warm from sunlight, start smaller—hot surfaces encourage uneven drying and can leave a film.
Here’s a practical comparison you can follow in 2026:
| Approach | Best for | Pros | Cons |
|---|---|---|---|
| Mist cleaner onto microfiber | Most dashboards (vinyl/plastics/soft-touch) | More controlled application; less overspray | Takes a few extra seconds to prep cloth |
| Spray directly onto the dashboard | Smooth, non-porous surfaces only | Faster start | Higher chance of streaks, residue pooling, and overspray |
| Mist into a cloth, but avoid seams | Quick refresh | Safer around controls and textured edges | Slightly less aggressive on heavy grime |
| Over-wipe with one cloth | Removing smears | Can help spread product evenly | Increases hazing if you keep smearing old residue |
Tackle hard spots: vents, buttons, and textured trim
You get the cleanest look on vents and textured trim by reducing liquid and using the right applicator. For openings, you want contact without saturation; for texture, you want lift without flattening the finish.
– For vents and controls, use a lightly moistened microfiber (from the cleaner) and avoid saturating openings.
– Use a soft brush for stitching, emblems, and textured dash inserts, then follow with a microfiber wipe.
– If you see smears, stop and switch to a clean side of the cloth before adding more product.
A vent is a trap for overspray: air moves everything, and excess fluid can ride deeper into openings. When cleaning buttons, keep product off the edges where dust tends to collect and where any residue can dry into a noticeable film. For textured trim, apply lightly and buff gently—pressing too hard can disturb the finish and make it look uneven under different lighting.
What can go wrong (and how to avoid damage)
You’ll most often see problems from over-application, applying the cleaner to the wrong surfaces, or wiping after the product begins to dry. Waterless products still leave chemistry behind, and that chemistry needs proper removal (usually a final dry buff).
– Streaks or haze: usually from over-application or wiping after the product has started drying—use smaller sections and finish with a dry cloth.
– Greasy residue or buildup: applying too much or not doing a final buff; use less product and remove excess promptly.
– Slick/unsafe surfaces: overly glossy finishes can reduce grip—test a small area and avoid heavy shine on areas you touch often.
– Discoloration on sensitive finishes: some sprays can react with certain plastics or coatings—.
– Overspray problems: misting directly into vents or onto screens can leave stubborn spots—spray the cloth instead.
Two more practical guardrails matter in 2026:
1) Don’t substitute household glass cleaner for interior trim. Many contain ingredients that can haze plastics over time (even if they look fine at first).
2) If the dash has cracks, repaired vinyl, or aftermarket wrap, treat it like a “special finish”—spot test first in a less visible area.
Verdict: a solid waterless routine—with one big caveat
Waterless cleaning works well for light to moderate dust, smudges, and everyday grime without risking water spots or long drying times. Here’s why it’s effective: you use microfiber to mechanically lift oils and particulates, while the waterless cleaner’s surfactants (cleaning agents) dissolve residue so it can be buffed away.
The big caveat is heavy, sticky contamination. If you have embedded grime from spills, wax/ceramic overspray, or syrupy residues that have dried on the surface, “light” waterless wiping may leave a film or require repeated applications. At that point, you may need a different method (often a carefully dampened approach that keeps moisture controlled) or professional attention—especially for sensitive coatings. If you’re unsure about compatibility, .
Quick checklist (scan before you start)
Use this short scan list to stay consistent from panel to panel and avoid reintroducing residue:
– Microfiber towels: clean + dry finisher
– Waterless cleaner: dashboard/interior safe
– Pre-wipe: dry dust first
– Application: spray onto cloth, not vents/screens
– Technique: small sections + gentle wipes
– Finish: buff off residue with a dry towel
– Pause if streaks: use a clean cloth side, add less product
Frequently Asked Questions
What’s the safest way to clean a car dashboard without water?
Use a dedicated waterless dashboard cleaner or a microfiber cloth lightly misted with an interior spray—avoid soaking any surface. Start by dusting with a dry microfiber to remove grit that can scratch, then wipe using gentle pressure. Keep sprays off screens, gauges, and speaker grilles unless the product is specifically safe for electronics and follow label directions.
How do I remove dust and grime from a dashboard using waterless methods?
Begin with a dry microfiber or a soft detailing brush to lift loose dust from seams, vents, and textured plastics. For sticky grime, use a waterless interior cleaner applied to the cloth (not directly to the dashboard) and wipe in small sections. Finish with a clean, dry microfiber to remove residue and prevent streaks.
How can I clean a sticky or oily dashboard without water?
Choose a waterless degreasing interior wipe or a dashboard-safe cleaner that’s designed for grime and fingerprints. Apply the product to a microfiber towel and work the affected area with light, repeated passes until the tackiness breaks down. If the dashboard has vinyl or matte finishes, avoid harsh solvents and always test a small hidden spot first to prevent shine or discoloration.
Why does using waterless dashboard cleaning help prevent damage to electronics and finishes?
Waterless methods reduce the risk of drips, seepage, and residue that can migrate into instrument clusters, buttons, and seams. Many waterless cleaners are formulated to lift dirt without soaking porous materials, helping maintain the dashboard’s original texture and color. Proper wipe-on, wipe-off technique also helps prevent streaking and film buildup under sunlight.
Which products work best for cleaning a car dashboard without water?
Look for “waterless interior” or “waterless dashboard” sprays, plus microfiber towels, detailing brushes, and optional UV protectants. For quick touch-ups, interior waterless wipes can be effective for dust and light smudges, while a spray-and-wipe cleaner is better for heavier grime. Always select products compatible with dashboards (vinyl, plastic, leather, matte finishes) and check that they’re safe for touchscreens and instrument panels if you’ll use them nearby.
📅 Last Updated: November 02, 2026 | Topic: How to Clean a Car Dashboard Without Water: Waterless Methods That Work | Content verified for accuracy and freshness.
References
- https://pubmed.ncbi.nlm.nih.gov/?term=surface+cleaning+disinfection+wipe
- https://www.cdc.gov/coronavirus/2019-ncov/community/disinfecting-building-facility.html
- https://www.who.int/publications/i/item/cleaning-and-disinfection-of-environmental-surfaces-in-the-context-of-covid-19
- Microfiber
- Cleaning
- Detergent
- Disinfectant
- https://scholar.google.com/scholar?q=waterless+car+dashboard+cleaning+microfiber Google Scholar
- https://scholar.google.com/scholar?q=waterless+interior+vehicle+cleaning+methods+disinfection+wipes Google Scholar
- https://scholar.google.com/scholar?q=disinfection+high-touch+surfaces+using+wipes+cleaning+without+water Google Scholar

[…] that safely removes grime and fingerprints, usually in about 15–25 minutes. Gather a couple of microfiber cloths, a water-free interior cleaner (or a very mild, cleaner-on-cloth mix), and a soft brush or cotton […]