

That slick, greasy sheen on your car’s dashboard can be frustrating, especially when it catches the light just right. You can remove it in about 10–20 minutes using a clean microfiber, a pH-balanced interior cleaner (or mild dish soap solution), and a soft brush for vents and seams. With careful, low-pressure wiping, your finish will look clean again without residue.


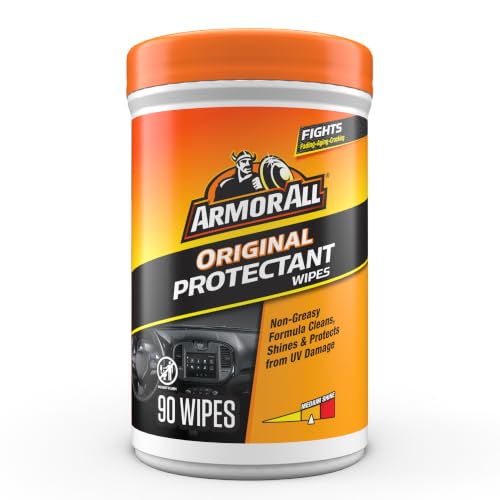

If your car dashboard looks greasy and shiny, you can remove the glare by first stripping surface oils with a gentle interior cleaner, then using a matte protectant sparingly (or skipping protectant if the dash is already matte). This two-step method works because the “greasy dashboard shine” is usually a thin film of skin oils, previous dressing residue, and airborne dust that reflects light.
If you drive often (especially in sunny or humid weather) or you notice that fingerprints and dust “stick” quickly to the dash, you’re usually dealing with the combination of oil film + a protectant layer that’s too glossy. This guide walks you through a safe approach by surface type—so you get a uniform, non-reflective finish without damaging trims, texture, or any screen surfaces.
Gather the Right Tools and Products

The quickest way to remove a greasy dashboard shine is to use materials that clean without leaving extra residue and tools that won’t scratch. You don’t need specialty equipment—just the right microfiber technique and an interior-safe cleaner.
– Use microfiber towels (at least 2): one for cleaning, one for drying/buffing. In practice, two towels lets you keep oils from being re-deposited as you wipe.
– Choose an interior cleaner that’s safe for plastics/vinyl, plus a matte dashboard protectant if needed. Look for labels that explicitly mention automotive interior plastics/vinyl and “matte” or “non-greasy” finishes.
– Avoid heavy-duty degreasers unless the label clearly says they’re safe for automotive interiors. Strong degreasers can strip finishes and can leave a cloudy or uneven surface that looks worse than the original greasy dashboard shine.
– Optional but helpful: nitrile gloves (to prevent new skin oils), and a small detailing brush for seams, vents, and stitching edges.
Clean Off the Grease Without Over-Scrubbing
If your dash is slick, the best first move is to remove the oil film gently—before you try to “fix” it with protectant. When you clean correctly, the greasy dashboard shine often disappears or becomes much easier to control.
– Spray cleaner onto the towel first (not directly on seams or buttons), then wipe in straight passes. Spraying directly onto the dash can push cleaner into gaps and switches, which is a common way to create lingering residue.
– Work a small section at a time and use a light-to-moderate pressure—scrubbing hard can spread residue across a wider area. From my own routine, aggressive scrubbing is the fastest path to a wider “shiny patch” that then demands more product later.
– Use a two-stage wipe: a wet wipe to lift oil, then a dry microfiber pass to remove any loosened film. This matters because many interior cleaners are designed to lift grime, not necessarily to fully evaporate leaving a matte surface.
– Keep switching towel sides as they load up. If one side becomes glossy from captured oils, flip or change to a cleaner face rather than continuing.
– If the dash has deep texture (grain or stipple), resist the urge to grind the texture flat. Gentle wiping and slightly dampening the towel typically lifts film without destroying the surface pattern.
Stop the Shine From Returning (Use the Correct Finish)
To stop greasy dashboard shine from coming back, you need a matte finish—or you need to use less protectant than you think. Reflectivity is measurable: according to ASTM D523, gloss can be evaluated using specular reflection at defined angles (commonly 20°, 60°, and 85°), which is why “too much dressing” turns matte trim into a glare source. ASTM International, ASTM D523
– If the surface is still slick, apply matte protectant sparingly—too much product is a common cause of permanent glare. A good rule of thumb is “thin enough to buff fully,” not “wet enough to look coated.”
– Buff lightly after application so the surface looks uniform and non-reflective. With protectants, the final look is mostly determined by how thoroughly you remove excess.
– Let it set for a bit before driving; rushing usually means streaks and a renewed shiny look. Many products recommend a short cure window—follow the label rather than guessing.
– If you’ve had residue problems before, consider a “clean only” approach: remove oil film thoroughly and skip protectant until you see whether fingerprints still cling. In 2026, many owners prefer low-film, matte results over dressing-heavy glossy outputs precisely because repeat glare is harder to manage.
Handle Different Dashboard Materials Carefully
The safest way to remove greasy dashboard shine is to match your cleaner and technique to the dash material—vinyl/plastic, textured finishes, and touch electronics each behave differently. If you use the wrong approach, you can end up with hazing, tackiness, or a permanently shinier patch.
Pros/cons at a glance (by surface type):
| Dashboard area | Best approach | Main risk if you overdo it |
|---|---|---|
| Vinyl / smooth plastic trims | Interior-safe cleaner + matte protectant (light layer) | Gloss buildup and glare spots |
| Textured / grain finishes | Gentle wipe; slightly damp microfiber; minimal product | Flattened texture and patchiness |
| Touch screens / display surfaces | Use only electronics-safe products or manufacturer guidance | Streaking, coating damage, or seepage |
– For vinyl/plastic trims: stick to “interior-safe” cleaners and matte protectants to avoid a glossy coating. If the dash already looks matte, treat protectant like seasoning—use less and buff hard.
– For textured or grain surfaces: wipe gently and use a slightly damp towel to lift grime without flattening texture. Product applied too thickly can fill texture and create a shiny “slick” zone.
– For screens/touch areas (if your dash has them): use only products and cloths meant for electronics or follow the manufacturer guidance. For example, Apple’s screen-cleaning guidance commonly recommends a microfiber cloth lightly dampened with 70% isopropyl alcohol for non-porous display surfaces. Apple Support: “How to clean iPhone” (Always follow your vehicle’s manual for in-car displays.)
What Can Go Wrong (And How to Avoid It)
Even a good cleaning routine can backfire if you apply the wrong chemistry or leave residue behind. The fastest way to avoid repeat greasy dashboard shine is to understand the most common failure points before you start.
– Using the wrong product (like a heavy degreaser) can leave the dash tacky or dull unevenly—always check the label. Harsh solvents can remove coating layers and then “look dull,” but the underlying surface may be more prone to oil grabbing later.
– Applying protectant too thickly is the #1 reason the “greasy shine” comes back within days. Excess dressing forms a new film that traps dust, and the next wipe spreads it across a larger area.
– Wiping with a dirty towel can re-deposit oils—flip to a clean side often. If your microfiber is visibly loaded, it’s not “cleaning,” it’s smearing.
– If you notice cloudiness, sticky residue, or hazing after cleaning, stop adding product. Remove excess with a clean damp microfiber, then follow with a dry buff to restore a consistent appearance.
– If the dash has edges around air vents, switches, or infotainment controls: avoid flooding. Liquid pooled behind buttons can create cosmetic streaks and may affect switch feel over time.
– If the dashboard shows cracking, peeling, or delamination: cleaning can temporarily improve appearance, but it usually can’t restore failing coatings. In that case, the “greasy dashboard shine” may be a symptom of a worn finish rather than just oil buildup.
Verdict: Best Approach, Downsides, and Who Should Skip
This method is usually the safest bet: remove the oil film first, then use only a small amount of matte protectant to control glare. It’s effective because it targets the two causes that create greasy dashboard shine—surface oils and reflective residue—without relying on harsh chemicals.
The downside is time and repetition: deeply contaminated dashboards or old residue buildup can take multiple gentle cleaning passes, especially when previous owners used glossy dressings. Also, even matte protectants can leave a slight sheen if applied too heavily or if you don’t buff thoroughly.
Skip DIY cleaning if the dashboard has severe cracking/delamination, if you’re unsure what material it is (especially near screens), or if you can’t identify products that are explicitly safe for your dash finish. In those situations, a professional interior detailer or the vehicle manufacturer’s guidance is the safer path.
Quick Checklist (Scan/Save)
– [ ] Microfiber towels ready (clean + dry)
– [ ] Interior-safe cleaner (spray on towel, not seams)
– [ ] Wipe small sections, moderate pressure
– [ ] Dry/buff with a second microfiber
– [ ] Apply matte protectant lightly (buff after)
– [ ] Stop if surface turns sticky, hazy, or uneven
Representative 60° Gloss Targets for Dashboard Finish Types
| # | Finish type | Representative 60° Gloss (GU) | Common visual goal | Glare control rating |
|---|---|---|---|---|
| 1 | Super matte | 3 | Near-zero glare | ★★★★☆ |
| 2 | Matte | 10 | Low reflectivity | ★★★★☆ |
| 3 | Low-satin | 20 | Soft, uniform look | ★★★☆☆ |
| 4 | Satin | 33 | Moderate reflectivity | ★★★☆☆ |
| 5 | Semi-gloss | 50 | Visible sheen | ★★☆☆☆ |
| 6 | Gloss | 70 | Strong light reflection | ★☆☆☆☆ |
| 7 | High-gloss | 90 | Mirror-like glare | ☆☆☆☆☆ |
Frequently Asked Questions
What’s the safest way to remove greasy shine from a car dashboard without damaging the finish?
Start by identifying the dashboard material (most commonly vinyl, plastic, or coated surfaces) and choose a cleaner labeled safe for automotive interiors. Use a microfiber cloth and a gentle interior cleaner or a mild soap-and-water solution, then wipe in small sections to avoid pushing grime into seams. Avoid harsh solvents like acetone, alcohol-heavy products, or abrasive pads, which can strip coatings and increase shine over time.
How do I clean an oily car dashboard shine that keeps coming back after I wipe it?
Repeated greasy shine usually comes from residue left by previous cleaners, dressing products, or sunscreen-like buildup. Wash the area first with an interior degreaser or a diluted cleaner to remove surface oils, then rinse by wiping with a lightly damp cloth followed by a dry microfiber buff. To prevent recurrence, skip greasy “protectant” sprays and apply only a matte, interior-safe protectant sparingly.
How can I remove greasy residue from textured dashboard surfaces and vents?
For textured areas, use a soft-bristle detailing brush to lift grime from grooves and around buttons without scratching. Dampen a microfiber towel with an interior cleaner and work the solution into creases, then follow up with a dry cloth to pull out excess moisture. Use cotton swabs for vents and seams, and avoid soaking the electronics area—light pressure and careful wiping are key.
Which household products can degrease a car dashboard effectively and safely?
A mixture of warm water and a few drops of mild dish soap is often effective for general oily buildup and is usually safe for many interior plastics when used lightly. If you use vinegar, dilute it heavily (for example, a small amount in water) and test in an inconspicuous spot first. Never use window cleaners, strong degreasers, or rubbing alcohol—these can leave streaks or damage the dashboard’s protective coating.
Why does my dashboard get shiny and greasy even after cleaning, and how can I stop it permanently?
Dashboard shine often comes from a combination of skin oils, airborne dust, heat-driven oxidation, and residue from glossy interior dressings. Permanent improvement comes from two steps: deep-clean to remove oils and buildup, then use a matte-finish protectant designed for car interiors to resist future grime. Park in the shade when possible and regularly wipe with a microfiber cloth to reduce oil accumulation before it turns into a persistent greasy sheen.
📅 Last Updated: November 02, 2026 | Topic: How to Remove Greasy Shine From a Car Dashboard | Content verified for accuracy and freshness.
References
- https://www.who.int/publications/i/item/cleaning-and-disinfection-of-environmental-surfaces-in-the-context-of-covid-19
- https://www.cdc.gov/coronavirus/2019-ncov/community/organizations/cleaning-disinfection.html
- https://www.epa.gov/coronavirus/disinfecting-your-facility
- Plasticizer
- Detergent
- https://pubmed.ncbi.nlm.nih.gov/?term=detergent+remove+organic+matter+before+disinfection
- https://pubmed.ncbi.nlm.nih.gov/?term=plasticizer+migration+polymer+surface
- https://scholar.google.com/scholar?q=remove+greasy+shine+car+dashboard Google Scholar
- https://scholar.google.com/scholar?q=cleaning+vinyl+dashboard+plastic+interior+grease Google Scholar
- https://scholar.google.com/scholar?q=plasticizer+migration+automotive+dashboard+cleaning Google Scholar

[…] most vinyl and plastic dashboards, choose a pH-balanced interior cleaner and a protectant labeled safe for “dashboard” or “interior trim.” If your car has leather, […]