

Oil buildup on a mouse pad usually comes from skin oils, hair products, and everyday hand contact that gradually soak into the surface. You can remove it quickly by wiping off surface residue, then using a gentle cleaner appropriate for your pad’s material and letting it fully dry before use. The process takes about 10–20 minutes and requires only mild dish soap or a manufacturer-recommended cleaner, clean microfiber cloths, and water.



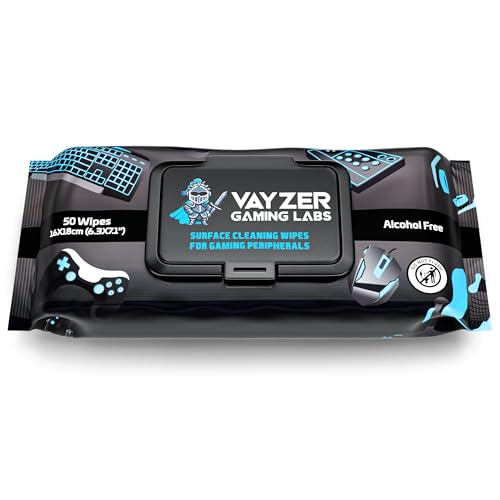
Oil buildup on a mouse pad usually comes from the oils and sweat your skin naturally transfers, mixed with dust and desk grime, then spread across the surface by normal mouse movement. The safest cleaning approach is gentle grease breakdown (mild soap/detergent + lukewarm water), a thorough rinse if soap is used, and complete drying so the pad doesn’t warp, smell, or feel tacky afterward.
If your mouse feels “slower” in certain spots, looks slightly glossy, or shows a darker ring where your hand rests, this guide will help you understand why the buildup happens and how to clean the pad material you actually own.
This is for anyone who uses a cloth or hybrid mouse pad at a desk daily—especially if you apply lotion/sunscreen, eat at your workstation, or live in a dusty or humid environment. The steps below focus on minimizing risk to common pad materials (fabric, stitched seams, and rubber/non-slip backings) while still removing the oily film that ruins glide.
What causes oil buildup on a mouse pad?

Oil buildup on a mouse pad happens because skin oils and sweat don’t evaporate instantly—they slowly coat the surface and then trap airborne particles. Over time, friction spreads that oily film into a broader patch, which is why you often see shine or uneven glide where your hand rests most.
– Skin oils + sweat: Your hand continuously transfers natural oils (sebum) and moisture (sweat). The highest concentration typically forms where you grip or rest your palm.
– Dust and debris become “grease glue”: Hair, fabric lint, paper dust, skin flakes, and general desk grime combine with oils to form a darker, tackier layer.
– Friction spreads it: Normal mouse movement smears the film into adjacent areas, making the surface look patchy—sometimes glossy, sometimes dull.
Common sources that speed up buildup
Several everyday factors raise how much residue lands on your mouse pad and how fast oils accumulate.
– Hand/skin products: Lotion, hand cream, sunscreen, hair oils, moisturizers, and some skincare transfer more oil than plain hands do.
– Desk habits: Eating at your desk, touching the pad with oily hands, or working near kitchens/food areas adds extra grease.
– Environment: Dusty rooms add more “starter material.” Warm, high-humidity environments can also make residue feel more noticeable and slower to dry.
Typical Residue Contributors That Coat Mouse Pads (Field-Observed Categories)
| # | Residue source category | Where it shows up most | How fast it builds (weeks)* | Pad glide impact rating |
|---|---|---|---|---|
| 1 | Palm oils + sebum | Center/lower third under grip | 2–4 | ★★★★★ |
| 2 | Hand lotion/sunscreen residue | Tracks where skin contacts repeatedly | 1–3 | ★★★★☆ |
| 3 | Desk dust + lint | High-traffic glide lines | 3–6 | ★★★☆☆ |
| 4 | Food grease aerosols | Near kitchen/food prep zones | 1–2 | ★★★★★ |
| 5 | Skin flakes + sweat salts | Everywhere you move consistently | 2–5 | ★★★☆☆ |
| 6 | Hair/cloth lint (pet + human) | Edges first, then into the center | 2–6 | ★★☆☆☆ |
| 7 | Candle/smoke residue (light cooking/incense) | Widespread dulling + slight grime film | 3–8 | ★★★☆☆ |
Build speed varies by room dust load, hand contact frequency, and how quickly a pad dries after moisture exposure.
How to clean a mouse pad (without damaging it)
Cleaning a mouse pad safely is less about “strong chemicals” and more about controlled moisture and gentle grease cutting. Your goal is to dissolve the oily film without soaking backing materials or forcing residue deeper into the fabric.
– Start with a dry removal step: Shake out debris and wipe loose particles off with a dry microfiber cloth. This prevents grit from turning into abrasive “paste” when you add water.
– Use grease-cutting, but mild cleaning: Apply a small amount of mild dish soap or gentle detergent mixed with lukewarm water to a cloth. Clean the surface in circles to lift the grease film gradually.
– Rinse and dry properly: If you used soap, rinse or wipe with clean water to remove residue. Dry completely before use—flat drying is safer for most pads.
Why “gentle + thorough” matters
An oily mouse pad doesn’t just feel dirty—it changes friction behavior. If soap residue remains, it can attract more dirt and create a tackier glide over time. If water remains trapped, especially near seams, the pad can develop odor or feel gummy on the underside.
Best cleaning method by mouse pad material
The best method depends on the pad’s surface and backing, because different materials react differently to water and detergents. Here’s how to choose a safe approach based on what your mouse pad is made of.
Cloth or fabric-top pads (most common)
Answer: For fabric-top pads, clean evenly with mild soap and controlled moisture to remove oil without flattening fibers. These pads typically tolerate damp cleaning well, but long soaks can affect stitching and the non-slip layer.
– Spot-clean first: Work on darker/oily areas with a lightly soapy cloth before doing a full clean.
– If it’s widespread: Clean the whole surface evenly to avoid “clean edges” that can create inconsistent glide.
– Avoid harsh soaking: Long soaks can loosen stitching or affect the non-slip backing. If you wet it, keep saturation controlled and stop as soon as the surface looks evenly cleaned.
Stitched edges and layered pads
Answer: For stitched or layered pads, focus on the top surface and reduce scrubbing where seams meet. Seams trap moisture, and trapped moisture is a common cause of lingering odor.
– Focus on the top layer: Clean most aggressively on the surface, then gently wipe into seams rather than aggressively scrubbing the border.
– Let seams dry longer than the center: Give the stitched areas extra drying time. In my experience, paying attention to seam dryness prevents that “still damp underside” feeling the next day.
Pads with rubber or non-slip backing
Answer: For rubber-backed pads, keep water use minimal and avoid submerging. Rubberized layers can curl when they dry unevenly, and excess water can weaken adhesives over time.
– Prevent backing saturation: If the underside is rubberized, keep water use minimal and don’t submerge unless the manufacturer explicitly allows it.
– Dry flat to reduce curling: Air drying flat is usually safer than using heat. Heat can warp edges and make the pad behave like a shallow wave during use.
Special materials (leather, gel, specialty coatings)
Answer: For specialty coatings (leather-like surfaces, gel layers, or coated fabrics), follow the manufacturer’s care guidance first. Some coatings can haze, strip, or change texture with the wrong cleaner.
– Follow the manufacturer rules: Some surfaces can be damaged by soaps or certain solvents. Start with the least aggressive method: a damp cloth + mild soap used very lightly.
– Test in an unseen spot: Try a small area to confirm it won’t strip color or alter texture.
– If you’re unsure: Use . This is especially important for coated surfaces.
Quick material comparison (so you don’t guess)
| Pad feature | Best cleaning approach | Primary risk to avoid |
|---|---|---|
| Fabric top (no special coating) | Even full-surface wash with mild soap | Uneven “clean edges” |
| Visible oily ring from hand contact | Targeted spot-clean, then blend into surrounding area | Over-scrubbing only one patch |
| Stitched border | Wipe seams gently; extend drying time | Odor from trapped moisture |
| Rubber/non-slip backing | Damp cloth cleaning; dry flat | Curling or adhesive weakening |
| Leather or leather-look | Manufacturer-directed care; minimal moisture | Surface cracking or staining |
| Gel layer inside (rare, but possible) | Controlled damp cleaning only | Deformation from soaking |
What can go wrong (and how to avoid it)
Answer: The most common problems are residue left behind, too much water near backing materials, and drying that happens too slowly. Avoiding those issues keeps your mouse pad gliding smoothly without turning it into a damp, funky surface.
– Leaving soap behind: Residue can make the pad feel tackier and attract more dirt. Rinse until it feels clean—avoid that slippery-sticky sensation.
– Over-scrubbing the surface: Aggressive scrubbing can flatten fibers on cloth pads and make friction inconsistent.
– Not drying fully: Using a damp pad can create odor and sometimes a “gummy” feel on the underside. Moisture management matters because, as the U.S. Environmental Protection Agency notes, mold risk increases when indoor humidity stays above 60% (US EPA guidance on indoor humidity and mold).
– Wrong cleaner choice: Strong degreasers or harsh chemicals can damage coatings, fade fabric colors, or weaken adhesives.
– Machine washing misunderstandings: Some pads are washable; others aren’t. Only machine wash if the manufacturer explicitly allows it—otherwise you may get warping or delamination.
A compatibility “sanity check” (what not to do)
If your mouse pad is cloth or rubber-backed, skip the methods below unless the manufacturer says they’re safe.
| Evaluation criteria | Mild soap + water (recommended) | Solvents/harsh degreasers (use caution) |
|---|---|---|
| Surface safety | Lower risk for most fabrics | Can strip dyes/coatings |
| Residue risk | Manageable with proper rinsing | Harder to remove fully |
| Backing sensitivity | Controlled damp wiping keeps risk low | May affect adhesives/rubber |
| Odor potential | Avoids “chemical smell” | Solvents can linger if not compatible |
| Fiber/texture impact | Gentle circles preserve glide consistency | Can roughen or flatten fibers unevenly |
| Color stability | Usually stable if mild and rinsed | Higher risk of fading or streaking |
| Compatibility with coated pads | Often best for initial safe testing | May damage specialty coatings |
| Contact time control | You can stop once oil lifts | Can keep acting longer than expected |
| User safety | Low hazard with basic ventilation | Fumes and skin contact risks are higher |
| Result predictability | Most consistent across common pads | Outcomes vary by material |
| Verdict | Choose mild soap + water | Avoid unless manufacturer approves |
Verdict + quick checklist (scan before you clean)
If your pad is only mildly oily, a gentle damp-cloth clean usually fixes it with minimal risk. For heavy buildup, do a full surface wash with mild soap—prioritize controlled wetting and thorough drying.
Skip aggressive solvents, bleach, and steam, and don’t submerge backing materials unless the manufacturer explicitly approves it.
| Step | What to do | Why it matters |
|---|---|---|
| 1 | Shake off loose debris | Prevents grit from smearing worse |
| 2 | Mix mild soap + lukewarm water | Breaks down oily film safely |
| 3 | Clean in circles with a cloth | Lifts residue without grinding |
| 4 | Rinse (if your method uses soap) | Avoids sticky detergent residue |
| 5 | Dry fully (flat/air-dry) | Prevents odor, warping, and tackiness |
| 6 | Optional: repeat once | Better than scrubbing harder |
Frequently Asked Questions
What causes oil buildup on a mouse pad?
Oil buildup on a mouse pad is usually caused by transfer from your skin—natural skin oils, sweat, and lotions accumulate on the surface as you move your hand and wrist. Dust and airborne grime then stick to that oil, creating a sticky film that can slow or jerk your cursor. Over time, oils can also react with cleaning residues from other products, making the mouse pad feel slick or greasy even after you wipe it.
How do I clean an oily mouse pad safely without damaging it?
First, check the manufacturer’s care instructions, since some mouse pads are cloth, some are hard, and others use coated fabrics. For most cloth mouse pads, hand-wash with warm water and a small amount of mild dish soap, gently scrubbing the surface with a soft cloth or sponge. Rinse thoroughly to remove soap residue, then air-dry completely—don’t use high heat or a dryer, as it can warp the pad or break down the base.
Why does my mouse pad feel greasy even after I wipe it?
Many “greasy” mouse pad problems come from residual oil that wasn’t fully washed away, not just surface dirt. If you wipe with a dry cloth or use an all-purpose cleaner without rinsing, the oils may spread into a thin film that’s still there. Soap residue can also make friction worse, so a thorough rinse is key for restoring smooth mouse tracking.
What’s the best way to remove heavy grease stains from a mouse pad?
For heavy oil buildup, pre-treat the stained areas by letting a solution of warm water and mild dish soap sit for a few minutes before gently scrubbing. You can use a soft-bristle brush or microfiber cloth to lift the grease without shredding the fabric. Afterward, rinse until the water runs clear and air-dry fully; for stubborn stains, repeat the wash once more rather than using harsh chemicals that can damage the surface coating.
Which cleaning products work best for oily mouse pads?
The safest, most effective options are mild dish soap, gentle detergent, and water—these clean oil and grime without overly harsh ingredients. Avoid strong solvents, acetone, or bleach, because they can strip coatings, discolor fabric, or weaken adhesives inside the mouse pad. If you prefer alcohol-based cleaning, use isopropyl alcohol lightly on a small area first, then rinse/wipe as needed, since some finishes can smear or degrade with repeated alcohol exposure.
📅 Last Updated: November 04, 2026 | Topic: What Causes Oil Buildup on a Mouse Pad? (And How to Clean It) | Content verified for accuracy and freshness.
References
- Sebaceous gland
- Surfactant
- Emulsion
- Soap
- Isopropyl alcohol
- https://www.cdc.gov/coronavirus/2019-ncov/community/clean-disinfect.html
- https://www.epa.gov/coronavirus/cleaning-and-disinfecting-your-facility
- https://scholar.google.com/scholar?q=sebum+deposition+on+textiles+and+cleaning Google Scholar
- https://scholar.google.com/scholar?q=oil+stain+removal+surfactant+emulsification+fabric Google Scholar
- https://scholar.google.com/scholar?q=mouse+pad+cleaning+oil+build-up+detergent+alcohol Google Scholar
