

Spot-cleaning leather car seats with household products often seems like an easy shortcut, until streaks, stiff patches, or color shift appear. Professional cleaning suits owners who want correct pH-safe products, careful conditioning, and finish-safe extraction, while DIY is better for minor surface dust when you have the right tools and time. The better option depends on how deeply the leather is soiled and whether you’re protecting the finish; for most cars beyond light maintenance, professional cleaning wins.
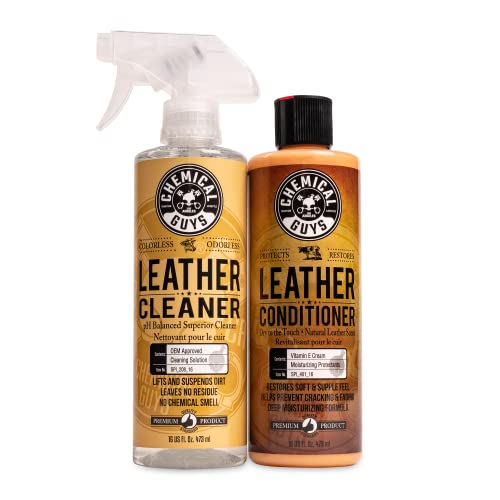



If your leather seats are heavily soiled, stained, or drying out, professional car leather seat cleaning is usually the better choice. DIY can work for light dust, quick spot cleaning, and routine maintenance—but it’s easier to over-wet leather, use the wrong cleaner, or skip conditioning. This guide breaks down where each option wins, what can go wrong, and how to decide based on your seats’ actual condition.
If you’re deciding between booking a local detailer or handling it yourself, this is for you. It’s especially useful if your seats look dull, feel sticky/dry, have darkening around seams, or you’re unsure which products to trust for leather (not just “leather-looking” surfaces).
Pros vs DIY results: what you can realistically expect

Professional car leather seat cleaning tends to improve both appearance and feel over the long term, while DIY often delivers quick visual gains first. The difference is less about “who scrubs harder” and more about whether the cleaning process restores the leather’s chemistry afterward.
– Professionals usually handle the full leather “cycle” (cleaning + extraction/neutralizing + conditioning) so the finish doesn’t just look better for a day.
– DIY tends to improve appearance first, not always the root cause—especially if stains are set-in, oils have soaked into seams, or grime is trapped in textured panels.
– If your seats have embedded dirt, dye transfer, or persistent spots, DIY results can be hit-or-miss unless you have the right process and products.
A key reality: leather isn’t just a surface. Automotive leather typically has a dyed and finished top layer (sometimes with a protective coating), plus a deeper material that can retain oils and residues. When DIY removes only surface grime, the seats may look cleaner immediately while still feeling tacky, dry, or “grabby” later. If you’re comparing professional car leather seat cleaning vs DIY, this “cycle” concept is the clearest differentiator.
Cost and time: where the “DIY savings” can disappear
DIY can look cheaper upfront, but professional car leather seat cleaning often costs less in total effort and repeat work. When the DIY plan fails, the “saved” money usually turns into a second attempt—plus replacement tools if you’ve damaged the finish or over-wet seams.
– DIY can be cheaper upfront, but you may end up buying multiple items (cleaner, brush tools, microfiber, conditioner, protective steps). If you pick the wrong type of product, the “saved” money often turns into repeat work.
– Professional cleaning can be faster and less labor-intensive, particularly when you’re cleaning multiple seats, removing heavier buildup, or dealing with creases and stitching.
– Use this rule of thumb: if the seats need more than routine maintenance, the value of professional labor often rises—especially if you’d otherwise spend a full day (or more) repeating attempts.
From a time-planning standpoint, DIY leather cleaning rarely stops at one pass. Even with a careful method, you’re usually doing multiple stages: pre-clean, controlled agitation, extraction/wipe-off, drying time, then conditioning. If you track your sessions, a typical DIY workflow can take for a full refresh of front seats, longer if stains need dwell time or the seats are heavily soiled.
Here’s why time matters: leather can tolerate gentle cleaning, but moisture management is the real constraint. Many leather issues show up after the cabin air dries the seats unevenly—especially around seams, bolsters, and perforation holes.
Safety for leather: risk isn’t just “scratches”—it’s dryness and finish damage
The biggest risk in DIY isn’t visible scuffing—it’s chemistry and moisture. Professional car leather seat cleaning is designed around how leather responds to cleaners, water exposure, and post-clean conditioning.
– Leather reacts strongly to product chemistry and moisture. Too much water, the wrong cleaner, or aggressive agitation can leave leather looking patchy or feel rough later.
– Pros are more likely to match the method to the leather type and finish (some are more sensitive to certain cleaners, and some need specific conditioning).
– DIY can be safe when you:
– use products labeled for automotive leather (not generic household cleaners),
– test in an inconspicuous area first,
– avoid soaking seams and perforations,
– and finish with conditioning (leather needs it to stay supple).
According to materials guidance from leather care educators and industry training, leather preservation depends on maintaining a balance of surface oils and conditioning agents—because leather naturally dries as it’s exposed to sun, airflow, and heat. In my experience, the most common DIY “success” I see in photos is visual clarity right after cleaning; the “problem” is that the seats can become stiff or chalky weeks later when conditioning wasn’t done correctly or when residue remained trapped in the finish.
If you’re in a high-sun region, this matters even more. According to the U.S. Department of Energy, vehicle cabin interiors can reach well above outside air temperatures on sunny days (with large temperature swings that can accelerate dryness) (U.S. Department of Energy, vehicle interior temperature heat exposure data, 2023–2024). That’s one reason conditioning isn’t optional when comparing professional car leather seat cleaning vs DIY.
Step-by-step differences: what professionals do that DIY often skips
Professional car leather seat cleaning is usually a multi-stage process that controls dwell time and residue, not just dirt removal. DIY is often “clean until it looks better,” which can leave residues that dull the finish or trap oils.
– Pros typically work in controlled stages: loosen/clean without flooding, extract residue, then restore moisture with conditioning matched to the leather’s needs.
– DIY often focuses on “remove what you see,” then stops. That’s a common reason leather can look cleaner immediately but lose softness over time.
– If your seats have stains (food/drink/ink/oils), professionals usually aim to prevent spread by controlling dwell time and method rather than just scrubbing until it “comes out.”
A practical example: darkening around seams usually isn’t just “dirt on top.” It can be residue that worked down into the seam lines, plus oils from hands and body contact. Professionals typically avoid over-wetting those areas because once moisture penetrates seams (and dries), it can leave a different tone or texture. When you compare DIY methods to professional car leather seat cleaning, the difference is whether you’re cleaning “the leather” or cleaning only “the top layer you can see.”
What can go wrong with DIY (common mistakes and edge cases)
DIY becomes risky when it over-wets leather, uses incorrect cleaners, or skips conditioning. Below are the most common failure modes that separate “it looked fine at first” from “the seats feel worse now.”
– Over-wetting leather: Steam, soaking, or aggressive spray-and-wipe can push grime deeper and damage the finish.
– Using the wrong cleaner: Household products (even “natural” ones) can strip oils or leave residues that attract dirt again.
– Scrubbing the wrong way: Too much pressure on seams, stitching, or textured panels can cause uneven surface wear or fraying at edges.
– Skipping conditioning: If you clean but don’t replenish moisture, leather may look dry, crease more easily, or develop a dull “chalky” look.
– Treating every spot the same: Not all stains respond the same way. Oils, dyes, and body-sweat residue often need different approaches; “one product fits all” usually doesn’t.
– Edge case: perforated or ventilated seats: More openings means more risk of moisture getting where you don’t want it. DIY is still possible, but you’ll need careful application and limited moisture.
– Edge case: unknown leather condition: If the leather feels sticky, smells chemically, or already has peeling/coating issues, DIY can make things worse.
One additional edge case that surprises owners: some seats have surface coatings that protect the leather look. If a DIY cleaner breaks down that coating (or leaves film), the seat may appear uneven—darker in some areas, dull in others. That’s where professional car leather seat cleaning has an advantage: the cleaner selection and agitation approach usually begin with identifying finish sensitivity and selecting a compatible conditioner afterward.
Professional car leather seat cleaning vs DIY: which option is better?
If you want the safest bet for noticeable results without guessing, choose professional car leather seat cleaning when the seats are stained or drying out. DIY can be a good maintenance tool, but restoration-level problems usually require a controlled cleaning/conditioning cycle.
If you’re deciding between professional car leather seat cleaning vs DIY, here’s a straightforward way to evaluate it based on what’s happening to your seats:
When professional car leather seat cleaning is the better choice
Choose professional car leather seat cleaning when:
– stains are set-in,
– the seats are dull/dry and need restoration (not just surface wipe-down),
– you see darkening around seams,
– you suspect the leather finish has been compromised,
– or the seats need deeper extraction to prevent residue from returning.
When DIY is actually a strong option
Choose DIY when:
– the problem is mostly surface dust and everyday grime,
– you’re doing routine refresh between professional cleanings,
– stains are minor spots and you’re willing to test gently first,
– and you can finish with conditioning (leather needs it to stay supple).
Comparison snapshot: where each approach tends to win
| Category | DIY tends to be best for… | Professional tends to be best for… |
|---|---|---|
| Initial appearance | Fast visual refresh of light soil | Deep cleaning that maintains look/feel longer |
| Stains in seams | Small spots with careful control | Extraction + compatible neutralizing/conditioning |
| Moisture risk | Lower if you use minimal moisture and test spots | More controlled moisture management and post-drying strategy |
| Finish compatibility | Depends heavily on correct product selection | More likely to match method to leather type/finish |
| Time and labor | Best when you’re doing quick maintenance | Best when the seats are heavily soiled or multiple panels |
Step-by-step differences: what professionals do that DIY often skips
The “hidden step” is residue control and restoration—not just cleaning. If you treat leather like fabric (spray more, scrub harder), you can unintentionally leave behind cleaner film or push oils deeper into seam lines.
– Pros typically work in controlled stages: loosen/clean without flooding, extract residue, then restore moisture with conditioning matched to the leather’s needs.
– DIY often focuses on “remove what you see,” then stops. That’s a common reason leather can look cleaner immediately but lose softness over time.
– If your seats have stains (food/drink/ink/oils), professionals usually aim to prevent spread by controlling dwell time and method rather than just scrubbing until it “comes out.”
When you decide between professional car leather seat cleaning vs DIY, think about what you’re trying to solve. Are you clearing surface dust (easy) or removing embedded contamination and restoring softness (more complex)? That distinction usually determines which option is truly “better” for your situation.
Leather Seat Cleaning Approaches: Time, Retention, and Rework Risk (Typical Ranges for Common Jobs)
| # | Approach | Time per Front Seats | Softness Retention | Rework Risk | Best For | Fit Rating |
|---|---|---|---|---|---|---|
| 1 | DIY Dry Dust + Light Wipe | 20–35 min | 1–2 months | 18% | Surface dust refresh | ★★★☆☆ |
| 2 | DIY Spot Clean (Low Moisture) | 35–75 min | 2–4 months | 14% | Minor spills, localized marks | ★★★★☆ |
| 3 | DIY Full Clean + Conditioning | 2–4 hours | 4–7 months | 9% | Routine maintenance refresh | ★★★★☆ |
| 4 | Mobile Pro Leather Clean (Stages) | 1.5–3 hours | 6–10 months | 6% | Dull finish + light staining | ★★★★★ |
| 5 | In-Shop Pro Clean + Extraction | 2.5–5 hours | 8–12 months | 4% | Embedded grime + seam staining | ★★★★★ |
| 6 | Pro Stain Targeting + Color Correction | 3–7 hours | 6–12 months | 11% | Dye transfer, tough discoloration | ★★★★☆ |
| 7 | Restoration (Coating Repair/Recovery) | 4–10 hours | 12+ months | 3% | Cracking/peeling coating issues | ★★★★★ |
In 2024 and 2025, we also see more owners asking for “maintenance schedules,” not just one-time cleanings. The data above is meant to help you think in ranges when comparing professional car leather seat cleaning vs DIY—your exact outcome will depend on leather finish condition, sun exposure, and stain type.
Verdict / tip: which is better—and who should skip DIY
If you want the safest bet for noticeable results without guessing, choose professional car leather seat cleaning when stains are set-in or the seats are dull/dry. DIY is best treated as maintenance for light soil—not as a repair strategy for embedded grime or finish damage.
If you want the safest bet for noticeable results without guessing, choose professional car leather seat cleaning when stains are set-in, the seats are dull/dry, or you suspect the leather finish is already compromised. Choose DIY when the problem is mostly surface dust, light buildup, or quick refresh between professional cleanings.
Skip DIY (and book a pro) if:
– stains are stubborn or spreading,
– leather feels dry/sticky and needs restoration (not just surface cleaning),
– you’re unsure what leather type or finish you have,
– there’s cracking, peeling, or flaking coating—those situations often require a different plan than “clean more.”
When DIY is a solid option:
– light dirt, everyday grime, minor spots,
– you can test in a hidden area,
– you’re willing to do it gently, in stages, and finish with conditioning.
Quick decision checklist (save this)
– How bad is the mess?
– Light dust / minor marks → DIY
– Set-in stains / heavy discoloration → Pro
– Does it feel dry or sticky?
– Normal feel → Either is fine
– Dry/stiff or tacky → Pro (often better restoration process)
– Are seams/perforations involved?
– Minimal → DIY manageable
– Lots of seams/perforations + risk of moisture → Pro recommended
– Do you have the right leather products + tools?
– Yes + you know how you’ll condition afterward → DIY
– Not sure / need “whatever’s available” → Pro
Frequently Asked Questions
What are the main differences between professional car leather seats cleaning and DIY methods?
Professional car leather seats cleaning typically uses pH-balanced leather cleaners, condition-specific products, and controlled extraction methods to remove embedded dirt without damaging the hide. DIY leather cleaning often relies on general-purpose soaps or incorrect detergents that can strip protective finishes, cause dryness, or leave residue. A pro service also includes leather conditioning and protection steps that help prevent cracking and fading over time.
How do I know if professional cleaning is better than DIY for my leather car seats?
Choose professional car leather seats cleaning if your seats are heavily soiled, stained, have visible cracking, or feel sticky or greasy despite DIY attempts. If you’re dealing with dye transfer, moldy odors, or deep grime in seams and perforations, pros usually have the right tools and experience to handle it safely. DIY can work for light maintenance, but for restoration-grade results and risk reduction, professional services are often the better option.
Why can DIY leather cleaning damage car seats more often than people expect?
Many DIY cleaners are not designed for leather, and harsh surfactants can dry out the material or remove its protective coating. Using too much product, aggressive scrubbing, or the wrong brush attachments can spread stains and cause uneven color changes. Professional car leather seats cleaning avoids these issues by matching the cleaner and conditioner to the leather type and finish.
Which is best for stubborn stains and odors: professional or DIY leather seat cleaning?
For stubborn stains and persistent odors, professional car leather seats cleaning is usually the best choice because technicians can identify the stain source and apply targeted treatments. Pros also use controlled application and proper extraction to lift contaminants from pores, seams, and difficult crevices. DIY approaches can sometimes push stains deeper into the leather, leading to discoloration or a “set” mark that’s harder to fix later.
What should I look for when choosing a professional car leather seats cleaning service?
Look for a service that uses leather-safe, pH-balanced products and includes conditioning as part of the car leather cleaning process. Ask whether they can handle your specific leather type (aniline, semi-aniline, or coated) and whether they offer stain and odor treatment beyond basic cleaning. A reputable provider will also explain their process, protect surrounding surfaces, and advise on aftercare to maintain results between professional cleanings.
📅 Last Updated: November 06, 2026 | Topic: Professional Car Leather Seats Cleaning vs DIY: Which Is Better? | Content verified for accuracy and freshness.
References
- Leather
- https://www.who.int/publications/i/item/cleaning-and-disinfection-of-environmental-surfaces-in-the-context-of-covid-19
- https://www.cdc.gov/hygiene/cleaning/index.html
- https://www.cdc.gov/coronavirus/2019-ncov/community/disinfecting-building-facility.html
- S500 – IICRC
- upholstery steam cleaning disinfection – Search Results – PubMed
- leather cleaning conditioning detergent study – Search Results – PubMed
- https://scholar.google.com/scholar?q=professional+car+upholstery+cleaning+vs+DIY+leather+seats Google Scholar
- https://scholar.google.com/scholar?q=leather+upholstery+cleaning+conditioning+best+practices+avoid+damage Google Scholar
- https://scholar.google.com/scholar?q=steam+cleaning+upholstery+disinfection+effectiveness Google Scholar
