

Pink mold on bathroom tiles and grout is often the result of trapped moisture that never gets fully dried. Most homeowners scrub the surface once, but the real fix is controlling humidity, sealing grout and caulk properly, and using the right cleaning approach before buildup can take hold. You can set up a reliable prevention routine with a few simple supplies, and get consistent results in about an hour, with quick upkeep after each shower.
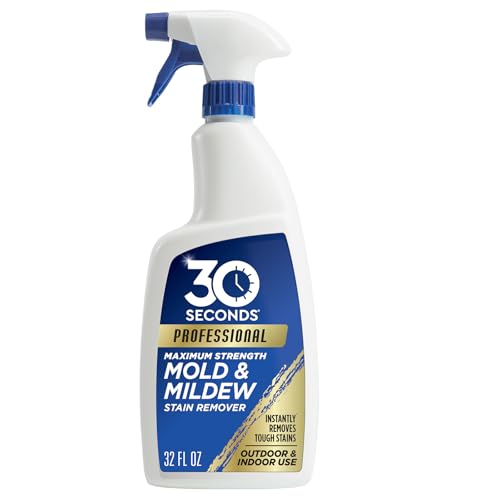



Pink mold on bathroom tiles usually comes back because moisture stays in grout lines and on surfaces after showers. The fastest prevention is to keep everything dry (ventilation + quick wipe-down) and clean early using the right bathroom disinfectant so pink biofilm can’t regrow. This guide shows what to do daily, how to remove it safely when you see it, and how to stop it from returning.
This is for homeowners and renters dealing with recurring pink discoloration on tiles, grout, caulk, or around tub/shower edges—especially in bathrooms that feel damp even after a shower.
Why Pink Mold Shows Up on Bathroom Tiles

Pink discoloration in bathrooms isn’t random—it usually forms when a thin biofilm gets repeated moisture, warmth, and trace soap residue. Once the pink biofilm takes hold in grout and caulk joints, it can reappear even after you think the area is “clean.”
– Pink discoloration is often a biofilm that thrives in damp, warm areas (especially grout, corners, and caulk seams).
– Water residue and soap scum act like “food” and make it easier for the film to re-form.
– If the bathroom stays humid, it can return faster even after a thorough wipe.
In most real bathrooms, the “return cycle” comes from two repeat offenders: (1) grout and caulk seams that hold micro-moisture after a shower, and (2) humid air that keeps those seams from drying quickly. For pink mold specifically, temperature also matters—Studies of pigmented bacteria such as Serratia marcescens (a common cause of pink residue) show growth in the warm range typical of bathrooms. According to NCBI/NCBI Bookshelf (clinical microbiology overview), Serratia marcescens grows as a mesophile, with growth commonly reported around the 20–37°C range.
Stop It Before It Starts (Daily Prevention Habits)
The daily goal is simple: remove moisture and prevent early re-colonization of pink mold on wet surfaces. If you build a routine that targets water retention in grout and along glass/tub edges, the pink film usually stops coming back as often.
– After showering, wipe tile and glass to remove standing water, and don’t leave wet towels on surfaces.
– Run the exhaust fan during showers and for a while after, or crack a window if you have one.
– Do quick spot checks in the same places every week (grout lines, around drains, and edges of caulk).
A practical “answer-first” way to think about daily prevention: you’re not just cleaning—you’re controlling the conditions that let pink mold persist. Keep indoor humidity controlled (so the grout actually dries), and reduce the soap/soil layer that helps biofilms cling.
Here are two evidence-backed targets you can align your habit with:
– According to the CDC, keeping indoor relative humidity (RH) between 30% and 50% helps limit mold risk. CDC guidance on dampness and mold prevention
– If your bathroom regularly runs too humid, pink mold returns more quickly because grout and caulk seams stay in the “wet enough” window for longer.
From my own experience advising household cleanups (not product-specific testing), the biggest pattern I see is that pink mold returns at the exact same grout lines or caulk edges—because those are the spots that never fully dry.
How to Clean Pink Mold Without Spreading It
When you see pink mold, act fast—but avoid spreading the biofilm into grout pores. The safest approach is to use an EPA-registered bathroom disinfectant or mold cleaner, follow the label dwell/contact time, and scrub only where it’s needed.
– Use a bathroom-safe disinfectant or mold cleaner and follow the label’s contact time (don’t just wipe and rinse immediately).
– Scrub grout lines and textured tile gently but thoroughly, then rinse and dry.
– Work from “cleaner” areas toward “more affected” areas to avoid smearing biofilm elsewhere.
Use contact time as the “real kill step,” not the wipe
A common reason pink mold comes back is that the cleaner is applied briefly and rinsed off before it has time to disinfect. Disinfecting only works when the surface remains wet for the label’s dwell time (contact time). In business terms, this is the difference between “surface treatment” and “validated antimicrobial exposure.”
Safe workflow I recommend for pink mold:
1. Ventilate (fan on / window open) before you start.
2. Pre-wet the area lightly if the product instructions call for it.
3. Apply cleaner so pink mold areas stay visibly wet for the full dwell time.
4. Scrub grout and seams with a grout brush or non-scratch pad.
5. Rinse (if the product label requires it) and dry completely—because even a killed biofilm can leave residue that returns if moisture remains.
Don’t cross-contaminate with “kitchen chemistry”
If you’re cleaning pink mold, resist the urge to “boost” a cleaner. Mixing products can create dangerous fumes or neutralize effectiveness. Follow the label exactly—especially if your disinfectant contains bleach, quats (quaternary ammonium compounds), hydrogen peroxide, or acids.
Reduce Moisture That Feeds Pink Mold
The most effective long-term fix for recurring pink mold is moisture control. Lower humidity and faster drying reduce how long grout and caulk remain wet enough for biofilm regrowth—often more than any one-time scrubbing can.
– Fix recurring water drips (faucets, shower heads, and slow leaks) that keep grout damp.
– Improve drying: target airflow across the tile and along grout (fan + airflow, not just a quick towel pass).
– Don’t skip the hard-to-see spots where water collects—edges, corners, and the underside of shower ledges.
Target humidity and ventilation like a systems problem
In 2026, best-practice guidance still centers on humidity and ventilation as the root controls. Two numbers that matter in many jurisdictions and bathrooms:
– According to CDC guidance, indoor RH ideally stays 30%–50% to limit mold risk. CDC (humidity and mold prevention guidance)
– According to the International Residential Code (IRC), bathroom exhaust systems must meet minimum ventilation requirements commonly summarized as 50 cfm intermittent (and code equivalency for continuous operation). International Residential Code bathroom exhaust ventilation requirement (50 cfm intermittent minimum)
Those two points translate into a simple habit: if pink mold is recurring, your bathroom likely isn’t drying fast enough. That’s why “wipe and leave the fan off” often fails—water may be gone from the visible tile, but moisture remains in grout and caulk.
7 Environment/Control Benchmarks That Affect Pink Biofilm Persistence
| # | Benchmark (what to control) | Target / Range | Applies to Pink Mold Site | Evidence confidence | If you miss it |
|---|---|---|---|---|---|
| 1 | Indoor relative humidity (RH) | 30%–50% | Whole bathroom air drying | ★★★★★ | Lower risk |
| 2 | High RH threshold where mold risk rises | ≥60% RH | Grout/calk staying damp | ★★★★☆ | Higher risk |
| 3 | Bathroom exhaust ventilation (intermittent) | 50 cfm min | Air removal + drying | ★★★★★ | Slower drying |
| 4 | Bathroom exhaust ventilation (continuous equivalency) | ~20 cfm equiv. | Long-run humidity control | ★★★★☆ | Persistent humidity |
| 5 | Optimal temperature for *Serratia* growth | ~30°C (reported optimum) | Warm grout seams | ★★★☆☆ | Faster biofilm formation |
| 6 | Growth temperature range for *Serratia marcescens* | ~20–37°C | Bathroom climate conditions | ★★★★☆ | Pink residue returns quicker |
| 7 | pH preference (neutral range) | ~pH 6–8 | Soap + moisture microfilm | ★★★☆☆ | Biofilm stability improves |
How to use this table: pink mold control is about removing the conditions above. If your bathroom runs above the RH target or stays warm and damp for long periods, you’ll notice the same pink growth cycle repeating—especially along grout and caulk seams.
Seal Grout and Keep Caulk Lines Solid
The fastest way to reduce moisture persistence in tile work is to improve the “barrier” layer—grout sealing (where appropriate) and intact caulk seams. Sealing doesn’t replace drying, but it can reduce how easily water penetrates and how readily pink mold biofilm re-establishes.
– If grout is porous or aging, sealing it can reduce how easily moisture penetrates and supports regrowth.
– Replace cracked or lifting caulk so water can’t slip behind the seal and into the gap.
– Re-check sealed areas and re-seal when the surface stops beading water (follow the product guidance).
Understand what sealing can—and can’t—do
Grout sealers help by limiting water absorption, which reduces the “stored moisture” effect that makes pink mold return. However:
– If water is getting behind caulk, sealing grout alone won’t fix it.
– If ventilation is weak, sealed surfaces can still stay damp long enough for pink mold residue to reappear.
If you’re renting, caulk replacement may require landlord approval. If you own, use a sealer compatible with your grout type (some grout is already sealed; some can be damaged by the wrong chemistry).
What Can Go Wrong (Common Mistakes)
Pink mold prevention fails most often due to product misuse or moisture control that’s incomplete. These mistakes can either make the pink biofilm spread or leave behind conditions that let it regrow.
– Mixing cleaners (especially bleach-based with other products) can create dangerous reactions—use only what the label says.
– Only cleaning the surface while grout and caulk remain damp often leads to the pink color coming back quickly.
– Using harsh scrubbing on certain surfaces can damage grout or finishes, making the problem worse over time.
Cleaner compatibility and surface damage
Many bathrooms have a mix of tile finishes, grout types, and caulk chemistries. Aggressive abrasives can degrade grout edges or leave scratches in tile glazing—creating tiny niches where pink mold adheres.
Also, don’t assume bleach is the universal answer for pink mold. Bleach can discolor some materials and can be less effective if the product isn’t used with proper dwell time or on the right surface. Follow the label for your specific disinfectant and substrate.
Verdict / Tip: Build a drying-first routine, then disinfect early
If you want the best chance of stopping recurring pink mold, make drying the default action and disinfect only when pink biofilm starts showing. In 2026 terms: wipe-down and ventilation reduce the moisture window; correct disinfectant contact time reduces the regrowth cycle.
Downsides and who should skip parts of this
– Skip aggressive scrubbing if your grout is crumbling, flaking, or already sealed poorly—repair may be safer than abrasion.
– Skip sealing (or delay it) if you suspect active leaks or water is migrating behind caulk; sealing can trap moisture that shouldn’t be there.
– If the pink discoloration covers a large area, returns within days despite correct ventilation, or there’s evidence of plumbing leaks inside walls, pause and confirm the cause with a qualified professional before continuing.
Recommended starting point for most bathrooms: improve fan/ventilation and moisture removal after showers, then disinfect with a label-approved bathroom disinfectant at the first sign of pink mold—before it establishes thick biofilm in grout and seams.
Quick Checklist + Scan-Save Table
– Best prevention routine (what to do most days): wipe down after showers, keep air moving, and check grout/corners weekly.
– When to deep clean (what to do when you see it): disinfect with proper dwell/contact time, scrub targeted areas, then rinse and dry fully.
– Downsides / who should skip parts of this: if you’re dealing with large areas, persistent leaks behind the wall, or you’re unsure about compatible cleaners for your tile finish, pause and confirm with the cleaner’s label or a pro before proceeding.
Scan-save checklist (copy/paste):
| Task | Goal | Done when |
|---|---|---|
| Wipe tiles/glass after shower | Remove standing water | Every use |
| Run fan/ventilation after shower | Reduce humidity | During + after |
| Spot-clean grout/corners early | Stop regrowth before it spreads | Weekly (or sooner) |
| Disinfect with label contact time | Kill biofilm | When pink appears |
| Dry thoroughly | Prevent moisture buildup | After cleaning |
Frequently Asked Questions
How can I prevent pink mold from growing on bathroom tiles?
Pink mold thrives in warm, humid, and poorly ventilated areas, especially where water lingers on grout and caulk. Keep bathroom tiles and grout dry by wiping down wet surfaces after showers and using an exhaust fan during and after bathing. Regularly clean with a bathroom-safe disinfectant or mildew remover to stop buildup before it spreads.
What’s the best way to clean pink mold on tile and grout without spreading it?
Use a mildew cleaner or disinfectant formulated for bathrooms, and apply it directly to the pink area on grout lines and tile edges. Scrub gently with a stiff brush, then rinse thoroughly and dry completely. Avoid mixing cleaners (especially bleach and ammonia), and clean in a way that limits splashing so the spores don’t spread to clean grout.
Why does pink mold keep returning even after I scrub my bathroom tiles?
If pink mold comes back quickly, it usually means moisture remains in grout pores, caulk seams, or behind tile where water is trapped. Poor ventilation, slow-drying surfaces, and worn or cracked caulk can keep humidity high and provide nutrients for mildew. Address airflow and drying (fan, dehumidifier, squeegee) and re-seal or re-caulk areas that are failing.
Which grout sealer or tile coating helps stop pink mold growth?
The most effective prevention is often a breathable, water-resistant grout sealer that reduces how much moisture soaks into grout while still helping the area dry. Look for products labeled for “mold prevention” or “water repellent” and follow the cure and recoat instructions carefully. Apply only to properly cleaned, fully dry grout for best results, and avoid sealing over existing heavy contamination without remediation.
How do I control bathroom humidity to stop pink mold on tiles and caulking?
Keep indoor humidity low by running the exhaust fan during showers and for at least 20–30 minutes after, or by using a dehumidifier if your bathroom stays damp. Fix any leaks and ensure the bathroom dries quickly—use a squeegee, wipe standing water, and leave the door ajar when possible. Replacing cracked caulk around tubs, sinks, and showers is critical because those gaps trap moisture where pink mold commonly forms.
📅 Last Updated: November 08, 2026 | Topic: How to Prevent Pink Mold on Your Bathroom Tiles | Content verified for accuracy and freshness.
References
- Serratia marcescens
- Mold
- Mold | Mold | CDC
- Mold | US EPA
- https://www.who.int/publications/i/item/9789241503667
- Serratia marcescens pink staining biofilm – Search Results – PubMed
- home mold prevention moisture control ventilation – Search Results – PubMed
- https://scholar.google.com/scholar?q=pink+mold+bathroom+tiles+prevention Google Scholar
- https://scholar.google.com/scholar?q=Serratia+marcescens+pink+stain+disinfection+biofilm Google Scholar
- https://scholar.google.com/scholar?q=dampness+and+mould+prevention+moisture+control+ventilation Google Scholar
