

You run the shower, step out, and notice the tiles look dull within days—spots on the grout and a haze that returns every time moisture sits. You can slow that cycle with nine practical prevention habits, most of which take only a short routine to add. You’ll just need basic cleaning supplies, a squeegee or microfiber, and a simple sealing and airflow plan to keep grime from taking hold.



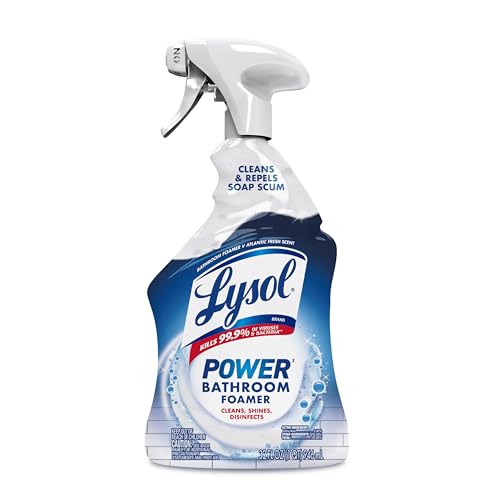
Keep your bathroom tiles looking clean longer by preventing grime and moisture from building up in the first place—then doing quick, low-effort touch-ups consistently. If you focus on drying, reducing soap scum and hard-water marks, and protecting grout, you’ll usually spend less time scrubbing later. This guide walks through 9 prevention tips you can start using right away.
If your tiles look dull from soap residue, spotty from hard water, or your grout darkens faster than it should, these tips are for you—especially if you want cleaner-looking tile without aggressive, frequent scrubbing.
This guide is for homeowners and property managers (and anyone maintaining a rental or high-traffic bathroom) who want a repeatable, prevention-first routine. As of 2026, many grout-cleaning problems still come down to the same root causes: soap film, mineral deposits, and moisture staying in grout lines longer than most people realize.
Stop buildup before it starts (Tips 1–3)

The best way to keep bathroom tiles clean longer is to reduce what enters the bathroom before it has a chance to grind into tile and grout. When you control tracked-in dirt and splash spread, you also reduce the “food” grime has for soap scum and mineral scale.
– Use a bath mat + wipe feet fast: Less tracked-in dirt and grit means fewer particles that grind into tile finishes and grout lines (Tip 1).
– Rinse loose residue after showers: A quick warm-water rinse removes the first layer of soap film before it sets (Tip 2).
– Keep water off non-tile surfaces: Redirect splashes away from tile edges/trim with positioning of the shower curtain or door (Tip 3).
Why these first steps matter (more than you’d think)
Tiles are often considered “easy” because the tile face is usually non-porous, but grout is porous and absorbs whatever lingers at the surface. That means your biggest wins typically happen before you even pick a cleaner—by preventing grit and residue from becoming stuck, dried, and embedded.
A practical way to think about it: every shower leaves three layers behind—(1) a thin soap film, (2) mineral residue from water, and (3) moisture trapped long enough to discolor grout. If you remove or shorten any one of those layers, the next two become easier to manage.
Reduce soap scum and hard-water marks (Tips 4–6)
You reduce stubborn spots fastest by cutting the time soap and minerals have to bond to the tile surface. Hard-water spotting and soap scum aren’t “random stains”—they’re dried residue, and drying time is the lever you control.
– Squeegee right after every shower: Spend 30–60 seconds clearing water so minerals and soap don’t dry onto the surface (Tip 4).
– Choose the gentlest cleaner that works: For routine maintenance, use a mild, non-scratching cleaner instead of harsh products that can leave residue (Tip 5).
– Don’t let “spots” sit overnight: If you notice hard-water specks or soap drips, address them same day to prevent etching and stubborn buildup (Tip 6).
Squeegeeing: the prevention step with the highest payoff
Squeegeeing isn’t a “deep clean.” It’s a timing change. By removing a majority of standing water right after the shower, you reduce how long minerals (calcium and magnesium) have to crystallize on the surface.
If you want a reality check: hard water severity varies widely. According to the USGS Water Science School, hardness is measured in mg/L as CaCO₃, with “hard” commonly starting around 121–180 mg/L and “very hard” often above 180 mg/L. In those higher ranges, spotting and scale build faster—so your 30–60 seconds of prevention matter more than in a low-hardness home.
Cleaner choice: gentler often prevents repeating cycles
Many people “solve” soap scum with aggressive cleaners, but aggressive products can leave their own residues or interact with tile finishes and grout surfaces. Soap scum (often a mix of fatty acids plus minerals) can redeposit if you rinse unevenly or if a product leaves a film that attracts more grime.
From a maintenance perspective, I’ve seen the same pattern repeated in homes and common areas: once the routine shifts from “scrub until it looks better” to “remove film quickly and avoid harsh residues,” the cleaning frequency drops.
Protect grout and keep surfaces drying (Tips 7–9)
You keep grout looking lighter and cleaner longer by preventing moisture from lingering in grout lines and by protecting grout from staining. Drying speed + surface protection is what breaks the cycle of darkening and mildew risk.
– Seal grout when it’s appropriate: Sealing helps grout resist staining and speeds up future cleaning—check your grout type first (Tip 7).
– Dry grout lines too: After squeegeeing, do a quick pass with a dry cloth or microfiber along grout where water tends to linger (Tip 8).
– Ventilate to cut mildew risk: Use the exhaust fan (or open airflow) long enough to reduce humidity after showers (Tip 9).
Moisture is the driver of grout discoloration and mildew
Grout darkens when water sits in the pores and when organic residues collect in damp conditions. Mold and mildew risk isn’t theoretical: according to the CDC, mold can begin growing on damp surfaces within 24–48 hours.
Ventilation helps by lowering relative humidity after showers. According to the EPA, keeping indoor humidity below 60% helps prevent mold growth. That’s why “run the fan until the steam clears” is more than a comfort habit—it’s a control method.
Drying grout lines: the overlooked 10%
A squeegee helps, but grout lines often hold residual moisture due to capillary action and surface texture. A quick microfiber pass along grout after squeegeeing can be the difference between “grout looks fine now” and “grout stays lighter for weeks.”
This is also where prevention-first thinking (a root-cause mindset) helps: you’re not trying to erase buildup after it bonds—you’re preventing water retention, which is the root cause behind many recurring grout problems.
Typical pH of Common Bathroom Cleaners (and Neutrality Index)
| # | Cleaner/Ingredient | Typical pH* | Avg. distance from pH 7 | Neutrality Index (0–10) |
|---|---|---|---|---|
| 1 | Distilled/Deionized water | 7.0 | 0.0 | ★ ★ ★ ★ ★ (10.0) |
| 2 | Baking soda (sodium bicarbonate) solution | 8.3 | 1.3 | ★ ★ ★ ★ ☆ (8.1) |
| 3 | Hydrogen peroxide (3% solution) | 3.5 | 3.5 | ★ ★ ★ ★ ☆ (5.0) |
| 4 | White vinegar (acetic acid) | 2.5 | 4.5 | ★ ★ ★ ☆ ☆ (3.6) |
| 5 | Lemon/citric acid solutions (typical) | 2.0 | 5.0 | ★ ★ ★ ☆ ☆ (2.9) |
| 6 | Household ammonia (typical) | 11.5 | 4.5 | ★ ★ ★ ☆ ☆ (3.6) |
| 7 | Sodium hypochlorite bleach (typical) | 12.5 | 5.5 | ★ ★ ☆ ☆ ☆ (2.1) |
pH varies by concentration and formulation. Neutrality Index is calculated from average distance from pH 7; this table is meant to support safer routine-cleaning choices, not to replace manufacturer guidance.
What can go wrong (and when to adjust)
Prevention can backfire if you correct the wrong variable, use incompatible chemicals, or rely on “looks clean” when moisture is still present. If your bathroom has unusual tile materials or aging grout, you’ll need to adjust the routine instead of forcing the same steps everywhere.
– Using the wrong cleaner for the tile finish: Some acids or abrasive tools can damage certain surfaces or finishes—test in a small, hidden spot first.
– Over-scrubbing grout: Heavy brushing and repeated aggressive chemicals can wear down grout over time, especially if it’s older or already fragile.
– Skipping sealing if you can’t maintain it: If your grout isn’t sealed (or the seal has failed), prevention still helps—but you may need different expectations about staining.
Quick comparison: prevention-first vs “clean only when it looks bad”
This is the trade-off most homeowners feel after a few weeks: prevention reduces buildup, while reactive scrubbing often becomes a repeating cycle.
| Feature | Prevention-first routine | Reactive “scrub when it’s visible” |
|---|---|---|
| Typical effort | Low daily touch-ups | Higher periodic scrubbing |
| Buildup driver addressed | Soap film + drying time + moisture | Mainly visible residue |
| Grout longevity | Generally better (less abrasion) | More risk with repeat deep cleaning |
| Hard-water spotting | Reduced via squeegee timing | Often persists until more aggressive cleaning |
| Time to “reset” | Faster between cleanups | Slower after scale sets |
| Chemical compatibility risk | Lower (gentler products more often) | Higher (more frequent strong cleaners) |
| Mildew risk | Lower with ventilation + drying | Higher if moisture stays |
| Consistency needed | Moderate daily habit | Less daily effort, more heavy days |
| Best for busy households | Yes—micro-steps prevent major work | Only if buildup isn’t severe |
| Best For | Homes needing fewer deep cleans | Bathrooms with rare use |
Verdict: a realistic prevention plan that’s worth it
A prevention-first routine is the fastest way to keep bathroom tiles clean longer because it tackles the cause (residue + drying time), not just the symptoms (stains you scrub later). The downside: it requires small habits (squeegee, quick rinses, airflow) more than occasional deep cleaning—so if you want a “set it and forget it” approach, this may feel like extra steps.
Skip or adjust these tips if you have damaged/crumbling grout or unknown tile material and can’t confirm what cleaners or sealing your surface can handle. If your grout is already deteriorating, too much brushing or chemical exposure can accelerate the problem.
| Criteria | Option A: Prevention (Tips 1–9) | Option B: Reactive scrubbing |
|---|---|---|
| Primary goal | Reduce residue + moisture retention | Remove visible buildup after it forms |
| Hard-water spotting | Lower (squeegee prevents crystallization) | Higher (scale has time to set) |
| Soap scum growth | Slower (rinse + drying) | Faster (film dries and bonds) |
| Grout wear risk | Lower (less abrasion) | Higher (frequent heavy cleaning) |
| Time investment pattern | Small, consistent steps | Bigger sessions |
| Chemical exposure frequency | Lower (gentle cleaners more often) | Higher (stronger products more often) |
| Mildew risk | Lower with ventilation + drying | Higher when humidity lingers |
| Learning curve | Easy—few repeatable habits | Steeper—more experimentation |
| Best results timeframe | Weeks (not days) | Immediate but returns quickly |
| Costs over a year | Usually lower (less product + labor) | Often higher (more replacements + deep cleans) |
| Verdict | Choose prevention for cleaner-looking tile longer | Use reactive scrubbing only when buildup is unavoidable |
Quick scan checklist (save this)
| Habit | When | What to look for |
|---|---|---|
| Squeegee tiles | After each shower | Water not drying in streaks/marks |
| Quick rinse | After shower | Reduced soap film on walls/floor |
| Bath mat + quick wipe | Daily/first pass | Less tracked-in grime |
| Gentle cleaner | Routine touch-ups | No sticky residue left behind |
| Same-day spot cleanup | When you see drips/spots | Fewer stubborn stains later |
| Ventilate | After shower | Less lingering steam/humidity |
| Dry grout lines | After squeegeeing | No damp grout edges |
| Seal grout (if suitable) | As needed | Better stain resistance |
| Keep splashes contained | Ongoing | Less water reaching grout/edges |
Frequently Asked Questions
What are the best ways to prevent bathroom tile grime from building up fast?
Start by controlling moisture—run the exhaust fan during and after showers and fix leaks promptly to reduce soap scum and mildew growth. Use a gentle, pH-neutral bathroom tile cleaner regularly instead of waiting for heavy buildup. Also wipe down tiles and glass after heavy water use so mineral deposits and grime don’t have time to bond to grout and tile surfaces.
How do you stop soap scum and hard water spots from sticking to bathroom tiles?
Create a routine that targets soap residue right after it forms: a quick wipe with warm water followed by a squeegee can significantly reduce buildup. For hard water spots, use a cleaner designed for limescale and rinse thoroughly to prevent residue from attracting more dirt. Avoid harsh acidic products too frequently on natural stone tiles, and always test in a small area first.
Why does grout get dirty faster than tile, and how can you prevent it?
Grout is porous, so it absorbs water, oils, and cleaning residue that lead to discoloration and mold. Seal grout with a high-quality grout sealer to create a protective barrier, then reapply based on the product’s recommended timeline. Keep grout lines clean by using a soft brush and non-scratch tools, and avoid letting spills sit for long periods.
Which cleaning tools and materials are safest for long-lasting clean bathroom tiles?
Choose microfiber cloths, a grout brush with soft-to-medium bristles, and a non-scratch scrub pad to protect tile finishes and prevent micro-scratches. Use non-abrasive, tile-safe cleaners to maintain shine and reduce the risk of dulling glazed surfaces. Skip steel wool and aggressive scouring powders, which can damage grout and leave rough surfaces that trap dirt.
How often should you clean bathroom tiles to keep them looking spotless longer?
Aim for quick maintenance weekly—wipe tiles, rinse, and dry high-use areas to prevent soap scum and limescale buildup. Do a deeper clean every 2–4 weeks with a bathroom tile cleaner that’s appropriate for your tile type (ceramic, porcelain, or natural stone). If your bathroom has hard water or poor ventilation, you may need more frequent spot cleaning, especially on shower walls and grout lines.
📅 Last Updated: November 08, 2026 | Topic: How to Keep Your Bathroom Tiles Clean Longer: 9 Prevention Tips | Content verified for accuracy and freshness.
References
- https://www.cdc.gov/mold/default.htm
- https://www.epa.gov/mold/mold-and-mildew
- https://www.who.int/publications/i/item/9789289041687
- Soap scum
- Hard water
- Grout
- bathroom mold prevention humidity ventilation cleaning – Search Results – PubMed
- https://scholar.google.com/scholar?q=bathroom+tile+cleaning+soap+scum+grout+sealing Google Scholar
- https://scholar.google.com/scholar?q=indoor+mold+prevention+humidity+ventilation+bathrooms Google Scholar
- https://scholar.google.com/scholar?q=ceramic+tile+and+grout+surface+cleaning+efficacy+study Google Scholar

[…] can restore bathroom tiles to a clean, mold-free finish by removing black mold from grout lines and tile surfaces with the right cleaners and careful scrubbing. This step-by-step approach walks […]