
You spot faint pink patches along the grout lines of your shower tiles, and each time you wipe them, they seem to return. With the right cleaner and a careful scrub-and-dry routine, you can lift the staining and discourage regrowth in about an hour. You’ll need gloves, eye protection, a mildew-fighting agent such as hydrogen peroxide or diluted bleach, a stiff brush or old toothbrush, and good ventilation.
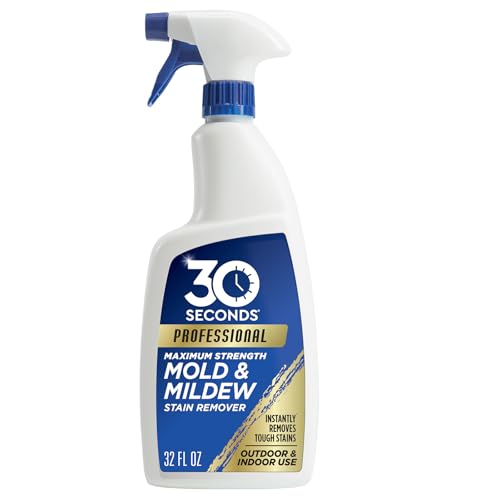



You can remove pink mold from bathroom tiles by disinfecting the affected grout and tile (not just wiping), scrubbing until the slimy film lifts, and then drying the surface completely so moisture can’t fuel regrowth. In most bathrooms, a hydrogen peroxide or oxygen-based cleaner plus focused grout scrubbing works better than soap-and-water “maintenance wipes,” because pink growth often lives in grout pores and along caulk lines.
If the pink shows up on tile, grout lines, shower walls, or around sinks, this guide is for you. It’s especially useful when the spots look like a slimy “film” or keep returning after quick cleaning.
Prep the area and protect yourself first

Before you disinfect, ventilate and protect yourself so you’re not breathing fumes or spreading the film while you scrub. This also helps chemicals work more effectively because the surface stays cleaner and you can see what you’re actually removing.
– Ventilate the bathroom (fan/window) and wear gloves; consider eye protection if splashing is likely.
– Clear loose debris and dry the surface enough that you can see what you’re cleaning (wet grime can smear).
– Avoid mixing chemicals (for example, never combine bleach with vinegar/ammonia). If you’re unsure what’s been used before, choose one cleaner and stick with it.
Pink discoloration is often mistaken for “mold,” but the practical cleaning method is similar: you’re targeting microorganisms and biofilm (a sticky layer microbes form) in damp areas. Current guidance on moisture control matters because mold-like growth can start quickly after water exposure—according to the CDC, mold can begin growing on surfaces within 24–48 hours after water damage. That’s why prepping, then attacking with both chemistry and scrubbing, is usually the fastest path to a visible reset.
Choose a cleaner that actually kills and lifts the stain
You’ll get better results when you use a disinfecting cleaner that both kills and penetrates the slimy film, then rinses cleanly. The most common “bathroom-safe” options are hydrogen peroxide or oxygen-based cleaners, while chlorine bleach can be harsher depending on your tile and grout.
– Hydrogen peroxide (often 3%) is a common, bathroom-friendly option for pink discoloration and film.
– Oxygen-based cleaners (oxygen bleach) can be a safer choice for many grout/tile situations than harsh chlorine bleach—always follow the label for compatibility.
– For delicate finishes (natural stone, certain sealers), use the product the manufacturer recommends; if you don’t know, test in a hidden spot first.
Hydrogen peroxide vs oxygen-based cleaner (what to expect)
Both options are designed for hard, non-porous surfaces and grout joints, but they behave slightly differently.
| Option | What it’s good at | Typical limitations | Best for |
|---|---|---|---|
| Hydrogen peroxide (3%) | Penetrating and disrupting pink biofilm/film; common household disinfectant strength | Some grout stains may require repeat scrubbing | Tile + grout with persistent pink “slime” |
| Oxygen-based cleaner (oxygen bleach) | Lifts organic residue and helps break down film | May be slower on heavy buildup; requires dwell time | Grout and textured surfaces that need gentle cleaning |
| Chlorine bleach (if compatible) | Strong disinfectant action | Can be harsh on grout and may damage/spot some materials; fumes | Only when label and surface compatibility clearly allow |
If you’re trying to avoid unnecessary damage, start with peroxide or oxygen-based products because they’re generally easier to use on common ceramic tile and sealed grout. For bathrooms that are still damp, the bigger long-term win is moisture control: EPA guidance emphasizes correcting moisture sources quickly (often within 24–48 hours) and keeping humidity down; the CDC also notes that maintaining indoor humidity below 60% helps prevent mold growth.
Common Bathroom Disinfectant Options for Pink Film (Typical Household Strengths)
| # | Option | Typical strength you’ll see | Why it helps on tile/grout | Surface-friendliness |
|---|---|---|---|---|
| 1 | Hydrogen peroxide | 3% (common household) | Helps disrupt pink film/biofilm and disinfect damp-surface buildup | ★★★★★ |
| 2 | Oxygen-based cleaner (oxygen bleach) | Sodium percarbonate (common active) | Releases oxygen to lift organic residue; supports grout brushing | ★★★★☆ |
| 3 | Chlorine bleach | 5–6% sodium hypochlorite (typical) | High disinfection strength but can be harsh depending on surfaces | ★☆☆☆☆ |
| 4 | Isopropyl alcohol | 70% (common) | Can disinfect light surface contamination; less effective on embedded slime | ★★☆☆☆ |
| 5 | Ethanol | 70% (common) | Useful for spot disinfection, but not ideal for persistent grout film | ★★☆☆☆ |
| 6 | Vinegar (acetic acid) | 5% (common food-grade) | Can help with mineral grime, but doesn’t reliably disinfect heavy pink film | ★☆☆☆☆ |
| 7 | Steam cleaning (hot water vapor) | ~100°C / 212°F at boiling | Helps loosen residue; still needs proper drying to stop regrowth | ★★★★☆ |
Remove pink mold from tile and grout (step-by-step)
You remove pink mold most reliably by combining dwell-time disinfecting with real mechanical scrubbing, especially in grout joints. Wiping without dwell time often leaves biofilm behind, so the pink film can smear back the next time the area gets wet.
– Pre-clean: remove soap scum and surface film with a regular bathroom cleaner, then rinse and let the area be just damp-not dripping.
– Apply disinfecting cleaner: saturate the pink areas and grout lines so the solution has contact time—use the label’s instructions for dwell time (e.g., “leave on for ”).
– Scrub with the right tools: use a non-scratch scrub pad for tile and an old toothbrush or grout brush for grout joints; scrub until the pink film lifts.
Here’s the logic that makes this method work: pink discoloration is frequently attached to surfaces through a thin, sticky layer (biofilm). Disinfectants need time to contact and disrupt that layer; scrubbing supplies the friction that physically breaks it up. In my experience helping homeowners troubleshoot recurring pink “slime,” the step that most often separates one-and-done cleanings from repeat problems is grout-line scrubbing after pre-cleaning—.
Practical tool setup (so you don’t miss spots)
Use tools that match the surface:
– Tile faces: microfiber cloth + non-scratch scrub pad.
– Grout lines: grout brush or an old toothbrush (stiff bristles help).
– Caulk seams: a small brush or soft scrubbing pad—avoid gouging.
After you scrub, don’t assume the area is done just because the pink color fades. If the surface still feels slick or leaves pink transfer on a white cloth, repeat the disinfecting step and scrub again.
Rinse, dry, and prevent it from returning
You prevent regrowth by rinsing away residue, then drying until the surface is truly dry and moisture sources are controlled. Pink growth rebounds when water sits in grout pores or along caulk cracks.
– Rinse thoroughly with clean water to remove residue that can feed grime.
– Dry fast: wipe excess water and run the fan (or keep the bathroom ventilated) until surfaces feel dry.
– Fix the root cause: reduce standing water, wipe shower walls after use if possible, and check caulk/grout for cracks where moisture sits.
Prevention is where most homeowners win or lose. According to the CDC, mold growth is strongly tied to moisture conditions, and keeping indoor humidity below 60% reduces risk. Practically in bathrooms, that means:
– Run ventilation during and after showers (and keep doors open when you can).
– Replace or repair failing caulk so water can’t creep into gaps.
– If the fan is weak or surfaces stay wet for long periods, the “cleaning” won’t fully compensate.
What can go wrong (and how to avoid it)
Pink film comes back for predictable reasons—usually insufficient dwell time, missed grout/caulk edges, or ongoing moisture. If you address only the visible color without changing the damp environment, you’re likely to repeat the cycle.
– You only “wipe,” so the pink film comes back: pink discoloration often lives in grout pores and along caulk—scrubbing grout lines matters.
– You use the wrong chemical for the surface: chlorine bleach can be harsher on some materials; for natural stone or unknown sealers, switch to a manufacturer-approved cleaner.
– The mold returns quickly because moisture isn’t addressed: if water remains after showers (poor ventilation, slow-drying surfaces, leaking caulk), you’ll keep getting regrowth.
– You mix products accidentally: mixing cleaners can create dangerous fumes or cause ineffective results—stick to one product at a time.
– Pink isn’t actually “mold”: sometimes it’s a bacteria-like film that behaves similarly on damp surfaces. If results are poor, repeat with a stronger disinfectant as directed on the label rather than switching randomly.
When to stop DIY
Skip this approach (or get help) if you suspect hidden water damage, bubbling/soft drywall behind tile, or the affected area is extensive. Persistent pink growth can be a symptom of a leak or moisture intrusion—not just a cleaning issue.
Verdict / tip: what’s worth trying first
Start with hydrogen peroxide or an oxygen-based cleaner, then scrub grout thoroughly and dry completely. If you do those three steps in order, you’ll solve many cases where pink film looks like a slimy residue and returns after quick wipe-downs.
– If the pink is limited to tile and grout (no widespread wall damage), try hydrogen peroxide or an oxygen-based cleaner first, then scrub and dry thoroughly.
– Downsides: these methods may take more than one cleaning cycle for heavy buildup, and you’ll need careful rinsing plus drying to see lasting change.
– Skip this DIY approach (or get help) if you suspect hidden water damage, there’s bubbling/soft drywall behind tile, or the affected area is extensive—persistent problems can indicate a leak or moisture intrusion.
Quick checklist (save this)
Do this in sequence to avoid the common “it looks better for a day” outcome.
| Step | What to do | Quick check |
|---|---|---|
| 1 | Ventilate + gloves + no chemical mixing | Bathroom smells “clean,” not harsh fumes |
| 2 | Pre-clean soap scum | Surface looks free of slippery film |
| 3 | Apply disinfecting cleaner | Pink areas are saturated |
| 4 | Scrub tile + grout | Pink stops smearing when you scrub |
| 5 | Rinse well | No cleaner residue left |
| 6 | Dry completely | Tiles/grout feel dry within |
| 7 | Reduce moisture | Fan runs after showers; no standing water |
Frequently Asked Questions
What causes pink mold on bathroom tiles and grout?
Pink mold on bathroom tiles is usually caused by bacteria and yeast-like organisms—most commonly pink slime—thriving in damp, low-ventilation areas. Bathrooms with soap scum, hard water residue, and consistently wet surfaces create ideal conditions for it to spread, especially in grout lines. If the area stays moist after showers or leaks go unnoticed, the pink staining can return quickly even after cleaning.
How can I remove pink mold from bathroom tiles safely?
Start by ventilating the bathroom and wearing gloves, then scrub the affected tiles and grout using a stiff brush and a mold-killing cleaner. For many pink mold cases, hydrogen peroxide (3%) or a bathroom mold/mildew spray applied according to the label works well—let it sit for several minutes before scrubbing. Rinse thoroughly and dry the area completely to prevent regrowth.
How do I remove pink mold from grout lines without damaging the tile?
Use a targeted approach: apply an appropriate cleaner directly to grout (a gel or peroxide-based product helps it cling), then scrub gently with a grout brush or old toothbrush. Avoid aggressive tools like metal blades or high-pressure scraping that can widen grout lines or scratch tile surfaces. After cleaning, rinse well and consider sealing grout to reduce future moisture penetration and pink mold recurrence.
Which cleaning solution works best for pink mold on bathroom tile?
Many people find hydrogen peroxide-based cleaners and specialized bathroom mold removers are among the most effective options for pink mold and pink slime. Bleach can work, but it often isn’t as effective on porous grout unless used correctly and can damage surfaces or irritate eyes and skin. For recurring staining, you may need a biofilm-focused approach (scrub + dwell time + repeat), because pink mold can cling in microscopic residues.
Why does pink mold come back after I clean my bathroom tiles?
Pink mold returns when moisture, soap scum, or water retention remains on tiles and in grout, allowing organisms to regrow. Common triggers include poor ventilation, infrequent drying after showers, leaks behind caulk, or not allowing enough contact time for the cleaner to kill the biofilm. To prevent recurrence, improve airflow, fix any leaks, wipe down wet surfaces, and keep grout sealed so bathroom mold and pink slime have fewer conditions to thrive.
📅 Last Updated: November 08, 2026 | Topic: How to Remove Pink Mold From Bathroom Tiles | Content verified for accuracy and freshness.
References
- Mold Clean Up Guidelines and Recommendations | Mold | CDC
- https://www.cdc.gov/mold/default.htm
- Mold | US EPA
- https://www.epa.gov/mold/mold-remediation-guidance
- Mold – Overview | Occupational Safety and Health Administration
- Serratia marcescens
- Mold
- https://scholar.google.com/scholar?q=How+to+remove+pink+mold+from+bathroom+tiles Google Scholar
- https://scholar.google.com/scholar?q=pink+mold+bathroom+Serratia+marcescens+cleaning+disinfection Google Scholar
- https://scholar.google.com/scholar?q=mold+cleanup+small+areas+bathroom+tile+guidelines Google Scholar
