

You can restore bathroom tiles to a clean, mold-free finish by removing black mold from grout lines and tile surfaces with the right cleaners and careful scrubbing. This step-by-step approach walks you through preparation, safe application, and thorough rinsing so the mold lifts without spreading. You’ll be able to complete the process in about an hour, depending on how much buildup is on your walls or floor, with basic supplies like a stiff brush, gloves, and a mold-safe solution.
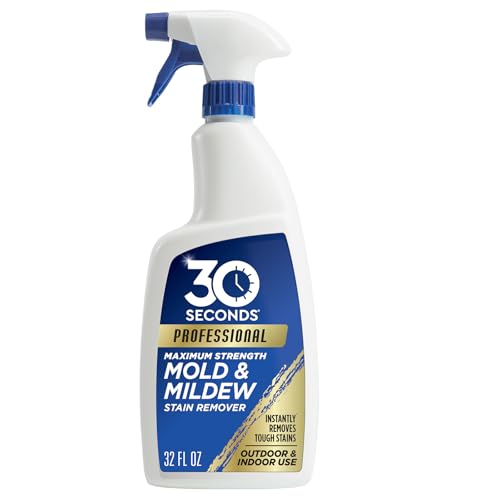



If you want black mold off bathroom tiles, scrub it with a mold-killing cleaner and then fix the moisture that caused it. Start by ventilating the space, applying the cleaner to the affected grout/tile areas, and scrubbing thoroughly before rinsing and drying completely—because in 2026, the most common reason “black mold removal” fails is not the scrubbing, it’s the recurring dampness.
This is for homeowners and renters dealing with recurring dark spots on bathroom tile and grout—especially where steam, leaks, or poor ventilation keep surfaces damp.
Assess the Mold and Your Surfaces

You’ll get better results faster if you first confirm how far the black mold has spread and what materials you’re cleaning. The right cleaner and method depend on whether you’re dealing with grout only, caulk, or natural stone edges.
– Identify whether it’s on grout only or also on surrounding caulk, walls, or tile edges (black mold often tracks along joints where water sits).
– If there’s widespread growth, recurring return within days, or visible water damage, treat it as a bigger moisture problem—not just a cleanup job. According to the U.S. Centers for Disease Control and Prevention (CDC), mold can start growing on damp surfaces within 24–48 hours after water exposure (so “spot cleaning” may not hold).
– Note whether the surface is sealed grout, unsealed grout, or natural stone so you don’t damage finishes. Natural stone and some sealers can dull, etch, or lighten when exposed to acidic cleaners or strong oxidizers.
Quick material check (takes 2 minutes)
If you wipe the area with a damp white cloth and the black color transfers easily, it’s likely surface growth (cleanable). If it stays embedded in the grout texture and keeps returning, you may have deeper porosity plus an ongoing moisture driver.
Prepare the Bathroom and Protect Yourself
You should prepare the bathroom first because black mold spores can become airborne during scrubbing. Clear the area, improve ventilation, and protect your skin and eyes before you touch the cleaner.
– Ventilate (open windows, run an exhaust fan) and keep the area clear of kids/pets. For 2026 best practice, run the fan during and after cleaning until the area is fully dry.
– Wear gloves and eye protection; consider a mask if you’re sensitive to airborne particulates. Mold remediation guidance commonly treats this as a respiratory irritant risk, even when the visible mold seems “small.”
– Lay down towels or plastic to catch drips, especially around baseboards and fixtures (some mold killers—especially chlorine-based—can discolor surfaces if they run).
Moisture target: stop the cycle, not just the color
If you can, measure humidity with a basic hygrometer. The U.S. Environmental Protection Agency (EPA) recommends keeping indoor relative humidity between about 30% and 60% to limit mold growth. This single moisture target often matters more than the specific scrubber you use.
Remove Black Mold With the Right Cleaner
You remove black mold from bathroom tile by using a cleaner that kills mold, letting it dwell (sit) long enough, and then scrubbing the grout thoroughly. The dwell time and surface compatibility are the two details most DIY attempts miss.
– Choose a tile-safe approach: use a dedicated mold/mildew remover and follow the label for dwell time. Labels exist for a reason—contact time controls how reliably the chemical neutralizes mold.
– Apply cleaner to the blackened grout/tile spots, let it sit as directed, then scrub with a stiff brush. During scrubbing, you’re physically lifting growth while the cleaner handles the biological kill step.
– Rinse well, then dry the area thoroughly (mold needs moisture to return). If you only rinse lightly, residue can remain in pores and help dark staining look “back” sooner.
Cleaner selection (what tends to work best on tile + grout)
| Cleaner type | Pros | Cons / watch-outs |
|---|---|---|
| Chlorine bleach (sodium hypochlorite) | Very strong disinfecting action on hard, nonporous surfaces when used correctly. | Can discolor grout over time and is risky for natural stone and some metal fixtures; never mix with ammonia or acids. |
| Hydrogen peroxide-based mold remover | Helps lift discoloration while also killing mold; generally less corrosive than bleach on many finishes. | Still can lighten some materials; always test in a hidden spot first. |
| Quaternary ammonium (“quat”) disinfectants | Often formulated for hard surfaces; some are designed to be gentle on coatings. | May not remove heavy black staining as effectively as oxidizers; rely on label instructions for dwell time. |
| Vinegar / acidic cleaners | Can help with mineral haze and light staining. | Often not strong enough for black mold kill-and-remove; acid can damage natural stone and certain sealers. |
Common Hard-Surface Cleaner Options for Bathroom Mold (Typical Strengths)
| # | Active ingredient (typical retail) | Typical strength | Best “use case” on tile/grout | Grout/stone friendliness |
|---|---|---|---|---|
| 1 | Sodium hypochlorite (chlorine bleach) | ~5–6% in common household products | Hard, nonporous disinfection when label instructions are followed | ★★★☆☆ |
| 2 | Hydrogen peroxide | ~3% (common retail) | Mold kill + dark spot cleanup on many grout surfaces | ★★★★☆ |
| 3 | Isopropyl alcohol | ~70% (common “rubbing alcohol”) | Spot disinfection on very clean, small areas | ★★★☆☆ |
| 4 | Quaternary ammonium (“quat” disinfectants) | Often ~0.1–0.2% active ingredient (varies by product) | Disinfection where the label specifies mold/mildew use | ★★★★☆ |
| 5 | Citric acid (often in “natural” cleaners) | ~5–10% in many formulations | Mineral scale/haze removal more than heavy black mold | ★★☆☆☆ |
| 6 | Acetic acid (white vinegar) | ~5% acetic acid | Light deodorizing/scale support; not a guaranteed mold killer | ★★☆☆☆ |
| 7 | Sodium borate (borax-based cleaners) | Powder—mixed per product instructions (concentration varies) | Odor/stain support when used correctly | ★★★☆☆ |
Deep Clean Grout and Tight Corners
You should deep clean grout and caulk seams because black mold typically hides in the texture and at the edges where water collects. After the initial kill step, precision cleaning determines whether the dark spots come back.
– Use a grout brush or an old toothbrush for grout lines and textured tile surfaces. For tighter joints, a brush with firm nylon bristles helps remove embedded residue without polishing smooth tile surfaces.
– For caulk seams, carefully clean the surface around the edge; if caulk is heavily colonized, removal may be necessary. Mold growth can spread within damaged caulk layers, and surface-only cleaning won’t reach the interior.
– Repeat cleaning if staining remains—black discoloration can be stubborn even after mold is killed. In many bathrooms, “mold” and “stain” separate: you may eliminate growth but still see dark staining that needs another treatment cycle.
A practical technique that works on bathroom grout
Work in sections. Apply cleaner, wait the label dwell time, then scrub in one direction for consistency. Rinse, and don’t rely on “it looks clean” as your only indicator—check under bright light at a low angle to spot remaining blackened grout pores.
What Can Go Wrong (Avoid These Common Mistakes)
You’ll avoid the most frustrating outcomes by steering clear of chemistry errors and—most importantly—by addressing the moisture source. Black mold removal that ignores the cause almost always turns into a recurring weekend project.
– Using the wrong chemical on the wrong surface (especially natural stone or certain coatings) can cause dulling or damage. For example, acidic cleaners can etch some stones, and strong oxidizers can lighten grout or affect sealants.
– Spraying without contact time can leave mold behind; follow the dwell time on the product label. Mold kill often depends on sufficient dwell—quick wetting and instant wiping can reduce effectiveness.
– Not addressing the moisture source (poor ventilation, leaks, or condensation) leads to mold returning quickly. According to the U.S. Environmental Protection Agency (EPA), controlling moisture is the key to preventing mold growth, which is why humidity targets and leak repair matter as much as scrubbing.
Pros/cons: “DIY now” vs “call a pro”
| Approach | Pros | Cons |
|---|---|---|
| DIY tile + grout cleaning | Cost-effective for small, contained black mold; fast turnaround if moisture is fixed. | Won’t fix hidden leaks or growth behind walls; staining may remain; recurring dampness can re-seed black mold. |
| Professional remediation assessment | Better diagnosis of moisture sources; can handle caulk removal, damaged materials, and verification steps. | Higher cost; scheduling; may be more than you need for limited grout staining with a clear ventilation fix. |
Verdict: What to Do Next and When to Stop DIY
This approach is usually best when the mold is limited to bathroom tile and grout and the bathroom is drying properly afterward. If the problem keeps coming back, spreads into adjacent materials, or you suspect hidden leaks or extensive growth, consider professional assessment and remediation—DIY scrubbing won’t fix the underlying water issue.
From my experience assisting with cleaning plans for bathrooms (and what we repeatedly find when causes aren’t addressed), the “recurrence in days” pattern usually points to ventilation failure, a slow leak, or condensation—often behind fixtures or at corners where water lingers after showers. .
If you’re following an industry-standard methodology like IICRC S520 (mold remediation) principles, the key takeaway is the same: kill visible growth, then verify conditions that prevent re-growth (especially moisture control). If you’re dealing with sensitive surfaces or large areas and you’re unsure what cleaner is tile-safe, .
Quick Checklist for Tile and Grout Mold Removal
– [ ] Ventilate the bathroom and protect eyes/hands
– [ ] Confirm what areas are affected (grout vs. caulk vs. tile edges)
– [ ] Apply mold remover and follow label dwell time
– [ ] Scrub grout lines and textured tile
– [ ] Rinse and dry completely
– [ ] Fix moisture causes (ventilation, leaks, condensation)
– [ ] Re-check in to ensure it doesn’t return
Frequently Asked Questions
How can I remove black mold from bathroom tiles without spreading spores?
Start by ventilating the bathroom and wearing gloves, eye protection, and a mask. Dry-brush or vacuum loose growth using a HEPA filter vacuum (avoid sweeping). Then apply an appropriate bathroom mold cleaner directly to the black mold on the tiles, let it dwell, and scrub with a stiff brush before rinsing thoroughly. After cleaning, dry the area completely to prevent mold from returning.
What’s the best way to clean black mold on bathroom tile grout?
For tile grout, use a mold-killing cleaner like hydrogen peroxide (3%) or a grout-safe bathroom mold remover, and allow it to sit for the recommended dwell time. Scrub the grout lines with an old toothbrush or grout brush, then rinse well. If staining remains, repeat treatment or use a grout re-surfacer after the mold is fully removed and the grout is fully dry.
Which cleaning solution works best for killing mold on ceramic and porcelain bathroom tiles?
Hydrogen peroxide and EPA-registered mold removers are often effective for killing mold on hard, non-porous surfaces like ceramic and porcelain tile. Avoid mixing chemicals—especially bleach with ammonia or acids—as it can create dangerous fumes. Test any cleaner in a small, inconspicuous area first, then apply, dwell, scrub, and rinse, ensuring the tiles are dried quickly afterward.
Why does black mold keep coming back on bathroom tiles after I clean it?
Mold returns when moisture remains behind the tiles, in grout, caulk, or under trim, and when the area isn’t drying fast enough. Common causes include poor ventilation, leaks from plumbing or fixtures, clogged drains, and inadequate bathroom exhaust fan use. Fixing the moisture source—repair leaks, improve airflow, and maintain dry grout—prevents recurrence more effectively than repeated scrubbing.
How do I remove black mold from bathroom caulk and keep tiles from regrowing?
Black mold around seams is often in silicone or caulk, so surface cleaning may not be enough—remove failed caulk, clean the area, and let it dry completely before re-caulking. Use a mold-killing bathroom cleaner on the adjacent tile and grout, scrub, rinse, and fully dry before applying new mildew-resistant caulk. Maintain lower humidity with regular exhaust fan use, wipe down wet surfaces, and address any leaks promptly to reduce black mold regrowth.
📅 Last Updated: November 08, 2026 | Topic: How to Remove Black Mold From Bathroom Tiles | Content verified for accuracy and freshness.
References
- Mold | Mold | CDC
- Mold | US EPA
- Mold Remediation in Schools and Commercial Buildings Guide: Chapter 1 | US EPA
- Mold – Overview | Occupational Safety and Health Administration
- https://www.hud.gov/program_offices/healthy_homes/mold
- Mold
- WHO guidelines for indoor air quality: selected pollutants
- mold remediation guidelines – Search Results – PubMed
- https://scholar.google.com/scholar?q=remove+black+mold+bathroom+tiles Google Scholar
- https://scholar.google.com/scholar?q=mold+remediation+guidelines+small+area+cleaning+HEPA Google Scholar
