

Pink mold on bathroom tiles usually points to a lingering moisture problem and soap and body residue that create a slimy surface where pigments can take hold. The common mistake is scrubbing without removing the film or drying the area afterward, so it returns quickly. With the right tile-safe cleaner, a stiff brush, and a thorough rinse and ventilation routine, you can typically clear it in about 30–45 minutes and help prevent it from coming back.
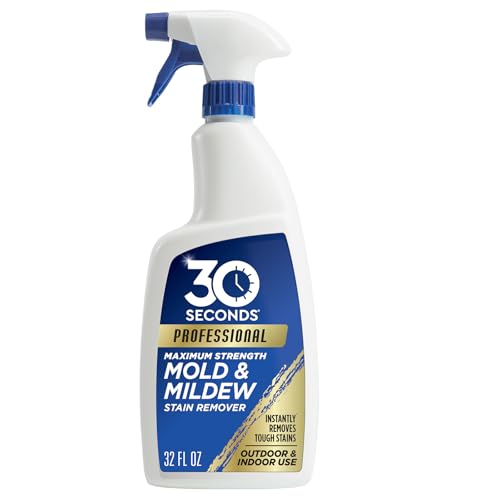



Pink “mold” on bathroom tiles is usually a bacterial film (often called pink slime) that thrives in constant moisture—not a true mold that spreads like mildew. To clean it, scrub with an appropriate disinfectant cleaner, then remove the wet conditions (humidity, leaks, soap residue) that keep feeding it. If the pink comes back quickly after “surface stain” cleaning, your real fix is disinfect + prevent moisture/repeat grime.
If your bathroom stays steamy, has poor ventilation, or you routinely see pink streaks around grout, caulk, or tile edges, this guide is for you—especially if cleaning “surface stains” hasn’t stopped the pink from coming back.
Why pink mold forms on bathroom tiles

Pink growth forms when bacteria settle on damp surfaces and build a slimy biofilm. That biofilm can look pink, coppery, or salmon-colored, and it often reappears if the surface never fully dries.
– It grows from moisture plus organic residue (soap scum, hair, body oils) that creates a surface for bacteria to cling to.
– Bathrooms provide the perfect combo: humidity, splashes, and damp grout where water lingers.
– Pink biofilms commonly develop along “water paths,” such as tub edges, shower floor grates, around drains, and the vertical seams where splashes repeat every day.
What “pink slime” is (and why it matters)
In most cases, the pink material you wipe off is a living layer of microorganisms (a bacterial biofilm) rather than fungal spores growing like mildew. Biofilms protect microbes from normal wiping, which is why the wrong cleaning method often leaves the problem to return within days. This distinction matters because biofilms respond best to disinfection plus mechanical scrubbing—not just stain removal.
The biggest causes (humidity, residue, and ventilation)
You don’t usually “catch” pink slime from a single dirty spot—you create an environment where it can keep re-seeding itself. In 2026, the most reliable control strategy is to manage two drivers at the same time: moisture duration and nutrient/residue availability.
– Poor ventilation (weak fan, no fan use during/after showers) keeps humidity high for too long.
– Untreated soap buildup and grime feed the pink film, making tiles and grout easier to colonize.
– Slow-drying surfaces (porous grout, textured tile, caulk at the tub edge) act like reservoirs that stay wet longer than the surrounding walls.
When humidity stays elevated, surfaces don’t fully dry between showers. According to the U.S. EPA, indoor mold growth risk increases when indoor relative humidity stays too high, and the agency recommends keeping indoor humidity below 60% to help inhibit mold and related growth conditions (U.S. EPA, 2012). Even when you’re not seeing classic black mold, that same moisture regime supports bacterial films too.
Moisture & Control Benchmarks That Help Stop Bathroom Pink Biofilm (2026)
| # | Guidance lever | Evidence benchmark | Authority | Recurrence control score |
|---|---|---|---|---|
| 1 | Humidity target for the bathroom | Keep indoor RH < 60% | U.S. EPA | ★★★★★ |
| 2 | Moisture time after water exposure | Growth can start in 24–48 hours | U.S. EPA | ★★★★☆ |
| 3 | HEPA filtration capability (air, not the tile surface) | 99.97% capture at 0.3 μm | U.S. DOE | ★★★☆☆ |
| 4 | N95 respirator particle filtration | ≥ 95% filtration efficiency | NIOSH | ★★☆☆☆ |
| 5 | N95 protection factor (tight fit matters) | Assigned Protection Factor (APF) = 10 | NIOSH | ★★☆☆☆ |
| 6 | Sodium hypochlorite for routine disinfection | 0.1% (1,000 ppm) available chlorine | CDC | ★★★★☆ |
| 7 | Sodium hypochlorite for higher-risk contamination | 0.5% (5,000 ppm) available chlorine | CDC | ★★★★☆ |
How to confirm it’s pink slime, not something else
Pink slime most often shows up as a slimy, wipeable biofilm or light streaking that returns quickly if moisture remains. If what you’re seeing behaves like “wet streaks” more than “fuzzy growth,” bacterial biofilm is a strong likelihood.
– Pink growth often looks like a slimy film or light streaks that return quickly after wiping.
– If it’s mostly on surfaces that stay wet (around drains, tub edges, grout lines), it often points to bacterial biofilm rather than deep mold.
– True mold (mildew) tends to look more powdery, fuzzy, or patchy and may not produce the same slick feel right after you wet the surface.
Simple, non-destructive checks you can do
To confirm without special lab tests, try two observations:
1. Texture test: After you wipe, does the surface feel slick or coated again within a short time?
2. Distribution pattern: Is the pink concentrated where water pools or where soap scum repeatedly accumulates (grout joints, caulk seams, corners)?
If the pattern matches wet zones and the film reforms fast, you’re dealing with biofilm dynamics—cleaning needs to disrupt and disinfect, not just brighten.
How to clean pink residue from tile and grout
To remove pink biofilm, you need two phases: dislodge it mechanically (scrub) and then disinfect it with the right cleaner (contact time + rinsing). Skipping either phase is a common reason the pink returns.
– Scrub first: loosen the film with a stiff brush and warm water, then apply a bathroom disinfectant cleaner formulated for mildew/bacteria.
– Disinfect and rinse: let the cleaner sit for the label’s recommended contact time, scrub again, and rinse thoroughly to remove residue.
– Finish by drying: wipe down and run the exhaust fan to reduce the “wet film” conditions that cause it to reform.
What works best (and what doesn’t)
Here’s the practical logic: biofilms attach strongly to surfaces, and they’re more likely to survive “wipe-only” cleaning. A disinfectant works only if the surface stays wet long enough to contact the organisms.
- Scrub-only cleaning
- Pros: removes streaks fast and improves appearance. Cons: often leaves enough biofilm behind to reform.
- Disinfect + scrub (recommended)
- Pros: disrupts the film and kills remaining microorganisms. Cons: takes longer than wiping and requires label contact time.
- Disinfect-only (no scrubbing)
- Pros: less physical effort. Cons: thick soap scum and biofilm can block disinfectant contact, reducing effectiveness.
Product-handling notes (important for real bathrooms)
– Wear gloves and ensure the bathroom is ventilated, especially if you’re using disinfectants.
– Don’t mix cleaners. Mixing bleach with other chemicals can create dangerous fumes. If you switch products, rinse thoroughly between steps and follow each label.
– If you have delicate finishes or older caulk, test your cleaner in a small, hidden spot first—some disinfectants can dull surfaces or degrade certain sealants over time.
How to prevent it from coming back
Prevention works because pink biofilm is an ecosystem—remove moisture and food (soap scum/grime) and the system collapses. In 2026, bathrooms that are dried quickly and cleaned on a predictable schedule show the biggest improvement.
– Reduce moisture: run the bathroom fan during showers and for a while after, and fix leaks or slow-draining fixtures.
– Cut the food source: clean soap scum regularly (and don’t let it build up in grout and corners).
– Improve airflow: keep the space dry between uses—especially along tub edges and behind/around fixtures.
A realistic prevention routine
Use a two-tier plan:
– Daily/after-shower: run the exhaust fan, wipe standing water (especially on shower floors and around drains), and leave the area to dry.
– Weekly: scrub high-risk seams (caulk lines), grout joints, and tub/shower edges with your disinfectant cleaner—focus on where pink slime typically originates.
Also consider a simple monitoring habit: if you use a hygrometer, aim to keep bathroom conditions under control. According to U.S. EPA (2012), indoor humidity guidance helps inhibit microbial growth, and keeping humidity below recommended thresholds makes a measurable difference in how quickly surfaces re-stain.
What can go wrong (and when to pause)
Even with a good plan, a few mistakes can keep the pink coming back—or make the situation worse. If you’re seeing widespread growth or signs of hidden moisture, stop treating it like a surface-only problem.
– Using only a light cleaner or just “wiping” often spreads the film instead of killing it—disinfection + scrubbing matters.
– Mixing cleaners can be dangerous (for example, never combine bleach with other chemicals); follow label directions and rinse between products if you must switch.
– If pink growth is widespread in hard-to-reach areas (behind walls, under flooring, or large grout sections), surface cleaning may not fully solve the problem—consider professional assessment.
When professional help is the smartest move
Pause DIY cleaning if you notice:
– Recurring growth despite consistent drying and disinfection
– Warping, bubbling, or soft spots around tile or caulk
– Evidence of water intrusion behind walls (stains, damp drywall, persistent odor)
As the EPA notes, microbial growth can start quickly after water exposure (U.S. EPA, 2012), so hidden moisture can keep “re-seeding” the surface even while you clean.
Verdict / tip
For most bathrooms, the fastest, most reliable approach is: scrub + disinfect with the right product contact time, then stop the moisture and soap buildup that feeds it. This works because pink slime is typically a bacterial biofilm that resists wipe-only cleaning, especially on wet seams and grout.
Downsides: disinfectant methods require patience (contact time), thorough rinsing, and safe chemical handling; also, some stronger chemicals may dull certain finishes over time. Skip harsh disinfectants and consider gentler, surface-appropriate methods (or professional assessment) if your grout/caulk is delicate, the growth is extremely widespread, or you suspect hidden water intrusion.
Quick checklist (scan and save)
| Step | What to do | Goal |
|---|---|---|
| 1 | Scrub pink film with warm water + stiff brush | Loosen residue so disinfectant can reach it |
| 2 | Apply disinfecting bathroom cleaner | Kill bacteria/biofilm, not just remove streaks |
| 3 | Let it sit for the label contact time | Give the product time to work |
| 4 | Scrub again and rinse | Remove film + chemical residue |
| 5 | Dry thoroughly + run fan | Prevent the damp conditions that restart it |
Frequently Asked Questions
What causes pink mold to grow on bathroom tiles?
Pink mold on bathroom tiles is typically caused by bacteria and moisture—not “true mold” in the traditional sense. It often forms when warm, humid conditions let biofilm develop on grout, caulk, and tile surfaces, especially around showers, tubs, and sinks. Poor ventilation, frequent water splash, and cleaning with residue-forming products can leave behind nutrients that encourage the growth of pink biofilm.
How do I clean pink mold from bathroom tile and grout without spreading it?
Start by ventilating the bathroom and removing loose debris with a dry cloth or brush before using a cleaner. Spray a tile-safe disinfectant or oxygen bleach-based cleaner on the pink areas, let it sit for the recommended dwell time, then scrub grout lines thoroughly with a stiff brush. Wipe with clean water and repeat if any pink staining remains, since biofilm can be stubborn. Avoid using only water, and don’t scrub dry without cleaner because it can spread residue.
Why does pink residue keep coming back after I clean it?
Pink growth often returns because moisture remains in grout, caulk, and corners where water lingers after showers. If the cleaner isn’t disinfecting (or you don’t allow enough contact time), the underlying biofilm may survive and re-colonize quickly. Frequent warm humidity plus inadequate drying and ventilation make the bathroom an ideal environment for continued pink biofilm formation. Addressing ventilation and daily drying usually matters as much as the cleaning product.
Which cleaner is best for removing pink mold from shower tiles safely?
For many bathrooms, an EPA-registered bathroom disinfectant or an oxygen bleach (sodium percarbonate) cleaner is effective at breaking down pink biofilm on tile and grout. Hydrogen peroxide-based cleaners can also work well for stubborn spots when left to dwell before scrubbing. For safety, avoid mixing chemicals—especially bleach with ammonia or acids—and always spot-test in a small area if you have natural stone tiles. The “best” option is one that both disinfects and is compatible with your grout and tile material.
What’s the best way to prevent pink mold on bathroom tiles after cleaning?
Reduce moisture by running the bathroom fan during and after showers, keeping the door slightly ajar, and wiping down tile and glass to remove water. Seal or maintain grout and caulk to reduce how much water penetrates porous surfaces where biofilm forms. Establish a regular routine using a disinfecting bathroom cleaner, not just soap scum removers, and ensure proper contact time. Consistent ventilation and drying are key to preventing pink mold or pink biofilm from returning.
📅 Last Updated: November 08, 2026 | Topic: What Causes Pink Mold on Bathroom Tiles? (And How to Clean It) | Content verified for accuracy and freshness.
References
- Mold | Mold | CDC
- Mold Cleanup in Your Home | US EPA
- Mold
- Serratia marcescens
- Biofilm
- Serratia marcescens biofilm – Search Results – PubMed
- indoor mold health effects dampness – Search Results – PubMed
- https://scholar.google.com/scholar?q=pink+mold+bathroom+tile+Serratia+marcescens Google Scholar
- https://scholar.google.com/scholar?q=mold+remediation+nonporous+surfaces+bleach+cleaning+study Google Scholar
- https://scholar.google.com/scholar?q=indoor+mold+dampness+health+effects+systematic+review Google Scholar

[…] mildew, rust, or soap scum buildup that has soaked into grout or porous tile surfaces. Areas with poor ventilation—like around showers and bathroom sinks—often develop mildew and biofilm that can look yellow or […]
[…] and catch that faint, musty odor on the tile, you are noticing more than a visual nuisance—grime, soap scum, and moisture quietly build up in the pores and grout lines. Over time, this buildup can dull the […]