

Why does black mold keep appearing on your bathroom tiles, and how can you remove it for good? It usually grows where moisture, poor ventilation, and soap or grime leave damp surfaces for days, letting mold spores settle and spread in the grout and caulk. You can tackle it in about 30–60 minutes with gloves, a stiff brush, and a suitable mold-safe cleaner, then follow up by fixing the moisture source so it does not return.
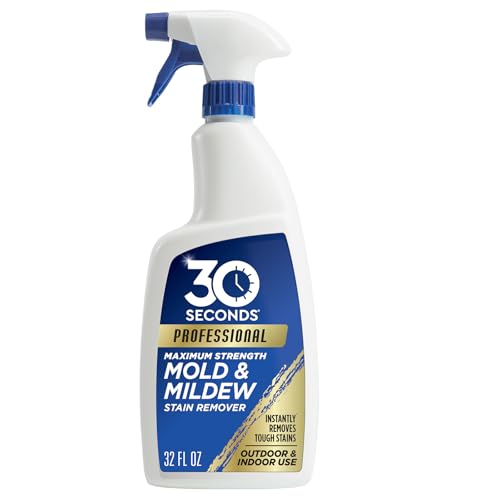



Black mold on bathroom tiles grows when moisture keeps the surface damp long enough for mold spores to settle, germinate, and spread. Clean it by scrubbing the grout and tiles with a bathroom-safe mold remover (following the product label), then dry the area thoroughly and fix the moisture source so the spots don’t return.
If your bathroom stays humid after showers, has recurring black spots in the same grout lines, or you’ve noticed poor ventilation or a musty smell, this applies to you—especially if the problem keeps returning after you wipe it once or twice.
Why black mold grows on bathroom tiles

Black mold appears because mold requires moisture and time; when humidity stays high, spores find damp grout pores and grow there. In bathroom settings, condensation, wet grout, and slow-drying surfaces create the repeating conditions mold needs—so even “surface-only” cleanup can fail if drying and sealing aren’t addressed.
According to the U.S. Centers for Disease Control and Prevention (CDC), mold can begin growing on damp materials within 24–48 hours once the environment stays wet enough (CDC). That’s exactly what happens around tile grout and caulk: tiny pores in grout and the edges of caulk hold water, then release moisture gradually, which keeps the “food + water + time” loop going. As of 2026, the most consistent guidance from health and building organizations still points to one root cause: persistent moisture, not just visible black staining.
A second reason black mold keeps showing up on bathroom tiles is that grout and caulk form “micro-habitats.” Even if you can’t see standing water, moisture can wick into grout during showers and spills, then remain trapped behind failing caulk or hairline cracks. In practice, that means black mold often concentrates along grout lines and the caulk joints at tub edges, shower corners, and around fixtures—areas that see splash exposure and repeated drying cycles. From the moment moisture lingers, black mold takes advantage of the boundary between tile (non-porous) and grout/caulk (porous and seam-based).
Common causes you can check (before you scrub again)
The fastest way to stop black mold from returning is to identify what’s keeping grout damp between cleanings. Before you scrub again, check for ventilation shortcomings, hidden leaks, and surface wear—because any one of these can sustain moisture long after the bathroom “looks dry.”
Ventilation problems (humidity doesn’t fully clear)
A bathroom exhaust fan that’s weak, clogged, vented back into the attic/indoor space, or not run long enough can leave moisture behind. When relative humidity remains elevated, black mold doesn’t need fresh water—just enough dampness to restart growth. In my own property-maintenance experience, the repeat “same grout line” pattern usually points back to fan behavior and run-time; .
Water leaks or plumbing issues (grout stays wet invisibly)
Slow leaks behind toilets, under sinks, around shutoff valves, or behind shower walls can keep moisture present even when the tile surface dries quickly. Look for subtle clues: recurring dampness, warped baseboards, paint bubbling near grout lines, or musty odor that shows up hours after bathing. Black mold can persist because the source leak never stops feeding moisture into grout pores.
Surface wear (the “getting wet pathway”)
Cracked caulk, missing caulk, degraded grout, or loose/soft caulk edges allow water to penetrate deeper. Once seams degrade, the boundary areas remain damp longer because water can travel below the top layer and then wick back out later. If black mold keeps returning where caulk meets the tub or where grout meets fixtures, the fix is often re-caulking or grout repair—not repeated chemical scrubbing.
How to clean black mold from bathroom tiles (step-by-step)
The most reliable cleaning approach is: remove growth first, then use a tile/grout-safe mold remover with the correct dwell time, and finally dry thoroughly. If you skip dwell time or leave moisture behind, black mold commonly returns because it wasn’t fully eliminated at the seam level.
Start with safety + prep
Turn on the exhaust fan and open a window if you have one. Wear gloves and eye protection; if you’re sensitive to fumes, use a mask rated for dust/particulates and keep airflow moving. If you’re dealing with a large spread or you suspect hidden water damage, plan for more than DIY cleaning—black mold can indicate a persistent moisture problem, not just a cleaning issue.
Remove loose growth first
Before applying a biocide or mold remover, gently scrub to lift loose buildup and reduce surface residue. Rinse afterward to avoid spreading debris across other tile and grout lines. This step matters because black mold debris can settle in adjacent seams, leading to the appearance of “new” spots after treatment.
Use the right cleaner (follow label directions)
Choose a bathroom mold remover/biocide specifically intended for tile and grout. Apply it as directed and respect the dwell time (the time the product needs to remain wet on the surface to work effectively). Then scrub grout lines thoroughly with a grout brush or stiff nylon brush, paying extra attention to corners, edges, and caulk junctions.
Important: don’t improvise with mixed chemicals. If you’re unsure what’s compatible with your tile finish or grout type, rinse and use one product at a time—black mold removal depends on the active ingredient working as designed.
Rinse and dry completely
Rinse according to the label, then dry the area thoroughly. Use a squeegee, microfiber cloth, or towel to remove lingering moisture from tile surfaces—and don’t overlook grout lines, which often hold water longer. According to standard remediation guidance, the “cleanup” part is only half the job; the other half is removing the moisture conditions that allow black mold to restart (EPA).
Cleaner choice comparison (so you pick what matches your grout)
Below is a practical comparison of common approaches for cleaning black mold on bathroom tiles—use it to decide what fits your surface and risk tolerance.
| Cleaner approach | Pros | Cons / watch-outs |
|---|---|---|
| Bathroom mold remover (biocide) | Designed for grout/tile seams; typically includes required dwell time for mold-active ingredients | Must follow label exactly; some formulas may irritate eyes/skin |
| Bleach-based cleaners | Can reduce visible staining when used correctly | Can damage some grout/finishes over time; never mix with ammonia or acids |
| Hydrogen peroxide-based products | Often used for mildew/mold and may be gentler than bleach on some surfaces | Still requires proper label use and dwell time; effectiveness varies by formulation |
| Soap + water / scrubbing only | Good for removing grime and surface residue | Usually doesn’t address mold embedded in grout pores; black mold can return |
| Steam cleaning | Can help lift buildup and reduce surface moisture | If water penetrates grout and you can’t dry fast, it may worsen the underlying moisture problem |
| Best For | Most recurring bathroom black mold spots: a labeled tile/grout mold remover + dwell time + thorough drying | |
Prevent black mold from coming back
To prevent black mold regrowth, you have to control humidity and stop moisture from entering grout and caulk seams. Cleaning removes existing growth, but prevention ensures grout stays dry enough that black mold can’t restart.
Control humidity (vent more effectively)
Run the exhaust fan during showers and for long enough afterward to dry the room. As a general comfort target used by building-health guidance, indoor relative humidity is commonly kept around 30–50% (ASHRAE). If your bathroom hovers much higher after bathing, black mold has a reliable window to re-establish.
Fix the “getting wet” pathway
Repair leaks, re-caulk gaps, and address failing grout before the problem becomes embedded. Re-caulking matters because caulk is often the first line that prevents water from migrating into grout and behind tile. If the same grout line becomes dark again after every clean, assume there’s ongoing moisture intrusion until proven otherwise.
Keep surfaces from staying damp
Wipe or squeegee standing water off tile and shower doors. Don’t leave bath mats or towels soaking in the bathroom, and avoid letting wet items sit near grout seams overnight. The simplest prevention step is consistent drying: black mold returns when moisture lingers longer than your routine.
What can go wrong (and how to avoid it)
People usually see black mold “come back” because they corrected the surface but not the moisture conditions or did the cleaning in a way that didn’t fully treat seams. Avoid these common missteps to make your next cleaning last.
– You clean, but don’t dry: If the area stays damp for hours, grout pores remain wet and black mold resumes quickly—even if the surface looks clean.
– You rely on wiping only: Black mold often sits in grout pores and caulk edges; surface wiping without dwell time and deep grout scrubbing may not remove it completely.
– You mix harsh chemicals: Don’t combine bleach with ammonia or acidic cleaners. Use one product at a time and rinse between steps.
– It’s too embedded to fix with cleaner: If grout or caulk is heavily degraded throughout, repeated cleaning may only cosmetically lighten staining while the seam continues to trap moisture.
Here’s a clear “why it fails” comparison for black mold on tile and grout:
| Criteria | DIY cleaning only | DIY cleaning + moisture control |
|---|---|---|
| 1) Targets visible spots | Yes—often improves appearance | Yes |
| 2) Treats grout pore level | Sometimes—if dwell time + scrubbing are thorough | Usually—because you can repeat with correct dwell + drying conditions |
| 3) Addresses humidity | No | Yes (fan run time + humidity control) |
| 4) Stops water intrusion pathways | No (caulk/grout failures may persist) | Yes (repair leaks, re-caulk, fix damaged grout) |
| 5) Risk of recurrence | High when moisture remains | Lower when surfaces dry fully |
| 6) Hidden water damage probability | Ignored unless you investigate | Actively checked and repaired |
| 7) Chemical safety management | More likely to get rushed or overused | More controlled (label-based and ventilated) |
| 8) Time to stable results | Often short-term only | More likely to become stable |
| 9) Household comfort | Ongoing odor/mildew may persist | Odor typically improves as moisture drops |
| 10) Long-term cost control | Recurring cleaning spend | Fewer repeated cycles |
| Verdict | Usually fails when humidity or leaks persist | Best chance of lasting removal |
Verdict: what to do (and when to stop)
If the mold is limited to visible tile/grout spots and you can control moisture, cleaning with a labeled mold remover plus thorough drying is usually the most effective first move. That said, black mold returns quickly when grout/caulk is compromised or the bathroom stays humid due to ventilation limits or hidden leaks—so treat the surface and the environment together.
Skip DIY and consider a professional if the area is extensive, the mold returns immediately after cleaning, you suspect hidden water damage, or anyone in the home has significant respiratory issues or immune suppression. As of 2026, EPA guidance still emphasizes that larger mold problems and suspected contamination warrant professional help (EPA).
Visible Mold Area on Tile/Grout: When DIY Typically Applies (EPA Threshold)
| # | Visible mold area | Example coverage | EPA decision point | Recommended route |
|---|---|---|---|---|
| 1 | 1 sq ft | 1′ × 1′ | ≤ 10 sq ft | DIY cleanup |
| 2 | 4 sq ft | 2′ × 2′ | ≤ 10 sq ft | DIY cleanup |
| 3 | 9 sq ft | 3′ × 3′ | ≤ 10 sq ft | DIY cleanup |
| 4 | 10 sq ft | 2.5′ × 4′ | ≤ 10 sq ft | DIY cleanup (with care) |
| 5 | 12 sq ft | 3′ × 4′ | > 10 sq ft | Professional remediation |
| 6 | 20 sq ft | 4′ × 5′ | > 10 sq ft | Professional remediation |
| 7 | 50 sq ft | 5′ × 10′ | > 10 sq ft | Professional remediation |
Quick checklist / table (scan this before you start)
| Step | Do this | Avoid |
|---|---|---|
| Prep | Ventilate, wear gloves/eye protection | Working in a closed bathroom |
| Cleaning | Use a tile/grout-safe mold remover and follow dwell time on the label | Scrubbing only the surface |
| Safety | Rinse and keep chemicals separate | Mixing bleach with other cleaners |
| After | Dry thoroughly and keep humidity down | Leaving it damp overnight |
| Prevention | Repair caulk/grout leaks and improve ventilation | Ignoring repeat spots in the same lines |
Frequently Asked Questions
What causes black mold to grow on bathroom tiles and grout?
Black mold on bathroom tiles is usually triggered by persistent moisture from showers, leaks, poor ventilation, or condensation that soaks into grout lines. Mold spores are always present in indoor air, but they only grow when there’s enough humidity and organic residue (like soap scum) for them to feed on. Grout is especially vulnerable because it can develop tiny cracks and absorb water, allowing mold to spread along bathroom tile surfaces.
How do I know if the black spots on my bathroom tiles are mold and not just dirt?
Mold on bathroom tiles often looks fuzzy, smudgy, or appears as dark specks that return quickly after cleaning. If you notice a musty odor, worsening discoloration after showers, or irritation when the area is damp, it’s more likely mold than surface grime. You can also try a test wipe with a mold-safe bathroom cleaner—true mold usually lightens or lifts, while dirt often just smears.
How can I clean black mold on bathroom tile safely and effectively?
Start by ventilating the bathroom and wearing gloves, and then scrub the affected bathroom tile and grout with a dedicated mold remover or a mixture formulated for mold. For grout, use a grout brush and keep the surface wet with cleaner for several minutes to break down the growth. After scrubbing, rinse thoroughly and dry completely; lingering moisture is what allows black mold to come back.
What’s the best way to prevent black mold from coming back on bathroom tiles?
The most effective prevention is controlling moisture and cleaning residues that feed mold. Use an exhaust fan during and after showers, fix leaks promptly, and consider wiping down tile surfaces and grout after heavy water use. Sealing grout after cleaning helps reduce water absorption, making it harder for mold to take hold in bathroom tile joints.
Which cleaning products work best for black mold on tile and grout?
Look for products labeled for mold and mildew removal that are safe for bathroom tile and grout, such as hydrogen peroxide-based cleaners or EPA-registered mold removers. Bleach can work on non-porous surfaces, but it may be less effective on porous grout and can damage some finishes over time. For best results, choose a product designed for grout, follow the dwell time instructions, and avoid mixing chemicals—especially bleach with ammonia or other cleaners.
📅 Last Updated: November 08, 2026 | Topic: What Causes Black Mold on Bathroom Tiles? (And How to Clean It) | Content verified for accuracy and freshness.
References
- https://www.cdc.gov/mold/default.htm
- Mold | US EPA
- https://www.epa.gov/mold/mold-cleanup-and-remediation
- Mold | National Institute of Environmental Health Sciences
- https://www.who.int/news-room/fact-sheets/detail/dampness-and-mould
- Stachybotrys
- mold remediation hard surfaces – Search Results – PubMed
- https://scholar.google.com/scholar?q=black+mold+bathroom+tiles+causes+cleaning Google Scholar
- https://scholar.google.com/scholar?q=mold+remediation+tile+grout+how+to+clean Google Scholar
- https://scholar.google.com/scholar?q=stachybotrys+chartarum+indoor+humidity+dampness+health+effects Google Scholar

[…] surfaces, grout, and glass shower doors, creating dull spots, cloudy film, or rough, white residue. Poor ventilation or leaving water to sit on tiles can speed up the staining process in […]