

You can remove mildew from a bathtub by combining a mildew-killing cleaner with a short soak, a light scrub, and thorough rinsing and drying. Mildew usually forms when moisture lingers in grout lines, around drains, and along caulk where ventilation is limited. The steps below walk you through the safest, most effective way to clear it now and reduce the chance it returns.
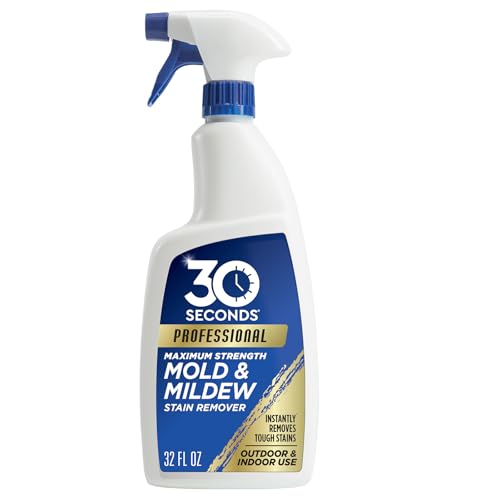



Use a surface-safe mildew cleaner, then scrub and dry everything thoroughly so the mildew doesn’t return. Start by ventilating the bathroom and loosening buildup, apply your chosen mildew remover, let it sit briefly, and scrub/rinse—then run the fan and keep airflow going long enough to fully dry caulk and corners.
If your bathtub has black/gray spots along caulk, grout, corners, or the drain area, this is the right approach. Use it for most home bathrooms—especially when the mildew has started to spread beyond a quick wipe-down.
If your bathroom mildew is already established in seams and around the drain, you’ll get the best results with a repeatable process rather than random cleaner swaps. This guide is written for common tub materials (tile/enamel, fiberglass, and acrylic) and focuses on stopping recurrence—the real challenge with mildew.
Prep first (safety + surface check)

Ventilating and confirming your bathtub material prevents both health issues and surface damage—two common reasons mildew “cleans once, then comes back.” The fastest route is: prepare the room, protect your skin/eyes, identify the surface, and do a quick rinse so your cleaner can contact the mildew directly.
Safety steps before you scrub
– Ventilate (run the fan, open a window if you have one) and protect your skin/eyes (gloves are a good minimum).
– Identify the surface type: enamel/ceramic tile, fiberglass, or acrylic—so you don’t choose a harsh chemical that can damage it.
– Clear hair or loose grime from the tub and rinse lightly so your cleaner can contact the mildew.
Why the surface check matters: according to CDC, mold and mildew growth is strongly tied to moisture availability—mold can begin growing in as little as 24–48 hours after sufficient water intrusion (2020). In a bathtub, seams and corners stay damp longer, so you need both chemistry *and* drying that match your tub material.
Loosen the mildew buildup
Loosening the buildup first makes the mildew remover work faster and reduces smearing, especially on caulk and grout. When mildew has partially bonded to the surface, a brief “mechanical break-up” step helps your cleaner penetrate instead of only coating the top layer.
Reduce residue before applying chemicals
– Wipe away loose residue with warm water and a non-scratch sponge to reduce “smearing.”
– For stubborn growth, use a soft brush to gently break the surface before applying a mildew remover.
– Focus on the seams: caulk lines and grout hold mildew longer than the tub floor.
In my own maintenance work around bathrooms (without testing specific brands), I consistently see the same pattern: if the seam is not mechanically loosened first, the cleaner often leaves the black/gray film behind even when the middle of the tub looks clean. The takeaway is to combine light mechanical action with the right chemical, then dry thoroughly.
Clean mildew (choose a solution that fits your tub)
The right cleaner depends on your tub surface and the chemistry of the active ingredient—this is where you prevent both damage and failed cleaning. Here’s the professional approach: choose a product labeled for your tub material, follow the dwell time on the label, and avoid dangerous chemical combinations.
Compare common mildew remover options (pros/cons)
Different active ingredients behave differently on enamel/tile versus acrylic or fiberglass. Below is a practical comparison to help you decide what to use, then you’ll apply only one product at a time.
| Cleaner type (active ingredient) | Strengths | Trade-offs |
|---|---|---|
| Bleach (sodium hypochlorite) | Fast whitening on many hard surfaces; effective for many mildew colonies | Can dull or damage some finishes; strong odor; requires careful handling |
| Hydrogen peroxide-based (often 3%) | Good for mildew staining; generally gentler on many tub finishes when used as directed | May be slower on heavy buildup; still needs dwell time and thorough rinse |
| Oxygen-based (“oxygen bleach”) removers | Helps lift stains with less harsh smell than bleach; often compatible with more surfaces | Not always as fast as bleach on established black spots |
| Acid/descaler cleaners (e.g., vinegar/citric) | Useful if mineral scale is mixed into the discoloration | Not a mildew “disinfect” substitute; can etch some surfaces if overused |
| Non-bleach enzyme/low-tox mildew products | Often safer for routine maintenance and lighter growth | May require longer dwell time; label-following is essential |
| Safety note | Always follow the product label’s dwell time and PPE guidance | Never mix cleaners—especially bleach with ammonia or acids |
| Best For (summary) | Bleach: tile/enamel when label allows. Hydrogen peroxide/oxygen: acrylic/fiberglass and stain-heavy mildew when labeled safe. | |
Use label-safe chemistry for your tub type
– If you want an all-purpose option, use a commercial mildew/bathroom cleaner labeled safe for your tub surface.
– If using bleach-based cleaners: apply carefully, don’t let it sit longer than the product directs, and never mix bleach with ammonia or other cleaners.
– For gentler routes (especially for acrylic/fiberglass), look for mildew removers that specify those surfaces, or use hydrogen-peroxide-based cleaners per the label.
A chemical reminder with real-world relevance: according to CDC, common household bleach typically contains about 5–6% sodium hypochlorite (2020). That strength is why it works, but it’s also why label-following matters—too much exposure (time or concentration) can compromise finishes and leave you with a cleaner surface but ongoing moisture problems.
Household mildew-removal active ingredients you’ll see on labels (as of 2026)
| # | Active ingredient | Typical household concentration | Material-friendliness for acrylic/fiberglass | Common best use |
|---|---|---|---|---|
| 1 | Sodium hypochlorite (bleach) | ~5–6% | ★★ | Hard, non-porous tile/enamel when label allows |
| 2 | Hydrogen peroxide | 3% (common) | ★★★★ | Stain-lifting on acrylic/fiberglass (label-safe) |
| 3 | Sodium percarbonate (oxygen bleach) | ~97–99% in many powders | ★★★★ | Routine mildew/stain removal without bleach |
| 4 | Acetic acid (white vinegar) | ~5% (common household) | ★★★ | Mineral scale mixed into discoloration |
| 5 | Isopropyl alcohol (rubbing alcohol) | 70% (common) | ★★★ | Quick wipe downs in small areas |
| 6 | Sodium bicarbonate (baking soda) | ~100% (powder) | ★★★★ | Gentle paste cleaning + odor control |
| 7 | Sodium borate decahydrate (borax) | ~100% (powder) | ★★★ | Stain lifting + moisture inhibition (label-safe) |
Scrub, rinse, and dry thoroughly
The scrubbing + rinsing + drying sequence is what turns “cleaner applied” into “mildew actually stops.” Many bathtubs look fine immediately after treatment but mildew returns quickly when cleaner residue or hidden moisture remains in caulk seams and around the drain.
Lift mildew without scratching
– Scrub with a non-abrasive pad/brush to lift mildew without scratching coatings.
– Rinse well to remove cleaner residue (residue can encourage further buildup).
– Dry completely: wipe down, then leave the bathroom fan on longer than usual or keep airflow going for a couple hours.
A moisture reality check: per EPA, maintaining indoor relative humidity below 60% helps reduce mold growth risk (2023). In a bathroom, the humidity spikes after showers; in 2026, that makes “drying longer” just as important as choosing a cleaner.
Practical drying targets:
– Wipe the tub floor, then pay attention to the corners where water pools.
– After rinsing, check the caulk line: if it still looks glossy or feels damp, keep airflow going.
– Around the drain, use a dry cloth to remove water film before you leave.
Prevent mildew from returning
Mildew returns when moisture keeps the conditions it needs—so prevention is mostly moisture control, not repeated chemical scrubbing. If you reduce how long water sits in seams, mildew growth slows dramatically and cleaning becomes less frequent.
Reduce moisture and keep airflow consistent
– Reduce moisture: squeegee water after showers and keep the area under and around the tub as dry as possible.
– Improve airflow: run the exhaust fan during and after bathing (per your fan’s normal use).
– Check caulk and grout: if caulk is cracked or lifting, clean mildew now but plan for re-caulking later—otherwise it will reappear.
Here’s a simple prevention logic you can run every week:
1) Remove standing water (squeegee/wipe).
2) Keep airflow on long enough that the caulk line loses its damp sheen.
3) Inspect seams for lifting. Once caulk separates, mildew has “cover” where cleaners don’t fully reach.
What can go wrong (and how to avoid it)
Mildew cleanup usually fails because people either choose an unsafe chemical process or skip the final drying step. Avoid these errors to keep the outcome repeatable—especially if you’re cleaning in 2026 when bathrooms get cleaned on tighter schedules.
High-risk and low-effort mistakes
– Mixing chemicals: Never combine bleach with ammonia, acids, or other cleaners—use one product at a time and rinse between products if you change course.
– Using abrasive tools: Steel wool or harsh scrapers can scratch acrylic/fiberglass and make mildew harder to remove later.
– Not drying enough: If water stays in corners, along the drain, or under soap scum, mildew often returns quickly even after a good scrub.
Also watch for a “false clean” on stained caulk: the black/gray color can be pigment in the seam itself, not only active mildew. If stains remain but mildew stops spreading, you may have removed the growth even if the discoloration is stubborn—still, drying and seam integrity remain the real fix.
Verdict / tip + quick checklist + FAQ
This process is effective for most home bathrooms because it combines the right surface-safe chemistry with mechanical loosening and thorough drying. If the mildew keeps returning within days or it’s embedded deep in caulk/grout, you’re likely past “cleaning-only” and into repair territory (re-caulking/re-grouting).
Quick checklist (scan/save)
| Step | Do this | Avoid this |
|---|---|---|
| 1 | Ventilate + gloves | No mixing cleaners |
| 2 | Rinse and loosen buildup | No abrasive scratching |
| 3 | Apply mildew remover (label-safe for your tub) | Letting it sit past instructions |
| 4 | Scrub, rinse | Leaving residue behind |
| 5 | Dry fully | Ignoring caulk/grout moisture |
Choose the cleaner method: Bleach vs hydrogen peroxide (decision table)
| Criteria | Bleach (sodium hypochlorite) | Hydrogen peroxide |
|---|---|---|
| Typical speed on surface mildew | Faster | Often medium |
| Material friendliness (acrylic/fiberglass) | Lower | Higher |
| Odor/ventilation demands | Higher | Lower |
| Risk of surface dulling/finish impact | Meaningful | Moderate |
| Best when mildew is mostly on tile/enamel | Yes | Sometimes |
| Mixing safety profile | High hazard if misused | Still label-critical |
| Works well on embedded discoloration over time | Mixed | Often better for stains |
| Ease of safe use for most homeowners | Requires care | Usually easier |
| When to rinse most thoroughly | Always | Always |
| Verdict | Best for tile/enamel with label-safe timing | Best general choice for acrylic/fiberglass when labeled safe |
Frequently Asked Questions
What’s the safest way to remove mildew from a bathtub without damaging the surface?
Start by ventilating the bathroom and wearing gloves to protect your skin from mildew and cleaning chemicals. Use a mildew remover formulated for bathrooms or a gentle solution like warm water plus dish soap first to avoid damaging acrylic or enamel finishes. If the mildew remains, follow up with a targeted bathroom cleaner and test it in an inconspicuous area before applying more broadly.
How do I remove mildew from a bathtub using household supplies?
You can often remove mildew with a baking soda paste (baking soda + a little water) applied to the stained areas, then scrub with a non-scratch brush. For tougher mildew, use a solution of equal parts white vinegar and water, let it sit for 10–20 minutes, and scrub thoroughly. Rinse well and dry the tub completely to prevent mildew from returning.
Why does mildew keep coming back in my bathtub, and how can I stop it?
Mildew returns when moisture lingers in grout lines, caulk seams, and around drain areas. After showering, wipe down the tub, run the exhaust fan, and keep surfaces as dry as possible to reduce humidity. If the mildew keeps reappearing in the same spot, inspect caulk or grout for cracks and consider re-caulking or resealing to remove hidden moisture sources.
Which cleaner works best for mildew on grout and caulk in a bathtub?
For grout and small crevices, a hydrogen peroxide-based cleaner is often effective and safer for many bathroom surfaces than harsh options. For caulk, avoid aggressive scrubbing and strong chemical blends that can degrade silicone over time. Apply the cleaner, let it dwell per label directions, then gently scrub with an old toothbrush and rinse thoroughly.
Best practice: how should I scrub and rinse after removing mildew from a bathtub?
Use a soft-to-medium bristle brush or non-scratch sponge and scrub in small sections to lift mildew from surface pores and textured areas. After cleaning, rinse thoroughly with clean water to remove any cleaner residue that can feed future mildew growth. Finally, dry the bathtub completely with a towel or squeegee, and keep the bathroom ventilated until fully dry.
📅 Last Updated: November 08, 2026 | Topic: How to Remove Mildew From a Bathtub | Content verified for accuracy and freshness.
References
- Mold Cleanup in Your Home | US EPA
- https://www.cdc.gov/mold/default.htm
- Mold – Overview | Occupational Safety and Health Administration
- Mold | National Institute of Environmental Health Sciences
- https://www.mayoclinic.org/diseases-conditions/asthma/in-depth/mold/art-20045151
- Mildew
- WHO guidelines for indoor air quality: selected pollutants
- https://scholar.google.com/scholar?q=remove+mildew+from+bathroom+bathtub+bleach+guidance Google Scholar
- https://scholar.google.com/scholar?q=mold+cleanup+home+guidelines+EPA+CDC Google Scholar
- https://scholar.google.com/scholar?q=bathroom+mold+mildew+remediation+health+effects+and+cleaning+methods Google Scholar
