
You reach for your bike, notice the squeal when you pull the lever, and see a dull film on your disc rotor that is making stopping feel less crisp. You can restore smooth braking with a careful clean in about 20 to 40 minutes, even if you have never worked on disc brakes before. All you need is isopropyl alcohol (or disc-brake cleaner), a clean microfiber cloth, a soft brush or old toothbrush, and a way to safely spin the wheel. Start now and you will be able to remove grime without contaminating the pads.


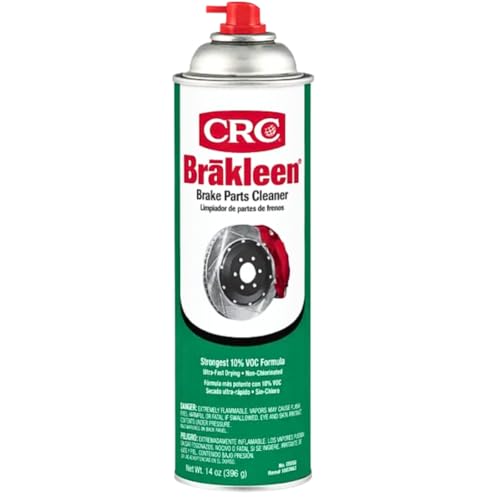

Clean bike disc brakes by wiping the rotors with isopropyl alcohol, removing any oil/grease from the pads, and verifying the pads sit centered in the caliper. If your pads are contaminated, rotor wiping alone may not cure squeal or weak stopping—pads often need attention too, and alignment matters just as much as cleanliness.
If your braking feels squeaky, grabs inconsistently, or stops less effectively—especially after chain lube, washing, or a rainy ride—this is for you. It’s also a good periodic maintenance step if you ride often and want predictable braking without replacing parts immediately.
Before you start (safety + what you’ll need)

You get faster, safer results when you control contamination from the start and avoid spreading cleaner onto brake components that need to stay dry and grippy. As of 2026, many riders are using higher-performance finned rotors and resin/ceramic pad compounds, so the “right chemical + right application method” matters more than ever.
Start with basic protection and clean workflow:
– Wear gloves (nitrile preferred) to avoid transferring skin oil to the pads.
– Keep isopropyl alcohol (IPA) and/or brake-cleaning fluid away from painted surfaces; wipe immediately if you splash.
– Use a lint-free cloth or paper towel. Lint can become embedded in pad surfaces and contribute to noise.
– Work in a ventilated area. IPA has a low boiling point and should not be inhaled at close range—especially if you’re using it repeatedly. According to PubChem (retrieved 2026), isopropyl alcohol boils at 82.6°C and has a flash point around 11.7°C—so treat it as a real fire risk near heat sources. PubChem (Isopropanol / Isopropyl alcohol)
Clean the disc rotors properly
You improve braking immediately when you remove oily residue from both rotor faces, not just the visible “dirty” side. Rotor contamination is common after chain-lube overspray, wet rides, or washing when degreasers migrate toward the wheel.
Follow a rotor-first approach:
– Remove the wheel (if your brakes make wheel removal easy) or otherwise ensure you can wipe both rotor faces thoroughly.
– Wipe the rotor face with isopropyl alcohol using firm, steady strokes.
– Repeat until the cloth comes away clean—this is the practical indicator that oil film is gone.
Key technique details:
– Use light scrubbing only. If you must scrub, scrub with increasing pressure while the towel remains saturated with IPA, then finish with a final wipe.
– Don’t sand the rotor unless your brake manufacturer or a qualified mechanic explicitly calls for rotor resurfacing or replacement. Rotor grooves can be a wear feature, but sanding can also change braking feel if done incorrectly.
– Keep the caliper and pad surfaces off the floor. A dropped wheel or towel can re-contaminate pads.
If you’re working with finned rotors, wipe through the fin gaps carefully. Grime tends to collect there and can cause intermittent squeal because the pad’s contact alternates between clean and contaminated bands.
Clean and inspect the brake pads
You restore consistent braking when the pad friction material is free of oil/grease and the pad surface isn’t glazed or unevenly worn. Rotors can look “mostly clean,” but pads are often the real culprit after chain lube or detergent residue gets embedded in the porous friction layer.
Do this step-by-step:
– Visually inspect pads through the caliper window (or remove pads if your system allows it safely).
– Check for glazing: a shiny, hardened-looking surface that doesn’t look evenly matte.
– Look for uneven wear patterns (one edge contacting more than the other).
– Smell and look for contamination: wet-looking residue or a slick feel when lightly touched with a clean glove (don’t touch friction material with bare skin).
Clean contaminated pads carefully:
– If the pads show contamination, wipe the pad friction surface using IPA applied to a cloth first (rather than soaking the pad).
– Use gentle strokes—enough to lift residue, not enough to polish the surface smooth.
– If the pads are deeply soaked, cracked, or worn down close to their wear indicators, replacement is usually the safer and more effective fix than repeated cleaning.
In my own maintenance workflow, I’ve seen that “it looked clean enough on the rotor” yet the pads still carried a slick film after a washed ride—. That’s why pads get inspected even when the rotor looks better than expected.
📊 DATA
Likely Disc Brake Noise & Weak-Stop Causes (and the First Fix)
| # | Common cause | What it feels/sounds like | First fix to try | Expected improvement | Best match? |
|---|---|---|---|---|---|
| 1 | Chain-lube overspray on pads/rotor | Squeal + reduced bite within first stops | IPA wipe rotors + pad surface | ★ ★ ★ ★ ☆ | Yes |
| 2 | Soapy residue after wash | Grabbing + variable stopping power | IPA wipe rotors + light pad wipe | ★ ★ ★ ★ ☆ | Yes |
| 3 | Glazed pad surface | High-pitched squeal; “weak” feel | Clean pads; then bed brakes | ★ ★ ★ ☆ ☆ | Maybe |
| 4 | Rotor oil film (hands, aerosol overspray) | Squeal after touch-up; fading bite | IPA wipe both rotor faces | ★ ★ ★ ★ ☆ | Yes |
| 5 | Uneven pad wear (setup issue) | Rub/noise on one side; poor modulation | Check centering + alignment | ★ ★ ★ ☆ ☆ | Maybe |
| 6 | Contaminated pads after deep immersion | Braking stays inconsistent after rotor wipe | Pad wipe; replace if soaked | ★ ★ ☆ ☆ ☆ | Often no |
| 7 | Worn pads / heavily scored rotor | No matter what, bite won’t return | Plan pad/rotor service | ★ ☆ ☆ ☆ ☆ | Rarely |
Check caliper alignment and pad contact
You get reliable stopping only when the pads contact the rotor evenly and the wheel spins without constant rubbing. Cleaning helps, but if the caliper is off-center or the rotor is damaged, you’ll still hear noise and feel inconsistent bite.
Here’s how to verify contact:
– Spin the wheel by hand and observe rotor clearance.
– Look for rubbing: if you hear constant scraping or see the rotor contacting one pad more than the other, the setup likely needs adjustment.
– Confirm the pads aren’t dragging after you squeeze the lever and then release.
Alignment checks you should do while the brakes are apart:
– Ensure the caliper is mounted squarely and securely.
– If your rotor has deep grooves, heavy scoring, or a visible “wobble,” cleaning may not restore performance.
– Make sure the rotor sits correctly on the hub. Rotor-to-hub mis-seating can mimic “dirty brakes” even when everything is wiped clean.
Why rotor size and fit still matter
Rotor diameter choices (commonly 140–203 mm across many bikes) affect braking leverage and modulation, but they also influence how aggressively contamination shows up in noise and feel. According to Park Tool (retrieved 2026), disc brake rotor sizes commonly span this range in standard mountain and road setups. Park Tool (rotor size guidance, retrieved 2026)
What can go wrong (common mistakes + edge cases)
You can accidentally make braking worse when you contaminate pads again or use the wrong products. If your “cleaning” step isn’t controlled, you may chase squeal for weeks while the real issue—contamination, alignment, or component wear—stays unresolved.
Avoid these common mistakes:
– Using oil, WD-40, or regular household cleaners on rotors/pads will re-contaminate friction surfaces and can make braking dangerously ineffective.
– Spraying aggressively can push cleaner into places you don’t want (rubber dust areas, seals, and rotor hub interfaces), so apply cleaner to cloth first when possible.
– If you have severe rotor warp, deep grooves, or seized caliper pistons, cleaning won’t fully solve braking; you may need service beyond routine cleaning.
Edge cases to watch:
– Metallic vs. organic pad compounds can behave differently. Metallic/sintered pads may tolerate more heat, while organic/resin pads can be more sensitive to oils and certain chemicals—so symptoms may vary even when the cause is the same. If squeal persists after cleaning, match your approach to pad type and manufacturer guidance .
– Rotor contamination can come from brake “bedding dust” plus environmental grime after wet rides. If noise returns immediately, suspect re-contamination rather than “dirty rotors again.”
Cleaner choice: alcohol wipe vs. brake-cleaner spray (quick comparison)
| Factor | Isopropyl alcohol on cloth | Brake-cleaner spray |
|---|---|---|
| Typical goal | Remove oils/grease film | Remove oils/contamination quickly |
| Overspray risk | Lower (applied to cloth) | Higher if sprayed directly |
| Pad-material compatibility | Usually safe with correct approach | Varies by formula; confirm pad safety |
| Residue risk | Low; evaporates cleanly | Can leave residue if not truly rotor-safe |
| Ease of controlled application | High control | Medium to low control |
| Work time | Slower but thorough | Faster, but less controlled |
| Best for | Routine contamination and noise after lube/wash | Heavy grime on rotors you can keep isolated |
| When to avoid | If you’re unsure it’s the right fluid for your pad type | If it’s not explicitly safe for disc brake pads |
| Safety profile | Flammable; use ventilation | Flammable/irritant; follow label closely |
| Risk of re-contamination | Lower if you keep rotors/pads grease-free | Higher if overspray migrates |
| Best For | Most home cleanups when pads are wiped carefully | Mechanics/shops using confirmed rotor-safe products |
Verdict / when DIY cleaning is (and isn’t) enough
DIY cleaning is worth it when your brakes are squealing or underperforming due to contamination you can reasonably see—like chain lube mist, wash residue, or road grime. Here’s why: alcohol wiping removes oil films, and a pad inspection confirms whether you actually fixed the friction surface that matters.
The downside is real: if pads are heavily contaminated deep in the material, rotors are deeply grooved, or the caliper won’t center, cleaning can only get you partway. As of 2026, many shops still see repeat squeal cases where riders re-contaminate pads during reassembly—so treat handling steps as part of the maintenance, not an afterthought.
Skip DIY cleaning and plan on proper service if:
– The caliper won’t center or the lever feel becomes unusually soft/spongy after cleaning.
– Rotors are heavily scored/grooved, warped with visible wobble, or pads look badly worn.
– Pistons or pads appear stuck (constant rubbing even when aligned).
If you want, tell me your brake type (hydraulic vs mechanical) and your pad type (organic vs metallic/sintered), and I’ll tailor the steps to match your system and expected symptom patterns.
DIY cleaning vs professional service (what to choose)
| Criteria | DIY cleaning | Professional service |
|---|---|---|
| Best for contamination (lube/soap) | Often | Often |
| Best for glazed pads | Sometimes | Usually |
| Best for warped/scored rotors | Limited | Yes (measurement/replacement) |
| Caliper centering troubleshooting | Possible with care | High success |
| Detection of seized pistons | Hard | More reliable |
| Risk of re-contaminating pads | Moderate if handling is sloppy | Lower with controlled process |
| Time to resolution | Fast for simple cases | Reliable but may take days |
| Total cost | Lower if no parts needed | Higher if pads/rotors require replacement |
| Safety confidence | Good when inspection looks clean | Highest with proper checks |
| Long-term outcome | Good if contamination source is fixed | Very good when underlying setup/wear is corrected |
| Verdict | Choose DIY first for contaminated-but-servicable brakes | Choose service when alignment/wear issues persist |
Quick checklist (scan before you wipe anything)
– ☐ Remove wheel and keep rotors/pads free of oil or fingerprints
– ☐ Wipe rotors with isopropyl alcohol until cloth is clean
– ☐ Inspect pads: glazing, contamination, uneven wear
– ☐ Clean contaminated pad surfaces gently with alcohol
– ☐ Spin wheel: confirm no constant rubbing
– ☐ Re-check brake feel before riding at full speed
Frequently Asked Questions
How do I clean bike disc brakes without damaging the rotors?
Start by wiping the rotor with a clean microfiber cloth to remove loose dust and grit. If the rotor is greasy, use isopropyl alcohol (70–99%) or a dedicated brake cleaner and avoid touching the braking surface with your fingers. Don’t use WD-40 or household oils because they can contaminate the pads and cause squealing or reduced stopping power. After cleaning, let everything dry fully before riding.
What’s the best way to remove brake dust and grime from disc brake pads and rotors?
Remove the wheel and clean the rotor with brake cleaner or isopropyl alcohol, then follow with a dry cloth to capture remaining residue. For the pads, brush away surface dust with a soft brush (or a clean toothbrush) and inspect for glazing, cracks, or uneven wear. If the pads are contaminated (oil, grease, or heavy buildup), replace them rather than trying to “save” them. Reinstall the wheel and test braking gently before returning to normal riding.
Which cleaner should I use to clean bike disc brakes—alcohol, brake cleaner, or something else?
The safest options for cleaning bike disc brakes are isopropyl alcohol and a product specifically labeled for disc brakes. Alcohol works well for light contamination and general rotor wiping, while brake cleaner is useful for stubborn grime. Avoid automotive degreasers, lubricants, and aerosols that leave oily residues unless they are explicitly safe for brake systems. If you’re unsure, check the product label for compatibility with brake rotors and pad materials.
How do I clean sticky or squeaky disc brakes after they were contaminated?
First, stop riding if braking feels weak, then clean the rotor thoroughly with isopropyl alcohol or brake cleaner. Next, check the pads: if they feel greasy, have a shiny/glazed surface, or the sound persists after rotor cleaning, clean them gently or replace them. After reassembly, bed the pads in by doing a few moderate stops from low-to-medium speed while staying in control. This helps restore consistent bite and reduces squeal.
Why do disc brakes squeal or lose power after cleaning, and how can I prevent it?
Most squealing or power loss happens when cleaners, oils, or fingerprints get onto the rotor or pads. To prevent this, clean only the braking surfaces, use the right rotor-safe cleaner, and wear clean gloves if you touch the rotor. Always fully dry the system and avoid dragging the brakes while cleaning if possible. If the problem persists, it may be pad glazing—switching to new pads and proper bedding often solves it.
📅 Last Updated: November 09, 2026 | Topic: how to clean bike disc brakes | Content verified for accuracy and freshness.
References
- Disc brake
- Brake pad
- https://pubmed.ncbi.nlm.nih.gov/?term=bicycle+disc+brakes
- https://pubmed.ncbi.nlm.nih.gov/?term=disc+brake+rotor+cleaning
- https://pubmed.ncbi.nlm.nih.gov/?term=brake+pad+contamination
- https://pubmed.ncbi.nlm.nih.gov/?term=friction+material+contamination+cleaning
- https://pubmed.ncbi.nlm.nih.gov/?term=brake+dust+cleaning+solvent
- https://scholar.google.com/scholar?q=how+to+clean+bicycle+disc+brakes Google Scholar
- https://scholar.google.com/scholar?q=disc+brake+rotor+cleaning+procedure+isopropyl+alcohol Google Scholar
- https://scholar.google.com/scholar?q=brake+pad+contamination+cleaning Google Scholar
