

Beach shells collect sand, salt, and grime quickly, and it is frustrating to want that smooth, natural shine while worrying about damaging delicate surfaces. In the next few steps, you will learn safe, effective ways to clean shells and rinse out grit without erasing color or texture. Most of the process takes about 20 to 45 minutes, and you will only need a soft brush, mild soap, fresh water, and a towel to finish.


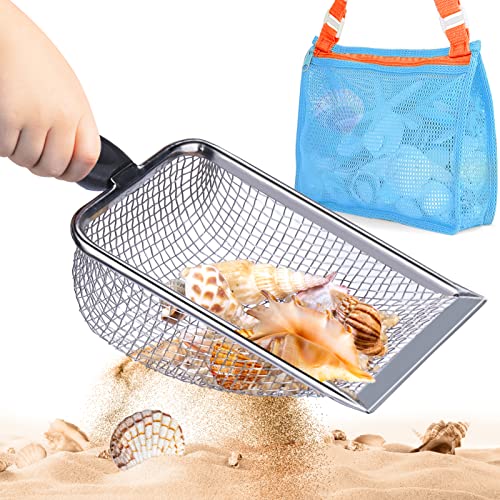

Rinse off sand quickly, scrub gently with a soft brush, and disinfect only if odor or grime remains—then dry completely so shells don’t smell or collect residue again. This approach keeps beach shells looking bright while minimizing damage to fragile texture and any painted or coated surfaces, and it still works well for most shells you find in 2026.
If your shells are covered in grit, algae, or that “ocean smell,” this is for you—especially if you want them to look bright without damaging fragile or painted surfaces. It also helps if you’re cleaning shells for crafts, display, or gifting. Below is a safe, step-by-step method that balances cleanliness with shell-surface protection.
Gather Supplies and Prep Your Workspace

You can clean beach shells safely with a simple setup—soft tools, mild cleaning products, and a drying plan. The goal is to remove loose sand fast, avoid abrasion, and only use stronger disinfecting steps when needed.
I recommend setting up a “cleaning zone” before you touch any beach shells: it reduces re-contamination and makes drying more predictable.
What you’ll need (and why it matters)
Use gentle, controllable steps first. Beach shells can be brittle, porous, and coated—so harsh scrubbers and aggressive chemicals are the fastest ways to dull shine or lift paint.
– Use a soft toothbrush or small scrub brush, plus a bowl/bucket for soaking.
– Have mild dish soap, clean water, and paper towels (or a drying rack) ready.
– Plan for ventilation and gloves if you’ll use any disinfecting cleaner.
Practical prep tips
1. Work over a sink or tray so you don’t lose tiny shell fragments.
2. Separate fragile shells (thin, flaking, painted, or chalky) from thicker, uncoated ones.
3. Use gloves for disinfecting—even “mild” cleaners can irritate skin, and you’ll want clean handling for display/crafts.
4. Avoid standing water near electronics; some cleaners can leave films on surfaces.
Remove Sand, Seaweed, and Loose Debris
You’ll get the best results by removing loose sand and seaweed first, using rinsing and gentle brushing—not scraping. This matters because grit left in crevices makes odors persist and increases the temptation to scrub harder later.
Start with a thorough rinse
– Start with a thorough rinse to get off loose sand and particles.
– Soak in warm water with a little dish soap, then gently scrub crevices with the toothbrush.
– For stubborn bits (like seaweed), use careful, slow brushing rather than scraping hard.
Warm water + dish soap is your “default”
Warm water helps loosen biological residue (algae slime, dried seawater salts, and marine films). Dish soap is effective because it breaks down oily organic buildup, not because it “sterilizes” shells. For beach shells, that distinction is important: you often only need soil removal, not disinfection.
How long should the initial soak be?
A short soak is usually enough to soften debris. For most shells, aim for enough time to loosen grime, then move to brushing. If you’re dealing with painted shells or thin, brittle shells, keep soaking brief and use more controlled, surface-focused cleaning (a damp cloth or light brush pass) instead of extended submersion.
If you see cracks or peeling coatings
Stop the “digging” approach. If a shell has cracks with stuck grime, you can:
– Rinse more thoroughly,
– Brush gently with a soft toothbrush,
– Repeat soak + brush lightly,
rather than forcing debris out with pressure.
Clean and Disinfect Beach Shells (Without Damaging Them)
You should disinfect beach shells only when the soap-and-brush steps don’t eliminate odor or visible residue. Here’s why: many shells (and especially painted/coated ones) can discolor or lose their finish when exposed to bleach or peroxide longer than necessary.
Disinfection is an “optional escalation,” not the first move
– If they still look dull or smell, use a disinfecting step—but only after you’ve removed the surface grime.
– Follow the product label for any bleach or hydrogen-peroxide-style disinfectant, and avoid soaking painted/fragile shells longer than necessary.
– Keep an eye on cracks, peeling coatings, and thin edges; some shells shouldn’t be treated the same way as thick, uncoated ones.
Choose the gentlest effective disinfecting approach
When people complain their beach shells still smell after cleaning, it’s usually because residue remained trapped in crevices or the shells weren’t dried completely. Disinfection helps in those “odor won’t quit” cases, but it’s not a substitute for good rinsing and full drying.
What the safest bleach approach looks like (if you use bleach at all)
If you’re using household bleach (not a specialty product), follow disinfection guidance carefully. According to the U.S. CDC, for disinfection with diluted bleach you can use 5 tablespoons of bleach per gallon of water (about 1 cup per 4 gallons) and keep surfaces wet for at least 1 minute (CDC cleaning and disinfection guidance, 2020). CDC also recommends preparing bleach solutions fresh daily, because effectiveness declines over time (CDC cleaning and disinfection guidance, 2020).
That’s the level of precision you want: correct dilution, limited exposure, and a label-consistent contact time.
Avoid “blanket disinfecting” for painted and fragile beach shells
For painted shells, thin shells, and shells with peeling coatings, treat disinfection as off-limits. Paint layers can lift when exposed to oxidizers (like bleach/peroxide) and can soften if repeatedly soaked. Instead, prioritize:
– short soapy soak (or no soak),
– gentle brushing only,
– thorough rinsing,
– immediate full drying.
Inserted data table (Disinfectant options you can compare)
Shell-Safe Cleaning Escalation: Common Disinfectant Concentrations
| # | Method | Typical strength (active) | Water mixing (if needed) | Best use case | Finish-safety rating |
|---|---|---|---|---|---|
| 1 | Fresh-water rinse + air-dry | Water only | No mixing | Dusty shells, quick refresh | ★★★★★ |
| 2 | Warm soapy soak + soft brushing | Dish soap (varies by brand) | A small amount per bowl | Most grit/algae residue | ★★★★☆ |
| 3 | Hydrogen peroxide spot-clean | Typical consumer: 3% | Often use undiluted (per label) | Targeted odor/biofilm after rinsing | ★★☆☆☆ |
| 4 | Diluted household bleach (quick dip) | Sodium hypochlorite (product label) | 5 Tbsp per 1 gal | Hard, unpainted shells with odor | ★☆☆☆☆ |
| 5 | Alcohol wipe-down (for small areas) | Typical: 70% isopropyl/ethanol | No dilution for 70% | Tight spots where soaking is risky | ★★☆☆☆ |
| 6 | Commercial disinfectant (label-follow) | Varies by EPA product | Use label dilution only | If label lists non-porous surfaces | ★★☆☆☆ |
| 7 | Vinegar rinse (odor support) | Typical household: ~5% | Usually no bleach-like “disinfection” claim | Mild odor refresh after soap | ★★☆☆☆ |
Rinse, Dry, and Store
You’ll avoid most “why does it still smell?” problems by rinsing thoroughly and drying completely, including in crevices. Damp beach shells trap moisture and residual cleaner, which can lead to lingering odor and new residue buildup.
– Rinse until the water runs clear and there’s no soap or cleaner residue.
– Dry fully (including inside crevices). Damp shells can re-develop odor.
– Store in a dry container, away from humidity, and handle gently once clean.
Drying method that prevents re-contamination
In 2026, many shell collectors are switching to drying racks and food-safe trays because it reduces bottom-of-container grime. For your beach shells:
– Pat dry, then air-dry on a rack or paper towel with airflow.
– Turn shells occasionally so water doesn’t stay trapped inside spiral grooves.
– Keep them out of direct humid air (near open bathrooms or wet basements).
How to tell they’re truly dry
Run a clean paper towel along crevices and check for dampness. If you feel cool moisture in thick shell interiors, give them more time. Shells that look dry on the outside sometimes hold moisture in deep channels.
Storage matters more than people think
Once beach shells are clean and dry, humidity is the enemy. Store them in:
– a lidded container with minimal airflow,
– or a drawer where moisture is controlled.
If you’re building a display, wait until shells are fully dry before gluing or sealing into shadow boxes.
What Can Go Wrong
Cleaning beach shells can go wrong fast when you use aggressive abrasion or over-treat with chemicals. The best prevention is knowing which failure modes happen most often—and designing your process to avoid them.
– Over-scrubbing can remove a shell’s natural shine or damage delicate layers and textures.
– Using harsh or undiluted chemicals can discolor shells, weaken thin structures, or lift any painted coatings.
– Skipping the full drying step can cause lingering “sea” smells even after cleaning.
– Cleaning a shell that still has living residents is risky—if you suspect anything is alive, leave it where it is.
Common mistakes (and how to fix them)
1. Scraping instead of brushing: If seaweed is stuck, pressure increases the chance of micro-scarring. Slow brushing is safer for beach shells.
2. Soaking too long for fragile pieces: Thin or chalky shells can erode or warp slightly after repeated soaking.
3. Not rinsing until residue is gone: Soap film or cleaner residue can leave a dull look and contribute to odor.
4. Disinfecting first: If sand remains, disinfectant can “trap” smell under a film rather than reaching it effectively.
Edge case: shells with attached organisms
If a shell looks inhabited or has tissue-like material, clean only the outside lightly (if at all) and don’t fully soak. Moving and disinfecting living residents can harm the animal and also creates bio-risk for handling.
Verdict: Best Method for Different Shell Types
The best method depends on whether your beach shells are unpainted, painted, thin, or coated. Here’s the practical rule: start with soap-and-brush, and only escalate to disinfecting for unpainted, hard shells when odor or grime persists.
– For most common, unpainted shells: gentle soap-and-brush cleaning first, then disinfect only if odor or buildup remains.
– For painted shells, very thin shells, or shells with delicate surfaces: prioritize brushing/rinsing and avoid strong disinfecting so you don’t ruin the finish.
– Downsides to note: disinfecting can change color or texture on some shells, and thicker shells usually handle it better than fragile ones. If you want guaranteed color preservation, consider limiting cleaning to soap + brush only.
Specific guidance I follow for shell type (what I avoid)
– Painted or decorated beach shells:
– Avoid bleach and prolonged peroxide exposure.
– Use warm soapy water for brief contact (short enough that you can still control the surface) and brush gently.
– If odor remains, repeat rinse + drying rather than escalating disinfectant strength.
– Thin/chippy shells (fragile edges, chalky surfaces):
– Minimize soaking; use damp brushing and quick rinsing.
– Avoid aggressive chemical steps that can stress delicate layers.
– Thick, uncoated shells (hard texture, no peeling):
– After soap-and-brush, a carefully diluted disinfecting step can help with “ocean smell,” but rinse and dry thoroughly afterward.
Quick comparison: “What to do” by shell category
Quick Checklist (Scan/Save) + FAQ
You’ll get the most reliable sparkling finish when you follow the sequence in order: remove grit, clean gently, disinfect only if necessary, then dry fully. Use this checklist to keep beach shells looking fresh for displays and crafts.
Shell Cleaning Checklist
FAQ
Do I have to disinfect beach shells?
Not always. If your beach shells are mostly clean but look dusty, soap + gentle scrubbing may be enough. Disinfecting is most useful when there’s lingering odor, algae residue, or stubborn biofilm after rinsing.
Can I use bleach to clean beach shells?
It can work, but it can also damage discoloration and delicate surfaces if used incorrectly. If you use bleach, follow the CDC-style dilution approach (for household bleach: 5 tablespoons per gallon and keep wet for at least 1 minute), prepare the solution fresh daily, and limit exposure—especially for unpainted, hard shells (CDC cleaning and disinfection guidance, 2020).
How long should I soak shells?
Use soaking only long enough to loosen debris. For fragile or painted beach shells, shorter soaking is safer—if grime won’t come off with gentle brushing, reassess and increase controlled rinsing/brushing rather than extending submersion.
Why do my shells smell after cleaning?
Most often it’s because beach shells weren’t dried thoroughly, or soap/cleaner residue stayed trapped in crevices. Dry fully, re-check inside grooves, and rinse again if any residue remains.
Are there shells I should not clean this way?
Yes—avoid aggressive methods on painted, thin, brittle, or peeling beach shells. Also don’t disturb anything that might be alive; if a shell looks inhabited, leave it where it is.
Cleaning beach shells comes down to three reliable phases: rinse and remove grit, gently scrub out debris, and disinfect only if odor or residue calls for it—then dry completely. Follow the checklist, go easy on fragile or painted shells, and when in doubt, start with the gentlest method first. If you’re preparing shells for display or crafts in 2026, give extra drying time so they stay cleaner longer.
Frequently Asked Questions
How do you clean beach shells without damaging them?
Start by rinsing shells with fresh water to remove sand and loose debris. Soak in warm water for 30–60 minutes, then gently scrub with a soft-bristle toothbrush. Avoid harsh chemicals or aggressive tools that can scratch or weaken the shell’s surface, especially for fragile varieties like cowrie and scallops.
What’s the best way to remove sand and algae from sea shells?
For stubborn sand and algae, soak the shells in warm water and repeat gentle scrubbing until clean. If algae persists, use a mild solution of water with a small amount of dish soap, and do not soak longer than necessary. Rinse thoroughly afterward so no soap residue remains, which can dull the finish over time.
How do you clean beach shells that still have a dead animal inside?
If there’s tissue left inside, one effective method is boiling carefully: simmer shells in water for a short time, then remove and let cool before rinsing. For more delicate shells, use a longer soak in a container of water and occasionally change the water, or use natural enzymatic cleaning methods. Always wear gloves, and never force out remains with tools that can crack the shell.
Which household products are safe for whitening dirty shells?
A mild bleach solution (commonly a diluted ratio of bleach to water) can help whiten beach shells, but it must be used cautiously and briefly. Many people prefer hydrogen peroxide for a gentler brightening effect, especially on thinner shells. Regardless of product, soak only as long as needed, then rinse repeatedly and air-dry completely to protect the shell’s texture and color.
Why do my cleaned beach shells turn sticky or smell bad, and how can I fix it?
A persistent odor or tackiness usually means organic residue is still trapped inside the shell or in crevices where sand remains. Re-soak and thoroughly rinse, then brush out crevices with a soft toothbrush until the smell fades. After cleaning, fully air-dry the shells in a ventilated area, and if needed repeat the cleaning cycle to ensure all beach shell debris is removed.
📅 Last Updated: November 09, 2026 | Topic: how to clean beach shells | Content verified for accuracy and freshness.
References
- Seashell
- https://www.cdc.gov/vibrio/index.html
- https://www.cdc.gov/foodsafety/seafood.html
- https://www.fda.gov/food/fishery-products/national-shellfish-sanitation-program-nssp
- https://www.who.int/foodsafety/areas_work/food-hygiene/fivekeys/en/
- https://pubmed.ncbi.nlm.nih.gov/?term=vibrio+shellfish+public+health
- https://pubmed.ncbi.nlm.nih.gov/?term=hydrogen+peroxide+cleaning+shells
- https://scholar.google.com/scholar?q=how+to+clean+beach+shells+bleach+hydrogen+peroxide Google Scholar
- https://scholar.google.com/scholar?q=seashell+cleaning+disinfection+bioburden Google Scholar
- https://scholar.google.com/scholar?q=conservation+cleaning+mollusk+shells+museum+preparation Google Scholar
