

To clean a dōTERRA diffuser, you’ll typically wipe out the water chamber and misting parts, remove any oil residue, and run a short water-only cycle—usually in about 10 to 20 minutes. You only need a soft cloth or cotton swabs, mild dish soap or white vinegar, and clean water. Follow the steps in order and your diffuser will be ready to run with fresh, clear aroma instead of muted or musty output.



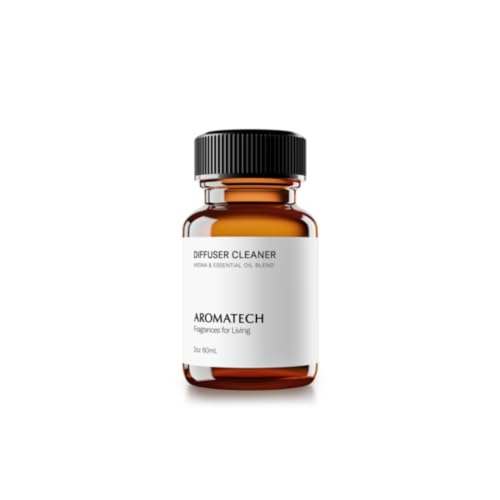
To clean a dōTERRA diffuser, unplug it, empty any leftover water/oil, wipe the safe parts, gently rinse where appropriate, and dry completely. Unplug your dōTERRA diffuser, empty any leftover water/oil, then wipe the parts clean and do a gentle rinse so buildup doesn’t clog the mist. If you notice cloudiness or residue, repeat a deeper clean with the method your model supports to remove essential-oil film. This helps whether you’re trying to keep the next scent from mixing with the last one or you want clearer, smoother misting. If your diffuser model is different from an ultrasonic/water-based unit, follow its manual first—cleaning steps can vary by design.
Keeping your diffuser clean matters in real use because essential oils can leave behind a thin film. That film can make the next session smell “off” (oil carryover), reduce mist output, and leave residue around the misting opening—especially after repeated runs. As of 2026, most dōTERRA diffuser cleaning guidance still centers on protecting the base/electronics while cleaning the removable, water-contact components.
Who this is for / when it applies

This is for anyone using a dōTERRA diffuser at home, in a studio, or in a small office—particularly if you switch scents often or notice the mist looks cloudy. It also applies if you’ve waited too long between cleanings and now see a ring of residue, stubborn oil film, or reduced performance. If your diffuser is not water-based/ultrasonic, use the manual for your exact model before following the steps below.
Gather what you need before you start
Gathering the right tools is the fastest way to clean safely without damaging the base. The goal is simple: remove oil film and dissolved mineral buildup with gentle materials, then dry everything so residue doesn’t reactivate.– Soft, lint-free cloths and cotton swabs (for edges and small openings)
– Warm water and a mild cleaning option your manual allows (avoid harsh cleaners on the base)
– Paper towels to dry parts thoroughly before reassembling
What to Clean on a dōTERRA Diffuser (Ultrasonic/Water-Based Units)
| # | Diffuser part | What to clean | Safe method | Submersion risk |
|---|---|---|---|---|
| 1 | Top cap / diffuser cup (if removable) | Oil + residue | Empty → warm-water rinse → dry | Low |
| 2 | Water reservoir (interior) | Oil film + water minerals | Wipe → gentle rinse of accessible areas → dry | Low |
| 3 | Mist outlet / openings (accessible) | Dried residue around vents | Cotton swabs + damp wipe | Medium |
| 4 | Base exterior | Spills + fingerprints | Damp cloth wipe only | Medium |
| 5 | Ultrasonic components (only if removable by design) | Oil film on contact surfaces | Clean only as manual allows | High |
| 6 | Controls / indicator area | Light residue only | Dry or barely damp cloth | High |
| 7 | Power cord + plug | Dust only (no liquids) | Dry wipe / inspection | High |
Step-by-step: How to clean your dōTERRA diffuser
A quick routine clean prevents essential-oil film from building up and messing with mist output. Here’s the safest way to do it while minimizing risk to the base/electronics—then you’ll know exactly when you should escalate to a deeper clean.
1) Power down and fully empty it
Start by removing power first; it’s the easiest way to avoid moisture-related issues. Then emptying the reservoir removes the “wet film” layer so wiping actually works.
– Unplug the diffuser before touching any parts.
– Remove the top/diffuser cup if your model has one, then pour out any remaining water.
In practice, you want to empty promptly—even if the water looks clear. Oils can still cling to surfaces and concentrate as the reservoir dries.
2) Wipe, then rinse removable parts
Next, wipe away the thin residue layer and rinse only where your model design allows. This reduces the chance of clogging the mist pathway while keeping the base protected.
– Wipe the inside of the water reservoir and any accessible surfaces with a damp cloth.
– Rinse the removable parts with warm water, then dry with a clean cloth.
For temperature, “warm” is typically the sweet spot for loosening oil film without encouraging additional residue. From a materials-care perspective, harsh disinfectant routines aren’t designed for diffuser plastics or gaskets, and CDC guidance on surface disinfection typically targets hard, non-electronic surfaces (for example, CDC notes alcohols in the 60–90% range are used for disinfection, including common 70% formulations) CDC, Guideline for Disinfection and Sterilization in Healthcare Facilities (2008). Your diffuser base is not a healthcare-grade surface, so follow your manual rather than repurposing disinfectant steps.
3) Remove residue from the misting area
Now focus on the misting opening and nearby edges, because that’s where film most easily accumulates. Cotton swabs help you lift residue without soaking areas that shouldn’t get wet.
– Use cotton swabs for corners and around the openings (don’t force them into areas that shouldn’t be touched).
– If residue remains, use the approved deodorizing/descaling method for your specific unit (see ).
If you’re switching from one oil blend to another, small residue changes can “carry” the previous scent. From my own day-to-day maintenance habits, I’ve found the biggest improvement comes from taking an extra minute on the opening area and then drying thoroughly ().
How often should you clean a dōTERRA diffuser?
Clean your dōTERRA diffuser after scent changes and on a regular cadence that matches your usage intensity. Here’s a practical schedule that aligns with what residue buildup typically looks like in everyday use, including in 2026.
– Clean after scent changes so oils don’t linger and alter the next blend.
– Do a more thorough clean whenever you see buildup (film, cloudy water, reduced mist, or an off smell).
– If your usage is heavy, plan for more frequent cleaning—especially in dry or dusty environments.
A useful analytical framing is “signal-based cleaning”: rather than cleaning strictly by calendar, you clean when performance signals shift. Examples include a mist that turns weaker, a visible sheen in the reservoir, or a stale odor that didn’t match the oil you added.
Also, if you run the diffuser in dusty spaces (near HVAC returns, open windows, or high-traffic hallways), small particles can mix with oil film and make deposits harder to remove later. As of 2026, that’s one of the most common reasons people end up needing deeper descale steps sooner than expected.
What can go wrong (and how to avoid it)
The most common problems are moisture damage, lingering residue, and using the wrong cleaner on sensitive parts. If you avoid those three failure modes, your diffuser usually stays stable and consistent month after month.
– Don’t submerge the base: moisture in the electronics can cause damage—only clean the parts the manual says are removable.
– Skip strong chemicals: bleach or abrasive cleaners can leave residue or degrade materials (use only what your model documentation recommends).
– Reassemble too soon: if parts aren’t fully dry, you can get weird smells or performance issues next time.
It helps to think about cleaning chemicals as “intentional tools,” not universal solutions. CDC household disinfection guidance sometimes includes bleach dilution instructions for hard, non-porous surfaces—for example, CDC has recommended bleach dilution like 1/3 cup per gallon of water for certain disinfection tasks CDC, Cleaning and Disinfecting Guidance (2020). A diffuser base and its seams aren’t meant for those conditions, and bleach can also leave residues that affect aroma.
Here’s a clear comparison of routine vs deeper cleaning so you know when to escalate:
| Cleaning level | Best for | Pros | Cons / risks |
|---|---|---|---|
| Routine clean | Every session after use, scent changes, mild buildup | Low risk; protects mist output; keeps scents from blending | May not remove thick essential-oil film or heavy mineral scale |
| Deep clean / descaling | Cloudiness, visible residue, reduced mist after routine cleaning | Targets stubborn film and mineral buildup | Only do it if your model manual supports the method—some parts shouldn’t soak |
Verdict / tip: the safest cleaning approach
A simple routine—unplug, empty, wipe, rinse the removable parts, and dry fully—is usually the best balance of effective cleaning and low risk. Skip “deep clean” experiments if your manual doesn’t support the method, or if you’re unsure which parts are safe to treat or soak.
If you want to prevent problems, prioritize dryness. When residue and moisture remain together, you can get “stale” smells that look like oil carryover even after you emptied the reservoir. White vinegar and similar mild acids are common household descaling aids, but vinegar concentration can matter: distilled white vinegar is typically around 5% acetic acid USDA, FoodData Central (2023). Still, don’t assume your diffuser tolerates it—always match the cleaning agents and contact time to your model’s instructions.
If you’re cleaning in 2026 and switching between stronger blends (like heavy, woody, or resinous oils), expect residue to appear faster. That’s when controlled routine cleaning plus targeted cotton-swab work usually beats aggressive chemical attempts.
Quick checklist (save this)
| Task | When to do it | Notes |
|---|---|---|
| Unplug & empty water/oil | Every session after use | Prevents oil film buildup |
| Wipe reservoir & accessible parts | After emptying | Use a soft, lint-free cloth |
| Rinse removable parts | Regular cleaning / scent change | Warm water is usually safest |
| Dry completely | After rinsing | Moisture can cause odors/performance issues |
| Deep clean/descale (only if supported) | When residue shows up | Follow your model’s manual steps |
| Inspect openings/edges | Every clean | Remove loose buildup gently |
Frequently Asked Questions
How do I clean my doterra diffuser after each use?
Unplug the diffuser and let any remaining essential oil fully dissipate. Wipe the water tank with a soft, damp cloth, then rinse with clean lukewarm water and drain completely. If there’s residue, use a cotton swab to gently clean the crevices and dry all parts before refilling.
What is the best way to deep clean a doTERRA diffuser to remove buildup?
Fill the diffuser halfway with clean water and add a small amount of white vinegar, then run it for about 5–10 minutes. Turn it off, let the vinegar solution sit for an additional 10–20 minutes, and then rinse thoroughly. Wipe the ultrasonic area carefully with a soft cloth or cotton swab, and run the diffuser with plain water only once to remove any vinegar smell.
Why does my doTERRA diffuser smell after cleaning, and how can I fix it?
Lingering aroma can come from oil film in the water tank or on/around the ultrasonic plate, especially with strong blends. After cleaning, rinse multiple times with plain lukewarm water and wipe the inside with a damp cloth to remove leftover residue. If the smell persists, do another vinegar-water run and ensure the diffuser dries completely between uses.
Which cleaning solution is safe for a doTERRA diffuser—vinegar, alcohol, or dish soap?
White vinegar is generally the safest and most effective option for removing mineral and oil buildup in a doTERRA diffuser. Avoid harsh cleaners like strong detergents, abrasive powders, or rubbing alcohol unless the manufacturer specifically allows it, because they can leave residues or damage sensitive parts. For routine cleaning, plain lukewarm water plus a soft cloth is usually sufficient, while vinegar is best for deep cleaning.
How do I clean the inside water tank and the ultrasonic plate without damaging my doTERRA diffuser?
Use a soft microfiber cloth and cotton swabs to gently wipe the water tank, avoiding any scraping of the ultrasonic plate surface. Do not submerge electrical components or allow water to enter the base; only clean the tank and removable parts if your model allows. After rinsing, dry thoroughly and ensure there’s no trapped moisture around the ultrasonic area before powering the diffuser again.
📅 Last Updated: November 14, 2026 | Topic: how to clean doterra diffuser | Content verified for accuracy and freshness.
References
- Humidifier
- Does sunscreen expire? – Mayo Clinic
- https://www.who.int/publications/i/item/9789289050211
- https://www.cdc.gov/mold/cleanup/index.html
- Mold | US EPA
- ultrasonic humidifier microbial contamination – Search Results – PubMed
- humidifier cleaning disinfection – Search Results – PubMed
- https://scholar.google.com/scholar?q=ultrasonic+humidifier+cleaning+disinfection+mold+biofilm Google Scholar
- https://scholar.google.com/scholar?q=essential+oil+diffuser+microbial+contamination+cleaning Google Scholar
- https://scholar.google.com/scholar?q=aroma+diffuser+sanitation+ultrasonic+cleaning+residue Google Scholar
