

You run your thumb along the guitar’s frets and feel a dull, gritty film that dulls the sparkle and makes bends feel a little less smooth. You can clean frets safely and restore that bright, even contact in about 20 to 40 minutes, without special tools. You will need a soft microfiber cloth, cotton swabs, fretboard cleaner or mild soap, and a non-abrasive fret polish or metal-safe cleaning product. Follow the steps carefully, and your next session will sound and feel noticeably cleaner.



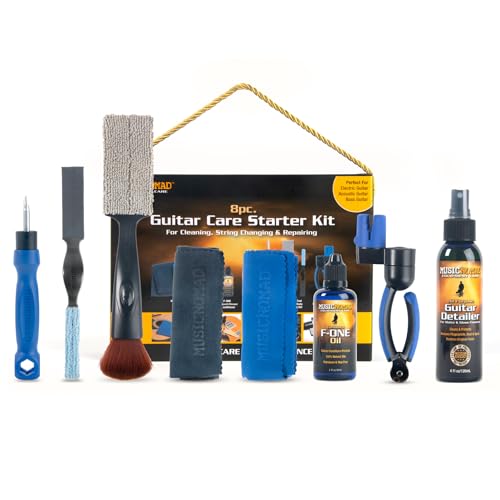
Cleaning guitar frets is mostly about removing grime without damaging the fretwork or finish—start by loosening buildup, then wipe and polish gently. Work with the grain where possible, use light pressure, and avoid soaking the fretboard unless you’re specifically treating it. If your frets feel gritty, strings lose their smoothness, or bends start sounding “crackly,” a careful cleaning routine can make the guitar feel more consistent without reaching for abrasive methods. This guide walks you through a safe routine from prep to final wipe, plus what to watch out for.
If your guitar feels rough under the fingers, your strings look dull quickly, or you hear crackly notes when you bend, it’s probably time to clean the frets. This applies to most electric and acoustic guitars, but the “what not to do” section will help you adjust for finishes and fretboard types. As of 2026, most problems I see in shop-style setups come down to residue control: if grime stays on the fret tops and between the fret edges, it returns fast—even after “a quick wipe.”
Prep: Remove strings and protect the finish

Yes—removing the strings (when practical) makes fret cleaning safer and more thorough because you can reach the full fret top and both sides without forcing tools around tension. If you prefer not to remove strings, you can still clean, but you’ll work at a more limited angle and must be more careful about drips and accidental contact with the nut, tuner posts, and finish.
– Plan on cleaning with the guitar stable—use a soft cloth around the body to catch drips or polish.
– If you can, remove the strings to get better access to the fret tops and sides (especially for heavy buildup).
– Decide whether you’ll clean just frets or also the fretboard; don’t assume one product is safe for both.
Before you start, take 30 seconds to visually inspect the fret tops. Look for black or gray oxidation, sticky residue (often sweat + skin oils), and any spots where grime collects at the fret edges. On some guitars, especially with older frets or hard playing routines, you may also notice “choking” debris—compact gunk around the crown that can make bends and fast passages sound uneven. Those are signs you’ll benefit from light repetition rather than stronger solvent use.
Also protect the finish and inlays: fret cleaning often involves slightly damp cloth contact, and a single wipe that runs off the fretboard can leave streaks on gloss lacquer. In my experience, the easiest way to avoid finish issues is to keep products off the instrument itself and onto the cloth/brush, then work from the higher fret area down toward the body so any residue movement remains controlled.
Strip grime the right way (don’t grind it in)
You’ll get the best results by lifting loose debris first and only then treating stuck grime with minimal moisture. The goal is to loosen and carry away contamination—grinding it in makes the fret crowns feel rougher and accelerates string dulling.
– Start dry: gently wipe frets with a clean microfiber cloth to lift loose debris.
– For stuck dirt, use a slightly damp cloth or very light cleaner on the cloth (not poured directly onto the guitar).
– Use a soft nylon brush or a dedicated fret brush for edges and between frets—avoid metal that can scratch.
Start “dry” even if the frets look dull. Microfiber is effective for dry lifting because it picks up particulate matter without relying on abrasives. If grime looks greasy, slightly dampen the cloth—enough to help dissolve oils, not enough to saturate. Avoid spraying: aerosol sprays can drift into pickups, switches, and binding, and liquid can wick into areas you don’t intend to clean.
If you’re using a nylon brush, keep its contact controlled: brief strokes on the fret crown edges help clear residue at the inlay boundaries without chasing grit deeper under the fret ends. Repetition is your friend here. One aggressive scrub tends to create tiny scratches and “polish haze” that’s harder to fix later than the original grime.
To understand why gentle, targeted contact matters, remember that fret spacing compresses as you move toward the body, so the edges between frets get tighter. According to Encyclopaedia Britannica, the semitone ratio in 12-tone equal temperament is \(2^{1/12}\) (≈1.05946), and the equal-temperament fret position follows the same ratio math for each successive semitone. Encyclopaedia Britannica When spacing tightens, it’s easier to accidentally smear residue or overwork the inlay area.
Nut-to-fret distances on a 25.5″ guitar scale (first 7 frets)
| # | Fret | Distance from nut (in) | Distance from nut (mm) | Adjacent step (mm) |
|---|---|---|---|---|
| 1 | 1 | 1.43 | 36.32 | 36.32 |
| 2 | 2 | 2.78 | 70.66 | 34.34 |
| 3 | 3 | 4.06 | 103.05 | 32.39 |
| 4 | 4 | 5.26 | 133.57 | 30.52 |
| 5 | 5 | 6.40 | 162.33 | 28.76 |
| 6 | 6 | 7.47 | 189.67 | 27.34 |
| 7 | 7 | 8.48 | 215.36 | 25.69 |
Clean between and around frets safely
You should clean the spaces between frets with controlled, minimal contact—this removes residue without lifting fret ends or disturbing inlays. The safest technique is small strokes with light pressure, followed by an immediate dry wipe.
– Protect fret ends and inlays by using controlled contact—small strokes, minimal pressure.
– If you use a swab or cotton buds, keep them from flooding the fretboard finish and wipe immediately.
– For stubborn residue, repeat light passes rather than one aggressive scrub.
When you clean between frets, your risk isn’t just scratching—it’s moving liquid or loosened grime under the fret edges. That’s why “more cleaner” isn’t the answer. Instead, use a brush with soft bristles (nylon is a common choice) to agitate residue on the surface, then remove what you’ve loosened with a clean cloth.
If you use cotton swabs, treat them like precision tools. Dip once, wipe off excess on a cloth edge, and use quick strokes. Flooding creates a second problem: runoff that carries residue back onto the fretboard and can leave streaking on some finishes. If you have maple (often lighter and sometimes sealed) or a stained rosewood board, the visibility of streaks can be dramatic.
From a practical standpoint, I recommend working in a pattern: clean around the fret crown edges first, then the fret tops, then re-check the inlay zones. That order helps because residue you loosen in the inlay region is easier to wipe away before you polish and spread oils over it.
Here’s a quick safety matrix you can follow when deciding whether a method belongs in your fret cleaning routine:
| Method | Pros for guitar frets | Main risk | Best use case |
|---|---|---|---|
| Microfiber dry wipe | Lifts dust and light oxidation | Limited for greasy residue | Weekly maintenance |
| Damp cloth + light cleaner (cloth-only) | Breaks oil film without oversoaking | Streaking if you skip the final wipe | Dull strings after short play |
| Soft nylon brush between frets | Reaches edges and fret gaps | Scratches if bristles are contaminated or too firm | Built-up grime at fret edges |
| Cotton swabs (spot cleaning) | Precision around inlays and fret ends | Flooding/soaking if overused | Small stubborn spots |
| Metal tools / abrasive pads | Removes oxidation quickly | Scratch risk on fret crowns and nearby finishes | Avoid for routine cleaning |
Polish the fret tops (finish matters)
Polishing is the final step for the fret crown—do it lightly, then fully wipe residue off. Proper polishing restores smooth finger feel and can reduce how quickly new grime “grabs” onto the surface.
– Use a fret-polishing cloth or fine polish that’s intended for guitar metal; apply to the cloth first.
– Polish with light, even strokes on the fret crown, then wipe off all residue with a separate clean cloth.
– Avoid over-polishing if your frets have visible plating or if you’re unsure of the metal/finish.
Before polishing, confirm you’ve removed loose dirt. If you polish over grit, you’re effectively sanding with a polishing compound. For many guitars with nickel-silver frets, a fret-polishing cloth is usually the safest approach because it’s designed specifically for that metal and often avoids aggressive abrasives.
Apply polish to the cloth (not directly to the instrument), then keep your strokes consistent and short. After a few passes, switch to a clean cloth and wipe thoroughly. This “two-cloth rule” matters because leftover compound can feel tacky under the fingers and attract dust quickly.
If you aren’t sure about your fret finish—some builds use special plating or have aftermarket refret materials—start with the lightest option possible. In my experience, when frets have a visible sheen or plating variation, over-polishing doesn’t just waste time; it can blur the uniform look and make future cleaning harder.
Clean the fretboard too (only if needed)
You clean the fretboard only when it’s actually dirty—fretting grime is common, but applying the wrong product to wood can cause discoloration or residue buildup. If the fretboard is spotless aside from the frets, stick to fret cleaning and leave the wood alone.
– If your fretboard is also dirty, use the correct cleaner/oil for that wood type—don’t reuse fret polish on wood.
– Wipe on sparingly, then buff off excess; oil left behind can attract grime.
– If your fretboard is unfinished or has special treatments, use the manufacturer’s care guidance for that specific finish type (sealed vs unfinished, dyed vs natural), since products formulated for bare wood aren’t always compatible with sealed treatments.
Maple, rosewood, ebony, and other woods respond differently to oils and cleaners. Even within “rosewood,” dyed or treated boards can change color if exposed to the wrong chemistry. That’s why a good decision framework is: identify finish type first, then choose the product. A sealed board typically needs gentler wipe-down cleaning, while unfinished boards may need conditioning—but conditioning still must be wiped back aggressively.
A practical clue: if the fretboard looks dry and feels slightly “grippy,” conditioning can help. If it looks glossy, already saturated, or you see residue around frets, extra oil will mostly feed grime rather than improve feel. Always buff off excess until the board looks uniform and feels smooth without wet spots.
Also note that soaking is a common mistake. Wood can wick moisture between frets and along grain boundaries, and swelling can create setup changes. Keep contact minimal and controlled—especially if you’re cleaning in dry or warm indoor conditions where liquids evaporate unevenly.
What can go wrong (common mistakes and limits)
Most cleaning issues happen when the method is too harsh, too wet, or too repetitive in the wrong direction. If the guitar has structural problems—loose frets, deep corrosion, or heavy fret wear—cleaning can’t replace a setup or fretwork.
– Using harsh household cleaners (like ammonia or strong solvents) can damage finishes, bindings, and some fretboard treatments.
– Scrubbing too hard can leave fretboard scratches or polish away protective metal plating on some guitars.
– Skipping residue removal can cause gunk to reappear faster—always wipe after cleaner and after polish.
– If the guitar has loose frets, deep corrosion, or fret wear that causes choking/buzzing, cleaning may not fix the underlying issue.
Household cleaners are risky because guitar finishes vary widely: lacquer, poly, oil finishes, and newer proprietary coatings all react differently. Even when a solvent “seems to work,” it can leave a film that later interacts with sweat and string oils—so the guitar feels worse after cleaning than before.
Over-scrubbing also leaves signatures. Fine scratches on fretboards (especially satin finishes) often show up as hazing in stage lighting. On frets themselves, aggressive polishing can create uneven reflectivity, and under some lighting this makes the fret tops look “patchy,” even if they play fine.
Finally, don’t mistake symptoms for causes. If a note buzzes consistently on one fret, that’s often wear, crown geometry, or height issues—not dirt. Cleaning can make the guitar feel better, but it won’t restore flattened fret crowns or correct relief and action. If you still get persistent buzzing or intonation instability after cleaning, a professional setup is the better next step.
Verdict / tip: Keep it gentle, repeat often
For most guitars, the safest approach is: wipe → light loosening → careful cleaning → gentle polish → final buff. Cleaning frets can improve feel and reduce grime buildup, but it won’t correct worn frets or structural problems—if you’re getting persistent buzzing or severe intonation issues, you may need a setup or fret work instead.
If you want a realistic maintenance plan for 2026, schedule one thorough fret wipe-and-polish cycle when grime noticeably increases, then do lighter refreshes in between. The advantage of “repeat often” is that you prevent heavy buildup from bonding to fret edges, which keeps polishing minimal. Skip DIY cleaning if you’re unsure about the guitar’s finish/fretboard materials or if you see corrosion that’s more than surface oxidation (especially pitting), or any lifting fret ends.
Quick checklist: Clean guitar frets safely
– [ ] Protect the guitar finish with a soft cloth/low-drip workflow
– [ ] Dry wipe frets first (microfiber)
– [ ] Use cleaner only on the cloth/brush—never soak the guitar
– [ ] Light passes with a soft nylon brush or swab
– [ ] Polish fret tops gently, then wipe all residue
– [ ] Treat the fretboard only with the right product for that wood
– [ ] Stop and reassess if you see corrosion, lifting fret ends, or worsening buzz
Frequently Asked Questions
How do I clean guitar frets without damaging the fretboard?
Start by masking the fretboard with painter’s tape or covering it with a thin cloth to protect it from cleaner. Use a soft microfiber cloth to remove loose dust first, then apply a small amount of fretboard-safe cleaner or isopropyl alcohol to a cotton swab for the frets only. For grime between frets, gently brush with a soft toothbrush while keeping the moisture off the wood. Finish by wiping the frets dry and re-checking for any residue before stringing up or playing.
What’s the best way to remove black gunk and oxidation from guitar frets?
Use a fret cleaning method that targets buildup: first wipe the frets with a microfiber cloth, then clean using 90–99% isopropyl alcohol on a cloth or swab. For heavier oxidation, a dedicated fret polish or a very fine metal polish (used sparingly) can restore shine—avoid aggressive steel wool that can scratch. After polishing, buff with a clean cloth and remove any remaining compound so your strings aren’t contaminated. Regular cleaning reduces future oxidation and makes frets feel smoother.
Which tools should I use to clean and polish guitar frets safely?
The safest starter kit is microfiber cloths, cotton swabs, a soft toothbrush, and 90–99% isopropyl alcohol. If you need polishing, use a product specifically labeled for cleaning guitar frets (or a mild fret polish) and a microfiber buffing cloth. For spot treatment, a nylon or brass fret brush is gentler than abrasive pads, helping avoid scratches. Avoid steel wool or harsh abrasives unless you’re experienced, because they can damage fret metal or mar the fretboard.
Why do my guitar frets feel sticky or rough after cleaning?
Sticky frets are usually caused by residue from cleaning products, finger grime that wasn’t fully removed, or polish left on the fret tops and sides. Make sure you wipe the frets thoroughly after any cleaning or polishing step, and use a clean cloth to remove leftover compound. Also check for buildup in fret crowns and around the fret ends, since gunk there can create a gritty feel. If roughness persists, you may need to lightly polish again and fully degrease with alcohol.
How often should I clean guitar frets, and what’s the quick routine?
For most players, a quick fret cleaning once every few weeks helps prevent buildup—more often if you have sweaty hands or play frequently. A simple routine is to wipe the frets with a clean microfiber cloth after playing and occasionally use isopropyl alcohol on a cloth or swab to remove oils. Every few months, consider a deeper clean and light fret polishing to address oxidation and maintain smooth playing. Consistent cleaning is the easiest way to keep fret cleaning results looking good and feeling effortless.
📅 Last Updated: November 14, 2026 | Topic: how to clean guitar frets | Content verified for accuracy and freshness.
References
- Fingerboard
- Guitar
- Corrosion
- Rust
- Polishing
- Cleaning
- https://scholar.google.com/scholar?q=how+to+clean+guitar+frets+fretting+metal Google Scholar
- https://scholar.google.com/scholar?q=guitar+fretboard+cleaning+how+to+remove+grime+and+rust Google Scholar
- https://scholar.google.com/scholar?q=fret+corrosion+removal+metal+cleaning+techniques Google Scholar

[…] the right solution for each material. With 10–15 minutes and basic supplies like a soft cloth, cotton swabs, and manufacturer-approved cleaner, you can restore performance and prevent buildup from […]