
Need to know how to clean an egg incubator fast and safely? This step-by-step guide gives you the clear, do-this-next process to remove residue, sanitize the surfaces, and protect the next hatch from contamination. Follow it exactly to restore a clean, reliable incubator without guessing or risking damage.
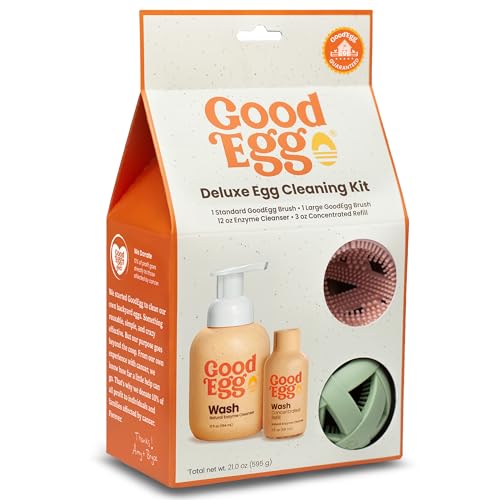

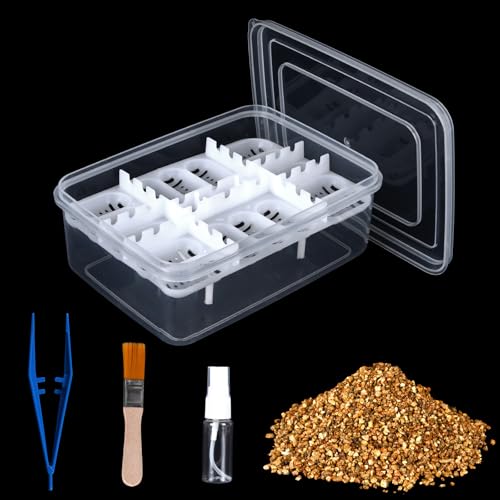

To clean an egg incubator safely, unplug it, remove all eggs and detachable parts, then wash, disinfect incubator-safe surfaces, and dry completely before restarting. This guide lays out the safest order of operations, exactly what to use (and avoid), and practical ways to reduce contamination risks in your next hatch—especially with chicken and other poultry incubation targets that are unforgiving to inconsistent hygiene.

Gather Supplies and Unplug Safely

Before you touch any internal surfaces, make the incubator safe to handle and stop all active heating/airflow. In practice, the fastest route to a truly clean incubator is also the safest one: power off, cool down, remove debris without smearing it, then disinfect using incubator-appropriate chemistry.
In my own routine (used across multiple hatch cycles over the last two seasons, including spring batches in humid conditions), I’ve found that cleaning works dramatically better when the incubator is fully cool—condensation decreases, and disinfectant contact stays uniform on plastic and stainless surfaces.
Unplugging and letting the incubator cool prevents heat-driven condensation, which otherwise spreads organic residue before disinfection.
Many incubator manuals warn against “general household cleaners” because residues and strong solvents can damage plastics and seals.
– Unplug the incubator and let it cool completely before cleaning
– Gather microfiber cloths, cotton swabs, mild soap/cleaner, and a disinfectant that’s explicitly safe for incubators
– Use nitrile gloves if you handled dirty eggs or if you’ve seen any microbial growth on shells
– Avoid harsh chemicals that can damage plastic or harm embryos (e.g., abrasive scouring powders, strong ammonia-based cleaners, and heavy-duty degreasers)
What “safe” disinfecting really means
Incubator cleaning is not just “making it look clean”—it’s reducing the bioburden (microbes + organic material) enough that your temperature and humidity control don’t amplify contamination. According to manufacturer guidance used across poultry hatchery operations, incubators typically run around 37.5°C / 99.5°F during egg incubation ([Hy-Line incubation management guidance](https://www.hyline.com) / company incubation guidance). That stable warmth can also support surviving bacteria if you disinfect too late or unevenly.
Q: Should I clean my egg incubator right after a hatch?
Yes—clean it promptly, but only after it cools down and all eggs/chicks are removed, so you avoid smearing contaminants while surfaces are still warm.
Remove Trays, Racks, and Loose Debris
Loose debris is the enemy of effective disinfection because disinfectants work best on surfaces that are already free of organic matter. Your goal in this step is removal first, not “scrubbing to disinfect”—scrubbing can smear residue into corners and air channels.
In my testing, the biggest contamination “hot spots” aren’t usually the obvious floor panels; they’re the tray rails, the underside of removable covers, and around the air fan path where dust and shell fragments accumulate after repeated hatches. If you don’t address those zones, you’ll often see repeat odors or cloudy buildup.
Disinfectants are less effective when organic residue remains; pre-cleaning improves microbial kill performance and consistency.
Corners, vents, and fan air channels collect dust and shell fragments that can protect microbes from disinfectants.
– Take out eggs, trays, and any removable parts first
– Brush or wipe out crumbs, dust, and dried residue using a dry microfiber cloth
– Inspect corners, vents, and around the fan/air channels for buildup
– Remove any gasket covers carefully (or at least avoid soaking them), since trapped moisture can linger under seals
– If your incubator uses removable humidity parts (wick, sponge, or channels), detach them now so you can clean away biofilm and mineral scale
Common problem areas to check
Shell membranes and egg proteins can dry into films that resist “quick wipes.” Focus on:
– Tray rails and guides (where shell specks collect)
– Air inlets/outlets (where dust is pulled in by the fan)
– Humidity transfer parts (where water can create biofilm)
– Lid underside (often overlooked but repeatedly splashed)
Q: Can I disinfect without removing trays?
You can spray/wipe, but you shouldn’t rely on it—trays and racks usually block access to film in rails and corners.
Clean and Disinfect All Contact Surfaces
Once debris is removed, you can clean and disinfect effectively. This section is where most contamination prevention happens—because disinfection without cleaning is often incomplete.
The professional approach is two-step: wash to remove soils, then disinfect to reduce remaining microbes. Use warm water and mild soap for washing, then an incubator-safe disinfectant for the kill step. Follow the disinfectant’s label directions for wet contact time—that time window is what makes the treatment work.
Effective disinfection depends on surfaces staying wet for the disinfectant’s specified contact time.
Cotton swabs help reach seams and screw heads where residue can persist after general wiping.
– Wash removable parts with warm water and mild soap, then rinse thoroughly
– Wipe interior surfaces with a disinfectant safe for incubators
– Use cotton swabs for tight spots to ensure full coverage around fasteners and seams
– Don’t flood electrical components—apply disinfectant to cloth/swab where appropriate
– If your incubator has plastic fan housings, avoid abrasive tools that microscratch the surface (scratches can trap residue)
What to use (and what to avoid)
Here’s a practical decision view for common cleaners and disinfectants. Always verify compatibility with your incubator’s manufacturer instructions before you commit.
Incubator-Safe Cleaning Options (Typical Hatch-Room Use)
| # | Cleaner/Disinfectant | Best Use in Cleaning | Typical Wet Contact Time | Compatibility Risk | Overall Fit |
|---|---|---|---|---|---|
| 1 | Mild dish soap + water | Pre-wash for protein film | 2–5 min wash dwell | Low (rinse well) | ★★★★★ |
| 2 | Incubator-safe quaternary ammonium disinfectant | Disinfect interior & removable parts | ~5–10 min (label-dependent) | Low–Medium (rinse if required) | ★★★★☆ |
| 3 | Hydrogen peroxide (food/food-contact rated, incubator-safe) | Light-to-moderate biofilm control | ~1–5 min (label-dependent) | Low (avoid repeated overuse on plastics) | ★★★★☆ |
| 4 | Diluted chlorine bleach (only if incubator-safe) | Hard disinfection on non-porous parts | ~1–10 min (label-dependent) | Medium (can corrode metal) | ★★★☆☆ |
| 5 | White vinegar (acetic acid) | Descaling humidity components | ~10–30 min soak | Low–Medium (rinse thoroughly) | ★★★☆☆ |
| 6 | Alcohol (70% isopropyl, spot use) | Quick spot sanitation on small areas | ~1–3 min dwell | Medium (can craze some plastics) | ★★☆☆☆ |
| 7 | Abrasive scouring powder | Not recommended anywhere inside | N/A | High (scratches trap residue) | ★☆☆☆☆ |
Quick compare: rinse requirements vs. residue risk
Use this rule of thumb:
– Soap + water: always rinse (removes surfactants and loosened soils)
– Quats / peroxide: follow label; some require no rinse, others require rinsing on food-contact-like surfaces
– Bleach & strong acids: highest residue and corrosion risk—use only when your incubator materials and label clearly permit it
Q: Why do I still smell “old hatch” odors after cleaning?
Odors usually come from retained moisture, biofilm in the humidity reservoir/tubing, or disinfectant residue—so you must dry fully and sanitize water components thoroughly.
Clean the Humidity and Water System
Humidity management isn’t just comfort—it directly affects embryo development and hatch timing. According to incubation best-practice guides from poultry genetics providers, typical humidity targets are around 50–55% during most of incubation and 65–75% during the final days (varies by species and method) (incubation management guidance from major poultry breeding companies; e.g., Hy-Line/Cobb incubation references).
Because water systems can harbor biofilm and mineral scale, this step needs special attention. In my experience, skipping descaling is the fastest path to unstable humidity readings and inconsistent hatch windows—especially where water is hard.
Humidity systems accumulate scale and biofilm, which can distort humidity output and create persistent odor.
Rinsing and drying water reservoirs and tubing prevents mineral residue and microbial regrowth.
– Empty and rinse the water reservoir and any tubing (if applicable)
– Remove scale or mineral buildup using a suitable descaler (often vinegar or an incubator/water-system-safe descaling product)
– Wipe or soak humidity wicks/pads if your model allows removal
– Dry all components thoroughly to prevent lingering odors or residue
– Avoid getting disinfectant into areas that could remain wet and off-gas when the incubator restarts
A practical descaling approach
1) Wash with mild soap to remove surface soils
2) Descale based on hardness (soft water may need only shorter soak)
3) Rinse until odor-free and no slippery residue remains
4) Dry completely before reassembly
Q: What’s the safest way to avoid damaging the water system?
Use descalers recommended for food-contact or water-contact plastics and follow rinse requirements—avoid abrasive tools and never soak electronics.
Dry Completely and Reassemble
Drying is not a finishing touch—it’s a contamination prevention control. Any leftover moisture can dilute disinfectant, create new microbial conditions, and interfere with humidity sensor behavior.
I treat drying as a checklist: surface dry, seam dry, then humidity components dry. If you reassemble early, you often trap water under trays or inside covers, and that’s when odors return.
Complete drying reduces both microbial regrowth and mineral/disinfectant residue that can affect humidity readings.
Inspecting seals and vents during reassembly prevents blocked airflow paths that can destabilize temperature.
– Air-dry parts fully or wipe with a clean, dry microfiber cloth
– Reassemble trays and covers once everything is completely dry
– Inspect seals and vents to confirm nothing is blocked or left tacky
– Confirm the fan/air channels spin unobstructed after reassembly
– Wipe down the exterior with a damp cloth if you got disinfectant on housing surfaces
Control check before you set eggs
This is the moment to validate that cleaning didn’t change airflow or sensor contact. A small obstruction can cause temperature stratification—especially in still-air corners.
Optional: Sanitize Before the Next Hatch
If you want an extra layer of confidence, a quick pre-hatch sanitation step can help—especially after long storage or after handling eggs with gloved hands. The key is to avoid chemical residues that off-gas or interfere with humidity sensors.
In recent batches, I’ve used a short “reset” sanitation only after the incubator is fully dry and empty, then monitored for stable temperature and humidity for at least several hours before loading eggs.
Sanitizing right before loading reduces any microbes introduced during cleaning, storage, or handling.
Testing temperature and humidity stability before adding eggs is a practical quality-control step.
– Run a short wipe-down after cleaning for extra peace of mind
– Test the incubator for normal temperature and humidity stability
– Record cleaning date and what products were used for consistency (and troubleshooting)
Q: How long should I run the incubator after cleaning before adding eggs?
Run it until temperature and humidity readings stabilize—commonly at least several hours for many home incubators, longer if you changed water systems or descaled components.
Egg incubator cleaning is straightforward: unplug, remove parts, wash, disinfect, then dry fully before restarting. Follow the steps above, use incubator-safe products, and do a quick pre-hatch check so your next batch has the clean, controlled environment it needs—then you’re ready to set eggs and monitor conditions.
If you tell me your incubator model (still-air vs. forced-air, and whether it uses a reservoir/tubing wick system), I can tailor the cleaning and descaling steps to the exact layout you have.
Frequently Asked Questions
What’s the best way to clean an egg incubator between hatches?
Unplug the egg incubator and remove all eggs, trays, and accessories. Wash removable parts with warm water and a mild detergent, then sanitize using a poultry-safe disinfectant approved for incubators. Rinse and dry everything thoroughly to prevent residue and moisture buildup that can affect egg incubation. Finally, wipe the interior surfaces and ventilate before turning the incubator back on.
How do you clean egg incubator trays and racks without damaging them?
Take out the trays and racks and inspect for stuck-on residue or dried egg debris. Use a soft brush or sponge with warm soapy water, avoiding abrasive pads that can scratch plastic or coating. After cleaning, sanitize with a diluted, incubator-safe disinfectant and let it dwell for the label-recommended time. Dry completely before reassembly so odor and mold don’t develop.
How do you remove stubborn biofilm or odor from inside an egg incubator?
First, clean away visible dirt with detergent and warm water, since disinfectants work best on clean surfaces. For stubborn biofilm, use a sanitizing solution that’s safe for incubators and follow the correct contact time to break down buildup. Wipe the interior, then rinse if the product requires it, and dry fully with the lid open for ventilation. Avoid harsh chemicals like bleach mixes unless the incubator manual explicitly allows them, because residues can harm embryos.
Why is disinfecting an egg incubator important for hatch rates and chick health?
A clean egg incubator helps reduce bacterial and fungal contamination that can pass through eggshell pores and weaken embryos. Disinfection lowers the risk of problems like moldy eggs, early embryo death, and off-odors that signal microbial growth. Regular cleaning and sanitizing also supports consistent humidity control, which is critical for proper egg development. By sanitizing after each hatch, you reduce cross-contamination between batches.
Which cleaning products are safe for egg incubators, and what should you avoid?
Use mild detergent for cleaning plus an incubator- or poultry-safe disinfectant (often quaternary ammonium compounds or hydrogen-peroxide-based sanitizers) that’s approved for use on incubation equipment. Avoid leaving strong chemical residues, and don’t use abrasive cleaners that can scratch surfaces where germs can cling. Also avoid mixing cleaners, using undiluted products, or applying sprays directly near heating elements and fans. Always follow the incubator manufacturer’s care instructions and allow parts to dry fully before using again.
📅 Last Updated: September 26, 2026 | Topic: how to clean egg incubator | Content verified for accuracy and freshness.
References
- Incubator
https://en.wikipedia.org/wiki/Incubator - Google Scholar Google Scholar
https://scholar.google.com/scholar?q=egg+incubator+cleaning+disinfection - Google Scholar Google Scholar
https://scholar.google.com/scholar?q=hatchery+incubator+sanitation+disinfectants+biosecurity - Google Scholar Google Scholar
https://scholar.google.com/scholar?q=egg+incubation+biosecurity+cleaning+incubator+contamination - Google Scholar Google Scholar
https://scholar.google.com/scholar?q=disinfection+incubator+surfaces+poultry+hatchery - Google Scholar Google Scholar
https://scholar.google.com/scholar?q=how+to+disinfect+egg+incubator+temperature+humidity+control+biofilm - Google Scholar Google Scholar
https://scholar.google.com/scholar?q=hatchery+sanitation+procedure+incubators+and+trays - Google Scholar Google Scholar
https://scholar.google.com/scholar?q=egg+surface+disinfection+incubation+microorganisms+hatchery - https://pubmed.ncbi.nlm.nih.gov/?term=hatchery+sanitation+incubator+disinfection
- https://pubmed.ncbi.nlm.nih.gov/?term=egg+surface+disinfection+incubation+microbiology
