

Scraping cooked-on grease inside a Weber gas grill can feel frustrating, especially when residue builds up under the burners and in the firebox. You can get it back to a safe, efficient burn in about an hour with a few basics: heatproof gloves, a grill brush or scraper, warm soapy water, and a vacuum for loose debris. Follow the step-by-step process to disassemble safely, deep-clean the interior surfaces, and help your burners perform at their best.


Cleaning the inside of a Weber gas grill is a straightforward process: cool everything fully, remove the internal parts that block access, degrease the firebox (inside walls), and then clean the grease tray/drip system so residue can’t keep smoking. Follow the steps below in order so you restore even heat without damaging burners, ports, or burner alignment.
A well-maintained firebox and burner area directly affect flame stability, temperature uniformity, and—critically—smoke and flare-ups from accumulated grease. In recent years, cooking-related fires remain a serious concern: according to the National Fire Protection Association (NFPA), cooking equipment accounts for 49% of reported home fires with known equipment involved (2014–2018). NFPA That’s why internal grease removal isn’t just “cosmetic”; it’s part of operating your Weber gas grill safely and consistently.
Who this is for / when it applies

This guide is for most Weber gas grill owners who want to clean the firebox and burner area without harming components or voiding their confidence in performance. It’s especially useful if you notice heavy grease buildup, persistent smoke even after preheating, uneven heating across the cooking surface, or burners that don’t seem to flame evenly.
When this applies, you’re not just cleaning after a cook—you’re doing an inside service that matches how the grill is engineered: combustion relies on clean burner tubes/ports and clear grease drainage pathways.
Prep first: safety + what to gather
Turn off your grill, disconnect the fuel, and work only after the interior is fully cool—this is the single biggest factor separating a safe clean from a messy one. LPG (propane) is flammable, and propane tanks have specific handling rules, including fill limits designed for temperature expansion: according to NFPA 58, propane cylinders are filled to about 80% of their liquid capacity (by volume) at 60°F. NFPA 58 Cooling and disconnecting before you start reduces risk from residual heat, vapors, and grease ignition.
Before you begin, gather tools so you’re not improvising mid-clean:
– A grill brush (stiff nylon or brass-bristle is typical; avoid anything that can gouge or deform burner components)
– Warm soapy water (dish soap works well for wiping and rinsing)
– Microfiber cloths or shop towels
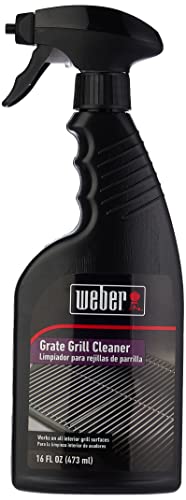
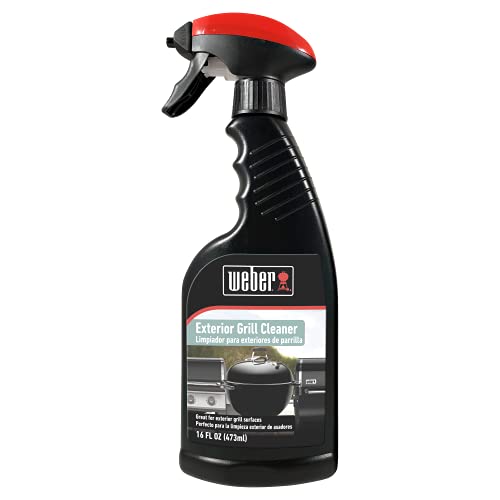
– A non-caustic grill degreaser labeled safe for grill interiors
– Nitrile gloves and eye protection (recommended whenever you’re degreasing)
– A small plastic scraper or old flat tool (for loose residue)
– A soft brush or dedicated burner brush (to clear ports without enlarging anything)
If your Weber model includes removable “flavorizer bars” (heat shields) and a specific grease management design, keep your owner’s manual nearby. Weber grills vary, but the workflow—access, degrease, rinse-wipe, and reassemble correctly—stays consistent.
Cleaner Types for Weber Grill Interiors: Safety & Typical pH Ranges
| # | Cleaner category | Typical pH | Best use in the grill | Interior safety score |
|---|---|---|---|---|
| 1 | Warm soapy water (dish detergent) | 7–9 | Wipe-down after degreasing; routine maintenance | ★★★★★ |
| 2 | Non-caustic grill degreaser | 9–11 | Firebox walls and grease film removal | ★★★★☆ |
| 3 | Mild alkaline detergent (sodium carbonate–based) | 10–11 | Degreasing and breaking down baked-on drippings | ★★★★☆ |
| 4 | Castile-style soap solutions | 8–9 | Gentle cleaning of interior surfaces before rinsing | ★★★☆☆ |
| 5 | Vinegar / acetic acid (weak acid) | 2–4 | Spot removal on exterior parts (limited internal use) | ★★☆☆☆ |
| 6 | Oven cleaner (lye/sodium hydroxide) | 12–14 | Avoid inside burner zones and firebox coatings | ★☆☆☆☆ |
| 7 | Chlorine bleach–based cleaners | 10–13 | Avoid near stainless finishes and metal parts | ★☆☆☆☆ |
Remove parts and do the first clean
Remove the parts that block access first, then do a quick “dry scrape” so your degreaser works on remaining grease instead of smearing it around. For most Weber gas grills, that means taking out cooking grates, and then removing flavorizer bars (heat shields) if your model uses them. From there, remove burner components only as allowed by your specific owner’s manual, because burner assemblies and igniter arrangements vary by model line.
Start with the first clean:
– Scrape loose residue (char flecks, surface drippings) with a scraper or brush
– Wipe away dust and loose grease using a microfiber cloth
– Keep water use controlled at this stage—light wipe-downs are fine, but you don’t want water pooling near igniters or control areas
I recommend treating the first clean like a “pre-treatment.” You’re setting up the degreaser so it can dissolve grease rather than lifting soot mixed with wet grime.
Deep clean burners and the firebox (inside walls)
Brush burners gently and clean the inside firebox surfaces thoroughly so you eliminate grease film that causes smoke and uneven flame. Your goal is residue removal without altering burner geometry—especially the burner ports/tubes that regulate gas flow and flame pattern.
For burners:
– Use a burner brush or soft grill brush and clean the burner ports carefully.
– Remove carbon/dust buildup around the ports; don’t enlarge holes, bend tubes, or force metal tools into port openings.
– If you find a burner that seems mis-seated or obstructed, correct the placement rather than aggressively “digging” into ports.
For the firebox (inside walls):
– Spray or apply non-caustic degreaser to the inside walls and any accessible surfaces.
– Allow a brief dwell time per the product label so it can dissolve grease (don’t guess; follow instructions).
– Wipe clean with a damp cloth, then do a second wipe with a cleaner water rinse if the surface still feels slick or soapy.
Because propane vapor is highly flammable, treat the burner area as a controlled zone: according to NIOSH, propane’s flammable range in air is approximately 2.1% to 9.5% by volume (year varies by reference, but NIOSH’s pocket guidance lists that range in the 2–10% band). NIOSH That’s one reason thorough wiping matters: you don’t want degreaser film vaporizing the next time you light the grill.
Repeat the same “degrea se → dwell → wipe” logic in any nooks you can access around burner supports and brackets.
Clean the grease tray/drip pan and finish the inside
Clean the grease tray/drip system last so you remove the real source of “burning residue” smoke. On many Weber models, grease drains into a designated drip pan, grease tray, or cup system—sometimes with a grease management component that slides out for service. Even when the firebox looks cleaner, grease trapped in the tray can keep smoking once the grill heats back up.
Finish this way:
– Remove the grease tray/drip pan per your manual.
– Scrape hardened drippings first (they often lift easier than you’d expect once they’re free of surrounding grease film).
– Wash with warm soapy water, then rinse-wipe with clean water.
– Dry fully—moisture left behind can cause new grime to cling quickly and can keep producing odor.
Finally, reassemble everything exactly as it came out:
– Seat burners so they align with gas outlets and igniters.
– Reinstall flavorizer bars/heat shields in the correct orientation (if your model has them).
– Place grates back properly, ensuring support points are seated.
What can go wrong
Internal cleaning goes wrong most often when people damage burner ports, skip wipe-down after degreasing, or use harsh chemicals that attack coatings. These issues can lead to poor ignition, uneven heating, lingering smoke, or faster rust.
Key pitfalls to avoid:
– Burner damage: Aggressive cleaning or poking burner ports can affect gas flow and flame pattern.
– Leaving residue: If you don’t wipe after degreasing, residue film can smoke during the next heat cycle.
– Wrong cleaner: Harsh chemicals can harm coatings or finishes. Stick to non-caustic, grill-interior-safe degreasers and follow dwell time instructions.
Verdict / tip (and who should skip this)
If your Weber gas grill interior is greasy or looks dirty but parts are still intact, this approach is usually the safest, most effective DIY route to restore even heating and reduce smoke. The step order matters: remove obstructions first, degrease and dwell, then wipe and dry—so you’re not fighting residue that gets spread or baked further.
That said, there are real downsides:
– Downsides: Extra time if grease is baked on; and reassembly mistakes can lead to misalignment (especially burner seating and heat shield orientation).
– Who should skip: Skip this (and use your Weber manual or a professional) if you see major corrosion, damaged burner components, broken igniter wiring/ceramics, or if you’re uncomfortable removing burners.
Here’s a simple way to decide between DIY and professional service:
| Factor | DIY inside clean | Pro maintenance |
|---|---|---|
| Cost | Lower (cleaner + time) | Higher (service labor) |
| Skill required | Basic (manual-guided) | Specialized (alignment + parts checks) |
| Access to hidden grease | Good if you remove burners | Excellent with full teardown options |
| Risk of misalignment | Moderate if reassembly is rushed | Lower (experienced verification) |
| Burner port safety | High if you avoid poking/enlarging | High (trained cleaning habits) |
| Time | Often moderate | Varies by shop schedule |
| Warranty impact | Depends on model/coverage | Generally conservative |
| Best symptom match | Smoke, uneven heat, greasy firebox | Persistent ignition issues or damage |
| Outcome consistency | Good if you follow the sequence | Very consistent |
| Best For row (decision) | Owners who can remove burners safely and want a reliable restore | Owners facing corrosion, burner damage, or chronic performance faults |
If you want a personal benchmark, I use the manual’s disassembly order as my “reassembly map,” and I photograph burner placement the first time—. That single habit prevents most reassembly-related uneven heating problems.
Quick checklist (scan/save)
– [ ] Turn off gas, disconnect tank, cool completely
– [ ] Remove grates/flavorizer bars/burners (as your manual allows)
– [ ] Scrape loose debris, wipe first
– [ ] Degrease firebox inside surfaces; let dwell briefly
– [ ] Brush burners gently; clear ports carefully
– [ ] Clean grease tray/drip pan
– [ ] Rinse-wipe, dry fully, reassemble correctly
– [ ] Run a short preheat to confirm normal behavior
Frequently Asked Questions
What’s the best way to clean the inside of a Weber gas grill?
Start by turning off the grill, shutting off the gas supply, and letting all parts cool completely. Remove the grates, heat shields, and flavorizer bars (if equipped), then scrape out loose grease and food debris from the firebox. Wipe the inside surfaces with warm soapy water, tackle stuck-on grime with a grill-safe degreaser, and rinse/wipe dry so you can reassemble without residue.
How do I clean the burners inside my Weber gas grill?
Inspect the burners for clogged holes, spider webs, or uneven burn patterns, and clean them carefully using a soft brush and pipe-cleaner type tools if needed. For stubborn residue, remove the burners if your model allows and gently scrub with a grill brush; avoid enlarging burner ports. After cleaning, ensure the burners are completely dry, then reinstall and perform a test fire to confirm proper airflow and flame spread.
Why is it important to clean the firebox and grease tray regularly?
Grease buildup inside the Weber gas grill’s firebox can cause flare-ups, unpleasant odors, and inefficient heating. A neglected grease tray can also attract residue and pests, making future cleaning harder and increasing the risk of uneven cooking temperatures. Regular cleaning helps maintain consistent burner performance and keeps your grill safer and easier to maintain.
Which cleaning products are safe for the inside of a Weber gas grill?
Use grill-safe tools and cleaners such as warm soapy water, a non-abrasive grill brush, and a degreaser that’s designed for gas grills. Avoid harsh oven cleaners or strong chemicals that can damage coatings or leave harmful residue inside the grill. If you use a cleaner, follow the label instructions and rinse/wipe thoroughly so the inside of your Weber grill is clean before cooking again.
How do I remove tough grease stains and buildup from inside my Weber grill?
Remove grates and heat shields first so you can access the firebox surfaces more effectively. Apply a grill degreaser to the problem areas, let it dwell according to the product directions, then scrub with a non-scratch pad or brush to lift baked-on grease. Wipe away loosened residue with a damp cloth, rinse with water where appropriate, and dry fully before reassembling to prevent lingering smells and sticky buildup.
📅 Last Updated: November 14, 2026 | Topic: how to clean inside of weber gas grill | Content verified for accuracy and freshness.
References
- Barbecue grill
- https://www.cdc.gov/foodsafety/cleaning/index.html
- https://www.fsis.usda.gov/food-safety/safe-food-handling-and-preparation/cleaning-and-sanitizing
- https://scholar.google.com/scholar?q=how+to+clean+inside+a+gas+grill+burners+and+heat+plates Google Scholar
- https://scholar.google.com/scholar?q=gas+grill+cleaning+grease+buildup+fire+prevention Google Scholar
- https://scholar.google.com/scholar?q=grill+grates+cleaning+methods+food+contact+surfaces Google Scholar
