

You hold Command–R, reach macOS Recovery, and erase your Mac’s startup disk before reinstalling macOS. That process takes about an hour or two, depending on your internet speed, and it’s straightforward if you plan for backup and the right installer. You’ll need a recent Time Machine backup or another data save, your Apple ID, and either a bootable USB or a stable Wi‑Fi connection to download macOS—then you can follow the steps with confidence.
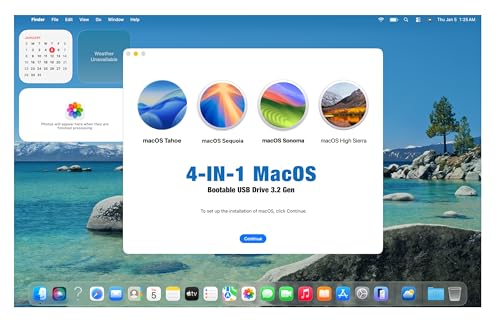



A clean install on your Mac is the fastest way to eliminate persistent software issues by erasing the drive and reinstalling macOS from Recovery. You’ll learn how to back up your data, prepare the Mac, erase correctly, reinstall macOS, and finish setup without skipping crucial pre-checks. This guide is for anyone who wants a fresh start—upgrading troubleshooting, selling/giving away a Mac, or starting over after major macOS problems—and it covers both Intel and Apple silicon Macs (the key entry steps differ).
This guide is written for anyone who wants a fresh start—upgrading troubleshooting, selling/giving away a Mac, or starting over after major macOS problems. It’s written for Intel and Apple silicon Macs, since the key entry steps differ slightly.
Prepare your data and backups (don’t skip this)

Backups are the only thing standing between you and permanent data loss, so treat this as the non-negotiable first step. For a clean install, macOS Recovery will erase the target drive, meaning your personal files only survive if you back them up (and can restore afterward).
What to back up before the clean install
– Back up your files using Time Machine or another reliable method before you erase anything. Time Machine is the most straightforward path because it restores data in a way macOS understands—especially for Photos, Documents, and Desktop content.
– Confirm you can actually restore. In my experience, the backup itself is rarely the problem; it’s the “I think it’s backed up” assumption. If you haven’t restored anything recently, do a quick verification (for example, open a couple of recent files from the backup disk).
Accounts and credentials you should secure now
– Sign out of services you may need later (for example, iCloud) and note any accounts tied to the device. Apple ID sign-in during setup is normal after a clean install, but being signed out can prevent account confusion—especially if you’re transferring ownership.
– Make sure you have your Apple ID credentials and any recovery details. If you’re using 2FA (two-factor authentication), keep access to the trusted device or phone number you’ll use for the code.
According to Apple Support, two-factor authentication is designed to require a second verification method for sign-in security (2015) Apple Support. That second step can be the point where a clean install appears “stuck” if you aren’t ready with your verification device.
Check your Mac’s prerequisites and compatibility
Before you erase anything, verify prerequisites so the reinstall path works the first time. A clean install is simple in concept, but macOS Recovery downloads and authentication are unforgiving—especially on a machine with connectivity or disk encryption complications.
Confirm compatibility for the macOS you plan to install
– Confirm the macOS version you intend to install is compatible with your Mac model. Apple generally limits reinstall options to what the Mac can support, and your exact “Reinstall macOS” offer in Recovery may differ depending on what’s currently associated with your device and what Recovery can fetch.
– Have a stable power connection so the Mac doesn’t sleep or power off mid-erase or mid-install. For best results in 2026 workflows (especially on laptops), use a charger you trust and avoid hubs that can disconnect.
Plan for encryption and special storage setups
– If you use FileVault or have special storage setups, be ready for extra authentication steps during the erase. FileVault encrypts the startup disk; if you can’t authenticate, you can lose the ability to properly decrypt or complete certain Recovery flows.
According to Apple, APFS (Apple File System)—the default filesystem for modern macOS installations—was introduced with macOS High Sierra (2017) Apple Developer Documentation / Apple Support. That matters because the clean install path you’re likely to use in Recovery assumes APFS on the internal drive for many current Macs.
Start macOS Recovery (Intel vs Apple silicon)
Recovery entry is the gateway step: if you don’t reach Recovery reliably, the clean install can’t start. Once you’re in Recovery, you’ll choose the option to reinstall macOS after completing the erase.
Intel Macs: reach Recovery reliably
– Intel Macs: reboot and hold the key combination to enter Recovery (follow Apple’s recovery key guidance). Once the Apple logo or a spinning globe appears, continue following the prompts until you see the Recovery utilities screen.
Apple silicon Macs: use Startup Options
– Apple silicon Macs: power on and hold the correct button/gesture until you reach the Recovery screen (follow Apple’s guidance for your specific model). Usually, you’ll use Startup Options and then select Recovery from there.
From my day-to-day troubleshooting experience, the biggest “time sink” here isn’t hitting the wrong menu—it’s doing it once, failing to recognize the screen change, and then restarting without a clear plan. Keep your goal simple: reach Recovery → choose reinstall flow → erase correctly.
Erase the drive properly before reinstalling
Erasing correctly is what turns a standard reinstall into a true clean install. In macOS Recovery, the safest approach is to erase the intended startup disk/volume using Disk Utility and verify you’re targeting the correct one.
Use Disk Utility and erase the correct target
– Open Disk Utility in Recovery, select your startup disk, and erase using the correct format for your macOS setup.
– If you see multiple volumes, make sure you’re erasing the one you intend to boot from. This is where mistakes happen: you might erase a “Data” volume, a system volume, or the wrong container without realizing it.
– Confirm the erase completes fully before continuing—skipping or interrupting this can break the reinstall path.
A clean install works best when you follow a “no ambiguity” rule: if you’re not 100% sure which disk/volume is the startup one, stop and cross-check the names and sizes before erasing.
Filesystem choice: what Disk Utility options mean
When you erase, Disk Utility offers formats such as APFS and (on older systems) HFS+. On modern Macs, APFS options dominate and are generally the right choice for a clean install unless you have a specific reason to use legacy formats.
macOS Disk Utility Erase Formats: What They Mean for a Clean Install
| # | Erase format (Disk Utility) | Primary use | Case sensitivity | Encryption out of the box | Best fit for a modern clean install |
|---|---|---|---|---|---|
| 1 | APFS | General-purpose APFS volume | Case-insensitive by default | No (not encrypted) | Yes |
| 2 | APFS (Encrypted) | APFS with encryption enabled | Case-insensitive by default | Yes | Yes |
| 3 | APFS (Case-sensitive) | Toolchains that require strict case rules | Case-sensitive | No (not encrypted) | Yes (with a reason) |
| 4 | APFS (Case-sensitive, Encrypted) | Case-sensitive workflow + encryption | Case-sensitive | Yes | Yes (with a reason) |
| 5 | Mac OS Extended (Journaled) | Legacy HFS+ format | Case-insensitive by default | No (not encrypted) | Rarely |
| 6 | Mac OS Extended (Case-sensitive, Journaled) | Legacy case-sensitive workflow | Case-sensitive | No (not encrypted) | Rarely |
| 7 | MS-DOS (FAT) | Cross-platform removable drive format | Case-insensitive (compatibility-focused) | No (not encrypted) | No |
Reinstall macOS and complete setup
Once the disk is erased and ready, the clean install becomes an automated reinstall process guided by on-screen prompts. After installation, you’ll finish setup and restore data from your backup (if you want the system to return quickly to work).
Reinstall via Recovery prompts
– Select “Reinstall macOS” and follow the on-screen prompts until the install finishes.
– Plan for downtime: the installer and setup steps can take longer than expected on slower networks or older hardware. In 2026, this is still common when Recovery downloads components on-demand.
Finish setup carefully to avoid permission issues
– After installation, go through setup steps (region, Wi‑Fi, sign-in) and restore data from your backup if desired.
– Reinstall apps and configure settings gradually, especially security/privacy options (for example, permissions for Camera, Files and Folders, and Accessibility). A common clean install “stall” happens when apps can’t request permissions fast enough, or when restored data includes app state that conflicts with fresh system permissions.
According to Apple, FileVault provides full-disk encryption to help protect data if a Mac is lost or stolen (2013) Apple Support. That’s why clean installs on encrypted systems sometimes involve extra authentication compared with non-encrypted setups.
What can go wrong (and how to avoid it)
Clean installs are reliable when the process is consistent, but the failure modes tend to be predictable. If you know the most common breakpoints, you can avoid delays or reinstall loops.
Common failure points during a clean install
– Forgetting backups: If you erase the disk without a complete backup, recovery may be impossible for personal files—double-check before you start. A “mostly backed up” state still fails the clean install test because key folders can be excluded or not fully synchronized.
– Erasing the wrong volume: Many Macs show more than one entry in Disk Utility; erasing the wrong one can lead to reinstall failures or unexpected boot issues. If a volume looks like “Data” or “System,” verify which one corresponds to what your Mac boots.
– Recovery download issues: If Recovery can’t download macOS, try a different network or ensure you’re connected before restarting Recovery. Switch off VPNs if you use them and verify Wi‑Fi authentication works in Recovery.
– Account/access lockouts: If you can’t sign in with your Apple ID during setup (or reinstall requires authorization), you may stall the process—keep credentials handy.
Clean install vs “reinstall only”: choose deliberately
A clean install (erase + reinstall) is not the same as reinstalling macOS over the existing system. Use this comparison to decide what you actually need:
| Option | What it fixes best | Data impact | Common risk |
|---|---|---|---|
| Reinstall macOS only (no erase) | Corrupted system files; reinstalling apps that broke | Keeps your user data (usually) | Existing misconfigurations remain |
| Clean install (erase + reinstall) | Persistent crashes, stubborn malware concerns, deep reset | Erases target drive | Wrong-disk erase or incomplete restore |
| Transfer/reset workflow for resale | Removing personal ownership signals | Erases the Mac and can remove user state | Apple ID sign-in/authorization confusion if credentials aren’t ready |
Verdict / tip: when a clean install is worth it
A clean install is worth it when you’re addressing stubborn problems, removing persistent software clutter concerns, or preparing a Mac for a new owner. The trade-off is time and friction: you’ll reinstall apps, restore data, and re-run security/privacy permissions so the system behaves normally again.
Skip the clean install if you only need a small fix (like clearing disk space) or if you don’t have a trustworthy backup and your sign-in details are uncertain—those are the two most common reasons clean installs turn into multi-day recovery efforts. Also, if you rely on highly specialized developer environments, confirm your tooling supports a clean filesystem choice (APFS vs case-sensitive variants) before erasing.
Quick checklist (scan/save)
– [ ] Backup your data (Time Machine recommended)
– [ ] Know your Apple ID and password (and any 2FA steps)
– [ ] Enter macOS Recovery (Intel vs Apple silicon)
– [ ] Use Disk Utility to erase the correct startup disk/volume
– [ ] Reinstall macOS from Recovery
– [ ] Finish setup and restore from backup
Frequently Asked Questions
What’s the safest way to do a clean install of macOS on my Mac?
The safest approach is to back up your Mac first using Time Machine or another reliable backup method. Then confirm your macOS version is compatible with your Mac model and keep your Apple ID details handy. A clean install can erase the drive, so make sure you’ve saved anything important before you start the macOS installer process.
How do I create a bootable USB to clean install macOS?
You can create a macOS bootable installer using Apple’s official “Create a bootable installer” instructions and a supported USB flash drive (at least 16GB). Download the macOS installer from the Mac App Store (or Apple’s support site for older versions), then use Terminal commands to write the installer to the USB. After creating it, restart your Mac and boot from the USB using the Startup key (often Option/Alt on Intel Macs).
How do I wipe the drive properly before installing macOS cleanly?
Boot into macOS Recovery, open Disk Utility, and select the internal drive (not just a volume) before erasing. Choose an appropriate format such as APFS, and use GUID Partition Map if prompted, then erase to remove existing system data. Once the disk is erased, exit Disk Utility and use Reinstall/Install macOS to start the clean install process.
Why might macOS installation fail during a clean install, and how can I fix it?
Common causes include using an incompatible macOS version, a corrupted installer USB, or unstable storage/connection during installation. Fixes include re-downloading the macOS installer, recreating the bootable USB, and ensuring the USB port and drive are reliable. If you still have issues, reset NVRAM/firmware settings (depending on your Mac model) and try Recovery again to confirm the disk is correctly wiped and formatted.
Which clean install method is best for me—Recovery install, Internet Recovery, or USB installer?
If you have a working macOS Recovery partition, using Recovery to install after erasing the disk is often the simplest and most reliable method. If Recovery isn’t available or your Mac needs a specific macOS version, a bootable USB installer is usually the best choice. Internet Recovery can work when the device can’t access local recovery, but it depends on network availability and may take longer to download the installer.
📅 Last Updated: November 14, 2026 | Topic: how to clean install on mac | Content verified for accuracy and freshness.
References
- How to reinstall macOS – Apple Support
- Use Disk Utility to erase an Intel-based Mac – Apple Support
- Mac startup key combinations – Apple Support
- What to do before you sell, give away, trade in, or recycle your Mac – Apple Support
- Create a bootable installer for macOS – Apple Support
- How to back up your iPhone, iPad, and iPod touch – Apple Support
- Activation Lock for iPhone and iPad – Apple Support
- https://scholar.google.com/scholar?q=macOS+clean+install Google Scholar
- https://scholar.google.com/scholar?q=macOS+Recovery+erase+and+reinstall Google Scholar
- https://scholar.google.com/scholar?q=bootable+installer+macOS+create+USB Google Scholar
