

How do you disinfect a faucet and make it truly sanitary without damaging the finish? You can do it in about 15–30 minutes with the right supplies: disinfecting cleaner or diluted bleach (when appropriate), gloves, a soft cloth or sponge, and cotton swabs for the handle and aerator. Follow the step-by-step process below to remove grime, kill germs on high-touch areas, and rinse thoroughly so water contacts only clean surfaces.



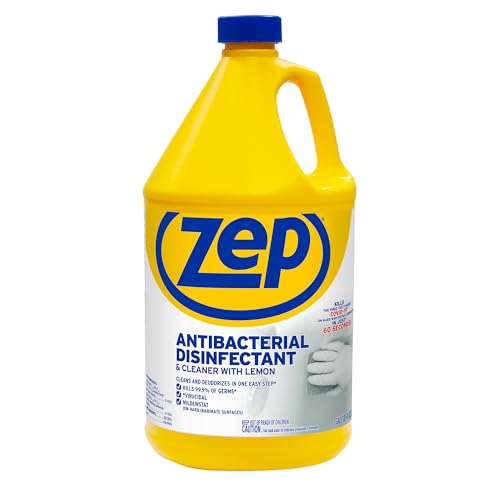
To disinfect and sanitize a faucet, clean off visible grime first, then apply a disinfectant to the parts people touch and let it sit for the product’s contact time. Finally, rinse (if the label says to) and dry so residue doesn’t build up or leave marks. This guide walks you through each step in the right order so it actually works.
This is for homeowners and renters who want a practical routine for kitchen or bathroom faucets—especially after guests, regular household germs, or when someone’s been sick. It’s also helpful if you’re trying to avoid damaging finishes like chrome, brushed nickel, or brass.
Gather supplies and choose the right disinfectant

If you want a faucet disinfection routine that actually works, start by choosing tools and a disinfectant that match your faucet’s finish and the intended use. This step prevents two common problems: ineffective germ-killing (because the surface wasn’t treated properly) and finish damage (because the chemical wasn’t compatible).
– Use mild dish soap (for cleaning) plus a microfiber cloth or soft brush (for scrubbing without scratching).
– Pick a disinfectant that’s compatible with your faucet finish (chrome, nickel, brass, etc.) and follow the label directions.
– Avoid mixing chemicals (for example, bleach with ammonia or acids), and consider gloves if you’re using stronger products.
A quick safety note: “Disinfectant” means a product designed to kill germs on surfaces, while “sanitizer” generally means it reduces germs to safer levels. The most important rule for either is label compliance—especially contact time (how long the surface must stay wet).
Bleach prep for faucet-safe disinfection (Target: ~1,000 ppm)
| # | Household bleach strength | Bleach per 1 gallon water | Target solution | Finish safety |
|---|---|---|---|---|
| 1 | 2% sodium hypochlorite | 1 2/3 cups (≈400 mL) | ≈1,000 ppm (0.1%) | ★ |
| 2 | 3% sodium hypochlorite | 1 1/9 cups (≈266 mL) | ≈1,000 ppm (0.1%) | ★ |
| 3 | 4% sodium hypochlorite | 3/4 cup (≈180 mL) | ≈1,000 ppm (0.1%) | ★ |
| 4 | 5–6% sodium hypochlorite | 1/3 cup (≈80 mL) | ≈1,000 ppm (0.1%) | ★★ |
| 5 | 6% sodium hypochlorite | 2.7 Tbsp (≈40 mL) | ≈1,000 ppm (0.1%) | ★★ |
| 6 | 8.25% sodium hypochlorite | 2 Tbsp (≈30 mL) | ≈1,000 ppm (0.1%) | ★★ |
| 7 | 10% sodium hypochlorite | 1.6 Tbsp (≈24 mL) | ≈1,000 ppm (0.1%) | ★★ |
This table is meant for routine nonporous disinfection when you’re using a diluted bleach solution around ~1,000 ppm (0.1%). According to CDC, a commonly used household approach for disinfection is ~1/3 cup bleach per gallon of water when the bleach is ~5–6% sodium hypochlorite (2024). Always double-check your bleach label for its actual percent and follow your disinfectant label rules for your specific faucet surface.
Clean first: remove grime, soap scum, and mineral buildup
For effective faucet disinfection, you need clean contact surfaces before you disinfect. A disinfectant cannot reliably work through soap scum, film, or mineral buildup, because those layers block direct contact with germs.
– Wipe the faucet down with soapy water and remove any sticky residue or visible film.
– For handle tops, crevices, and around the base, use a soft brush or an old toothbrush to loosen buildup.
– If your aerator is removable, remove it and wash it separately so disinfectant reaches the surfaces you usually miss.
A practical way to think about a faucet is: touch surfaces first, then water pathways. Handles and knobs often have the heaviest “hand transfer,” while spouts and aerators trap minerals and can harbor buildup in tiny crevices. When you clean first, you’re not just improving appearance—you’re increasing the chance the disinfectant reaches the exact areas where germs are likely to remain.
As of 2026, I recommend treating faucets like a small “high-touch system”: once you break the grime barrier, the disinfection step becomes consistent instead of guesswork. If your faucet has hard-water deposits, focus on dissolving the mineral film with gentle cleaning first—then disinfect.
Disinfect the faucet touch points (the key step)
The key to faucet sanitation is keeping the treated areas wet for the disinfectant’s full contact time. If the surface dries too quickly, you lose the germ-killing time the product was designed around.
– Apply disinfectant to high-touch areas first: handles/knobs, spout/neck, and the places water hits during use.
– Keep the surface wet for the disinfectant’s required contact time—don’t wipe it off immediately.
– If you’re using wipes/sprays, follow the label for coverage and how to handle overspray.
In my maintenance routine, the step I’m most likely to rush is timing—so I use a kitchen timer to ensure the faucet stays visibly wet for the full dwell/contact time printed on the disinfectant label. That small habit matters because disinfectants are performance-tested under controlled dwell times, not “spray-and-instantly-wipe.”
Choose where you apply disinfectant on a faucet
Treat the faucet like three zones:
1. Hands zone: handles, lever triggers, temperature controls.
2. Splash zone: the neck/spout area where water droplets land.
3. Flow zone: aerator and the underside lip where splatter collects.
Even if your faucet looks clean, these zones can hold residue in micro-scratches, knurling, or seams where finishes meet.
Disinfectant trade-offs (what to expect on faucet finishes)
Different chemicals behave differently on metals and coatings. The safest strategy is to match the product to the finish and follow the label.
| Disinfectant approach | Pros for faucet surfaces | Cons / watch-outs |
|---|---|---|
| Diluted bleach (sodium hypochlorite) | Strong disinfectant option for hard, nonporous surfaces when used correctly | Can discolor metals over time and may pit soft finishes if overused; always rinse if label requires |
| Alcohol (ethanol or isopropyl) at ≥70% | Fast-evaporating and often good for quick wipe-downs | Can dry out or dull some coatings if repeatedly used; avoid on delicate finishes unless label allows |
| Hydrogen peroxide-based disinfectants | Generally effective and often less odor than bleach | May still require rinsing depending on label; can leave spots if not dried well |
| Quaternary ammonium (quats) disinfectants | Common in wipe formats for routine disinfection | Residues can build up if you skip rinsing/drying; finish compatibility depends on product |
| Disinfectant wipes (mixed actives) | Convenient and easy to keep surfaces wet | Can leave residue if not used with correct dwell time and drying |
Anchoring facts you can use
– According to CDC, many disinfection workflows rely on keeping surfaces wet for the product’s required contact time (2024).
– According to CDC, alcohol solutions with at least 70% alcohol are used for disinfection/sanitization purposes (2024).
Sanitize, rinse, and dry to finish safely
Finishing correctly is what prevents faucet residue buildup and leaves a clean, streak-free surface. After disinfection, you either rinse (if the label instructs it) or follow the label’s “no-rinse” directions—then dry thoroughly.
– After disinfection, rinse with clean water if the product label instructs you to (especially important with bleach-based products).
– Dry with a clean cloth—this helps prevent water spots and reduces leftover residue.
– Reinstall any parts you removed (like the aerator) only after everything is dry and secure.
As of 2026, one thing that keeps recurring in real households is “chemical streaks” on chrome and brushed nickel: they happen when disinfectant residue is left to dry or when aerosol overspray lands and then gets wiped later. Drying right away reduces that risk.
If you removed your aerator, reattach it carefully. Misalignment can create leaks, and leaks can feed mineral buildup—meaning your next cleaning/disinfection cycle starts with more grime.
What can go wrong (and how to avoid it)
Most faucet problems after disinfection come from rushing the process, using the wrong chemistry for the finish, or skipping rinsing. Fix those points and the routine is typically low-risk for everyday homes.
– Skipping the “clean first” step: disinfectants work best on clean surfaces, not on soap scum or mineral film.
– Not following contact time: if the surface dries too fast, the disinfecting step may not be effective.
– Using the wrong product for the finish: abrasive pads or incompatible chemicals can dull or pit metal.
– Forgetting rinsing: leaving disinfectant residue can cause streaks or irritation, especially in food areas.
Here are edge cases to handle thoughtfully:
Finish type matters more than you think
Chrome and stainless typically tolerate common disinfectants better than some plated or coated finishes (like certain decorative brass or specialty lacquers). If your faucet has a manufacturer coating, warranty, or “do not use bleach/ammonia” instruction, treat that guidance as the controlling document.
Food prep areas and guest homes
If the faucet supplies a kitchen sink used for food prep, rinse guidance becomes especially important. Even if a disinfectant is safe while wet, residue can be unpleasant and can transfer if you wipe incorrectly.
If someone’s been sick
When illness is involved, tighten the workflow: clean thoroughly, disinfect all high-touch zones, and follow contact time without interruption. If your label calls for gloves or ventilation, follow that guidance. According to CDC, household disinfection guidance is strongest when products are used as directed (2024).
Verdict / tip: when this routine makes sense (and when to pause)
This faucet routine is a solid, low-risk approach for most households: clean with soap, disinfect with a label-approved product, then rinse/dry as directed. The main downsides are that some disinfectants can discolor certain finishes over time, and repeated chemical use may require more frequent polishing.
Skip or get manufacturer guidance first if:
– Your faucet has specific cleaning/disinfecting instructions (finish coatings, special metals, or warranty requirements).
– You’re unsure what’s under the finish (for example, older fixtures with unknown coatings).
– You can’t ventilate the area well or you’re sensitive to disinfectant fumes—choose a gentler, label-approved option instead.
Tip: If you disinfect often, alternate between “gentler routine cleaning” and “disinfecting sessions” rather than using stronger chemicals every time. That keeps both hygiene and finish longevity in balance.
Quick scan checklist (save this for next time)
| Step | What to do | Common slip |
|---|---|---|
| 1 | Clean with soapy water; scrub crevices | Trying to disinfect over grime |
| 2 | Disinfect handles + spout/where water hits | Not keeping the surface wet |
| 3 | Wait for the product’s contact time | Wiping off too soon |
| 4 | Rinse if the label says to; dry well | Leaving residue or water spots |
Frequently Asked Questions
How do I disinfect and sanitize a faucet after cleaning or illness in the household?
Start by washing the faucet with soap and warm water to remove visible grime, then disinfect the high-touch areas like the handle, spout, and aerator. Use an EPA-registered disinfectant or a solution appropriate for your faucet material, and keep the surface wet for the contact time on the label. Finally, rinse thoroughly with clean water and dry to prevent residue or water spots. For added safety, sanitize the aerator and any detachable parts separately if possible.
What is the best way to sanitize a faucet aerator without damaging it?
Remove the faucet aerator (usually it unscrews) and soak it in a disinfecting solution such as diluted bleach (follow the correct ratio) or a manufacturer-recommended cleaner for metal parts. After soaking, gently scrub with a soft brush to remove mineral buildup, then rinse well and reinstall. Avoid harsh abrasives or strong acids on chrome, brass, or plated finishes to prevent pitting or discoloration. Let the aerator air-dry briefly to reduce trapped moisture before reattaching.
Which cleaning products are safe and effective for disinfecting different faucet finishes?
For most faucets, disinfectants labeled safe for plumbing fixtures are the safest option, and they’re designed to work without damaging finishes when used correctly. Chrome and stainless steel typically tolerate mild disinfectants and non-abrasive cleaners, while brass, copper, and plated finishes may be sensitive to bleach, ammonia, or abrasive powders. Always check the faucet’s care instructions and test a small hidden area first. Using a soft cloth and avoiding steel wool helps keep your faucet looking clean while still sanitizing.
Why does my faucet keep getting dirty or smudged even after I disinfect it?
Many faucets accumulate residue from hard water minerals, soap scum, and fingerprints, which can make disinfection feel ineffective because grime remains. Disinfect first, but also remove scale and buildup before sanitizing so the disinfectant can reach the surface properly. Dry the faucet after cleaning to reduce water spots and mineral deposition, and consider using a microfiber cloth for a streak-free finish. Regular maintenance—such as weekly wipe-downs—helps prevent the buildup that leads to recurring dirt.
How often should I sanitize a faucet to maintain bathroom and kitchen hygiene?
High-touch faucet handles and spouts should be cleaned and disinfected regularly—often weekly in typical households, and more frequently in kitchens or bathrooms with heavy use. If someone in the home is sick, disinfect faucet surfaces after each likely exposure and pay special attention to shared hand contact points. For best results, sanitize by first cleaning off debris, then disinfecting for the label’s required contact time, and rinsing afterward. Keeping a simple routine helps reduce bacteria and improves overall faucet sanitation.
📅 Last Updated: November 08, 2026 | Topic: How to Disinfect and Sanitize a Faucet | Content verified for accuracy and freshness.
References
- https://www.cdc.gov/coronavirus/2019-ncov/prevent-getting-sick/disinfecting-your-home.html
- https://www.epa.gov/pesticides/how-use-disinfectants-safely
- https://www.who.int/publications/i/item/cleaning-and-disinfection-of-environmental-surfaces-in-the-context-of-covid-19
- About Legionella Control | Controlling Legionella | CDC
- Disinfectant
- https://www.deltafaucet.com/service-and-support/care-and-cleaning
- cleaning and disinfection environmental surfaces – Search Results – PubMed
- https://scholar.google.com/scholar?q=disinfect+faucet+cleaning+sanitizing+guidelines Google Scholar
- https://scholar.google.com/scholar?q=disinfectant+dilution+household+surfaces+CDC+EPA Google Scholar
- https://scholar.google.com/scholar?q=legionella+plumbing+faucet+disinfection+biofilm Google Scholar
