
Budget-Friendly DIY Cleaning Products for Wood
You can easily make budget-friendly, natural wood cleaning products using simple ingredients like white vinegar, olive oil, lemon juice, baking soda, and Castile soap. For everyday cleaning, mix a few drops of Castile soap with warm water to gently remove dirt without harming your wood. For tougher stains, try a lemon and baking soda paste. Plus, a homemade beeswax conditioner nourishes and protects surfaces. With these easy recipes and tips, you’ll keep your wood looking great longer.
Essential Ingredients for DIY Wood Cleaners
When making your own wood cleaner, choosing the right ingredients is key to protecting and enhancing the natural beauty of your wood surfaces. You’ll want to focus on natural alternatives that are gentle yet effective. Ingredients like castile soap provide a mild cleansing base without harsh chemicals, while distilled water helps dilute the mixture for safe application. Essential oils, such as lemon or tea tree, add natural antibacterial properties and a fresh scent. These eco friendly solutions not only safeguard your wood but also reduce your environmental footprint. Avoid anything abrasive or overly acidic, as these can damage finishes. By selecting thoughtful, natural components, you maintain your freedom to customize your cleaner while ensuring your wood stays nourished and vibrant for years to come. Similarly, using pH-neutral cleaners helps prevent damage and maintain the integrity of delicate surfaces.
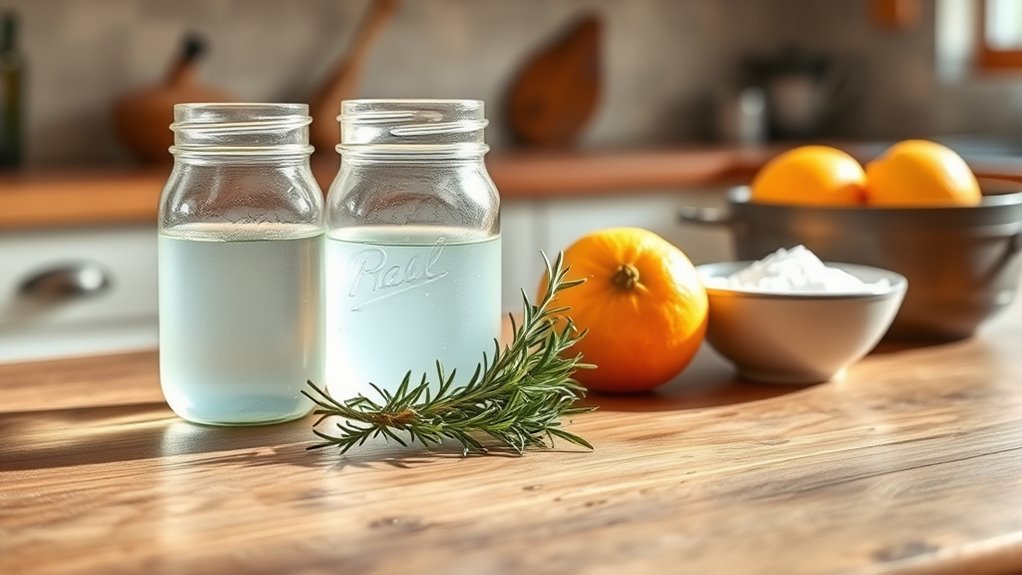
How to Make a Gentle Vinegar and Olive Oil Polish
One simple recipe you can whip up quickly combines just three ingredients: white vinegar, olive oil, and water. Start by mixing 1/4 cup white vinegar, known for its antimicrobial vinegar benefits, with 1/2 cup olive oil, which nourishes and adds shine to wood surfaces. Add 1 cup of water to dilute the solution, ensuring it’s gentle enough for your wooden furniture. Pour the mixture into a spray bottle and shake well before each use. Spray lightly onto a soft cloth and gently polish your wood, avoiding soaking the surface. The vinegar helps clean and disinfect, while olive oil restores moisture and luster without leaving a greasy residue. This easy DIY polish offers an effective, budget-friendly way to maintain your wood’s natural beauty and extend its lifespan. Using natural ingredients also helps reduce water pollution compared to conventional chemical cleaners.
Crafting a Lemon and Baking Soda Scrub for Tough Stains
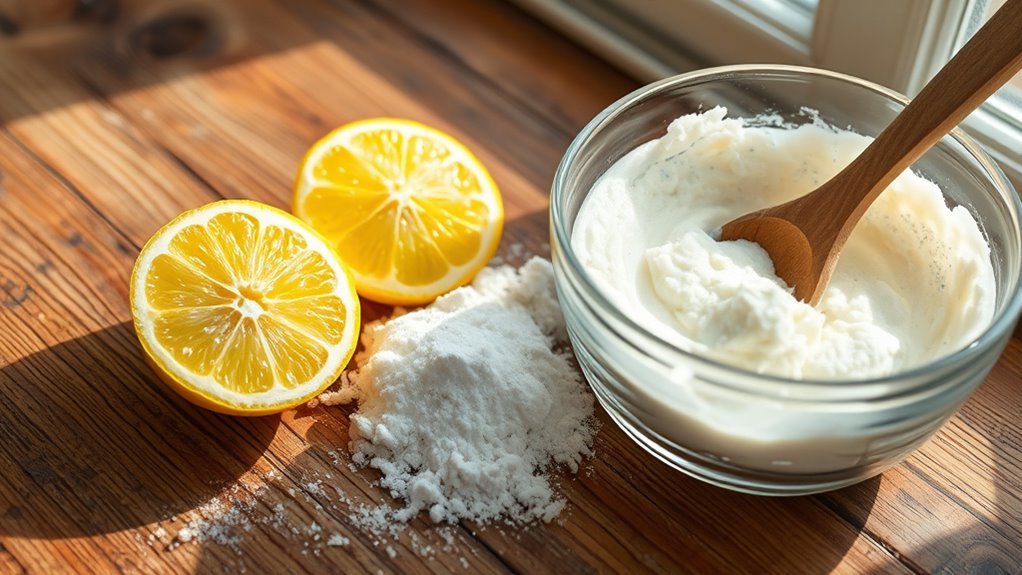
You’ll need just fresh lemon juice and baking soda to make an effective scrub for tough wood stains, mixing them into a paste. Apply it gently with a soft cloth or sponge, focusing on stained areas to break down grime without damaging the finish. This scrub brightens wood surfaces naturally while deodorizing, making it a powerful yet safe cleaning option. Always test your scrub on a small, hidden area first to ensure it won’t harm the wood finish.
Ingredients and Preparation
Gathering just three simple ingredients—fresh lemon juice, baking soda, and water—will set you up to create an effective scrub for tough stains on wood surfaces. Lemon juice acts as a natural preservative and brightener, while baking soda provides gentle abrasion without damaging the wood. Adding water helps achieve the right consistency for easy application.
| Ingredient | Role | Eco Friendly Option |
|---|---|---|
| Lemon Juice | Natural preservative | Use organic lemons |
| Baking Soda | Mild abrasive | Biodegradable and safe |
| Water | Diluent for consistency | Use filtered or rainwater |
Mix 2 tablespoons of baking soda with 1 tablespoon of lemon juice, then add enough water to form a paste. This DIY scrub is simple, effective, and respects your wood’s natural beauty.
Application and Benefits
After mixing your lemon juice, baking soda, and water into a paste, it’s time to apply the scrub to your wood surfaces. To maximize the cleaning benefits, follow these application techniques:
- Use a soft cloth or sponge to gently rub the paste onto tough stains, avoiding harsh scrubbing that could damage the wood.
- Let the mixture sit for 5–10 minutes to break down grime and lift stains effectively.
- Wipe the area with a damp cloth to remove residue without saturating the wood.
- Dry the surface thoroughly with a clean towel to prevent moisture damage.
This DIY scrub not only removes stubborn marks but also brightens wood naturally, leaving you with a fresh, chemical-free finish. You’ll enjoy a cleaner space and the freedom that comes from using safe, budget-friendly ingredients.
Using Castile Soap for Everyday Wood Cleaning
Although wood requires gentle care, using Castile soap for everyday cleaning offers a simple and effective solution. You’ll appreciate Castile soap benefits like its natural, biodegradable ingredients that won’t harm your wood surfaces. To use, mix a few drops of Castile soap with warm water in a spray bottle. Lightly mist your wood furniture or floors, then wipe with a soft cloth. This method removes dirt and grime without stripping the wood’s natural oils, essential for long-lasting wood care. Plus, it’s budget-friendly and free from harsh chemicals, giving you freedom from commercial cleaners. Just avoid soaking the wood, and always dry it thoroughly to prevent damage. With Castile soap, everyday wood cleaning becomes both safe and straightforward. Using a soft cloth helps prevent scratches and ensures a streak-free finish on delicate wood surfaces.
Homemade Beeswax Wood Conditioner Recipe
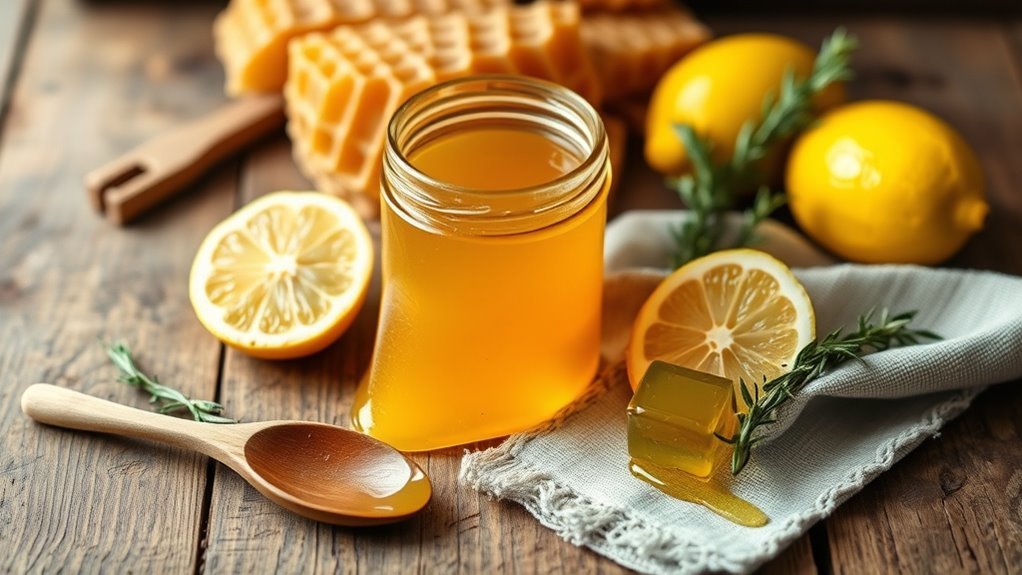
Keeping your wood surfaces clean with Castile soap is a great start, but to maintain their luster and protect them from drying out, you’ll want to apply a conditioner regularly. A homemade beeswax wood conditioner harnesses beeswax benefits for deep wood preservation. Here’s a simple recipe you can make at home:
- Melt 1/4 cup beeswax and 1/4 cup coconut oil in a double boiler.
- Stir until fully blended and remove from heat.
- Add 10 drops of essential oil (optional for scent).
- Let the mixture cool slightly, then transfer to a jar.
Apply sparingly with a soft cloth, rubbing in circular motions. This conditioner seals and nourishes wood, keeping it supple and vibrant, giving you freedom from harsh chemicals while extending your wood’s life. Remember to apply polish on clean surfaces for the best absorption and lasting protection.
Tips for Safely Cleaning Antique Wood Surfaces
When dealing with antique wood surfaces, you’ll want to use gentle cleaning methods that preserve their delicate finish and intricate details. Start by dusting with a soft, dry cloth to avoid scratching. For deeper cleaning, mix mild soap with water—never saturate the wood—and gently wipe with a damp cloth, drying immediately. Avoid harsh chemicals or abrasive tools, as they can damage the surface. Embrace antique preservation techniques, like testing your cleaning solution on a hidden area first to verify it won’t harm the finish. Regular maintenance using safe cleaning methods helps maintain the wood’s character and value. Using soft microfiber cloths is essential for gentle cleaning to protect delicate finishes. By treating your antique wood thoughtfully, you protect its beauty and extend its life, allowing you to enjoy its charm freely for years to come.
Storing and Applying Your DIY Wood Cleaning Products
Since homemade wood cleaning products often lack preservatives, you’ll want to store them properly to maintain their effectiveness and prevent spoilage. Choosing the right storage containers is key—opt for airtight glass jars or BPA-free plastic bottles to keep your mixtures fresh and avoid contamination.
When it comes to application techniques, here’s what you should keep in mind:
- Use soft microfiber cloths or natural sponges to apply your cleaner gently.
- Test any product on a hidden area to verify it won’t damage the wood.
- Apply in thin, even layers to avoid oversaturation.
- Wipe off excess moisture immediately to prevent warping or stains.
Following these steps guarantees your DIY cleaners last longer and work effectively, giving you freedom to maintain wood surfaces safely and economically.
Frequently Asked Questions
Can These DIY Cleaners Be Used on All Wood Types?
When it comes to cleaning different types of wood, you can’t paint with one brush. Not all DIY cleaners have the same effectiveness across various wood grains and finishes. You’ll want to test a small, hidden spot first to guarantee no damage or discoloration occurs. Softer woods may react differently than hardwoods, so adjusting your cleaner’s ingredients or concentration is key to preserving your wood’s natural beauty and longevity.
How Often Should I Clean Wood With These Homemade Products?
You should adjust your cleaning frequency based on your wood’s usage and exposure. Generally, cleaning wood with gentle homemade products every 1-2 weeks works well to maintain its natural beauty without overdoing it. For wood care, avoid excessive moisture and harsh scrubbing to prevent damage. If your wood is in a high-traffic area, you might clean it more often, but less frequent cleaning is fine for less-used pieces to preserve their finish.
Are These DIY Cleaners Safe for Wood Floors?
You’ll find that many DIY cleaners are safe for wood floors when used properly, but cleaning safety is vital to protect your wood care efforts. Always dilute ingredients like vinegar or essential oils, and avoid harsh chemicals that can damage the finish. Test any solution on a small, hidden area first to make sure it won’t harm the surface. This way, you maintain your wood’s beauty while enjoying freedom in your cleaning routine.
Can I Add Essential Oils for Fragrance?
You can definitely add essential oils for fragrance, but you’ll want to choose ones that’re safe for wood surfaces. Lavender, lemon, and tea tree oils are popular fragrance options that not only smell great but also have natural antibacterial properties. Just add a few drops to your cleaning solution, and test on a small area first to avoid any discoloration or damage. This way, you keep your space fresh without compromising your wood’s finish.
Do These Products Remove Wood Scratches or Dents?
When it comes to scratch removal and dent repair, you shouldn’t expect these DIY cleaning products to work miracles overnight. They can help minimize the appearance of minor scratches or shallow dents by moisturizing the wood and blending imperfections, but deep damage usually needs more specialized treatment. Think of these remedies as a band-aid, not a cure. For serious dents or scratches, sanding or professional refinishing is often the way to go.


