

When your mouse tracking feels inconsistent or your cursor skips, the problem is often the surface of your mouse pad, not your computer settings. Over time, skin oils, dust, and debris build up or the glide layer wears unevenly, which can confuse the sensor and make motion feel “off.” Try cleaning it the right way first, and you can follow the practical steps below.



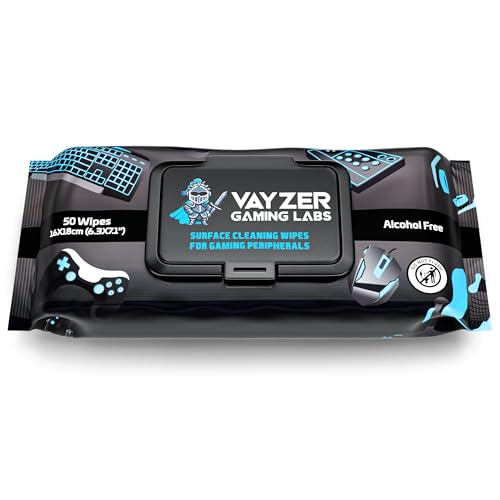
Yes—cleaning your mouse pad can often fix jumpy, inconsistent cursor movement by removing dust, oil, and grime that disrupt smooth optical or laser tracking. If your mouse feels like it “skips,” a careful clean (matched to the pad’s material) and a fully dry surface are the first steps that usually make a noticeable difference.
If you’re dealing with poor tracking, erratic cursor movement, tracking that won’t stay smooth, or a noticeable drop in accuracy, this guide is for you—especially if you haven’t cleaned your pad in a while or you’ve noticed changes after eating nearby, handling oils/lotions, or working in a dusty area. In this guide, you’ll learn when cleaning is worth it, how to do it safely, and what to check if cleaning doesn’t solve the issue.
Why a Dirty Mouse Pad Hurts Tracking

A dirty mouse pad can cause the sensor to “see” inconsistent texture from moment to moment, which looks like jitter, stutter, or sudden cursor jumps. When tracking is inconsistent, your aim feels less controllable—even if your mouse DPI and in-game sensitivity are unchanged.
Here’s what’s typically going wrong on a mouse pad surface:
– Dust and grit can change friction: A mouse pad is supposed to provide stable micro-texture (especially cloth and extended fabric). Fine particles can shift that texture and break the sensor’s ability to correlate movement frame-to-frame.
– Oils create a slippery, uneven film: Skin oils, food residue, and lotion can leave a coating that “smooths” or unevenly saturates the surface, leading to slight differences in how light reflects off the material.
– Wear patterns get worse when grime gets trapped: Over time, cloth fibers compress where you move most. If dust and oils accumulate in those compressed areas, the mouse pad can develop more visible inconsistency than it would from wear alone.
A practical way to think about it: your mouse sensor doesn’t measure distance—it measures change using visual texture. When the mouse pad’s texture is altered by contamination, small sensor readings turn into noticeable cursor behavior.
How Common Debris Size Influences Cursor Smoothness on a Mouse Pad
| # | Debris category found on desks | Typical size range (µm) | Why it matters to mouse pads | Dry-wipe removal ease | Result if not cleaned |
|---|---|---|---|---|---|
| 1 | Ultrafine particles (UFP) | <0.1 | Can cling to oily films and change micro-texture | ★ ★ ★ | Frequent “micro-jitter” |
| 2 | Fine dust | 0.1–1 | May coat fibers and smooth unevenly | ★ ★ ★ ★ | Stutter in slow aiming |
| 3 | PM2.5-range particles | ≤2.5 | Can spread across cloth and alter reflectivity | ★ ★ ★ ★ | Inconsistent tracking feel |
| 4 | Coarser fine grit | 2.5–4 | More “spark” when fibers are compressed | ★ ★ ★ ★ ★ | Cursor skips on direction changes |
| 5 | PM10-range particles | ≤10 | Can get embedded in cloth weave and seams | ★ ★ ★ ★ ★ | Visible “drag” and uneven glide |
| 6 | Course desk grit | 10–100 | Usually wipes off, but can cause “bumps” while present | ★ ★ ★ ★ ★ | Sharp jumps over specks |
| 7 | Coarse sand-like particles | >100 | Can mechanically interfere with smooth movement | ★ ★ | Repeated skips until removed |
If you’re trying to connect this to real-world numbers: According to the U.S. EPA, PM2.5 particles are 2.5 micrometers or smaller (
How to Clean a Mouse Pad (Safe, Step-by-Step)
Cleaning a mouse pad is usually worth doing because it targets the exact variables that affect sensor texture: oils, residue, and embedded dust. The safest approach is a gentle clean followed by full drying, so the surface returns to its intended feel and texture.Step 1: Check the material first
A mouse pad doesn’t behave the same across materials, and the right cleaning method depends on the surface and backing. Cloth pads and extended fabric are more forgiving with mild soap, but they also retain moisture longer. Hard plastic mouse pads tolerate wipes better, while stitched edges and layered composites need extra care to avoid water getting trapped under seams.
In my own setup, I’ve seen a cloth mouse pad recover smooth tracking after cleaning, but only when it dried completely and the surface returned to its original “matte” feel. If the mouse pad still feels slightly tacky after drying, that’s a sign residue remains.
Step 2: Use the gentlest effective method
For most mouse pads, start with a dry removal pass: shake the pad out over a trash bin or lightly wipe it with a clean microfiber cloth to remove loose dust. Then use mild soap and water only as appropriate for the material.
– Cloth / stitched fabric pads: use mild dish soap diluted in water, lightly scrub with a soft cloth, then rinse thoroughly.
– Hard plastic pads: wipe with a damp microfiber and mild soap solution, then wipe again with clean water to remove soap.
– Pads with adhesive backing (or layered bases): limit soaking. Use a mostly damp cloth approach and keep water away from the edges and underside.
According to CDC guidance on disinfecting surfaces, 70% alcohol is widely effective for many pathogens on hard surfaces (
Step 3: Dry thoroughly before using
A mouse pad must be dry before you test cursor movement. Even slight dampness can change friction and reflection, causing new inconsistency. It can also affect adhesives in the backing and lead to odors if moisture gets trapped inside seams.
Drying best practices:
– Lay the pad flat on a clean, dry surface.
– Pat gently with a towel (don’t rub aggressively across the tracking area).
– Air-dry long enough that the entire pad—including edges—feels fully dry to the touch.
As of 2026, manufacturers increasingly ship stitched and composite pads with materials that can be sensitive to uneven drying, so give your mouse pad the time it needs rather than rushing.
What to Avoid (Common Mistakes)
Cleaning can help a mouse pad a lot, but a few mistakes can make tracking worse or shorten the pad’s lifespan. These are common because they “sound right” (stronger chemicals, faster drying) but they conflict with how sensor surfaces and pad backings are made.
– Don’t use harsh chemicals or strong solvents unless the manufacturer says it’s safe. Even if the tracking surface looks cleaner, residue from cleaners can create a new uneven film that the sensor interprets inconsistently.
– Avoid long soaking for foam/stitched layers. If a mouse pad has a foam core or stitched edge construction, prolonged water exposure can saturate layers and damage the backing or internal structure.
– Don’t rush drying. Using a mouse pad that’s still damp can create unevenness, lingering odors, and (on some pads) edge warping. The result can look like “the problem returned,” when the pad is actually reacting to moisture.
If you’re working in 2026 under a dusty HVAC cycle or near an open window, you may also notice the mouse pad collects grime faster after cleaning. In that case, focus on reducing sources (desk cleanup, hand hygiene, and covering food) rather than repeating harsher cleaning methods.
Comparison: cleaning approaches and their typical risks
Below is a simple decision guide to keep your mouse pad safe while you try to fix tracking.
| Method | Best for | Main risk | Mouse-pad impact |
|---|---|---|---|
| Dry wipe (microfiber) | Surface dust, light debris | Oils and residue remain | Often improves feel if grime is minimal |
| Mild soap + damp cloth | Oils, light residue, fingerprints | Soap residue if you don’t rinse | Usually best balance of safety and effectiveness |
| Hand wash (gentle, limited soaking) | Cloth pads with embedded dirt | Long dry time; edge saturation | Can restore consistent tracking surface |
| Machine wash | Only if manufacturer explicitly allows it | Warping, backing damage, delamination | High risk for many stitched/composite mouse pads |
When Cleaning Won’t Fix It
Cleaning helps most mouse pad tracking issues, but it can’t solve every cause of jitter or cursor “skips.” If the problem originates elsewhere, your mouse pad will look cleaner while the tracking problem persists.
Here are the main scenarios where cleaning won’t be enough:
– The mouse sensor or sensor window is the real culprit. If the lens is dirty or scratched, the sensor may misread texture regardless of how clean the mouse pad is.
– The mouse pad is on an incompatible surface. A mouse pad can’t compensate for an uneven desk, wobbling mousemat, or a backing that’s peeling and lifting micro-areas.
– The mouse pad’s tracking surface is worn or damaged. If the pad is glossy, smooth, or has visible deterioration where you move most, cleaning may only provide a brief improvement.
– Settings mismatch (DPI/sensitivity/polling) can mimic surface problems. Cursor behavior sometimes feels like tracking problems when the mouse software or game settings are off—especially if you changed DPI profiles or enabled features like smoothing/acceleration.
In other words, if your mouse pad is clean and fully dry but the cursor still jumps, treat the mouse pad as “not the source” and move to the next layer of troubleshooting: the mouse itself and the surface stability.
Verdict: Is Cleaning Worth Trying?
Cleaning is a low-risk first step for most people because it removes grime that genuinely interferes with mouse sensor tracking. That said, you shouldn’t expect miracles if the mouse sensor is failing, the mouse pad material is damaged, or the backing is compromised.
Skip extra cleaning—or be extra cautious—if your mouse pad is clearly damaged, has peeling edges/backing, or the manufacturer warns against washing. If you do clean, the two success factors are material-appropriate cleaning and completely dry use afterward. If you rush drying or leave soap residue, the mouse pad may feel smooth while tracking accuracy stays inconsistent.
From a practical standpoint in 2026: cleaning is worth the time when the issue started after a clear contamination event (food, lotion/hand oils, dust exposure). If the problem developed without any change to your routine, you’ll often save time by checking the mouse sensor and settings immediately after a quick surface wipe of the mouse pad.
Quick Checklist (Scan & Save)
– [ ] Identify pad type/material (cloth vs. hard vs. composite backing)
– [ ] Remove loose dust first (gentle wipe or light shake)
– [ ] Clean with mild soap/water only as appropriate for the material
– [ ] Rinse to avoid soap residue
– [ ] Dry fully before using (no damp corners/edges)
– [ ] Test mouse tracking after drying
Sources
–
–
Cleaning your mouse pad is often the quickest way to restore smooth cursor movement when dust and oils have changed the tracking surface. If you clean appropriately for the material and let the pad fully dry, you’ll usually see improved consistency; if not, the odds shift toward sensor cleanliness, settings, or pad wear as the real cause. Either way, treating the mouse pad as part of your input system—not just an accessory—helps you get back to reliable control, especially as your workspace conditions change in 2026.
Frequently Asked Questions
Can cleaning your mouse pad fix performance problems like lag or jitter?
Yes—dirty mouse pads can cause inconsistent sensor tracking, leading to cursor lag, jitter, or skipping. Over time, dust, skin oils, and grime build up on the surface and interfere with optical or laser sensors. Cleaning can restore smooth glide and more accurate movement, which often improves overall mousepad performance.
How should you clean a mouse pad to improve tracking accuracy?
Start by checking the manufacturer’s instructions, then remove loose debris with a gentle shake or soft brush. For most fabric mouse pads, wipe with mild soap and lukewarm water, then rinse thoroughly and air-dry completely before use. For cloth or extended pads, avoid aggressive scrubbing and never use a dryer, since heat and residue can warp the surface or degrade the backing.
Why do a dirty mouse pad and dust affect your mouse sensor?
Optical and laser sensors rely on consistent surface texture to interpret movement, and grime can change that texture. Dust particles, oily buildup, and dried cleaning residue can create “noise” in tracking, causing micro-stutters and inaccurate cursor control. Regular mouse pad cleaning helps maintain the friction and texture your sensor expects, improving mouse performance.
What’s the best cleaning method for a cloth vs. hard mouse pad?
Cloth mouse pads respond well to gentle washing with mild detergent and a full rinse, followed by complete air-drying for consistent speed and control. Hard mouse pads (like plastic or glass) typically need wiping with microfiber cloth and a screen-safe cleaner or mild soap solution, then a final dry wipe. In both cases, make sure no residue remains, because leftover cleaners can reduce tracking quality.
Which cleaning mistakes should you avoid if you want better mouse performance?
Avoid using harsh chemicals, alcohol-heavy cleaners, or abrasive sponges that can damage coatings or leave residue. Don’t use hot water, machine wash, or tumble drying unless the manufacturer explicitly allows it, since that can warp the surface and affect glide. Also, make sure the mouse pad is fully dry before use—using it damp can cause uneven tracking and worsen the performance issues you’re trying to fix.
📅 Last Updated: November 04, 2026 | Topic: Can Cleaning Your Mouse Pad Fix Performance Problems? | Content verified for accuracy and freshness.
References
- Computer mouse
- Optical mouse
- Mousepad
- Optical flow
- https://pubmed.ncbi.nlm.nih.gov/?term=optical+tracking+surface+contamination+dust
- image sensor contamination dust effects – Search Results – PubMed
- cursor control accuracy surface friction human computer interaction – Search Results – PubMed
- https://scholar.google.com/scholar?q=mouse+sensor+tracking+surface+contamination+performance Google Scholar
- https://scholar.google.com/scholar?q=dirty+optical+mouse+sensor+effect+on+cursor+tracking Google Scholar
- https://scholar.google.com/scholar?q=mouse+cursor+control+accuracy+surface+friction+and+cleanliness Google Scholar
